
Painted bathroom cabinets
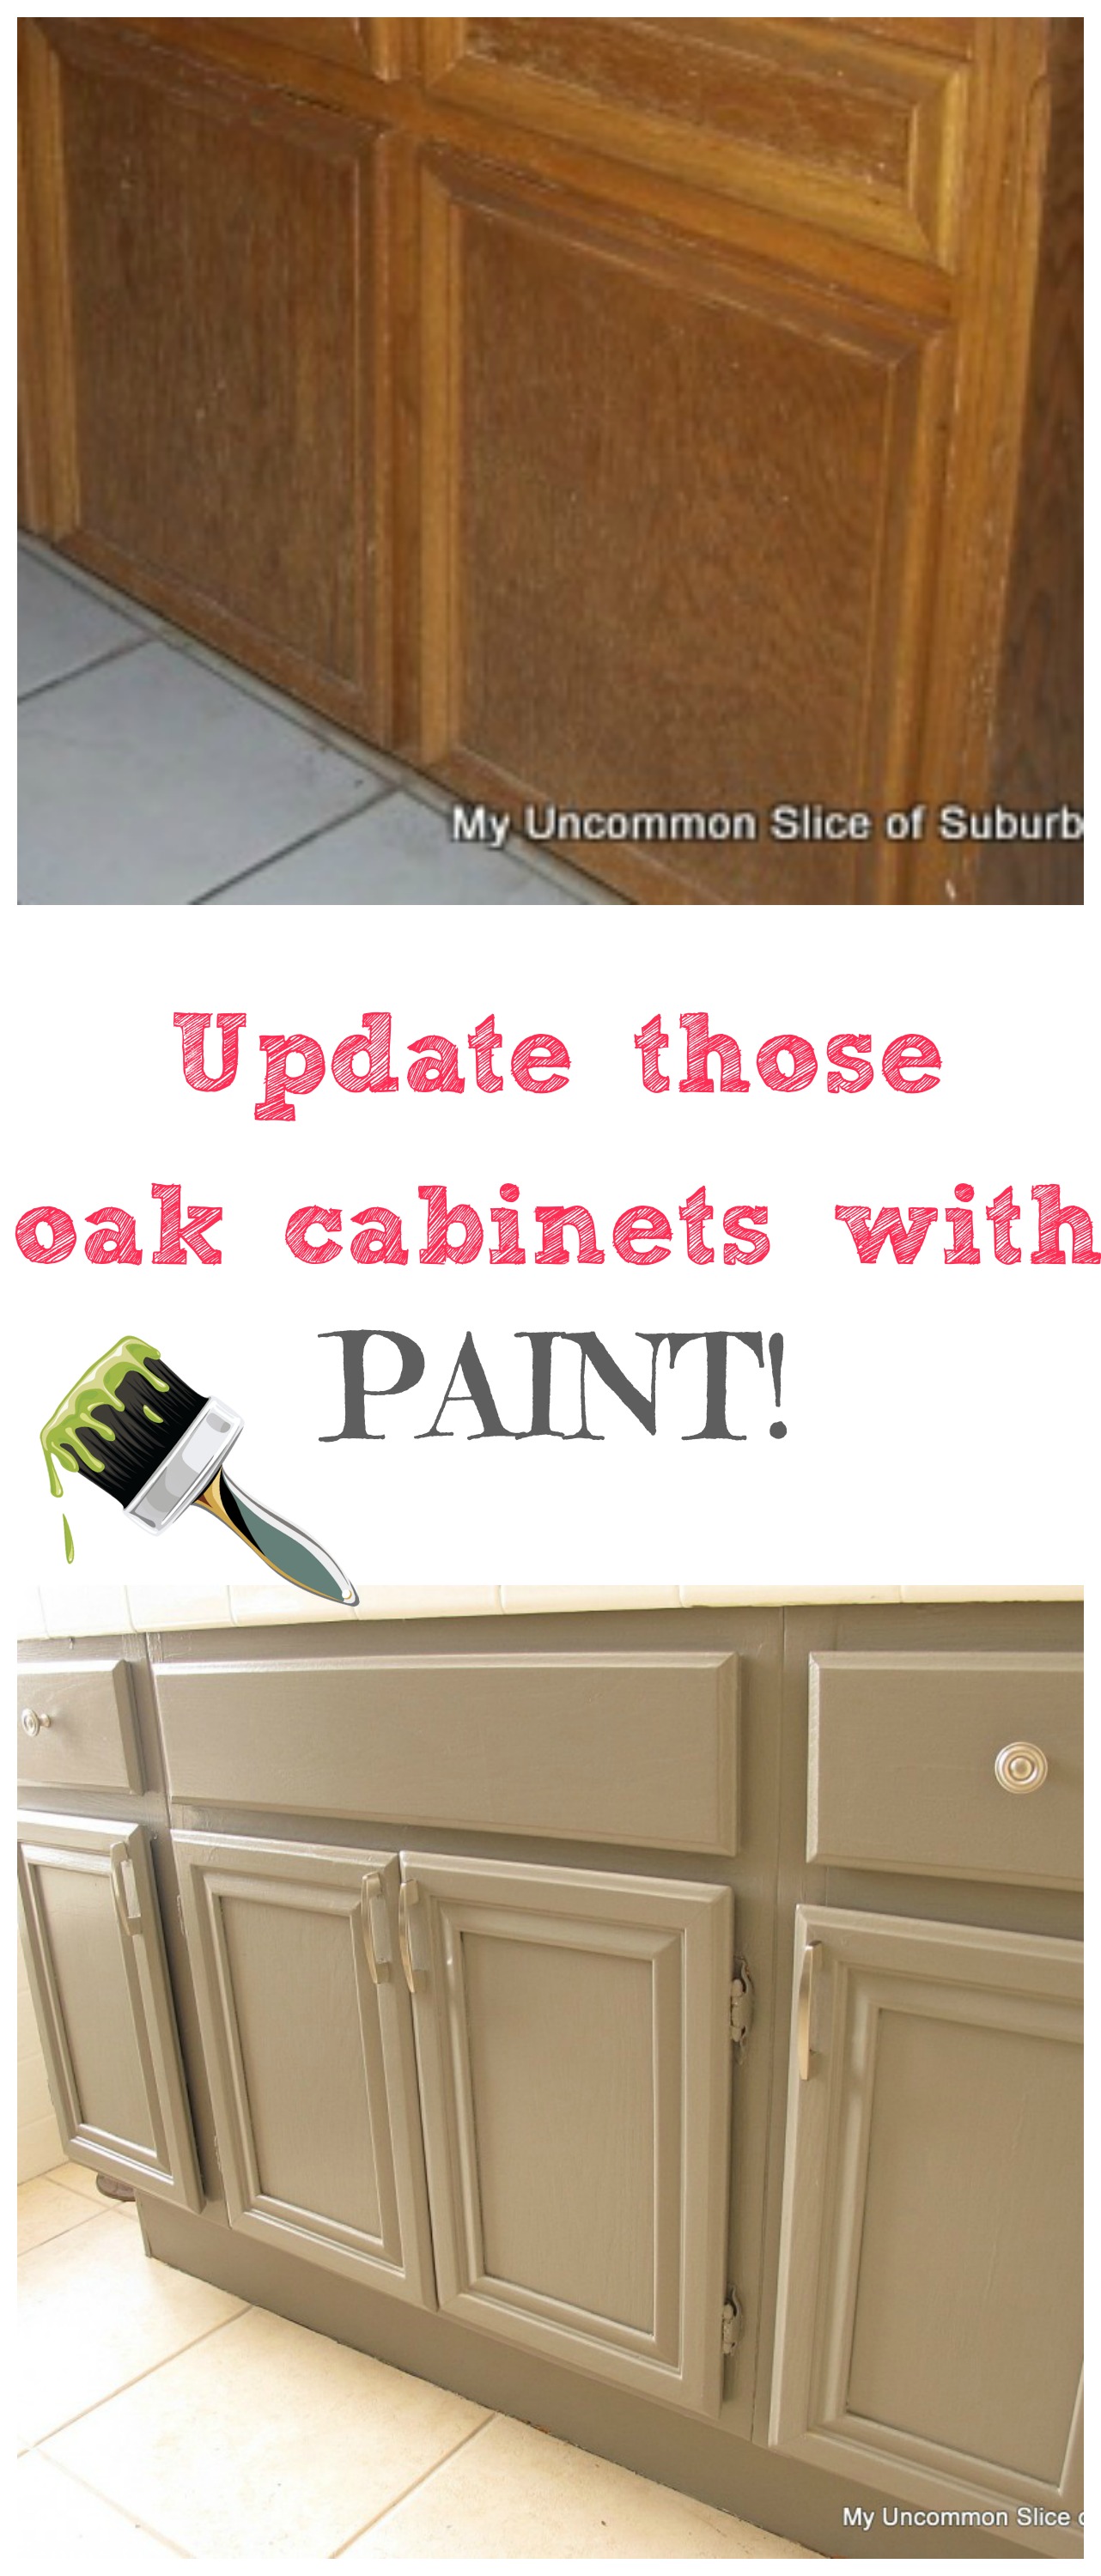
I have finally finished painting the bathroom cabinets and am excited to show them to you! Our home is a 90’s builder-grade so anytime I can get my hands on oak cabinets and give them an inexpensive update using paint, I can’t wait to show you how!

Supplies:
Oil based primer
Paint color of your choice

Had I not decided to put hardware on, they would have been complete a while ago but we all know how that went.

About 5 years ago I had gel stained the oak cabinets, I loved it but the stain was beginning to peel in highly used areas which is normal. Instead of re-staining, I decided to brighten the cabinets up using Chelsea Grey by Benjamin Moore, I had it color matched by Behr.


Here are the steps, same as the kitchen and loft.
Lightly sand everything.

Prime, I have had wonderful luck with Zinsser. You don’t have to sand with this product but I still give it a light buffing.

Foam rollers will give you the look as though your cabinets have been sprayed.

Use a sanding sponge to buff out any drips after it has dried.

Start painting, again using a foam roller and a purdy brush in the hard-to-reach places. (Paint Benjamin Moore Chelsea Gray)

NOTE: Latex paint will adhere perfectly to oil based primer. Latex primer over oil paint will not work at all.
Let it dry, buff out any drips and give it another coat.

Have your hubby add the hardware, obviously, there are some things I just am no good at.


Still have touch-ups on the wall and floor, I am not the neatest painter.

The before (this is my side, I had to paint two of these babies)

Even though this is not my bathroom cabinets this is the type of oak that is under all these layers of paint and stain, yuck.

So much better!

The cost for the paint was $30 and I have at least 3/4 of a gallon left and $30 for the hardware so $40 for brand new cabinets! YAY!
For more information on updating your back-splash click here.
They look great!!!!!
Love them! perfect color of gray. My cabinets have had the same evolution. ugly oak, to black to gray…and I am so pleased! Can’t wait to party with you next week at the Ready 4 Summer Party!
Heather
Thanks. We are doing ours next week. I think we can do this.
They look great and I love the color.
I was going to ask you how you went about doing yours just around the time you had your mishap with the hardware. I decided to wait since I figured if you are anything like me the last thing you would want to do is give a tutorial on painting bathroom cabinets. lol.
I hope ours come out as nice as yours.
Wish me luck!
Cathy
I love how they look! The color and the hardware make them look like a piece of furniture!
Great job!!! I have those yucky cabinets that you have in the “before” pic…bleh! I love the grey. You mentioned that you had peeling from the gel stain. Did you top it with poly? I was thinking of using gel stain on my stair railing. Do you suggest I go with traditional stain as opposed to gel since it’s high traffic?
I was going to paint my bathroom cabs white along with my kitchen cabs but you inspired me to go with a moody grey. Thanks again for inspiration 🙂
To be honest, no matter what you use if it is high traffic area parts will eventually come up. Our railings were sanded down to the bone, stained twice and poly. There are areas where part of it is coming up. The kitchen cabinets, same thing on high traffic areas and they were painted. The gel stain comes out so nice and the best part is you don’t have to sand. With regular stain you will need to sand. I think with anything over time parts will come up and it’s just a matter of touching up every few years. hope that helps, let me know if you have any other questions 🙂
Take care
Kristin
I still get so amazed at what a difference paint can make!! Looking good 😉
This is great – thanks for the post!
I’ve been dying to paint my bathroom cabinets, too, but have been advised against it several times by the folks at the paint store because they say it wouldn’t work with the humidity in the bathroom during hot showers. Have you heard this or had experience? Perhaps I was given bad info, but I’m curious of your thoughts?
Thanks again for a great post, they look amazing!
I think that is silly! If you are worried buy the bathroom paint I used it in the boys bathroom which is smaller and it has held up great! Wonder why they are giving that type of info, go for it the only problem is going to be asking yourself why you didn’t do it earlier 🙂
they look gorgeous! i love that shade of gray!
They are beautiful Kristin! I love gray on furniture- so pretty!! Can’t wait to see the rest of the makeover!! Thanks for linking up at Feathered Nest Friday this week too! xoxo, Courtney
They turned out beautiful Krisitin! That is a lovely gray…very striking! You did a fantastic job. Happy weekend to you.
That was worth a little delay! 🙂 They’re so fresh and stylish, I can’t wait to see your fabric choices to coordinate with that beautiful gray!
You did a great job, love the new color! You really know how to work a paint brush 😉
Have a great weekend!
Looks great, did you paint the hinges?? I removed mine when I did my bathroom and laundry room cabinets but I’m getting ready to do the kitchen and would like your input on the hinges.
Kristin, the new color is SO pretty, I love it with the silver nickel hardware!!! Gorgeous. Can’t wait to see the rest of the projects unfold in this space!
Heather, they are lovely! You have inspired me so much. I tackled my boys bathroom this past week and so far, the cabinets are turning out just great! I thank you for all your tips. Can’t wait to see your finished project, I know it will be incredible!
Smart lady to use elbow grease to transform them. If you bought new I don’t think they could look any better and your wallet would be less full.
~Bliss~
They turned out great, Kristin!! 🙂 You had mentioned wall touch ups and not being the neatest painter. I’m not either, had the same problem in my bathroom. If you’ve never tried Frog Tape, you have to! It’s more expensive than other painters tape but it’s worth every penny!
I used it to make my chevron tray last month and each stripe turned out perfectly. It was my test project for the Frog tape and now I won’t use anything else!
Happy Weekend!
Karla
Such a fresh and pretty update!
Good job! I always say what a difference a gallon of paint makes.
LOVE the grey..love!
It is no fun painting cabinets but after it is all done it is so worth it.
Wish I could have you come over and do mine. STILL have to do our kitchen but I think I am going to do some kind of refurbished just because ours are SO bad.
xoxo
Love the new color, Kristin! The hardware suits it beautifully!
I love the color Kristin. What a wonderful, fresh update! Have a super week ahead!!
I absolutely LOVE the color! Soft but makes a huge impact!
These turned out great! I have been keeping up on your bathroom progress! It is coming along nicely!
Lovin’ it! I just painted my cabinets a similar color.
http://dollarsandsensedecor.com/2012/05/im-baaaack/
Looks fabulous! I love Chelsea Gray!!! Can’t wait to see the rest of the bathroom when you are finished!
Great tip with the Zinsser. I cant stand sanding when I want to get straight down to painting, so I’ll definitely have to get down to Home Depot and get me a few gallons of that!
Thanks
I am curious about your painted cabinets. I want to paint mine,however, the side panel of the cabinets is only cheap particle board – feels almost like a paper covering on the side panels. CHEAP builder cabinets! Do you know if paint will stick to that? I’m afraid to dive in until I figure out if I’ll be able to paint the end panels. Thanks, Laura
I’m telling you, that Chelsea Gray is my new favorite color, but isn’t it a trip how much its tones change depending on the light? It has my head spinning. Beautiful cabinets-nice work!
I really love the finished look ~ the color is perfect and your tips…well, I need ALL the tips I can get. I’m hoping to do a lot of painting/updoing/redoing this summer.
I love the look of your cabinets and hope to paint my own oak bathroom cabinets soon, too! I have a couple of questions, did you take the hinges or doors off the cabinet or paint with both attached, do you have any issues with it sticking if you left them on, and did you paint the back of the doors or leave them oak?
I think this is one of the most vital info for me. And i’m glad reading your article. But want to remark on some general things, The web site style is ideal, the articles is really excellent : D. Good job, cheers|
This turned out beautifully! I love the way it looks with the backsplash! We just painted our kitchen cabinets and we loved the Zinnser primer as well.
I’m stopping by from Tutorials and Tips at Home Stories A to Z (#16 Budget Bathroom Makeover and 18 Bowl Licking Good Guacamole)
コート ダウン レディース
I love this and want to do it for our bathrooms. We have cheap looking white cabinets. Do you do them while the doors are still on or is it better to take the doors off? Also, do you know the color of your walls? 🙂
I’ve been dying to paint my bathroom cabinets, too, but have been advised against it several times by the folks at the paint store because they say it wouldn’t work with the humidity in the bathroom during hot showers.
Don’t let them talk you our of it, they have paint made just for bathrooms. I have had painted cabinets now for 7 years and they are fine 🙂
I love the colors! What color did you use on your walls?
THanks so much we used route 66 from Dutch Boy, you can see the rest here. http://myuncommonsliceofsuburbia.com/route-66-paint-in-the-bathroom/
Love the look! What finish paint did you use, satin, semi-gloss…..?
What a gorgeous job you did. You have inspired me to paint my oak China cabinet instead of selling it. Thank you for sharing!
Thank you so much Paddy, good luck with the cabinet!
Hi i justed wanted to know if yu had to use a sealer after??
Hi Shante, no I did not use sealer and they have held up great.
I see you used Chelsea gray in bathroom – it seems a coupk of th pics are a beige looking color , is it just the lighting or are those a different project and color ? It looks awesome !
Hi Michelle, we used dutch boy Route 66 on the bathroom walls, here is a better shot with how the paint looks like during the day. http://myuncommonsliceofsuburbia.com/diy-luxury-bathroom-makeover/ The Chelsea grey was used on the cabinets which is a little darker. Let me know if you have any other questions, happy to help.
Love this! I wanted to ask — how well is the paint wearing? I’ve read others who suggest using an enamel paint or putting poly on top. I am about to paint my oak bathroom cabinets gray, so am reading up on tips! Also — how did you color match the Behr paint to the paint you used? Do you just bring in the card with the color? Thanks!!
Hi Lauren, the paint has held up pretty well. In areas that are used a lot the paint has peeled off just a little bit. However, in my kids bathroom, it has held up perfectly. I think because I had a thick layer of gel stain under neath could be the reason for peeling. (I just touch it up) Poly would most likely help, just be careful if you are painting the cabinets white, poly can yellow the paint so just talk to the pro’s at a paint store. You can either bring the card in and they can scan it but most will have the code already in their computer system. Hope that helps 🙂