
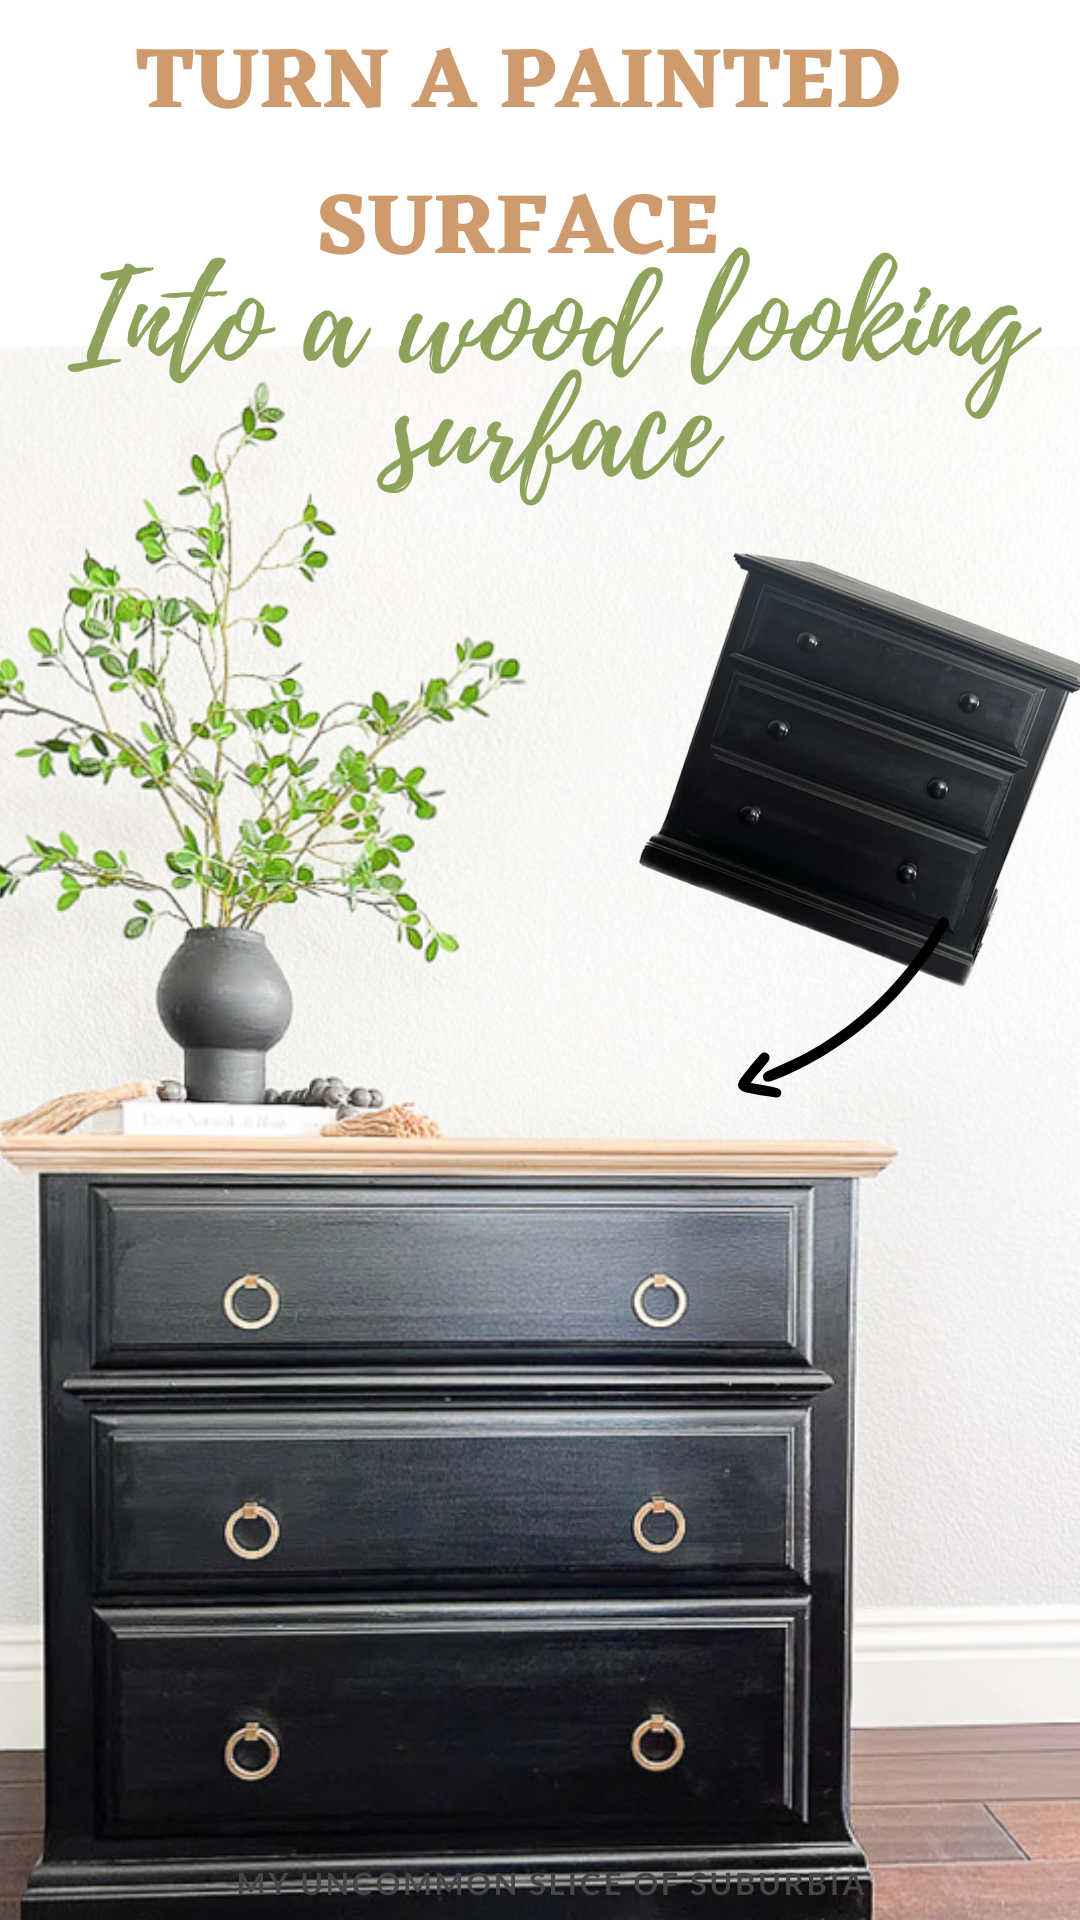
How to make a painted surface look like wood
Discover the secrets to achieving a remarkably realistic wood look finish on painted surfaces with my step-by-step guide. Learn how to use Retique It products in addition to a few others to transform any project into a stunning real wood masterpiece!
This was my first time using the product and I’m sold. I have a huge gigantic piece I want to make over but wanted to try this product first before diving in. They have full kits you can order that include a graining product to help you achieve a faux wood grain finish but I felt I was able to achieve the look I wanted with just the paint and the stain.
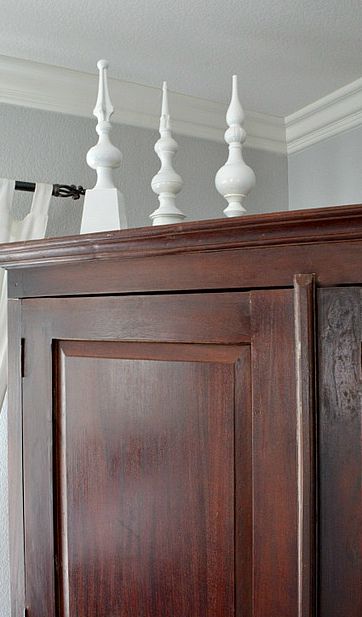
I think Grayson was just a baby (17 years ago) when I drove up to Los Angeles to look for used furniture for our master bedroom. I ended up finding the nightstands at a thrift store and a huge rustic armoire at a staging store, I honestly have no idea what I spent but I know the pieces were a steal compared to new. It’s Thrift Store Decor Day so make sure you check out all the projects at the end of this post!
If you are new to painting or have never used this product I would start on a sample boardso you can get the feel of the product.
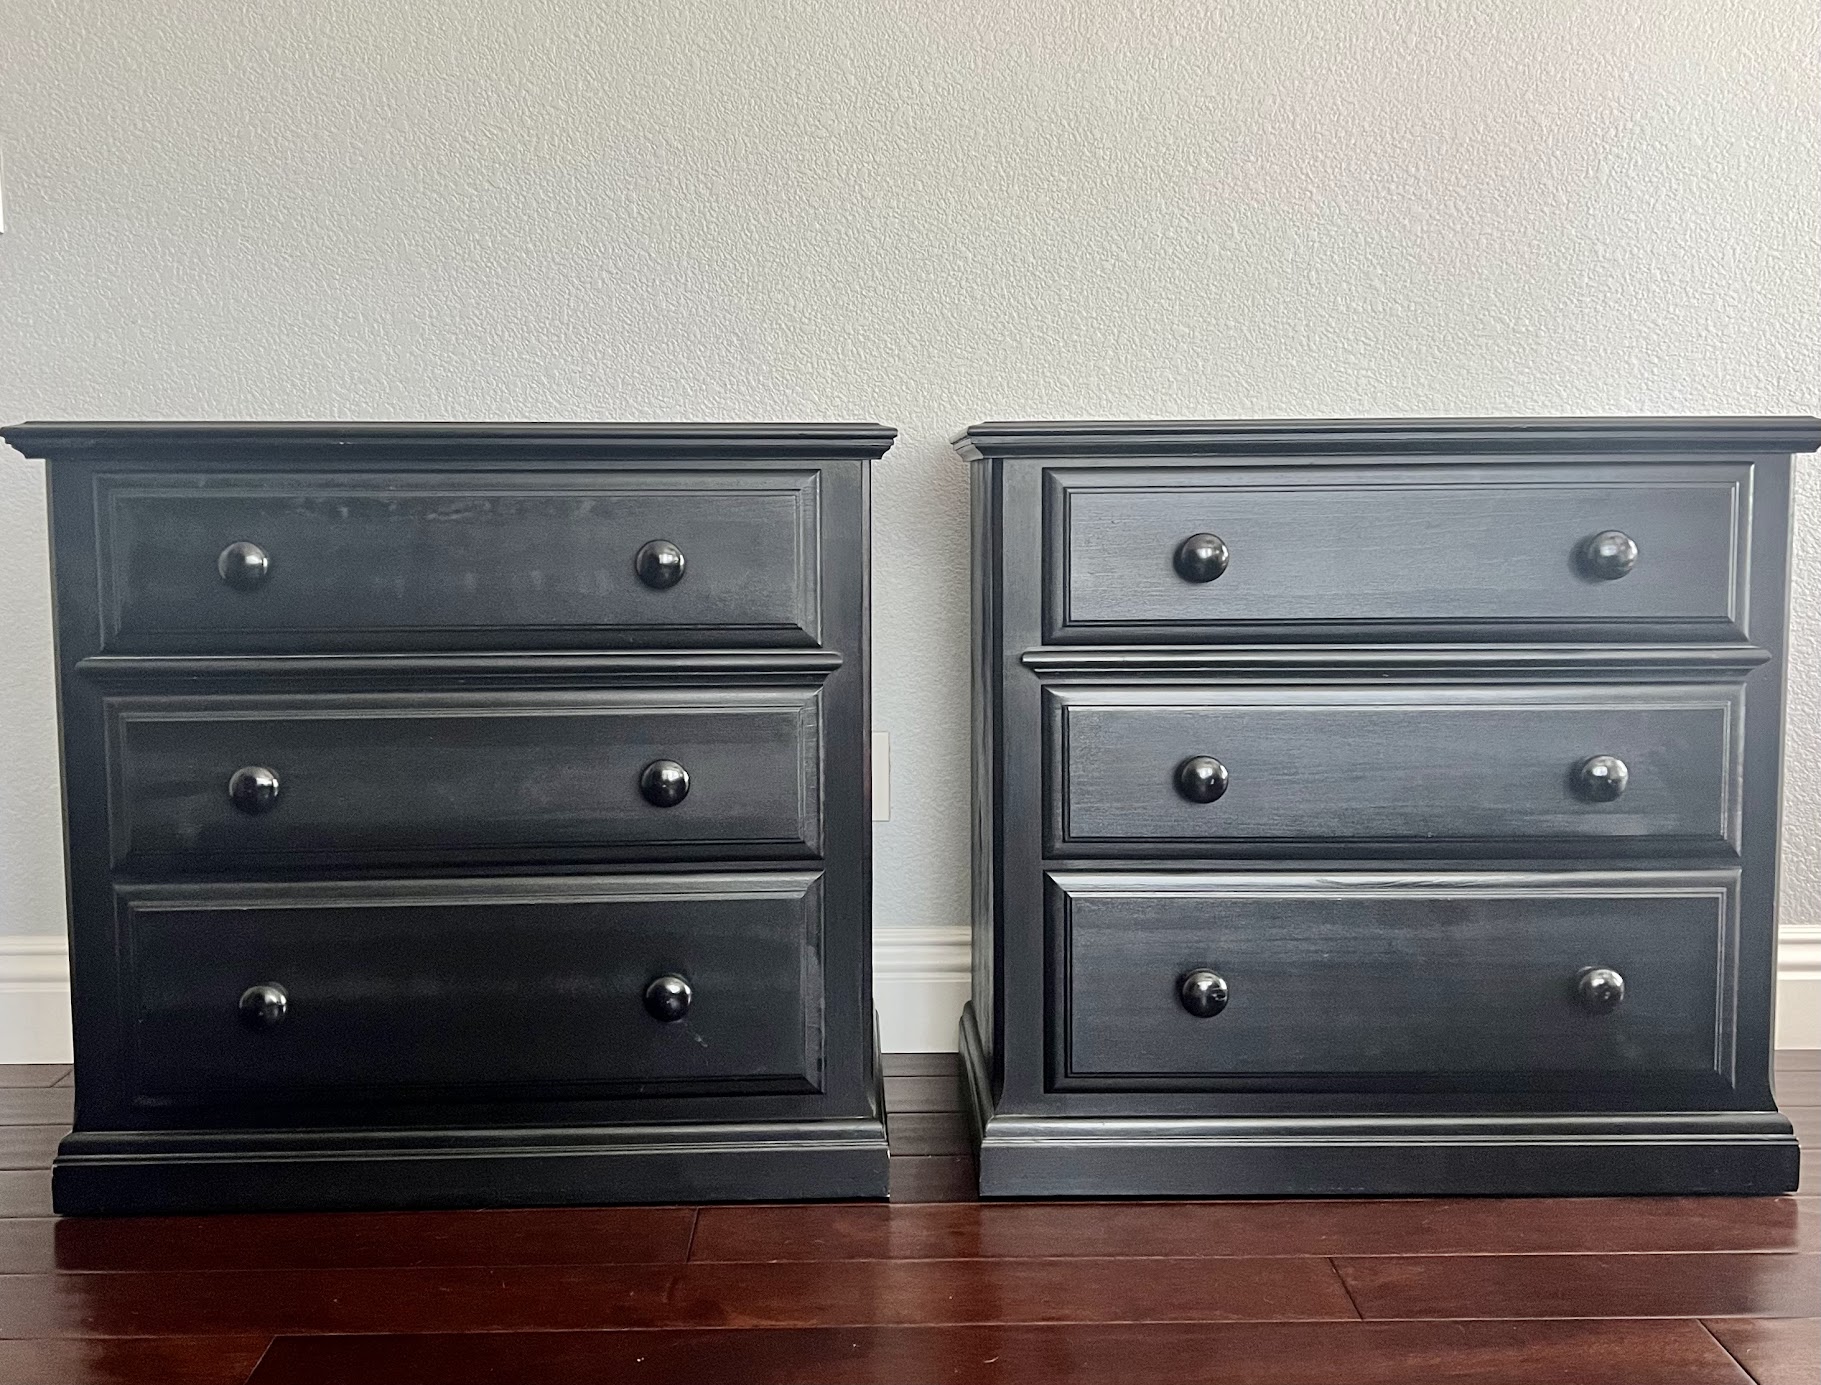
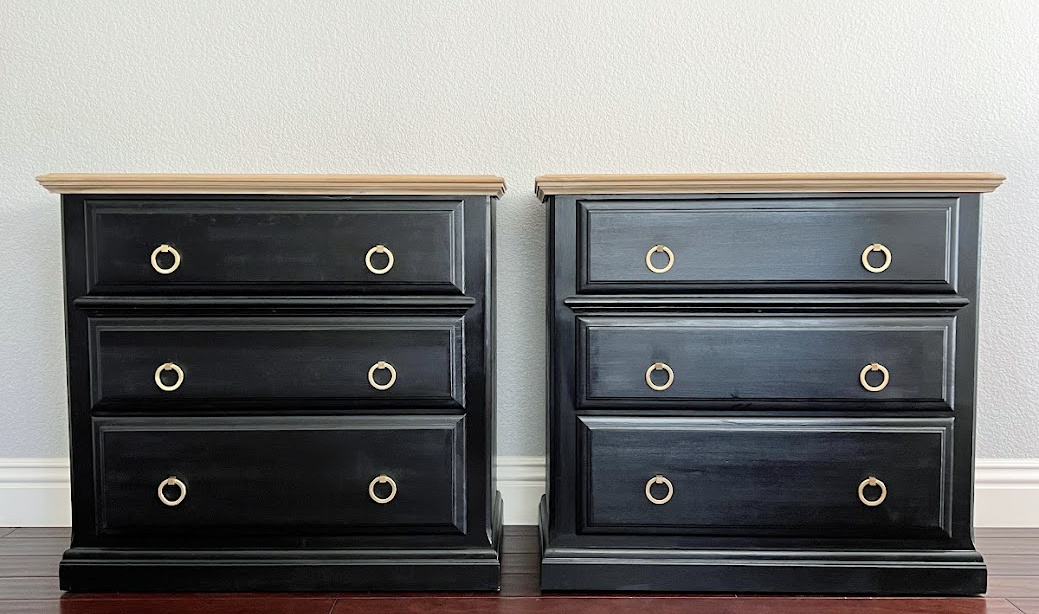
Here are the dressers before
Materials you’ll need:
Affiliate Links Listed Below you can read my full disclosure here
Retique It Liquid Wood- Light
Retiuqe It Gel Stain -Pecan
Sponge
Angular Trim Paint Brush
Painters Tape
Sanding block
Weatherwood Stains Dead Flat Top Coat
Or you can buy it through Amazon
Clean Cloth or Tack cloth
Painter’s Tape
Drop Cloth
For the rest of the nightstand I used Verathane Gel Stain Black
This is the hardware I purchased

Directions on how to make a painted surface look like wood
Prepare the Surface for proper preparation:
For your first step, you want to give your piece a good cleaning, removing any dirt, dust, or grease. They recommend that you wipe Down with denatured alcohol mixed with water or dawn dish soap mixed with water. TSP will NOT WORK and the product will not adhere properly. Using a sanding sponge I buffed the top to create a better bond for the Retique It products. Wipe away any dust with a clean cloth so you have a smooth surface.
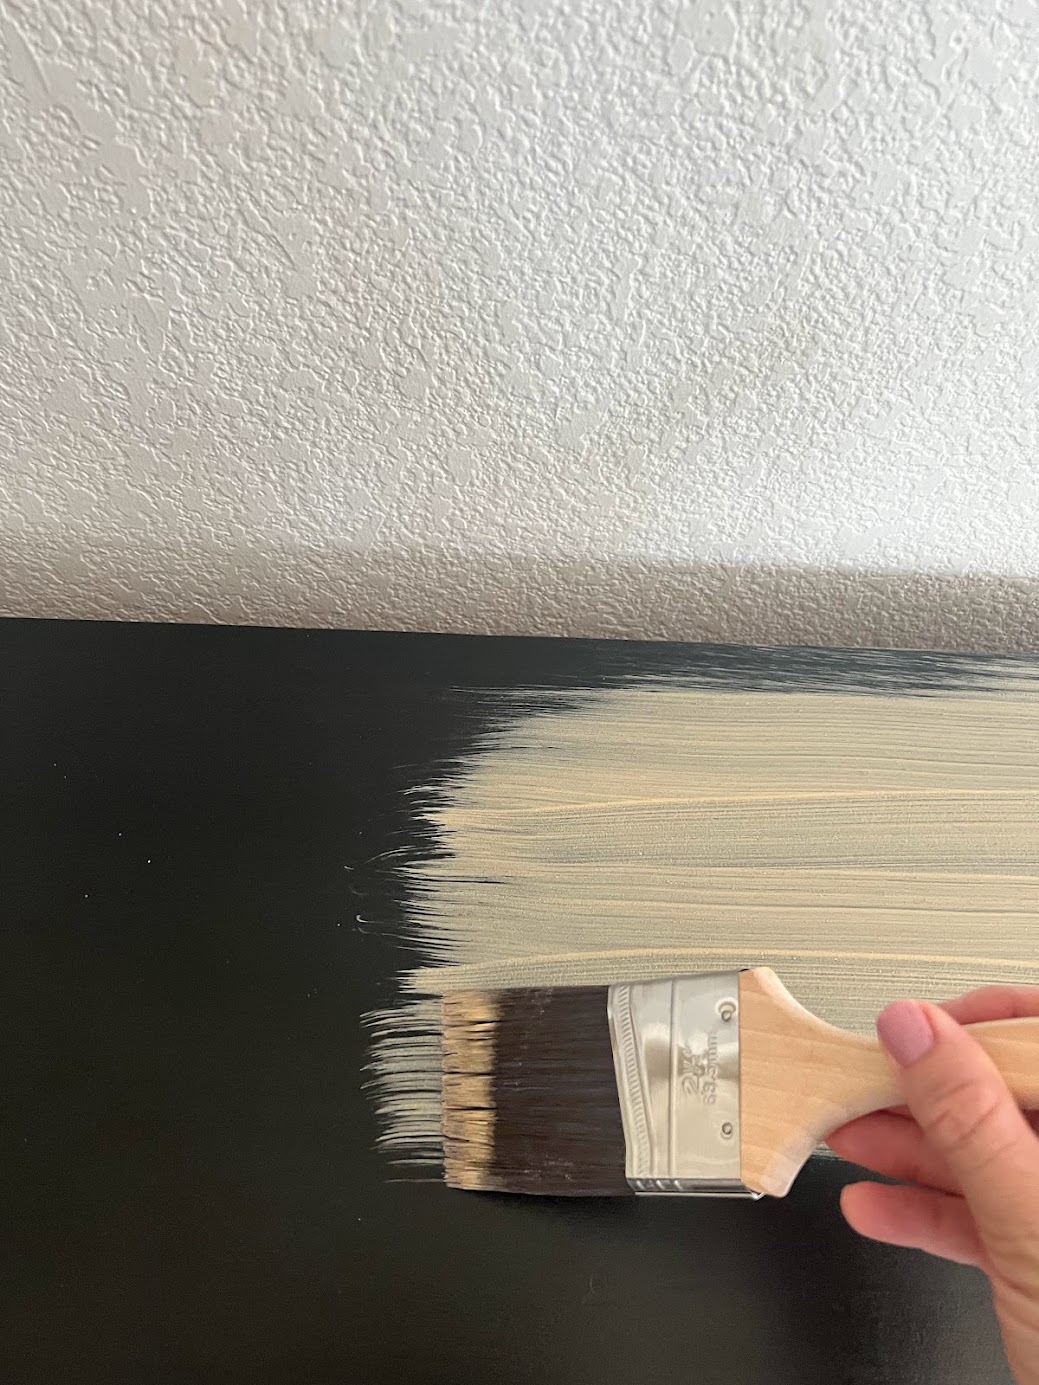
Apply Top Coat:
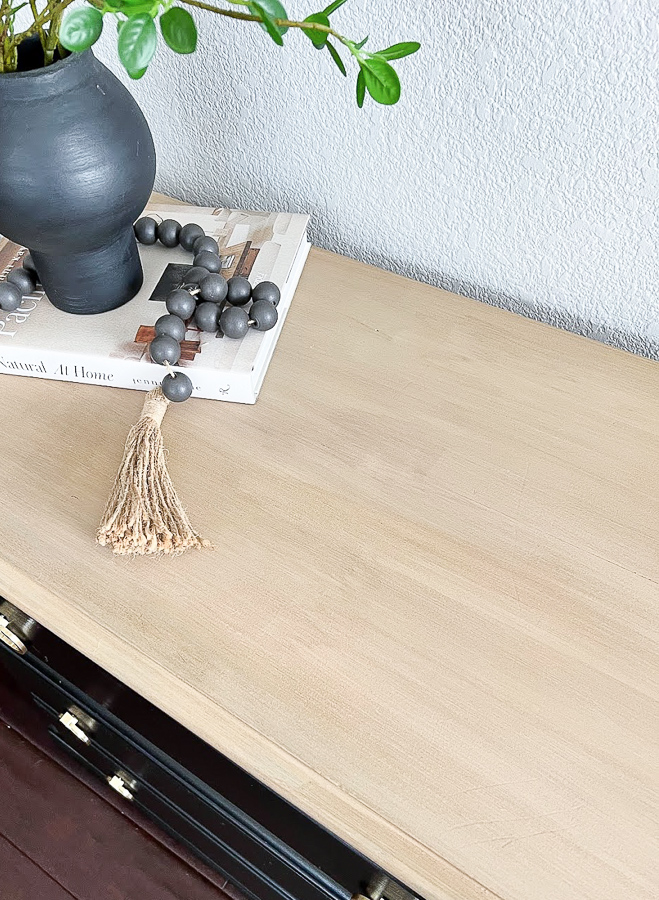
Next step, apply the first coat of the Retique It liquid wood to the entire surface. I used a paint brush and applied 2 even and long coats, your brush strokes should go in the direction you want the grain to go. If you are painting over wood that has grain showing, go in the direction of the wood grain. Allow each coat to dry completely. Drying time will depend on the weather and humidity, I found it to be completely dry within 30 minutes but it can take up to 2 hours.
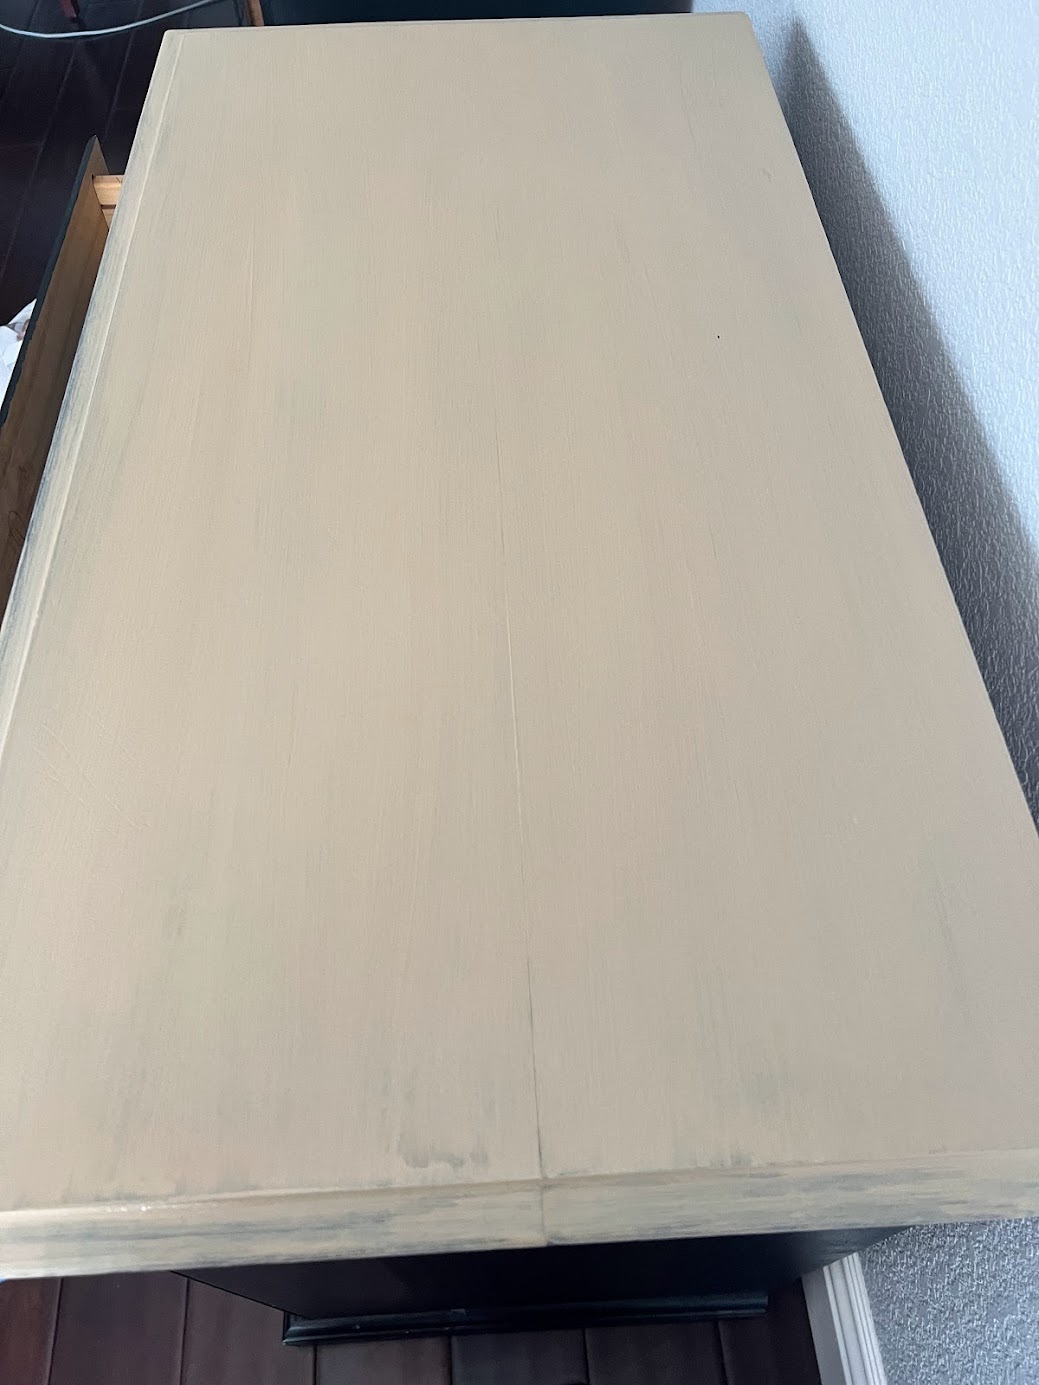
These little feathered craft brushes were perfect for the little nooks below the top. This was after 2 coats.
Apply Retique It Gel Stain
The gel stain is not like your typical jello-like constancy, it’s a liquid. Once the base coat is dry, apply the gel stain. You can wipe, brush, or use a sponge to apply. You want long even strokes, allow it to set for 1-3 minutes, You can allow it to set in if you are happy with how it looks or you can wipe off any excess.
Keep adding as many coats until you get your desired color, allowing for it to dry in between coats which can take up to an hour. I used 2 coats of gel stain.
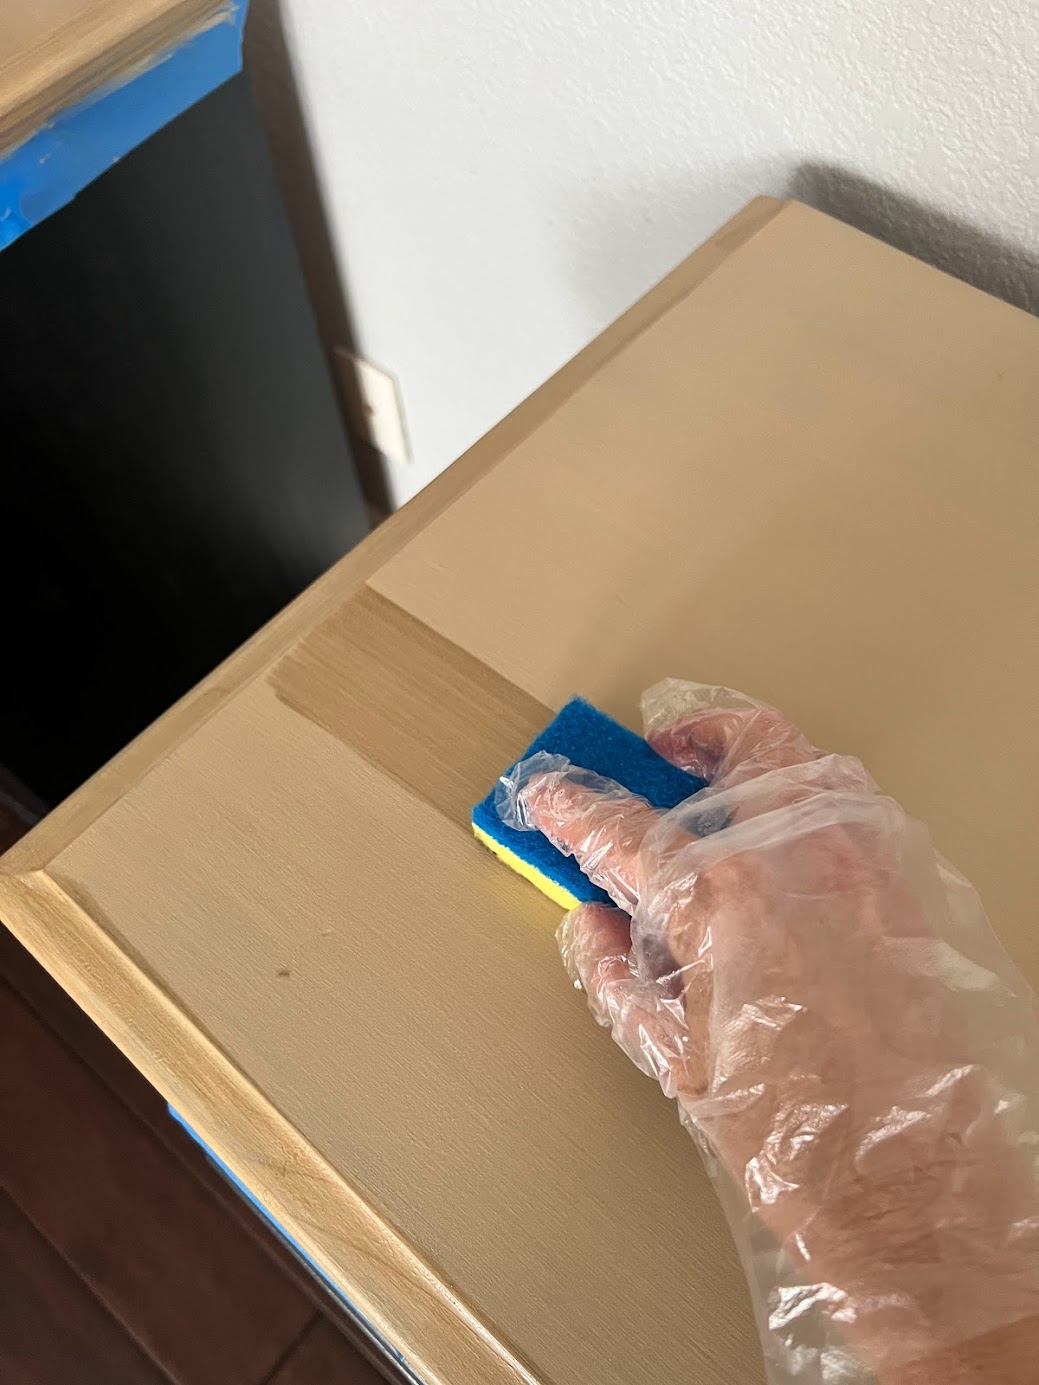
After 1 coat
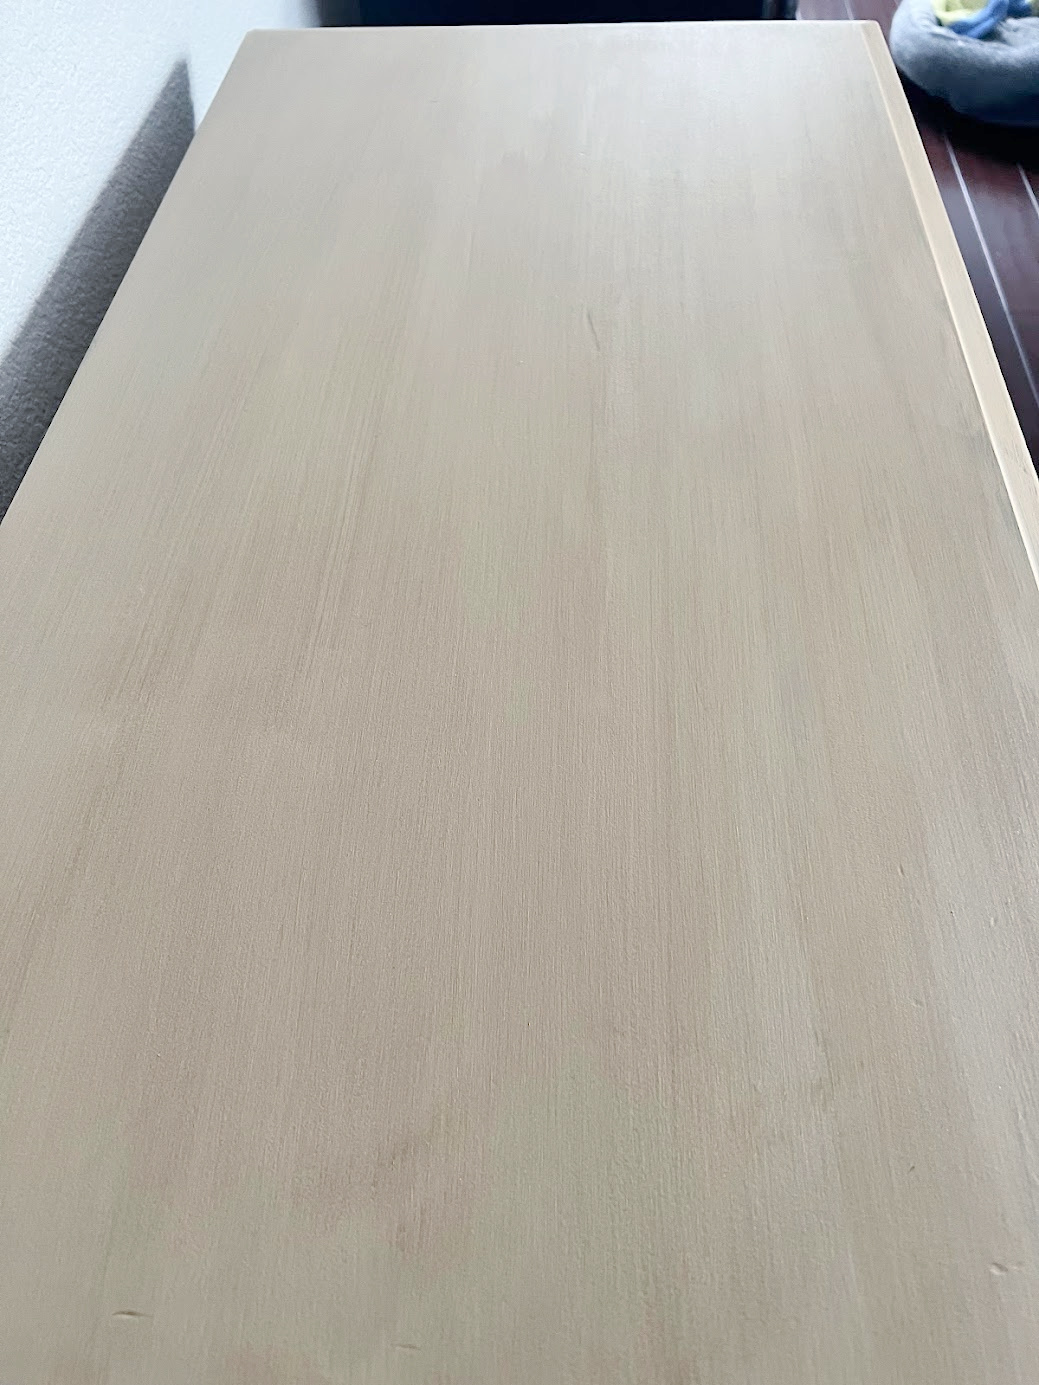
After 2 coats, I could keep adding coats for a darker finish but left it at 2 coats.
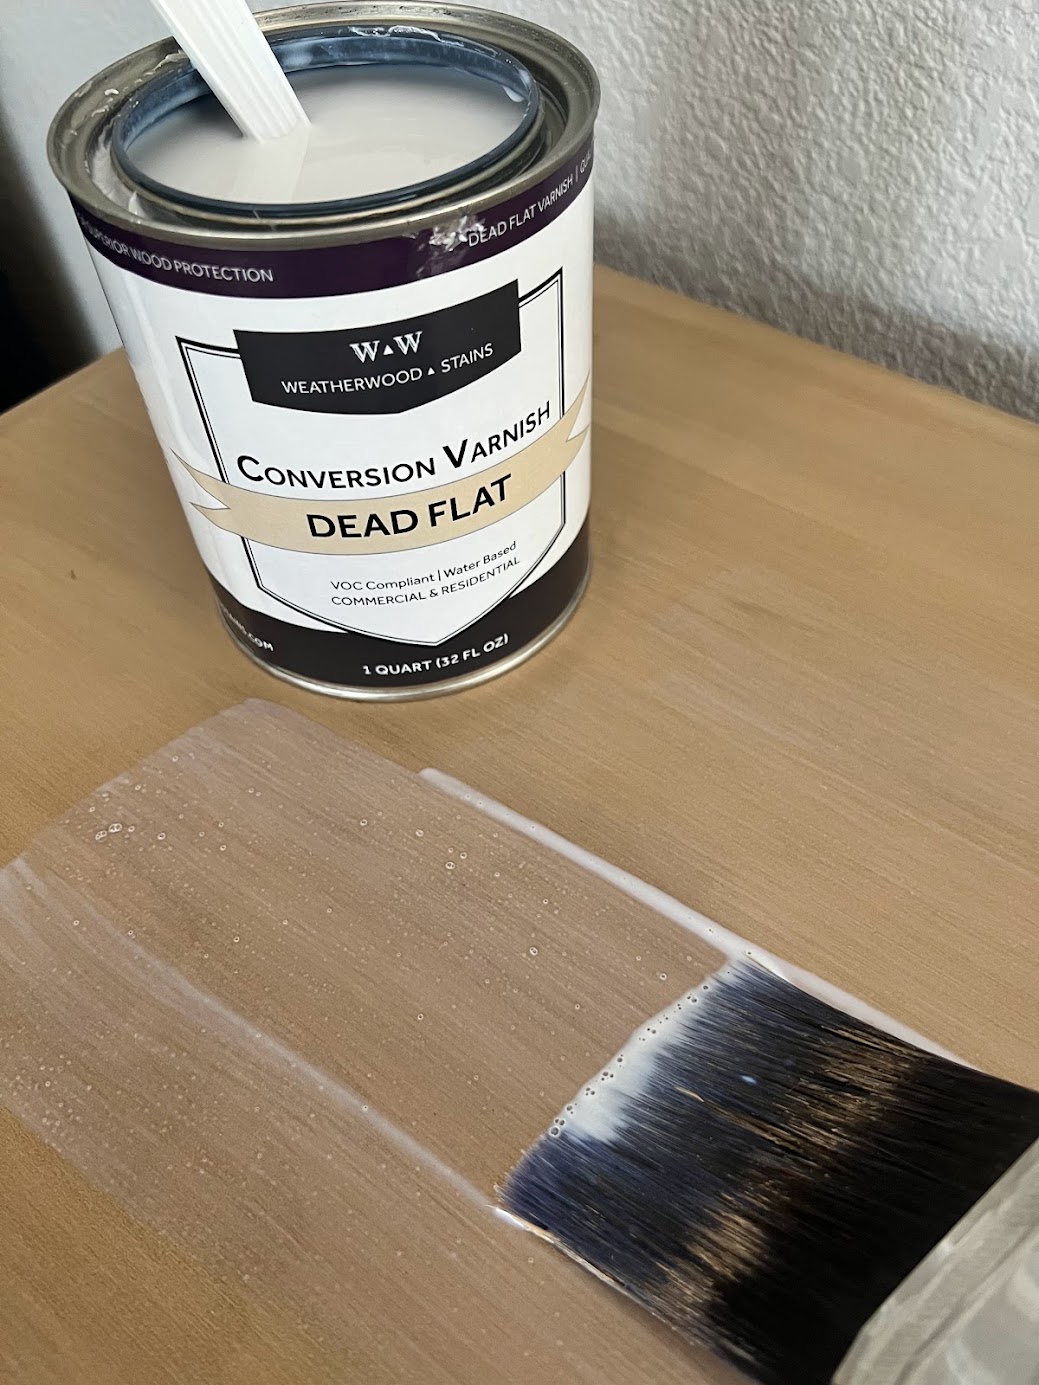
Seal the Finish:
Once the wood grain is dry, you will want to seal the surface for protection. I did a lot of research on this since many products will darken the color or turn the wood yellow. I decided to use Weather Wood Stains Flat Varnish since I have had good luck with it in the past. It kept my piece the same color and gave it zero shine, exactly what I was looking for.
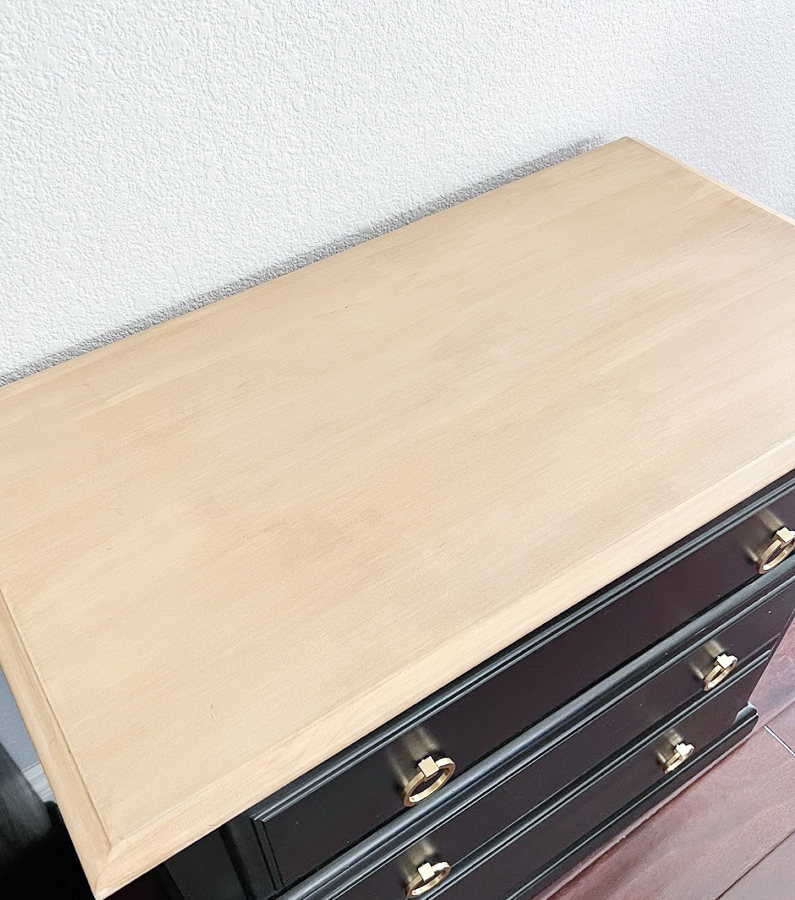
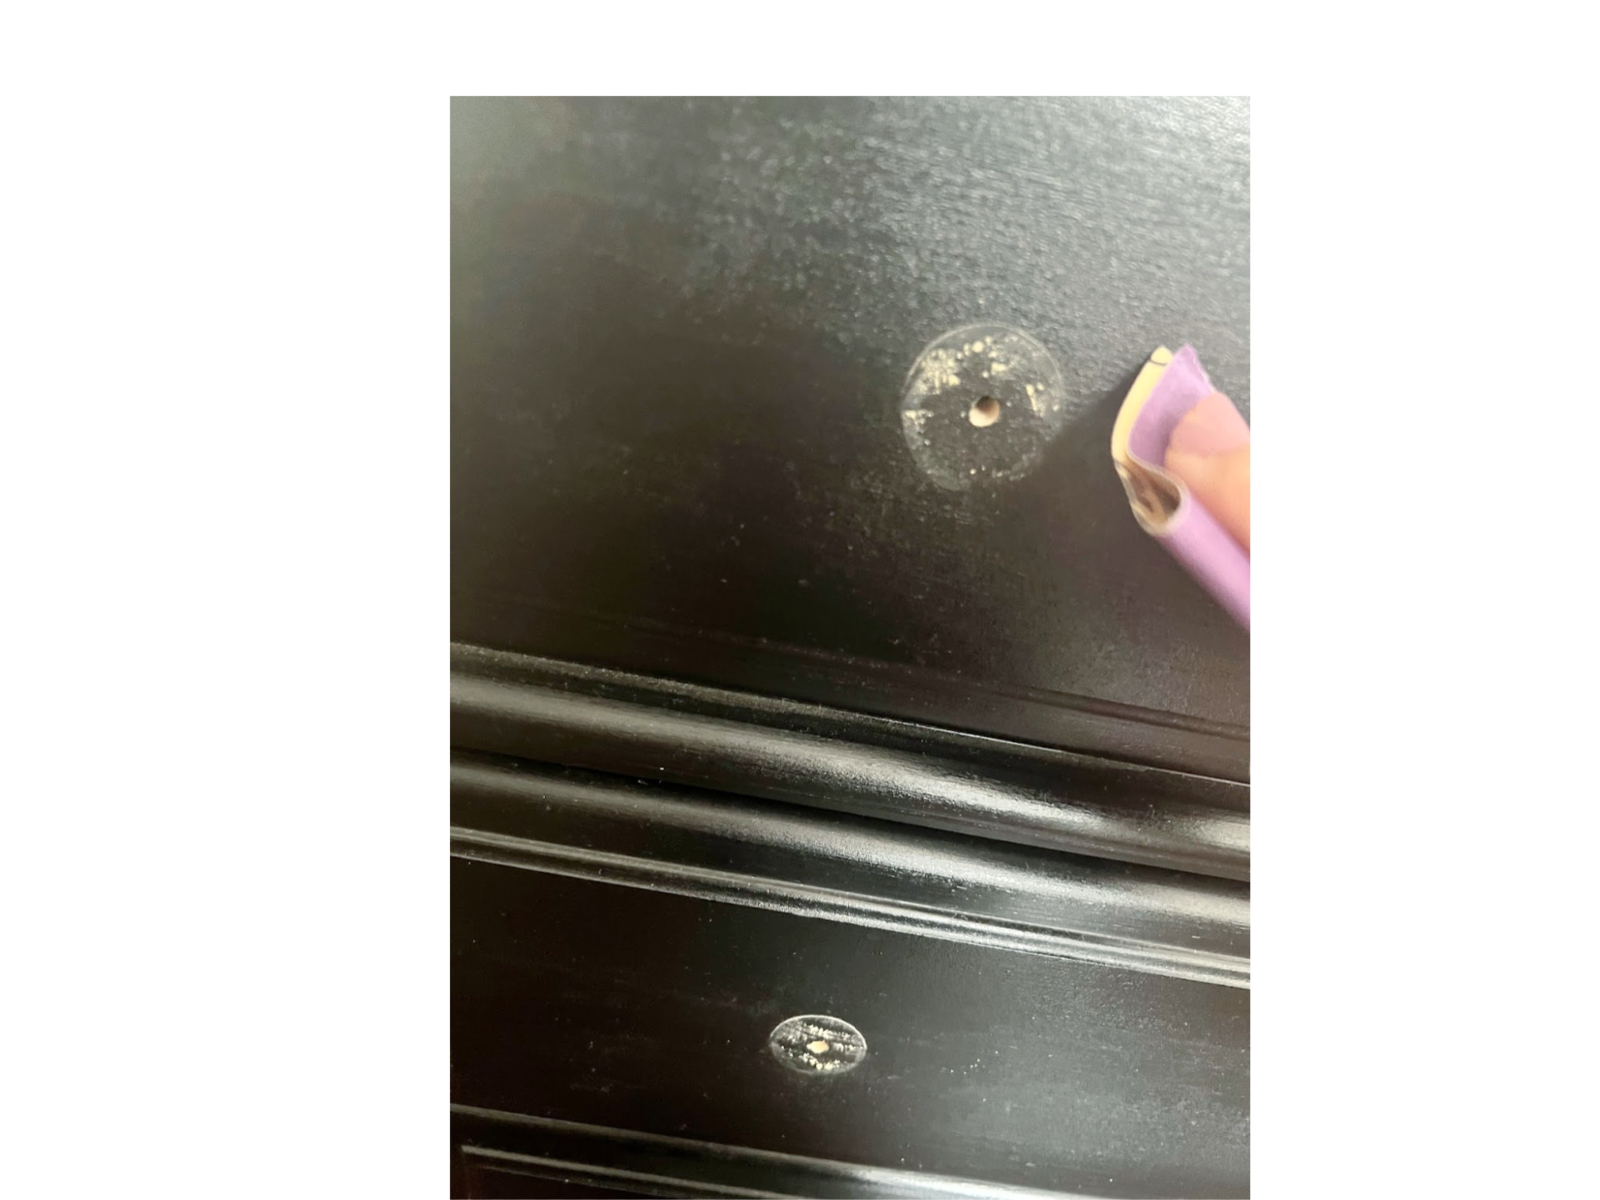
Once I was done I decided to paint the knobs and it just didn’t look right, at that point I knew it needed some updated hardware! When I removed the knobs there were rough spots on the surface of the wood so I buffed out the little circles on all of the drawer fronts to give it a smooth finish.
Updating the rest of the nightstand
Note: I had no intention of redoing the whole piece but once I saw the drawer fronts done I decided to finish the whole nightstand as it really updated the piece.
I decided at that point to go with Verathane Gel Stain Black, I had no idea what the color of the paint was and didn’t want to try and color match.
I like gel stain as it can revitalize your old wood furniture, and you can use it over a painted surface. It’s thicker than other wood stains, as it sits on top of the wood instead of soaking in, like traditional wood stain. This reduces blotching and leaves you with a beautiful finish.
Clean
I gave the whole piece a good cleaning using a degreaser (TSP) and then you’ll want to do some light sanding. Wipe everything down with a lint-free rag and apply the gel stain. Obviously, you are not cleaning the top part that you just finished.
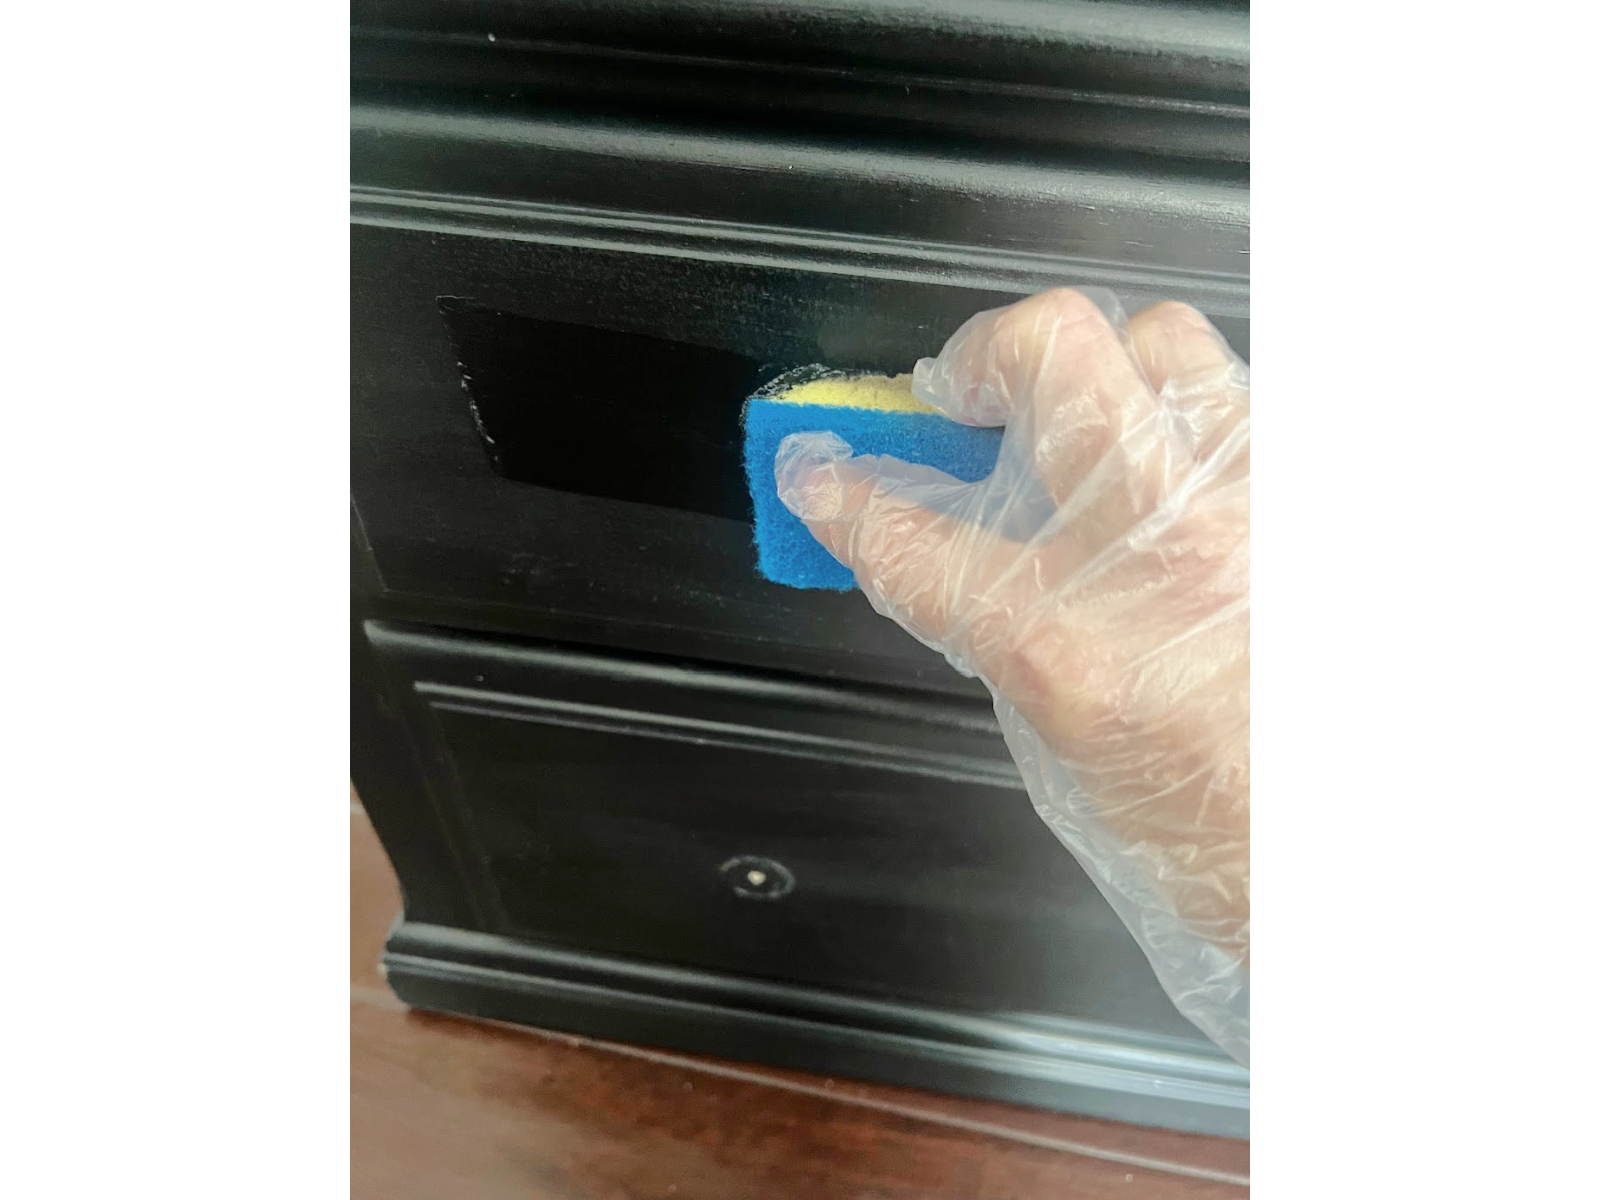
Apply Stain
I used a sponge to apply the stain, I simply dipped the sponge into the container and applied the gel stain to the entire surface working in small sections and using thin coats. Use a clean rag to wipe off any excess, Do not wait too long as it will become tacky and won’t dry properly. If you do make a mistake, you’ll have to remove that section before moving on. To do this, use mineral spirits or lacquer thinner. Wait about 10 minutes and reapply that section.
Because I was using black over black I only needed 1 coat. If you are changing the color of a piece of furniture or using raw wood you will need more than 1 coat and it will need to dry for 24 hours between coats.
Seal
Gel stain sits on the surface, much like paint. So it needs to be protected by a sealant over the surface.
Whether that be an oil based or water based top coat polyurethane finish it really doesn’t matter. If you use a Water-Based Polyurethane you need to wait at least 4-7 days for the gel stain coat to solidify into a hard layer atop the wood. Only then is it ready for a water-based poly finish. If you are sure that the gel stain coat is dry all over (usually takes up to 48 hours) then you can apply an oil based polyurethane over but you need to be careful. It can end up wiping off some of that gel stain by mistake. So, to prevent this, you may need to add a single coat of shellac over the gel stain first.
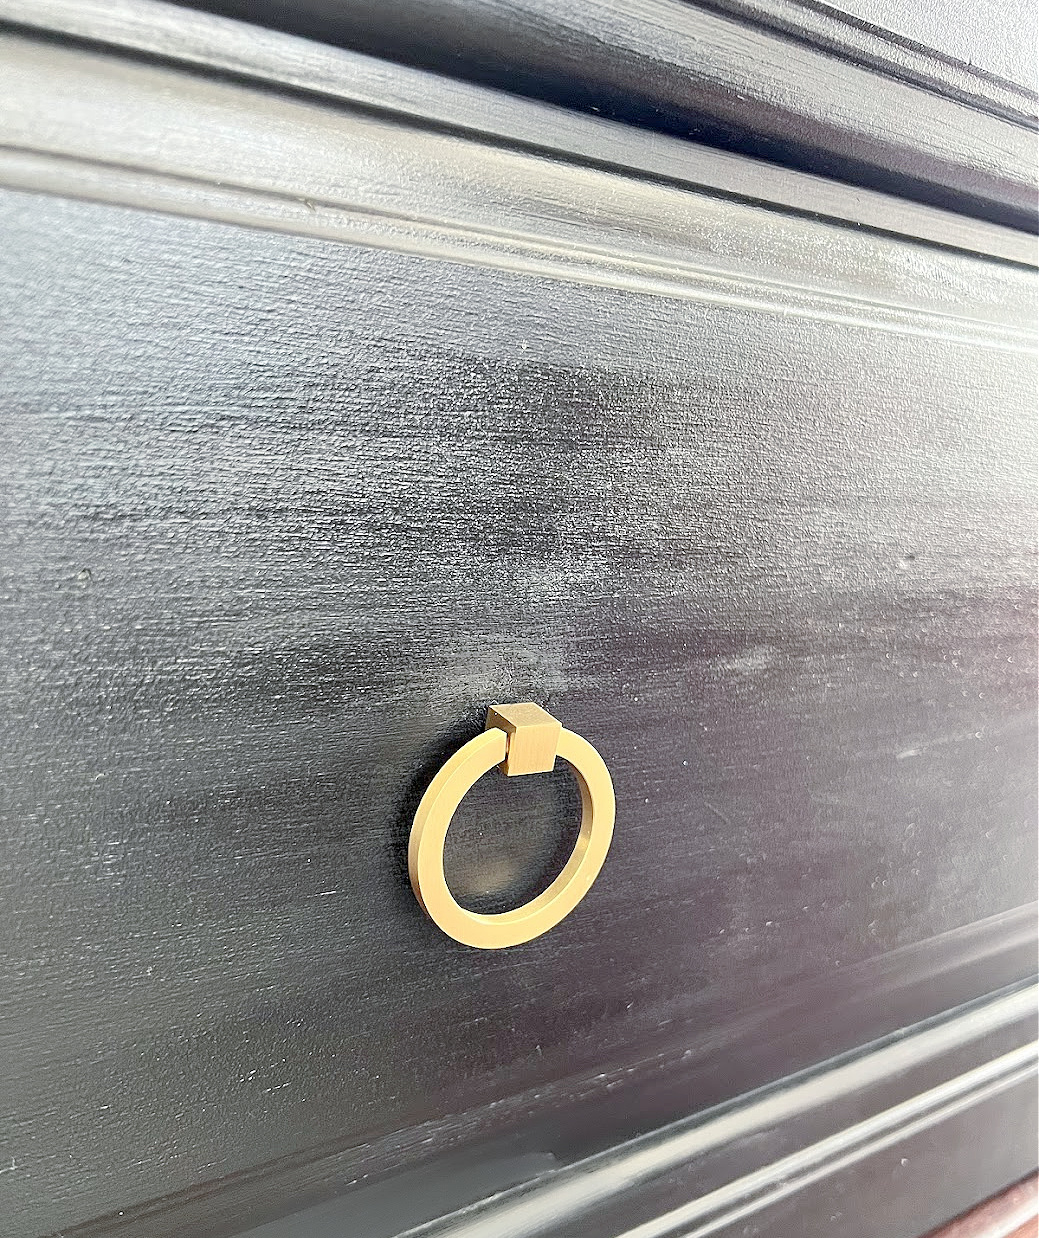
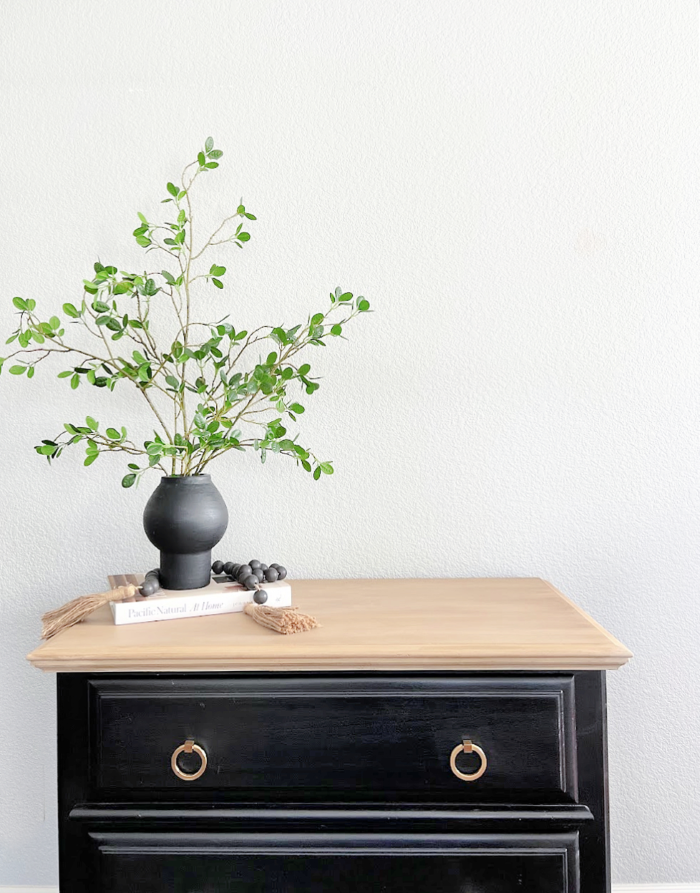
Add Hardware
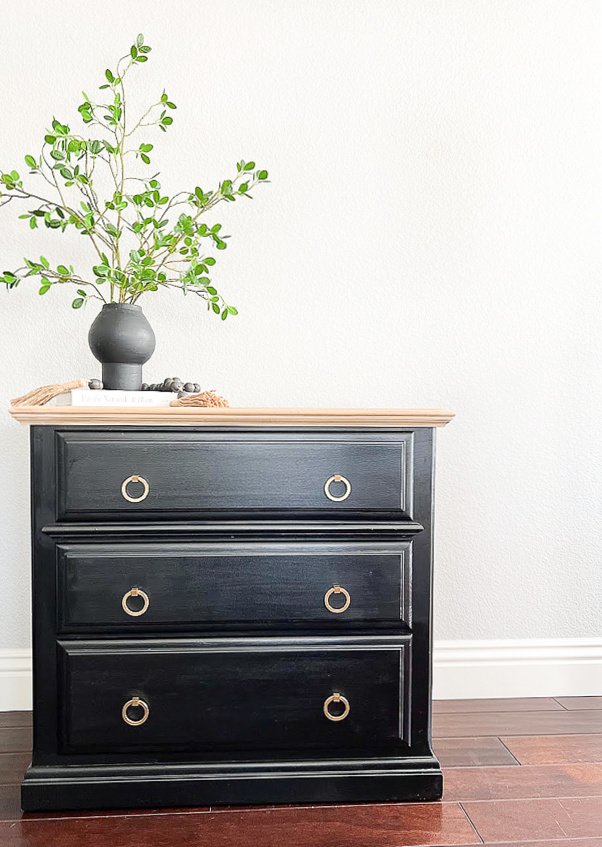
Lastly, add your new hardware and admire your work! This is the hardware I bought from Amazon.

Making a painted surface look like a wood surface is creative and rewarding. With the right materials, techniques, and a touch of patience, you can bring warmth and natural beauty to your home decor, furniture, or DIY projects and turn the ordinary into the extraordinary. Let me know if you give this method a try!
Remember to follow the manufacturer’s instructions on the Retique It product packaging for specific drying times and any other recommended steps. With patience and practice, you can achieve a realistic wood grain finish on your painted surface using Retique It.

It’s time to see all of the amazing thrift store makeovers!

Three-Tier Wrought Iron Plant Stand for Fall My Repurposed Life
Easy Modern Mirror Edge Domestically Speaking
Hanging Candy Dish Petticoat Junktion
DIY Bird Feeder House of Hawthornes
Pumpkin Decor from Straw Trivets Sadie Seasongoods
How to Make A Painted Surface Look Like Wood My Uncommon Slice of Suburbia
DIY Three-Panel Room Divider Refresh Shop At Blu
Thrifted Pumpkin Basket Makeover Organized Clutter
DIY Felted Leaves Our Southern Home
Thank you so much for stopping by, wishing you a beautiful week!

What a great makeover! I love a good twin side makeover. And you can’t go wrong with a fabricated wooden look. Pinned.
Thank you so much Sue, I really appreciate it!
I need to check out that product! It turned out so beautiful Kristin!
Thanks Maryann, I was a little hesitant to purchase it so I’m so happy it did what it says it does 🙂
WOW! That looks fantastic, Kristin! I never “wood” have guessed.
Ha ha, thank you Sarah!
Wow Kristin! You got a lot of bang for your buck in this makeover. I LOVE the new hardware, and the dressers will last for many, many more years.
pinned!
gail
Thanks so much Gail!
From boring to wow! You did an awesome job!
Thank you Carlene!
Wow, Kristin! I can’t wait to give this a try. So much time and effort saved not having to sand and strip old paint. I absolutely love the new look with the modern hardware.
Thank you so much Christy, I have a list of things to paint now lol
These look amazing! Love the hardware you chose.
Wow! Great furniture makeover. Your hardware really pops on the dark paint.
Happy Fall,
Kippi
Thank you so much Kippi!