
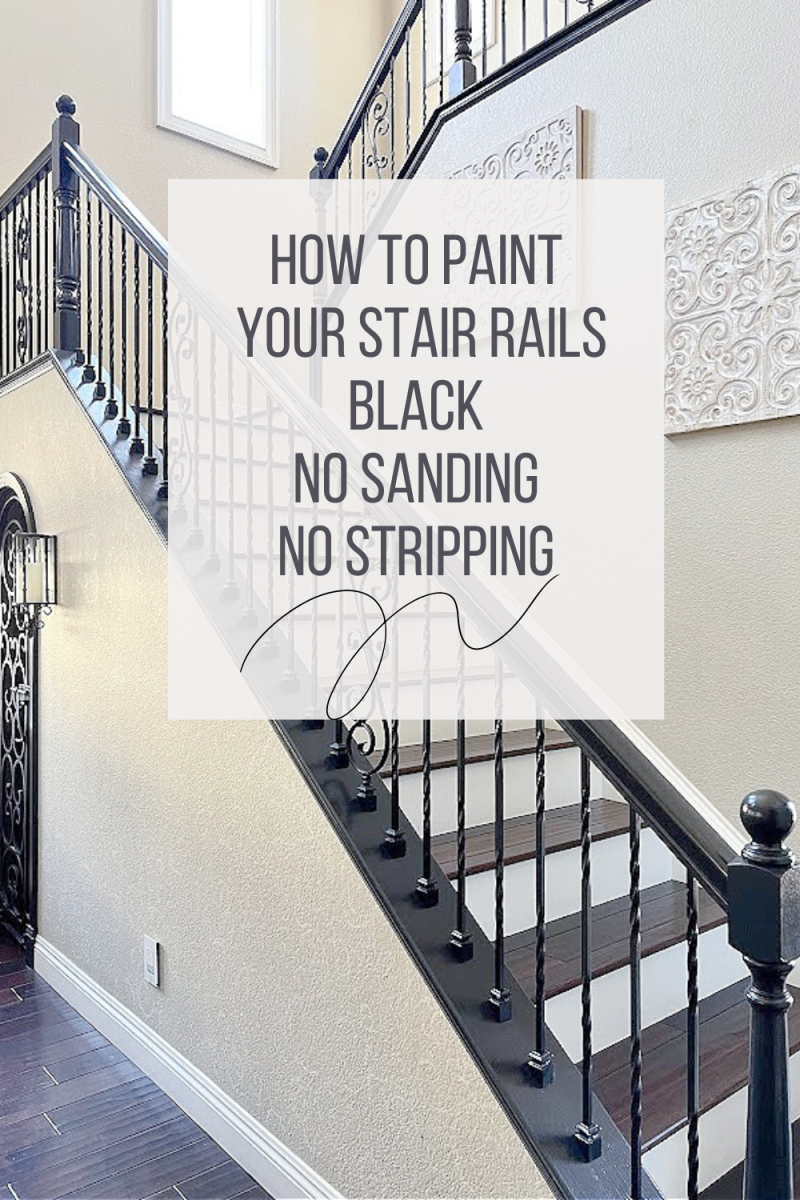
How to Paint Stair Railings Black Without Sanding (Easy DIY Update)
If you’ve been staring at your stair railings wondering if you really have to sand down every single spindle to update them, I have good news — you don’t. When we decided to paint our stair railings black, I was dreading the thought of sanding every inch of wood trim. But after some research (and a little trial and error), I found a method that skips sanding and stripping completely, using a bonding primer that grips right onto the existing stain. The result? A modern, moody black stair railing that’s held up beautifully — no sanding required. Here’s exactly how I did it, step by step.
This post was originally posted in 2023 and has been updated in 2026
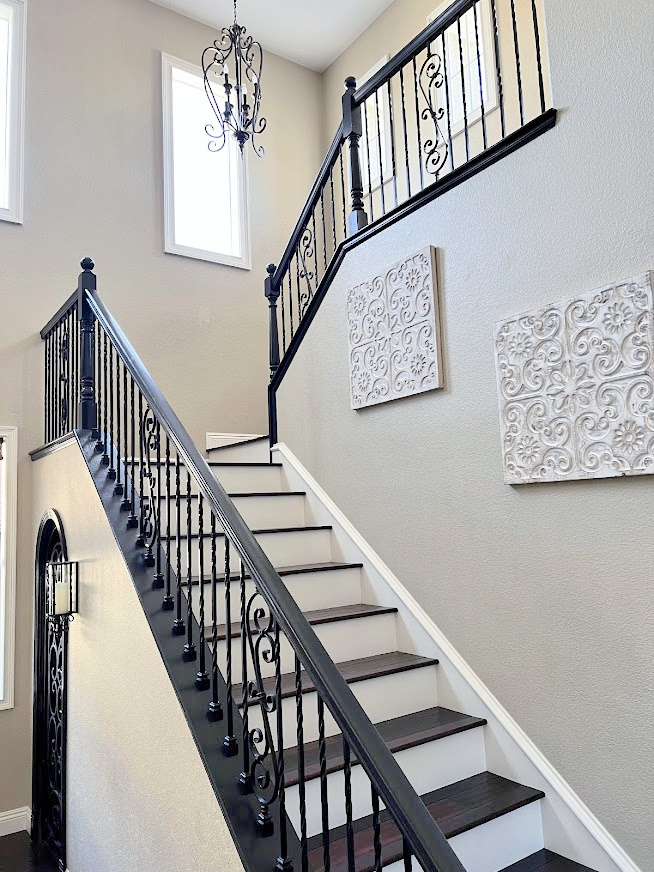
I have done this in our rental, and a year and a half later they have held up perfectly, so I was ready to tackle our stairs at home. I completed this right before the holidays, and I still have the rest of the banisters to complete that wrap around the whole upstairs. That section is going to be a little tricky as I will need a very tall ladder. If you are new here, let me share a little about the history of our stairs.
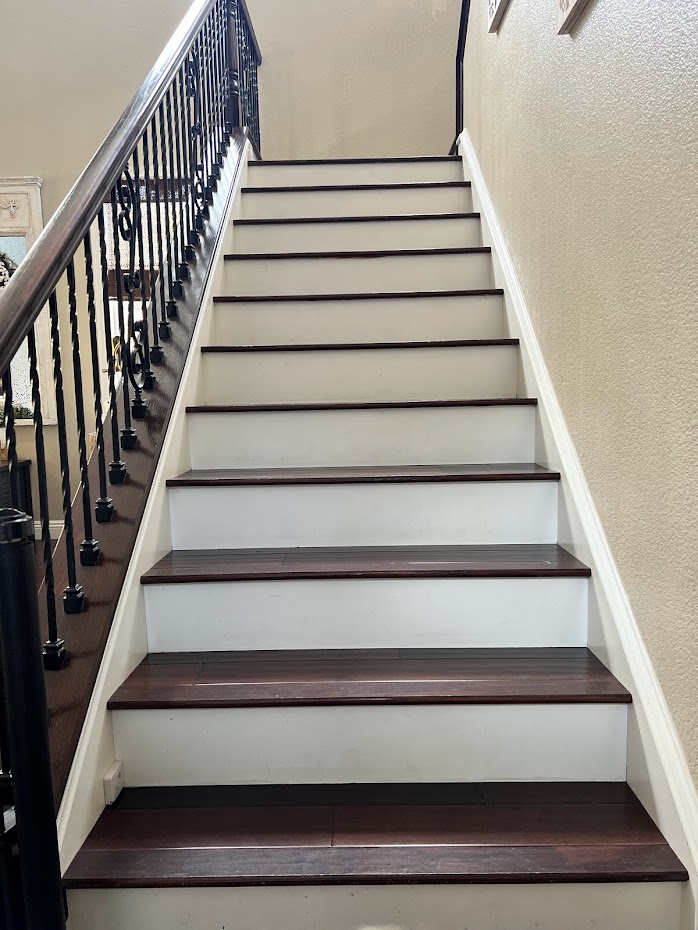
When we moved in 20+ years ago, the builders put in an oak banister, and it had been stained what looked to be honey oak, our whole house was covered in honey oak. I can’t believe this was 16+ years ago.
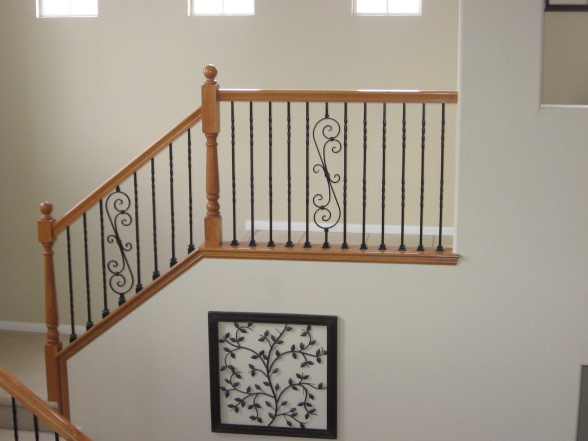
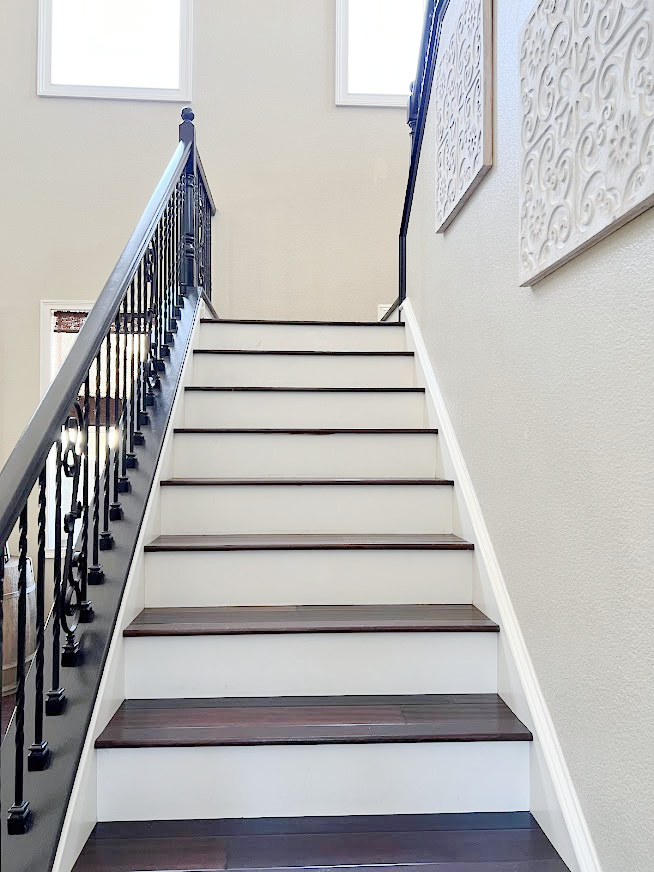
Eventually, we hired out and had them sand off the old stain to bring it down to the bare wood and restain with a darker color; I believe we used dark walnut. We tore the carpets out and installed wood stairs, and used white paint on the risers; this was about 15 years ago. Today, I am ready for a change; it is definitely showing its wear and tear. The kids used to love sliding down the rails with their hands, if that makes sense; as you can see, the stain is almost gone in many places.
Let’s get into all of the details!
When you need to sand:
There are several variations on how to paint over stained wood. I would NOT recommend this if your wood is peeling or chipping; if it is, you will need to sand the surface down to a smooth finish first.
What type of paint?
You want to make sure your primer is a bonding primer; there are many of them, and I’m sure most of us have heard of Kiltz.
The paint and primer I used has a bonding primer in it. If you don’t use the product I used, make sure you purchase a bonding primer and then follow it up with your choice of paint, making sure it is enamel paint.
I used Behr Ultra Scuff Defense paint and primer interior semi-gloss enamel Tricorn Black.
I was originally going to use Sherwin-Williams paint but forgot that Home Depot does not carry that brand. Not wanting to make another stop, they recommended Behr Scuff Defense for the handrails. It went on smoothly, and the coverage is amazing. I used 2 coats of paint. The best part: it stands up to scuffs with a premium scuff resistance, perfect for a stair rail.
Amazon Affiliate links are listed below for your convenience
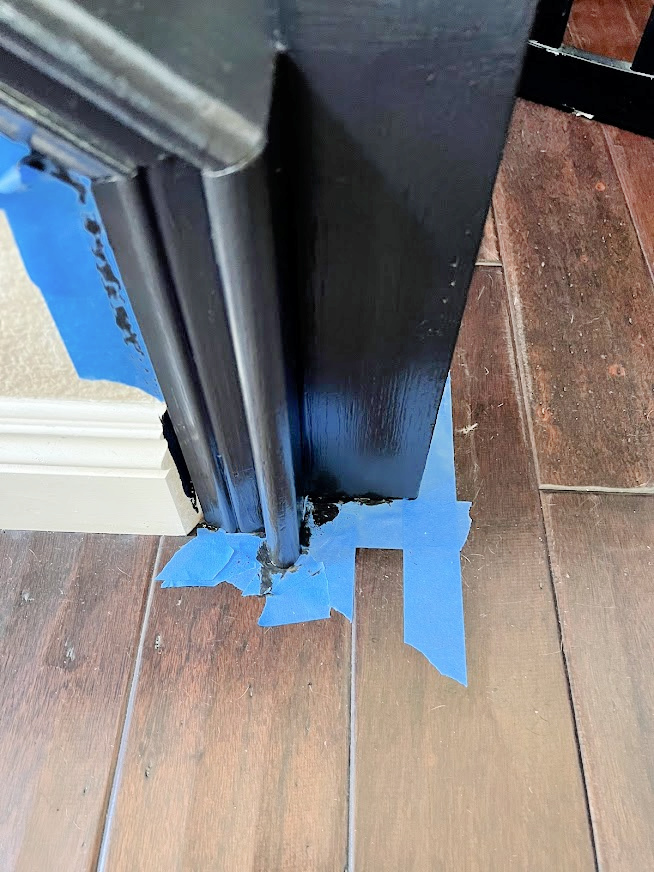
NOTE: I painted the railing and the outer string of the staircase, so when I refer to the railing, I’m also painting the outer string at the same time in this tutorial.
Is cleaning really important?
Yes, you must clean the railings very well using a chemical cleaner. It is REALLY IMPORTANT to use a chemical cleaner because there is likely a greasy residue that has built up over time. You could use borax or Dawn, but I can’t guarantee the paint won’t peel over time.

 Deglossing the stain
This is when the liquid sandpaper comes in, you need to get rid of the protective layer of varnish so your paint will stick to the surface.

Does it matter if your stain is oil or water based?
Most say that if the stain is water-based, you can paint over the stain as long as you use a primer. Others will say you can’t paint over the oil-based stain; however, I have done it without any problems using this method. I’ll list those projects at the end of this post.
You can determine which type of stain you are dealing with by sprinkling a tiny amount of water on the wood. Give it about a minute; if the water begins to bead up, the stain is oil-based.
Supplies for Painting Stair Railings Black
SUPPLIES
- All-Purpose Heavy Duty Cleaner (TSP)
- Liquid Sandpaper
- Foam Paint Roller
- Purdy Angular Trim Paint Brush (1″ or 2″)
- Painter’s Tape
- Sanding Block
- Drop Cloth
- Sponge Brush
- Clean, Dry Lint-Free Rags
- Small Craft Brush
- Paint Stick
- 1 quart Behr Ultra Scuff Defense Paint & Primer, Interior Semi-Gloss Enamel — color-matched to Sherwin-Williams Tricorn Black
Why Tricorn? Tricorn Black does not have any obvious undertones in it, giving it a classic yet sophisticated look. Exactly what I had imagined!
HOW TO PAINT STAIR RAILINGS BLACK: STEP BY STEP
STEP 1: Clean and Prep the Surface
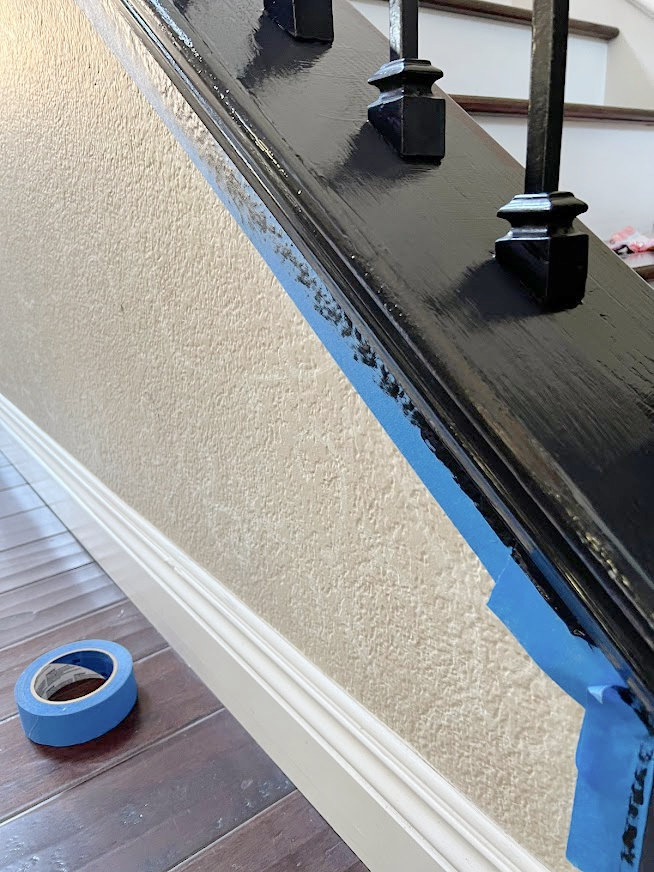
As with any DIY project, preparation is the key to success! Place your drop cloth down to protect your flooring, then clean thoroughly with a degreaser — TSP is my go-to. Using a microfiber or tack cloth, remove any dirt and grime. I went over the whole staircase twice.
To avoid a sanding mess, I used a liquid sander instead. It does the same job as light sanding — roughing up the surface so new paint will stick — without actually removing the existing paint or stain.
Wear gloves and apply the liquid sandpaper to a lint-free cloth, then rub it onto the whole railing in a circular motion. Let it sit for the time specified in the directions.
I actually repeated this step twice. Did I need to? Probably not — I just wasn’t seeing much of a visual difference, only a change in texture, so I got a little paranoid. But it worked out perfectly; the paint stuck great in the end.
Finally, use painter’s tape to cover the spindles, floors, and all corners. It’s a little tedious, but worth it for clean lines later.
Step 2: Paint
Using a foam roller, I painted the top and sides of the banister, rolling in the direction of the grain for my first coat. Using the roller will also prevent brush strokes. I used an angled brush for those little grooves in the railing, around the and. Next was the underneath, which was kind of a pain. I used a 2-inch angle brush and a sponge brush for all of the tricky areas.
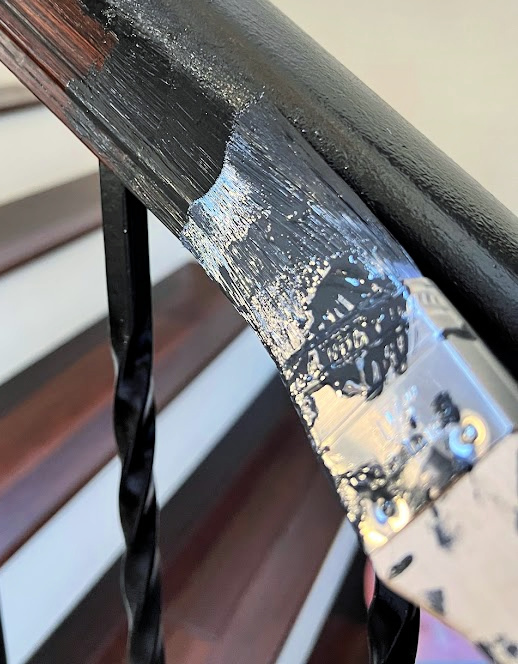
Allow to dry overnight and add your second coat.
Step 3: Use a Sanding Block

Let’s face it, dust particles will end up on wet paint. Using a sanding sponge (block) I went over any area that had a rough feel, and it instantly gave the rail a smooth surface. Touch up with paint where the sanding block was used.
Step 4: Remove tape and touch up
When I removed the tape, I could see the little areas where my taping was not perfect. I used a small craft brush for touch-ups.
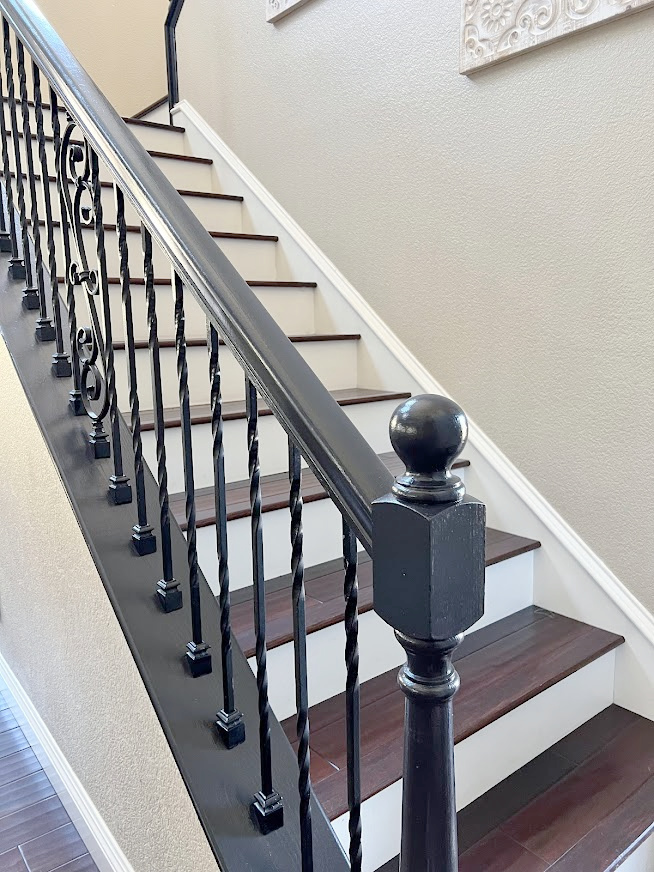
Voila
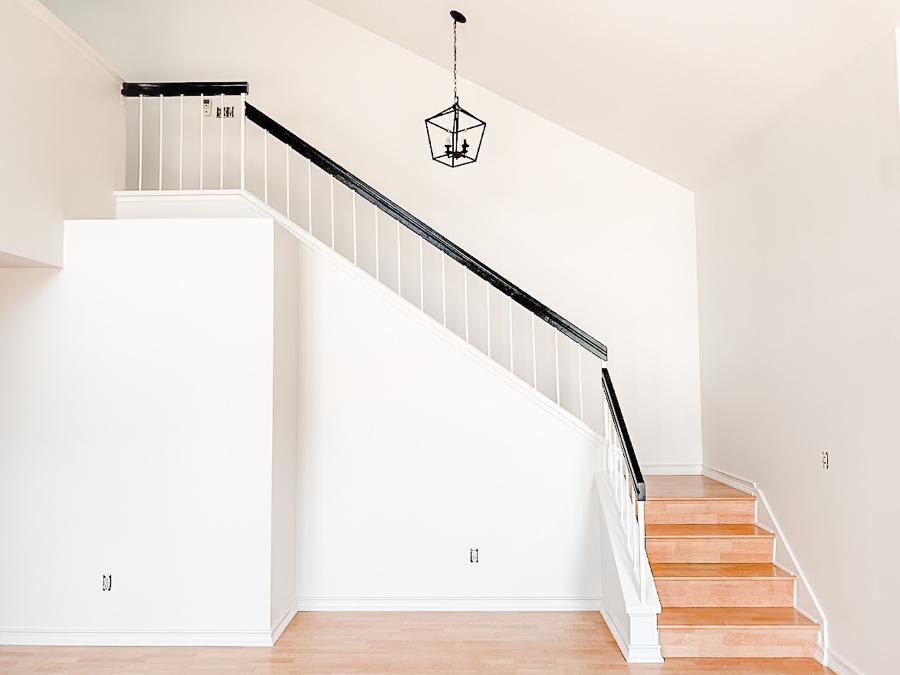
Before
After
Before
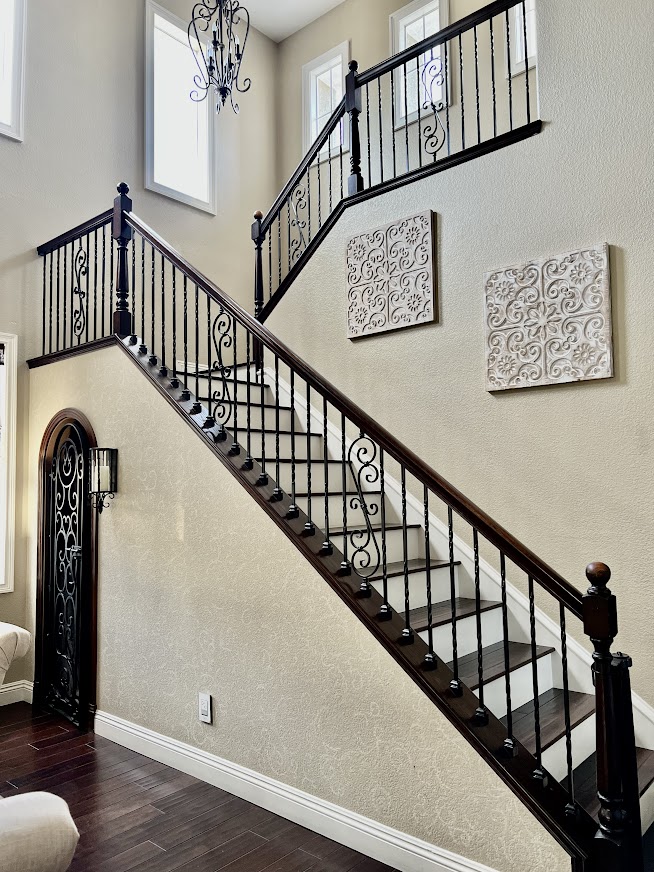
After
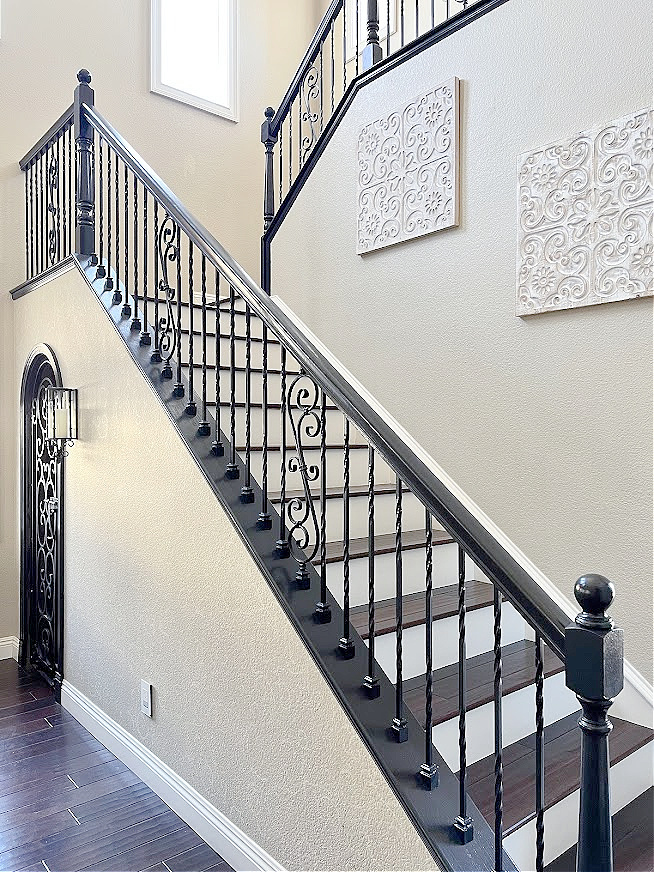
I also painted the trim that leads into the wine cellar under the stairs.
Such an inexpensive upgrade that makes such a big difference and adds value to your home! It is amazing how simply painting the stair rail can really modernize your home without breaking the bank.
Frequently Asked Questions
Can you paint over stained wood without sanding?
Yes! As long as you use a bonding primer designed to grip glossy or stained surfaces, you can skip sanding entirely. The primer creates the “tooth” that paint normally needs sanding to achieve.
Do I need to sand stair railings before painting?
Not if the existing finish is in good shape (no peeling, chipping, or flaking). If the surface is smooth and intact, a bonding primer alone will do the job.
How do you know if your railing has an oil-based or water-based finish?
A quick test: dab a cotton ball with rubbing alcohol and rub a small hidden spot. If the finish comes off or gets sticky, it’s likely water-based. If nothing happens, it’s oil-based — this matters for choosing compatible primer and paint.
What paint holds up best on stair railings?
Look for an enamel or cabinet-and-trim paint — these are formulated to resist scuffs, scratches, and daily hand contact, which stair railings get a lot of.
How long does painted stair railing actually last?
With a good bonding primer and enamel topcoat, painted railings can hold up for years of daily use, even with kids or pets touching them constantly.
Other options that are easier than using a power sander or paint stripper are General Finishes gel stain and chalk paint.

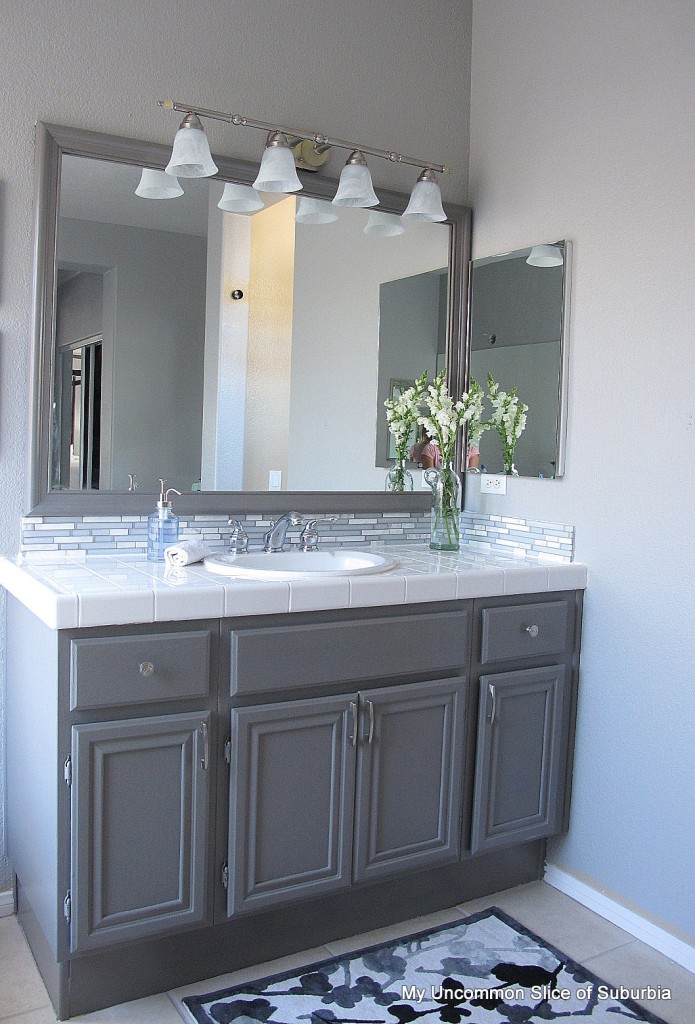
How I painted the bathroom cabinets
Thank you so much for stopping by. Drop any questions you have in the comment section.
This is great; we took the hard route and did the sanding and stripping lol!
Thank you so much Sara, I’m not sure I would have the patience with all those little details LOL
What a difference a coat of paint makes. I love the style of the stairs. I recently painted my whole house inside and out and used the deglosser, saved me so much time and mess.
What an amazing transformation painting stair rails makes for updating a home!
Thank you Kippi, still have a ways to go but it’s a start 🙂
Wow, what a game-changer! I’ve always admired the look of black stair rails, but the thought of sanding and stripping has deterred me from attempting it. The step-by-step instructions and helpful tips make it seem so achievable. I can’t wait to give it a try. Thank you for sharing this!