
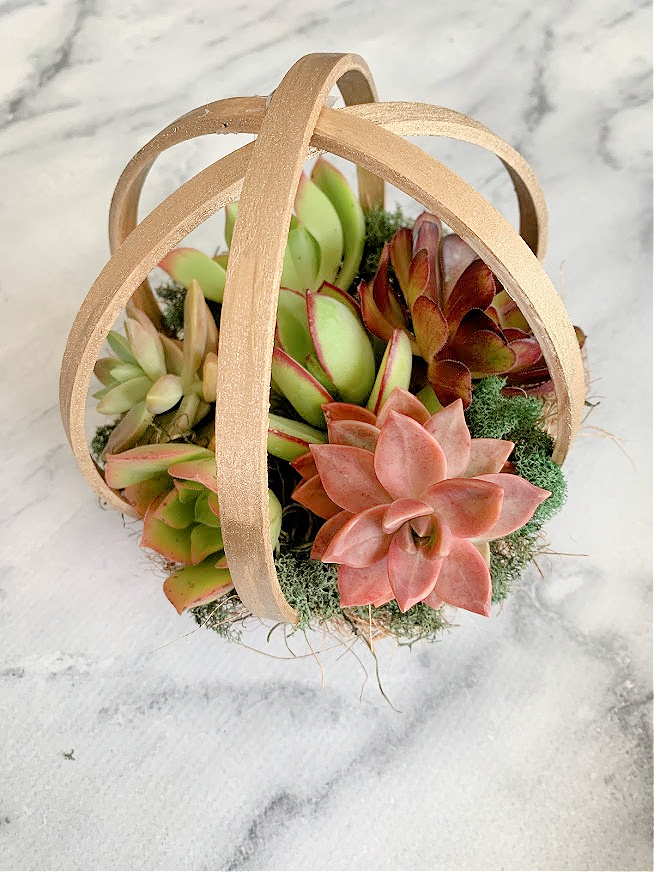
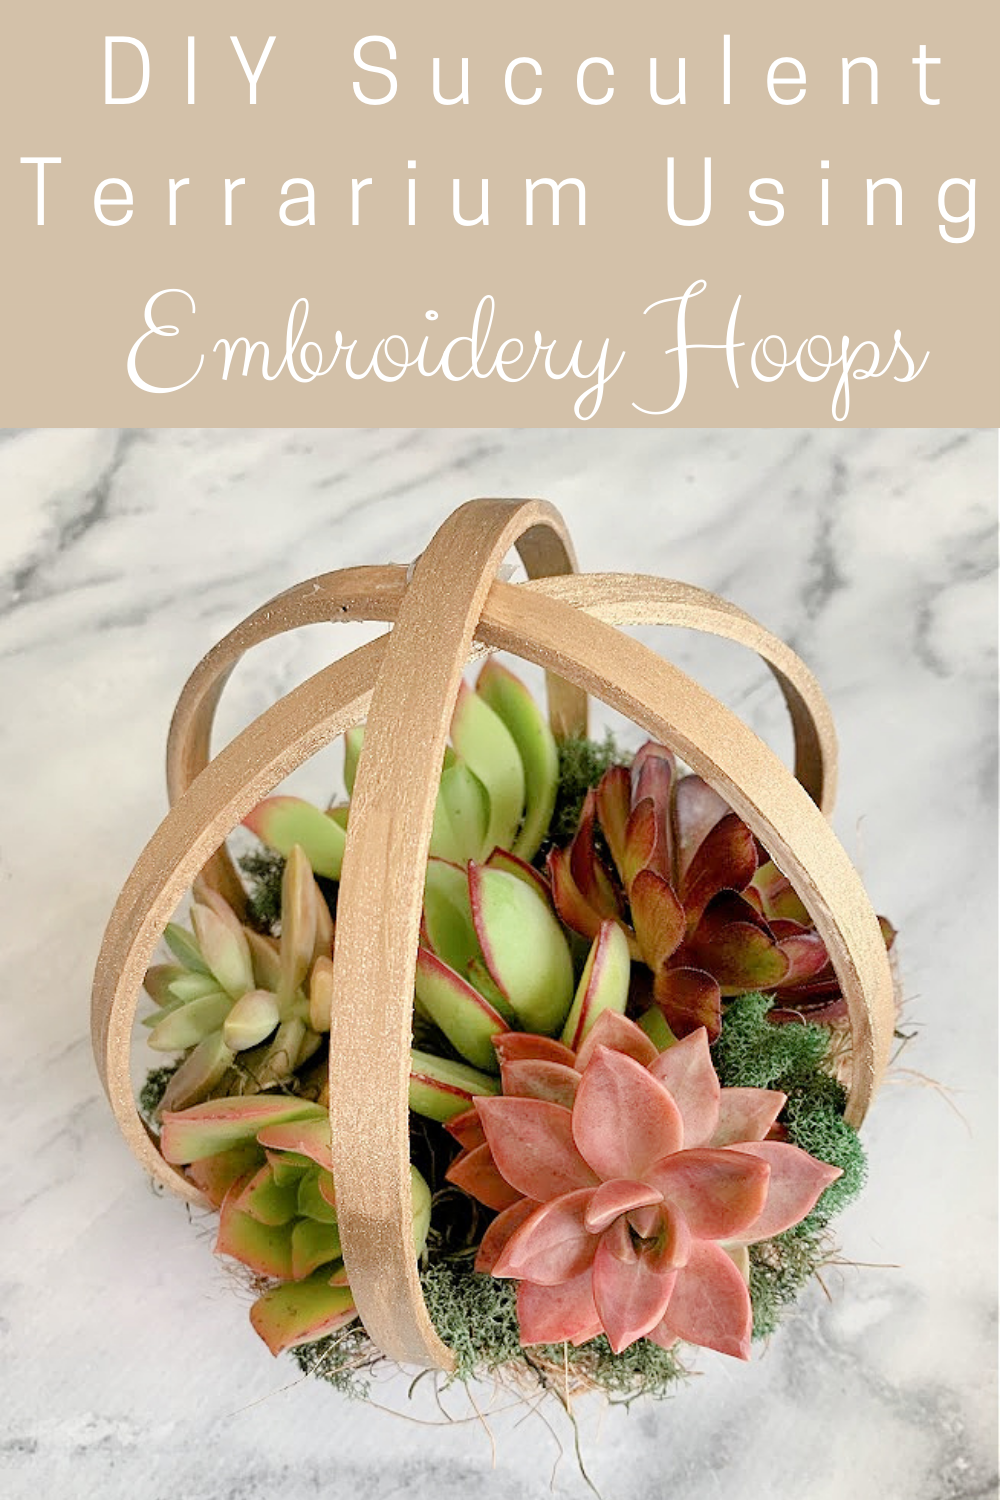
How To Make A Succulent Terrarium Using Embroidery Hoops
I’m so excited to share How To Make A Succulent Terrarium Using Embroidery Hoops today. This easy tutorial is such a fun addition to your home decor and with just a few materials of embroidery hoops, succulents, moss, and glue, you’ll have a beautiful terrarium to enjoy all year round. I promise you don’t need a green thumb to create this.
Our weather has been all over the place from sunny and warm in the high 80’s to thunder and lightning and snow in local mountains where my kids were snowboarding this weekend. 2 weeks ago I was planting flowers outside and this weekend we were bundled up in front of the fire. So when I was out and about 2 weeks ago and found these wooden embroidery hoops in different sizes, my mind instantly thought of something springy. I wasn’t quite sure what I was going to make so I did a quick search on google; embroidery hoop, spring, and succulents, and a beautiful tutorial from Lydi Out Loud came up. I had all of the supplies and only needed to walk out to our succulent garden and grab a few clippings.
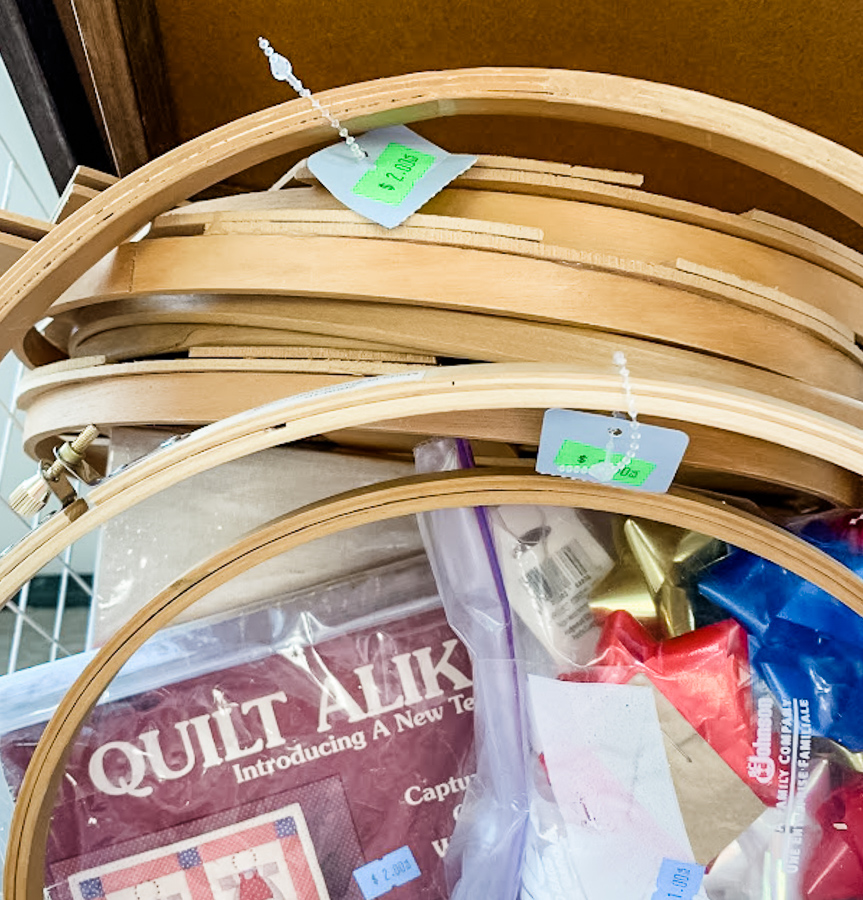
I love shopping at our hospice resale shop and donating items to them as well. As you know, hospice has been a true miracle to our family over and over again, they truly are angels. They had a box of embroidery hoops, but only 1 small hoop, it was 50 cents. I headed to Hobby Lobby to grab the second small hoop for $2.00, not bad.
Affiliate links listed below
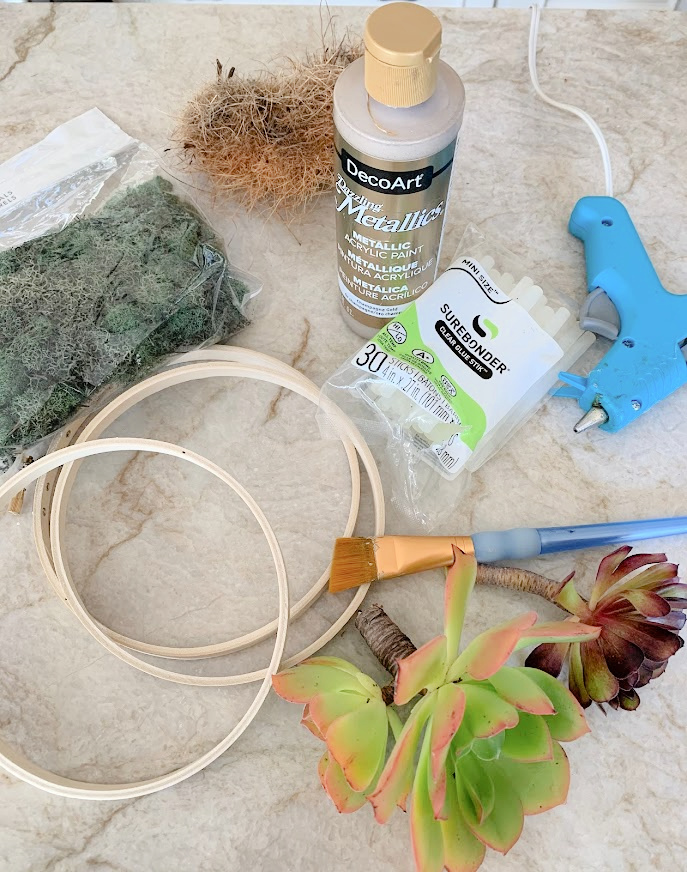
Supply List
Embroidery Hoops (check your local thrift stores first) 5 or 6 inches
Various Succulent Clippings in different colors
DecoArt Dazzling Metallics Acrylic Paint in Champagne Gold
Moss of your choice
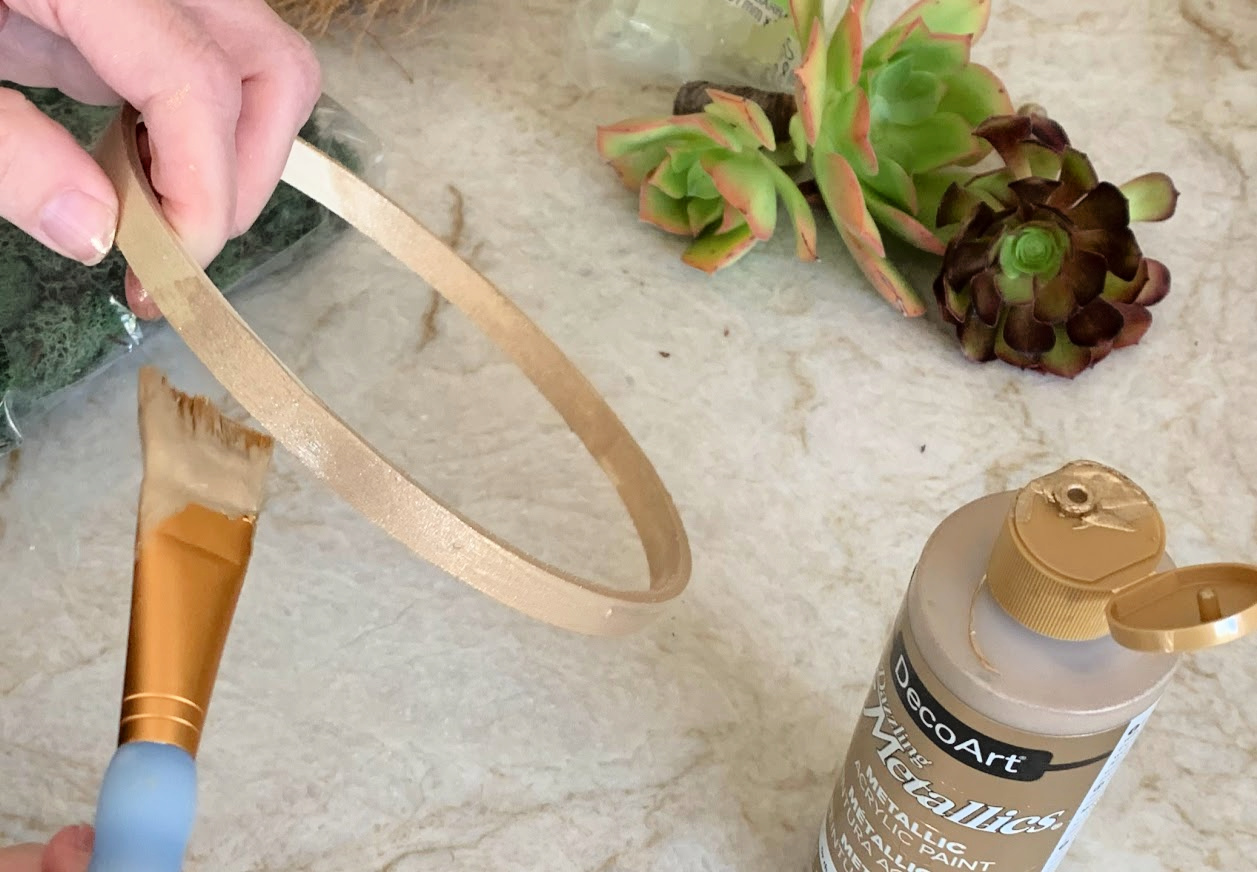
Step 1
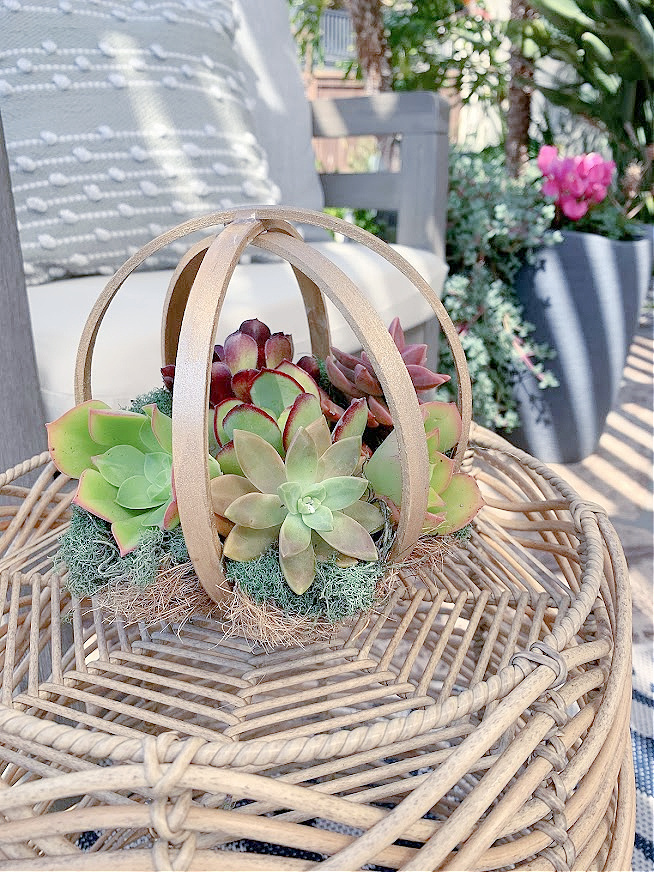
Paint your hoops, I painted the inside and the outside using a small craft brush and let them dry. I hung them on soap dispensers since I didn’t want to wait in between drying times to get each side. You don’t need to worry about the inside of the bottom part of the hoop since it will be covered by succulents.
Step 2
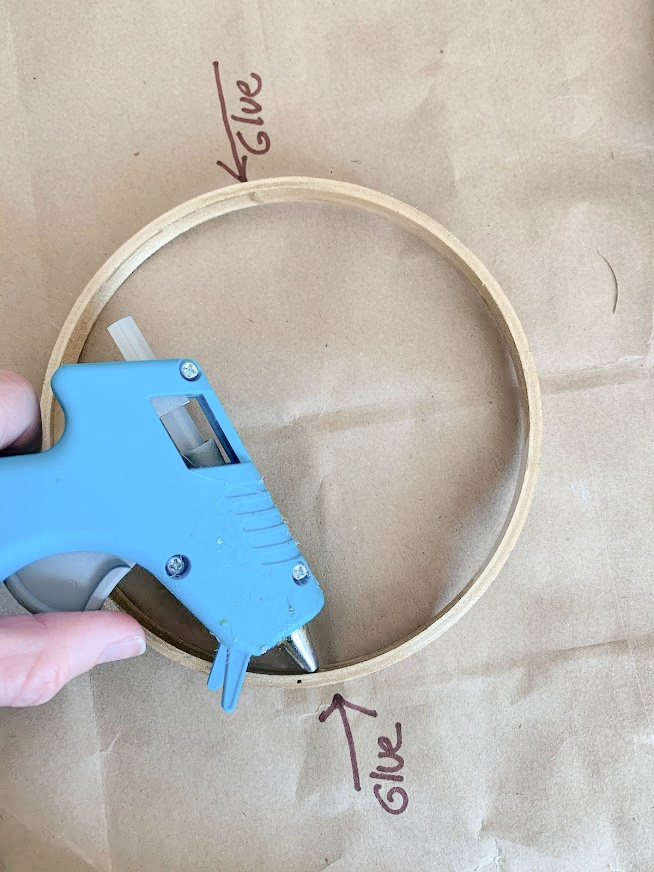
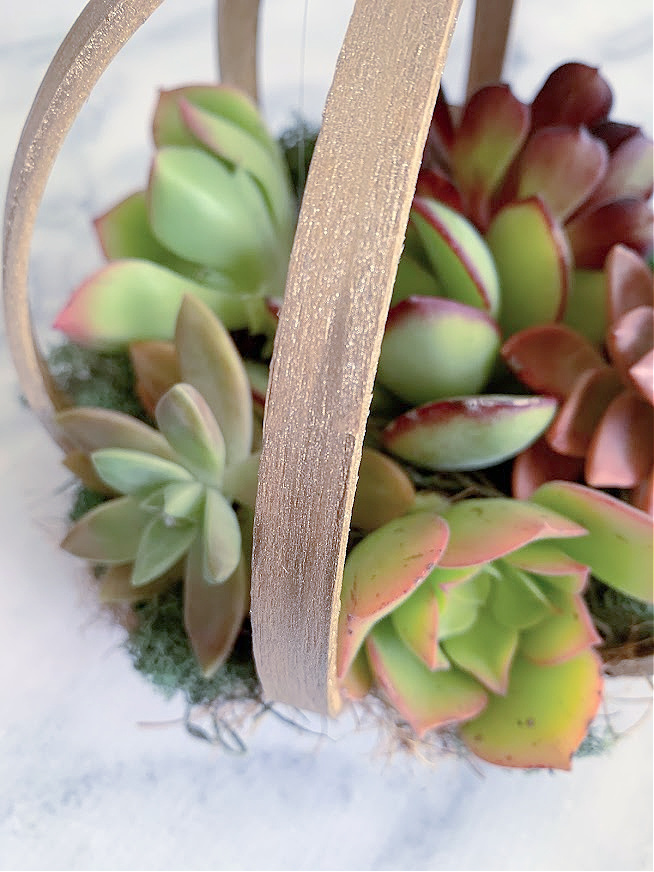
You will only need 3 hoops for this project. 2 Inners and 1 outer (the outer has the screw on it). Apply a small circle of hot glue to the inside of one of the inner hoops and another drop of hot glue on the opposite side. Slide your second inner hoop inside of the first hoop with the glue on it. There is a little flex in the hoop so give it a little squeeze while sliding it in and let go of that squeeze when your hoops are perfectly aligned with equal distance in-between.
Step 3
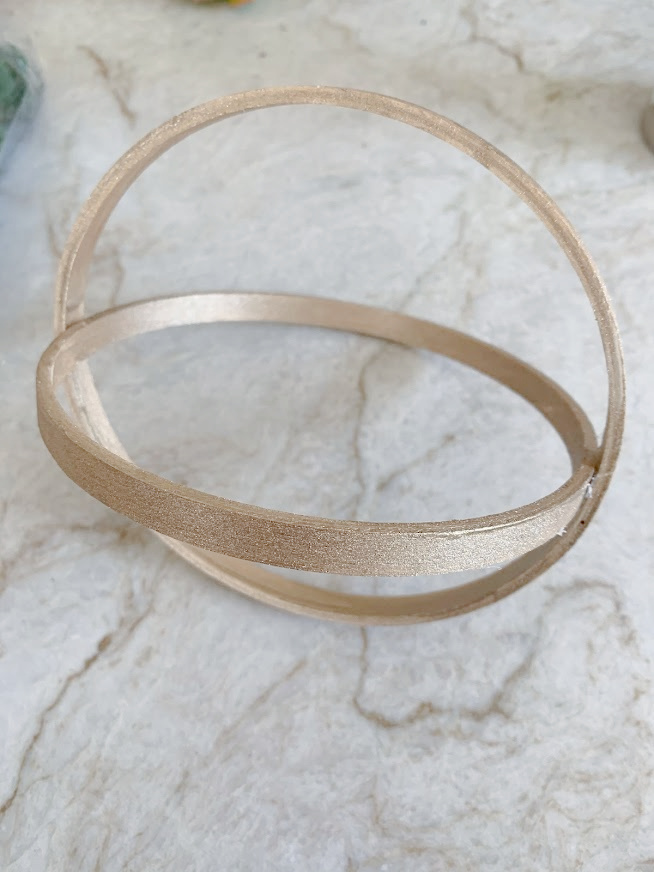
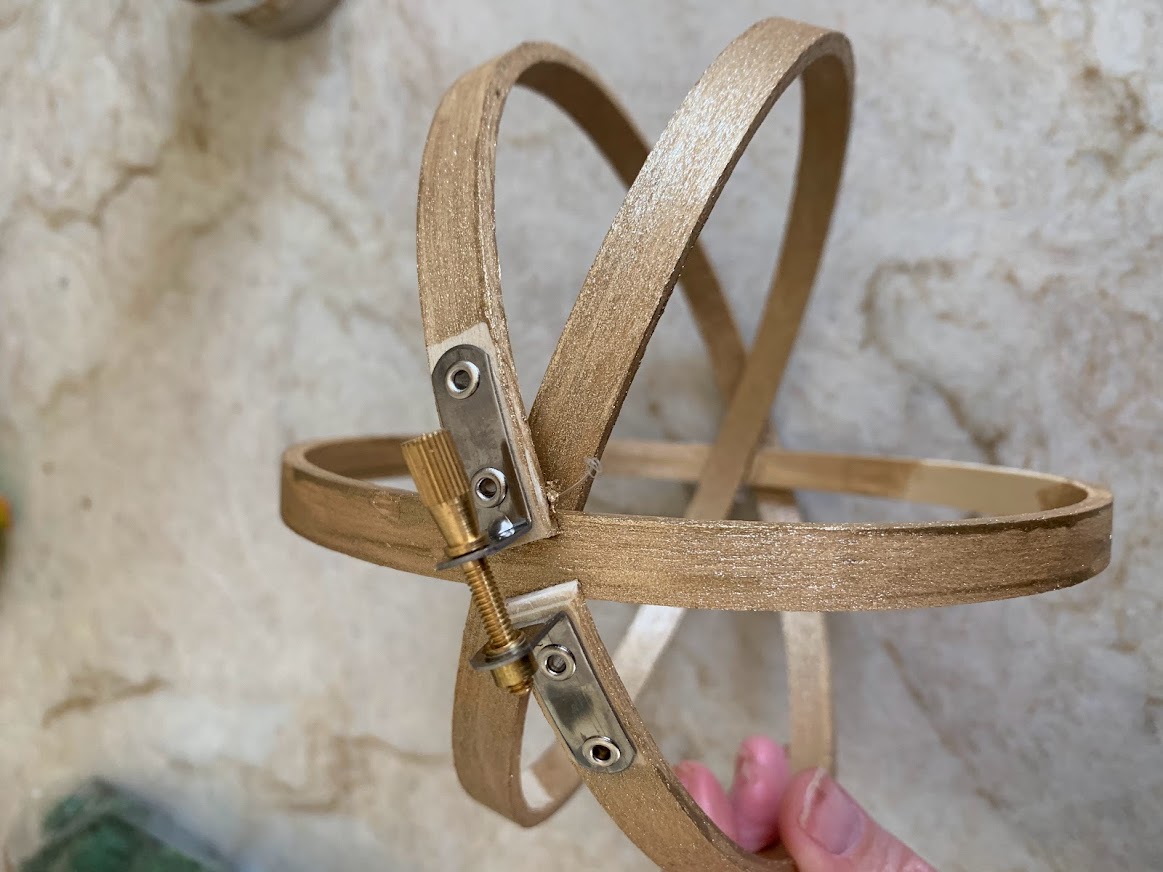
Unscrew the screw on the outer hoop and place it around the 2 hoops that you have glued together. When you feel you have a good distance between all 3 hoops, give it a dab of hot glue and tighten the screw of the hoop.
Step 4
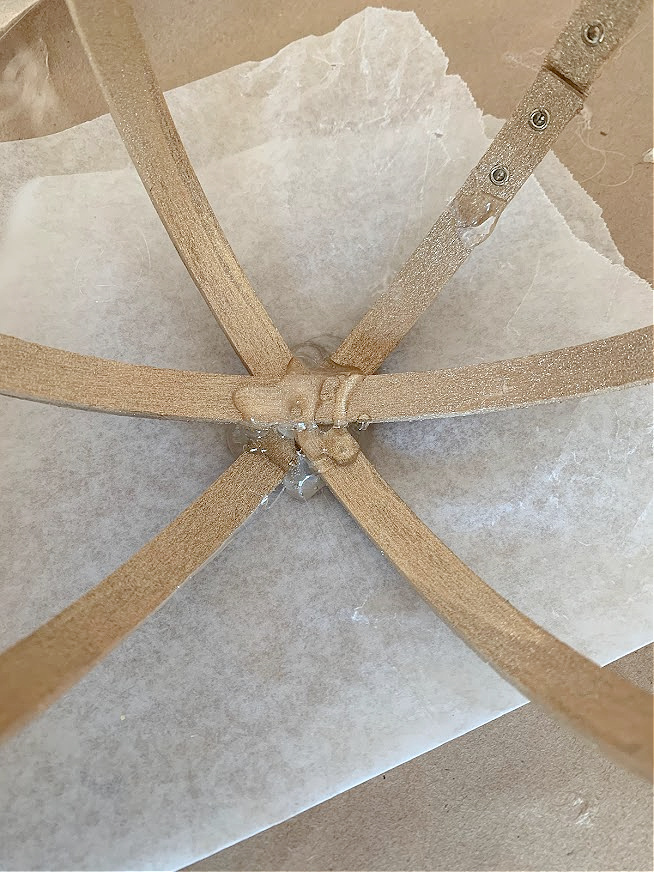
I was going to place it in a small container so I could start working on the terrarium but I love the idea of making a stand using hot glue. This is perfect if you decide not to hang your terrarium you will have a built-in stand already.
Simply place a good amount of hot glue on top of wax paper and press the bottom of the hoop into the glue. Secure it even further by covering the top of the base with more hot glue.
Step 5
Place a few dots of hot glue on the wood hoop bottoms and place your coco liners on the bottom going up a little less than halfway. Next, add a little bit of cactus soil followed by your succulents and moss until you are happy with the placement. Now if you’re not using real succulents, you can skip the dirt, you can even skip the coco liners and place your faux succulents directly on top of your moss.
The options are endless when it comes to this unique idea. You could turn it into a hanging planter using a string of pearls succulents, you can use air plants or give it a modern take using metallic copper paints. You could even make a boho wall full of embroidery hoop wall art with succulents hot glued to the hoop.
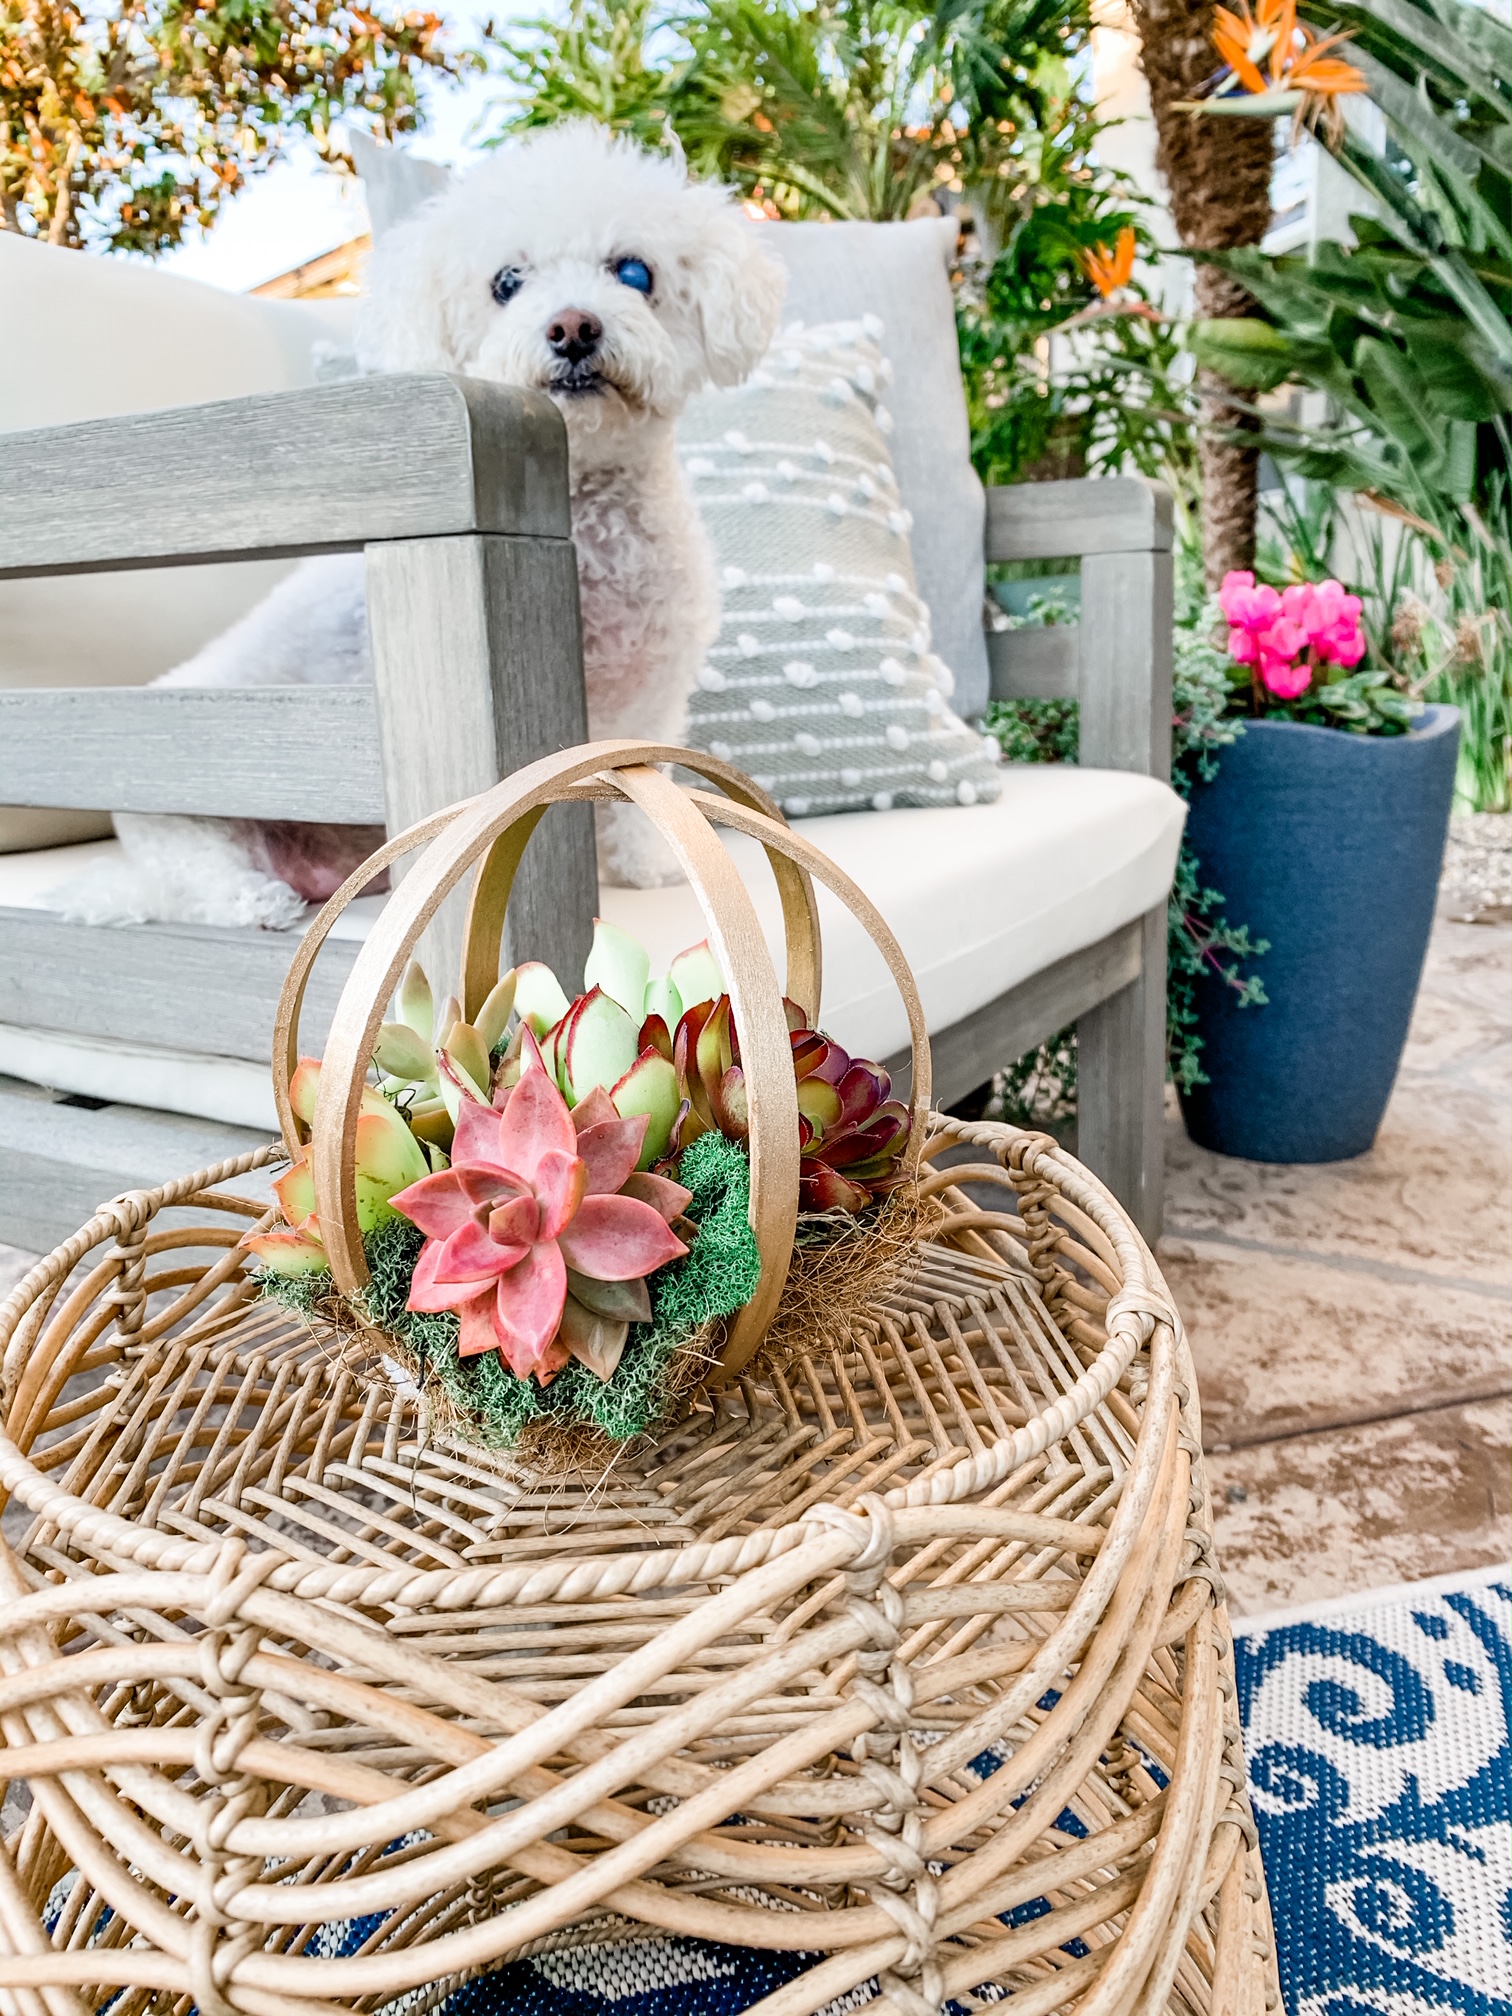
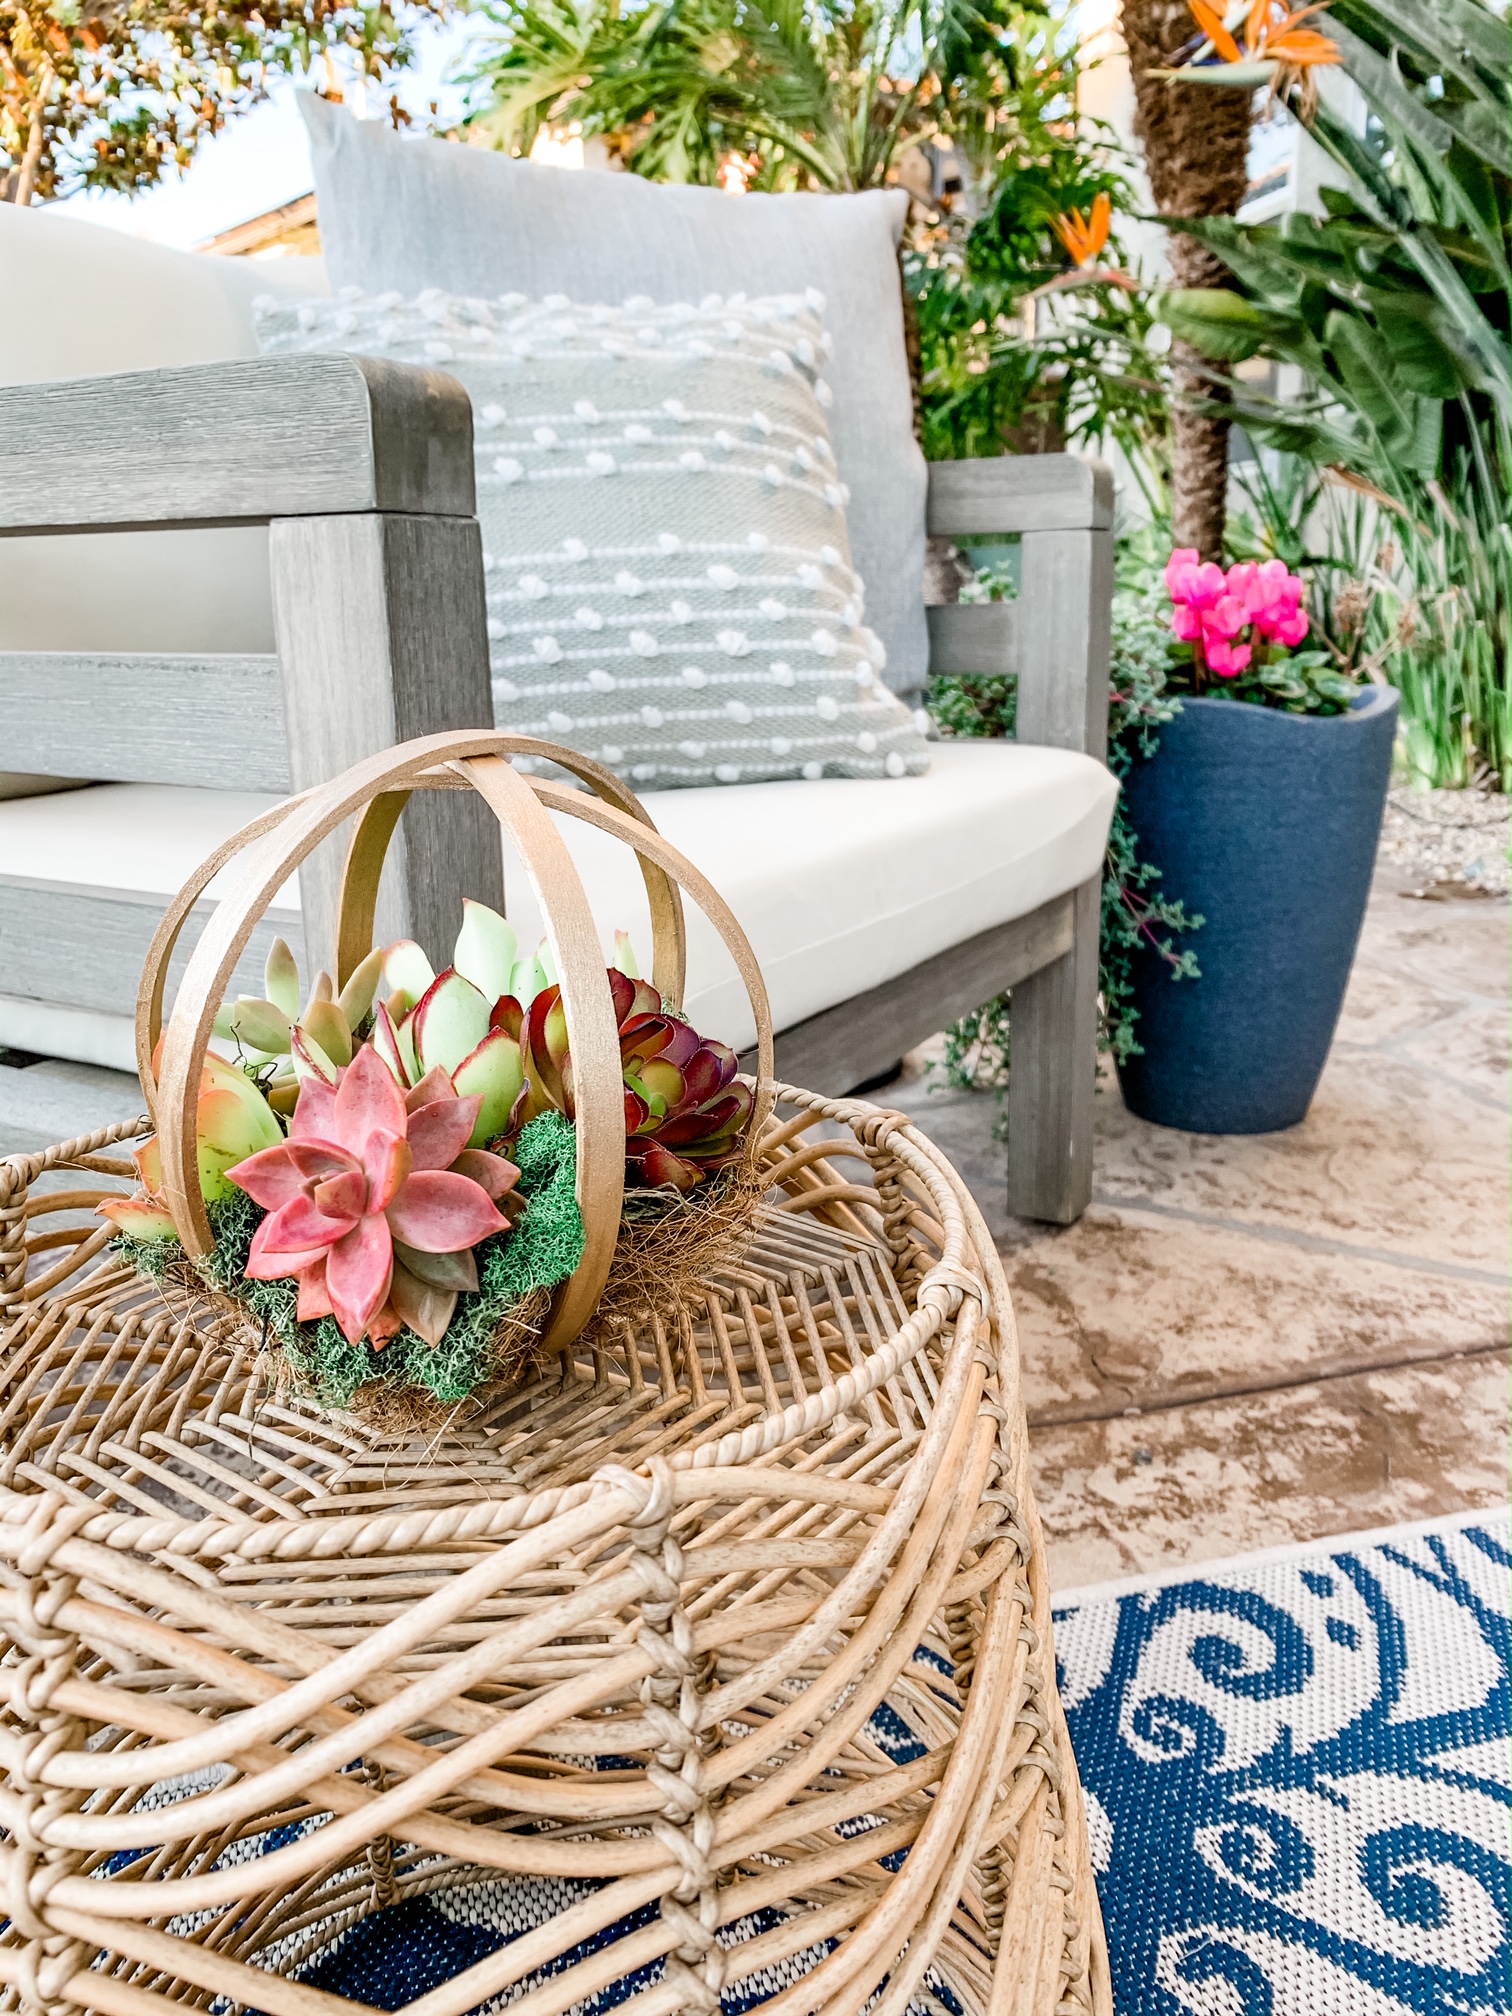
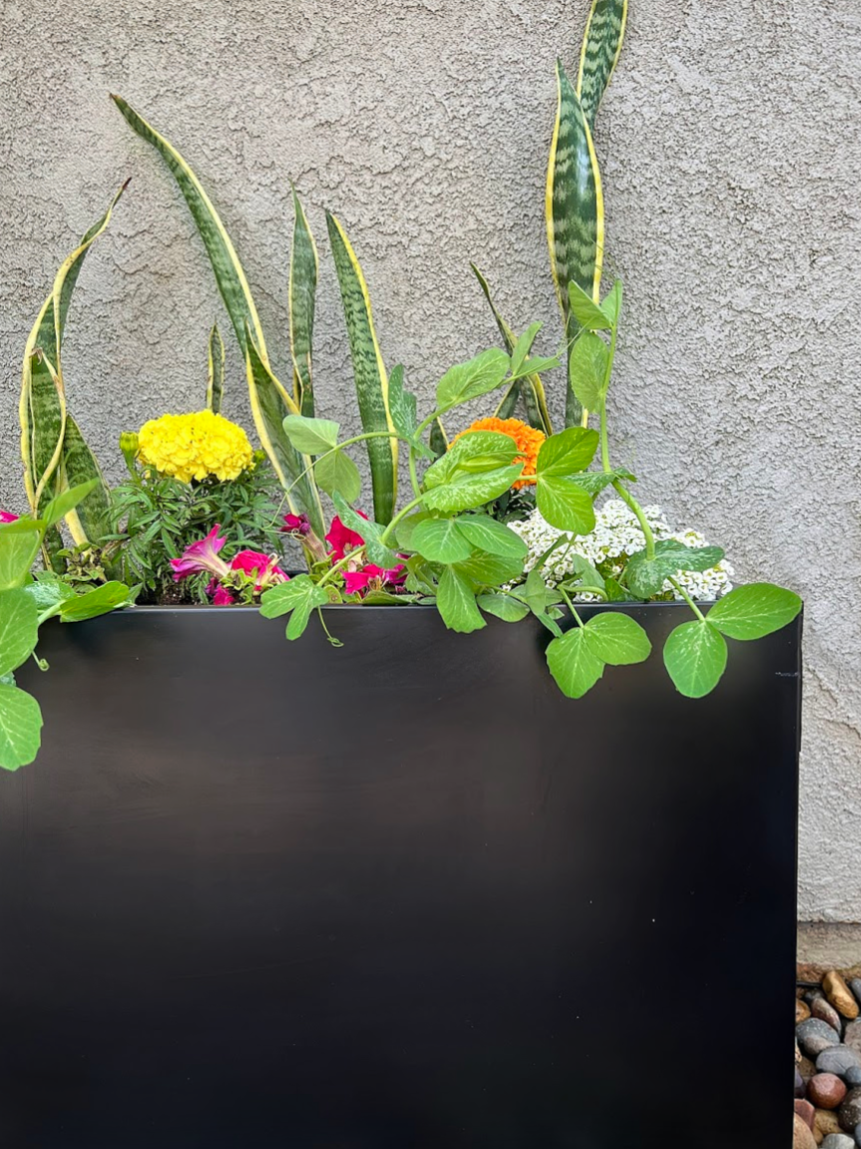
I love the different pops of color, this would be the perfect project to give to a family member or loved one.
Sophie just living her best life!
Let me know if you try making some succulent terrariums, I can’t wait to see all of the unique ways they turn out
Time to see what all of the thrift store ladies have been up to this month!
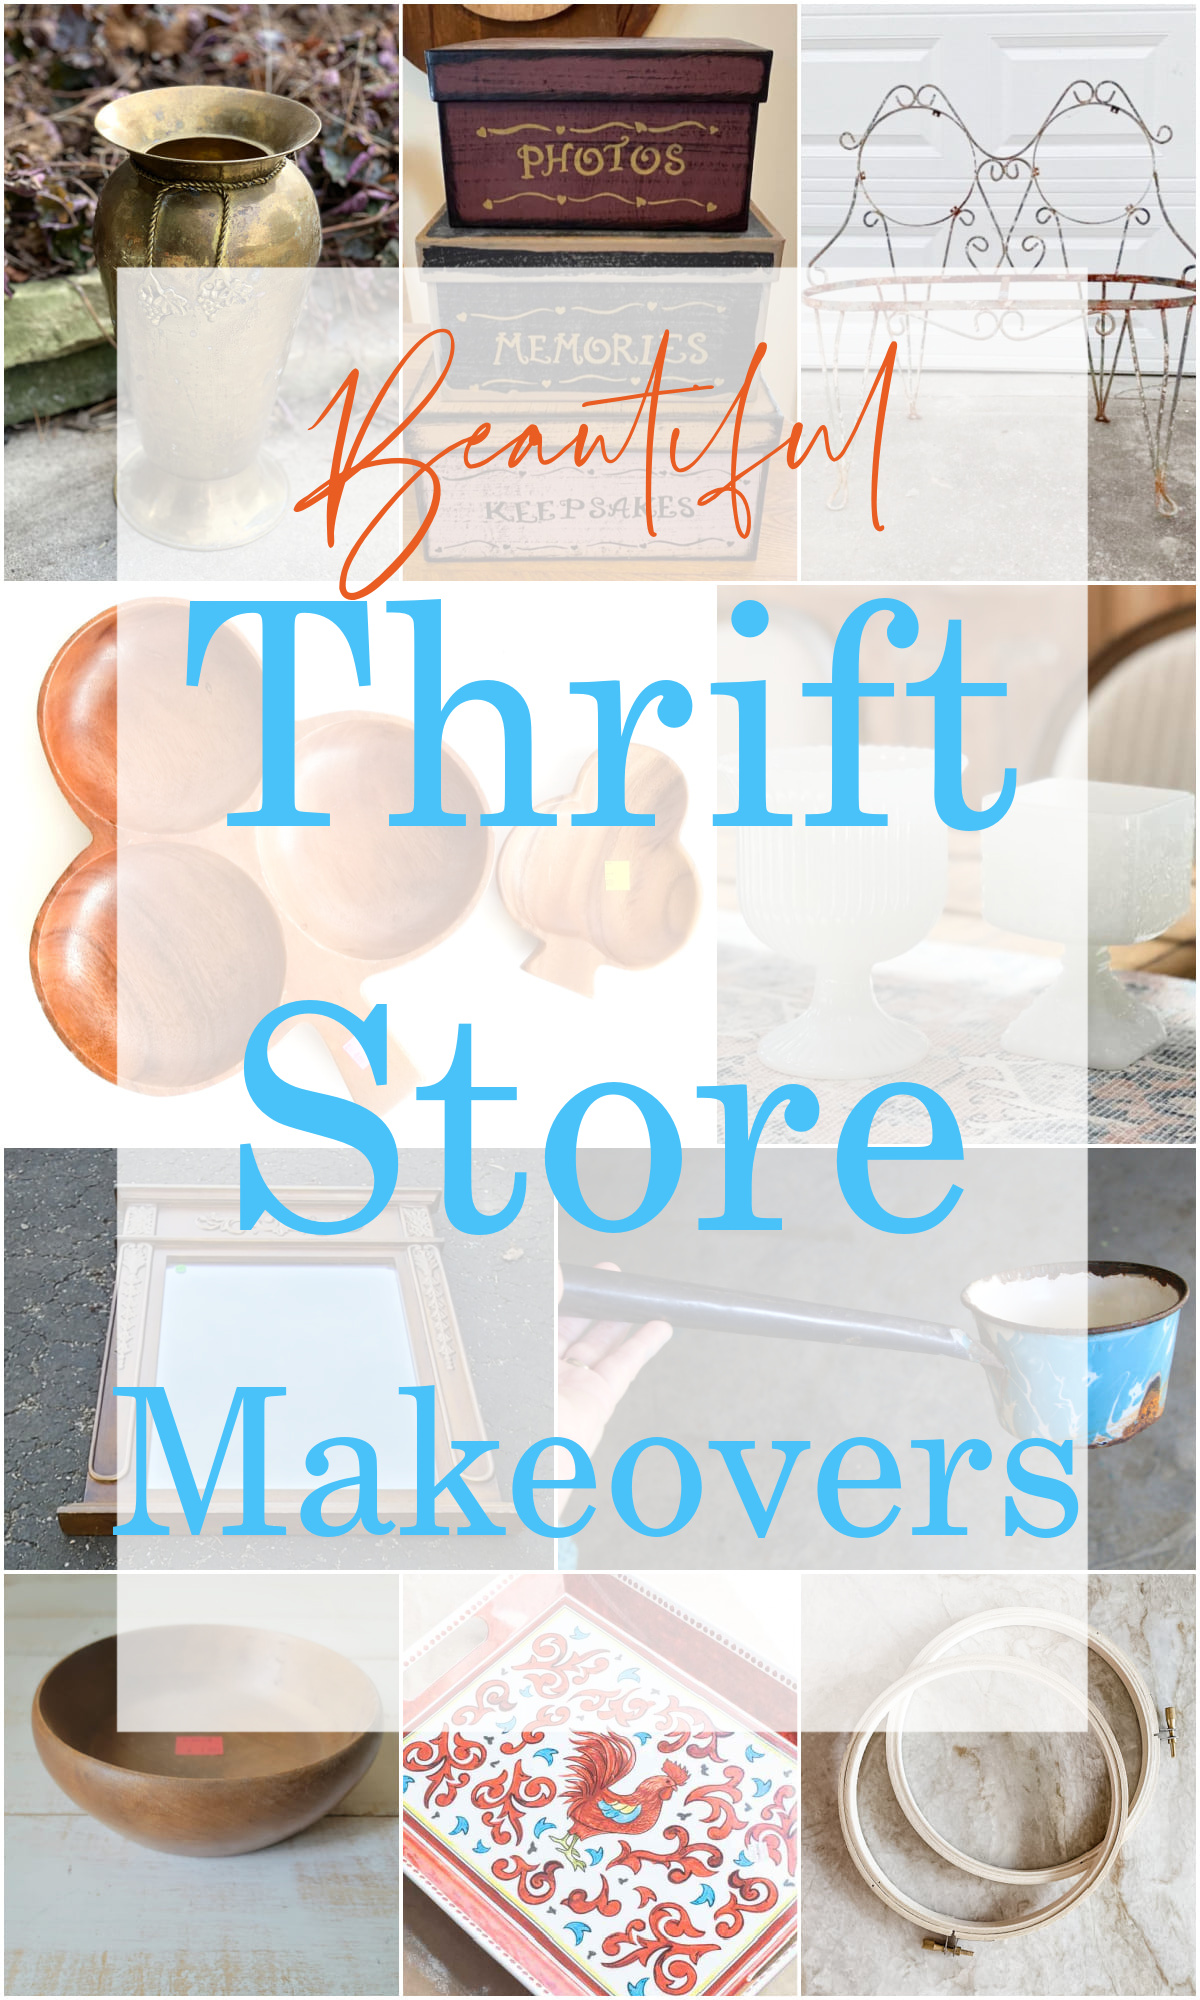
Baking Soda Paint Thrift Store Makeover
Thrift Store Stacked Boxes Makeover
Shamrock Decor from Vintage Wooden Bowls
How to Paint a Wooden Mirror Frame
Bird Nest Vintage Water Dipper Display
Melamine Serving Tray Makeover
Succulent Terrarium using Embroidery Hoops
For more Spring ideas I have made check out the following:

And for all you succulent lovers, just click here to be brought to all my succulent ideas.
Thank you so much for stopping in today and joining all of us on our monthly thrift store tour!


What a great idea! So beautiful and perfect for Spring.
Thank you Maryann!
Very cute project! The succulents fit perfectly.
Thank you Carlene!
Our weather has been all over the place too! Beautiful sunny warm days, and we’re suppose to get snow this weekend. Your succulent terrarium is very springy! I love the tip about making the hot glue stand for the embroidery hoops.
pinned!
gail
Thank you Gail 🙂
You have a knack for succulent projects Kristin! This is adorable and would make a great gift! Pinned
Thank you so much Cindy!
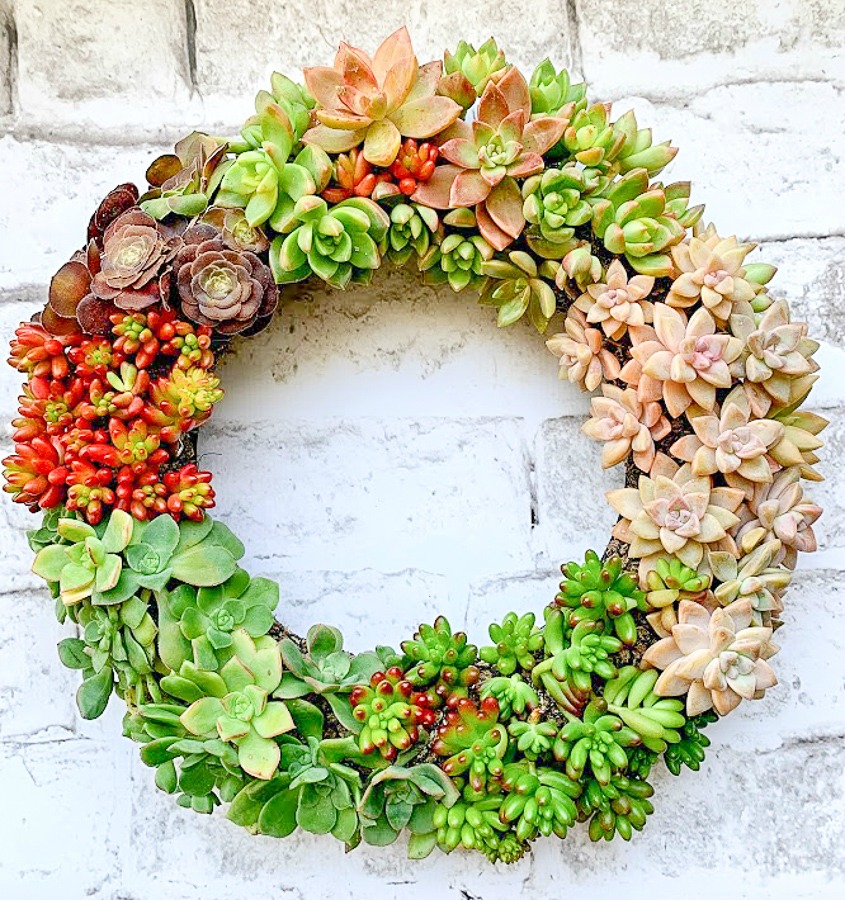
I love your succulent projects! I think this once is a close 2nd to your wreath (which is probably my favorite wreath of all times).
You are so sweet Pam, thank you so much 🙂
Darling project and I love how the succulent terrarium looks on the patio!
Thank you So much, Michelle!
This is such a cute idea for upcoming outdoor living! I honestly can’t wait. This would be fabulous on our screened porch. Sophie is the cutest model!!
Thanks so much Christy!
I always love your DIY succulent decor, Kristin… and this one is especially gorgeous! You are the queen of succulent DIYS! Pinned, and I’m so happy to be featuring at Tuesday Turn About this week!
Ahhh, thank you so much Julie! xo
I was looking at embroidery hoops today, but couldn’t remember what size you said, so I will get them the next time I go out. I’m not understanding what you mean about “the stand” using wax paper? What does the wax paper do? It can’t hold soil… so I’m afraid I don’t get it..lol.. This is a great spring/summer project and can’t wait to get started!
Hi Colleen, I would get the smaller size, 5 or 6 inches would be perfect. The stand with the wax paper was a way to hold the embroidery hoops in place while I was working on it, you could also place it on top of a cup to keep it in place, either will work. The paper has nothing to do with the soil. Hopefully, this clarifies but please reach out if you have any other questions 🙂 Happy Spring!
I love this succulent terrarium it looks gorgeous on your porch.
Happy Summer,
Kippi