
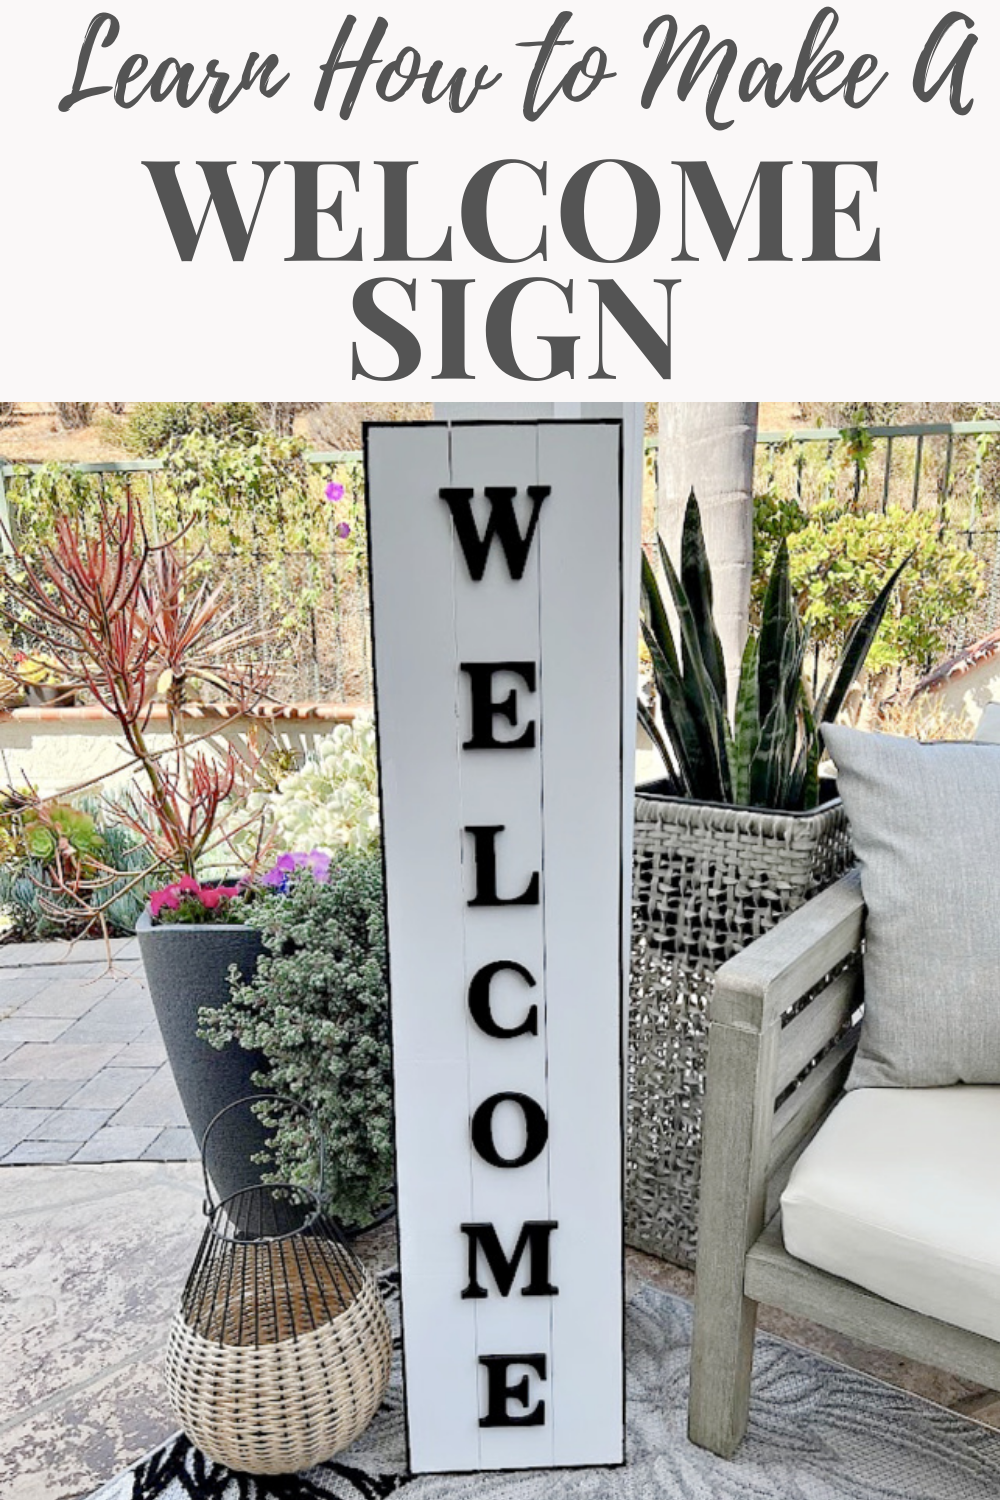
DIY Welcome Porch Sign
Update your front door with this handmade wooden welcome sign! This eye-catching sign is so simple to make and it’s a great way to update the space on your front porch or your back yard.
If you like dogs, you will feel extremely welcomed at our home! These little guys literally follow me and stare at me all day long, not kidding, they are my shadow.
It’s thrift store decor day so make sure you see all of the beautiful makeovers at the bottom of this post!

I found these adorable boards still in their packaging at our local thrift store for $7, it was 2 boards with reversible sides, all of them were super cute but decided to makeover one of the sides to better fit in with our home’s exterior.
A Few Tips
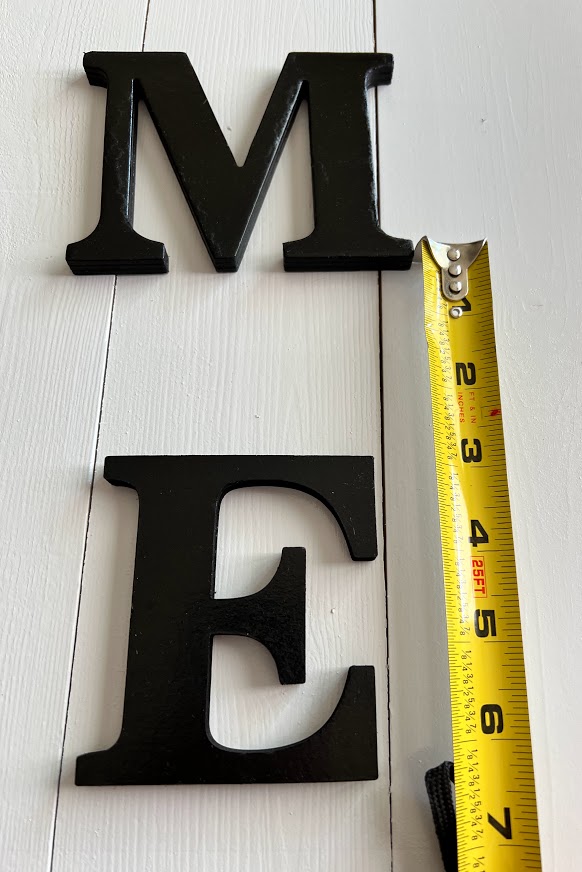
When picking out your letters, keep in mind the size of your board, my board measures 1×4 so I knew my letters shouldn’t be more than 4 inches.
If you can’t find a pre-made sign go to home depot and purchase a piece of cedarwood and cut it down to 1 x 4 feet. The type of wood is important if the diy welcome porch sign will be used outside, cedar is naturally weather resistant.
Affiliate links are listed below, you can read my full disclosure policy here.
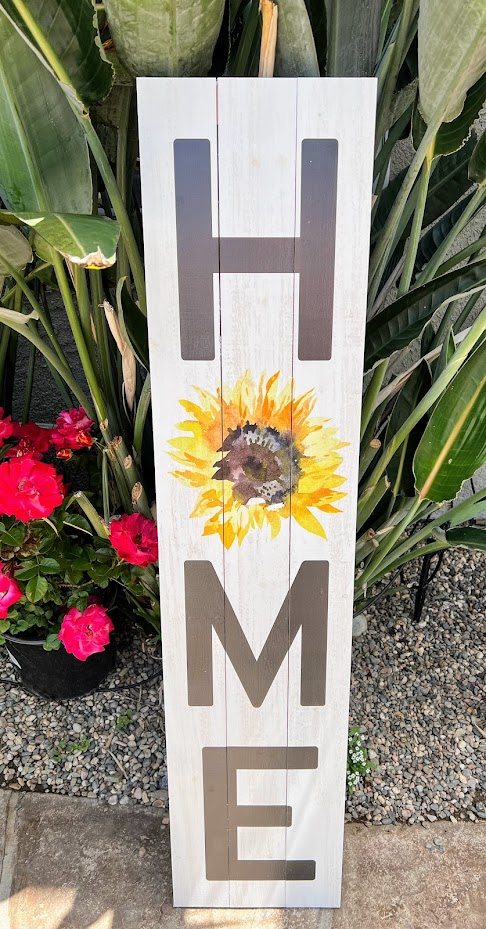
Here is the before
SUPPLIES:
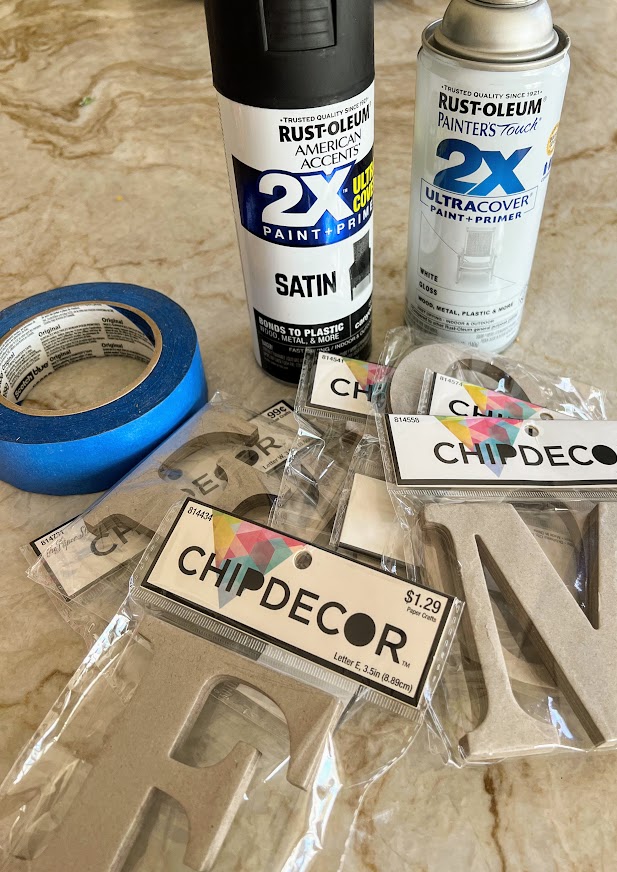
Letters, mine are 3.5″ tall I found mine at Hobby Lobby and they were 40% off
Spray Paint in black and white I like the Rustoleum 2x in satin
Pre-made welcome Board
Black acrylic paint I used craft smart acrylic paint
Small artist brush any craft store should have them.
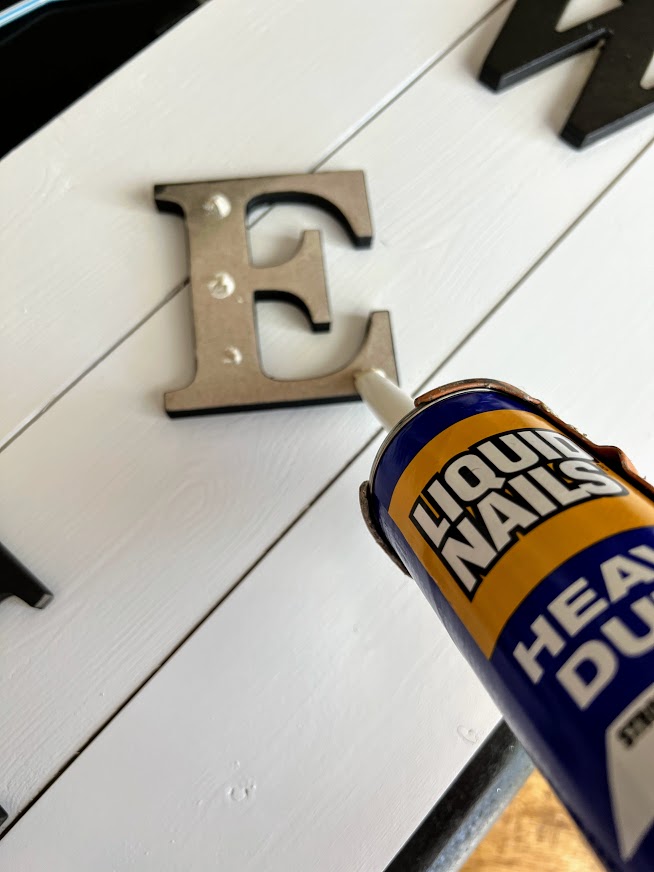
Liquid nails (gorilla glue would be a great alternative, hot glue should hold up as well)
Tape Measure
Painters Tape
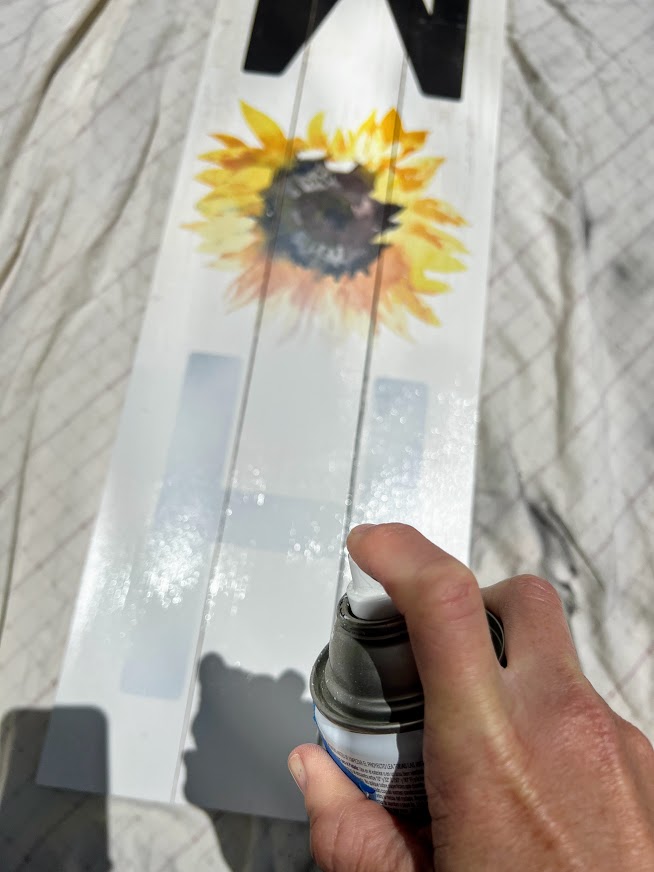
Step by Step Tutorial
Using your white paint, spray paint the board or piece of wood, It took me 4 coats to get rid of the old design and one light coat to cover the whole board. Make sure to let the paint dry in between coats.
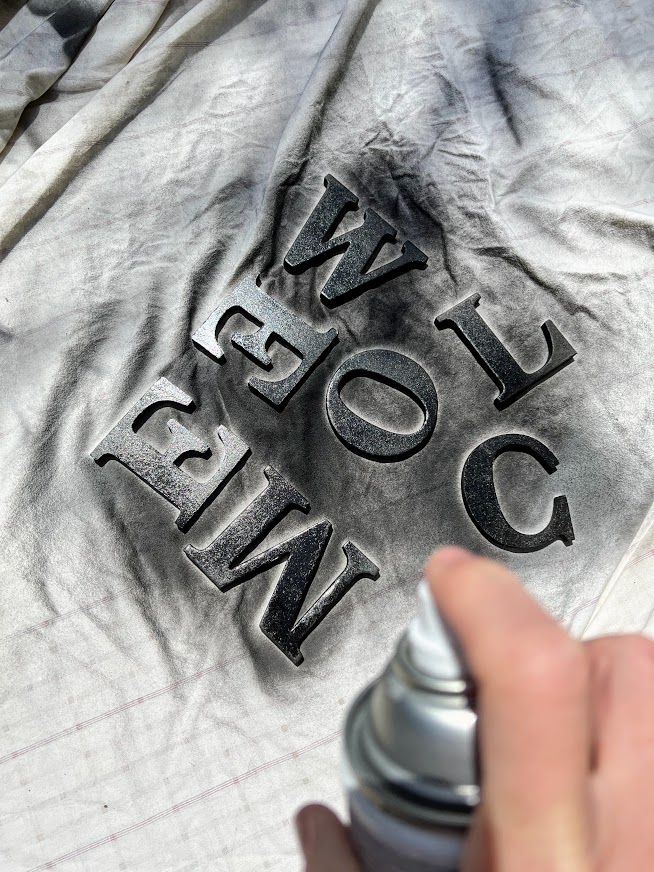
Spray paint all of your letters in the color of your choice, don’t forget to get those sides. You might be able to get away with one coat but they most likely will need two coats.
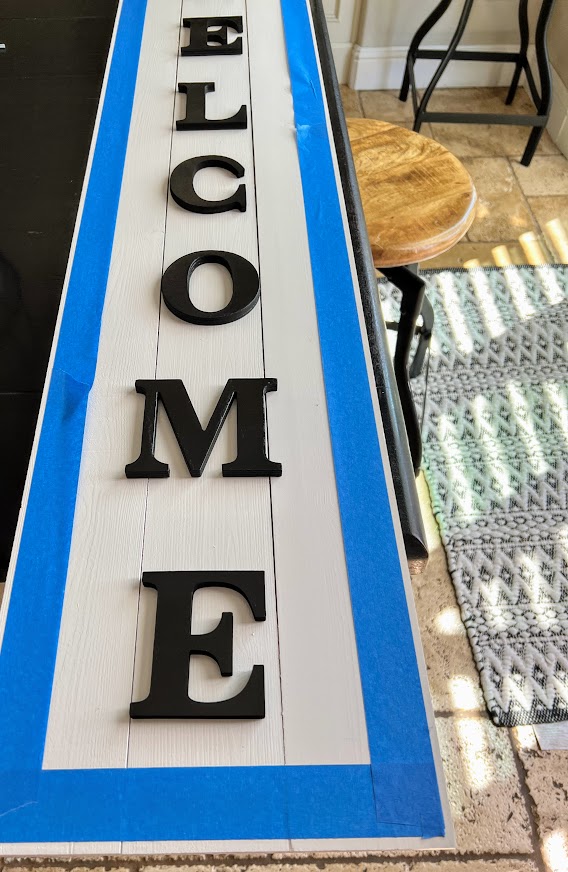
Using a tape measure, measure the top and the bottom of your board so there will be equal blank space on the top and bottom of your sign.
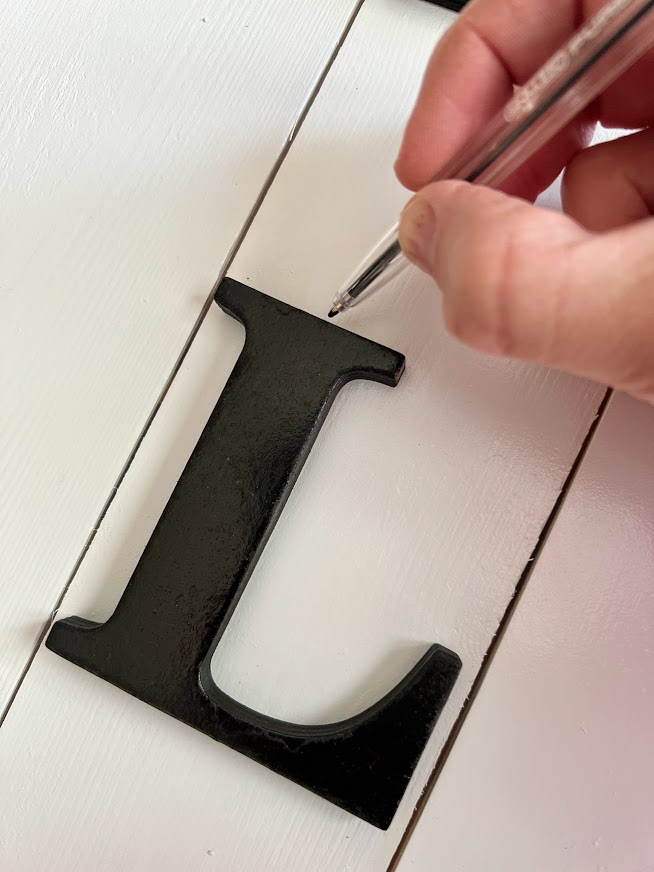
Next, arrange your letters on the board and measure the top of the letter from the previous letter to make sure each letter is spaced evenly. Make a little mark where each letter will be placed on the wooden board.
Apply the liquid nails on the back of each letter and carefully place them on the board where you had marked. Don’t apply too much of the liquid nails as you don’t want it to ooze out from underneath.
I wanted black trim around the whole wooden sign. I simply secured painter’s tape about 1/4 of an inch around the whole outside of the board and painted the edges using black paint and a craft brush.
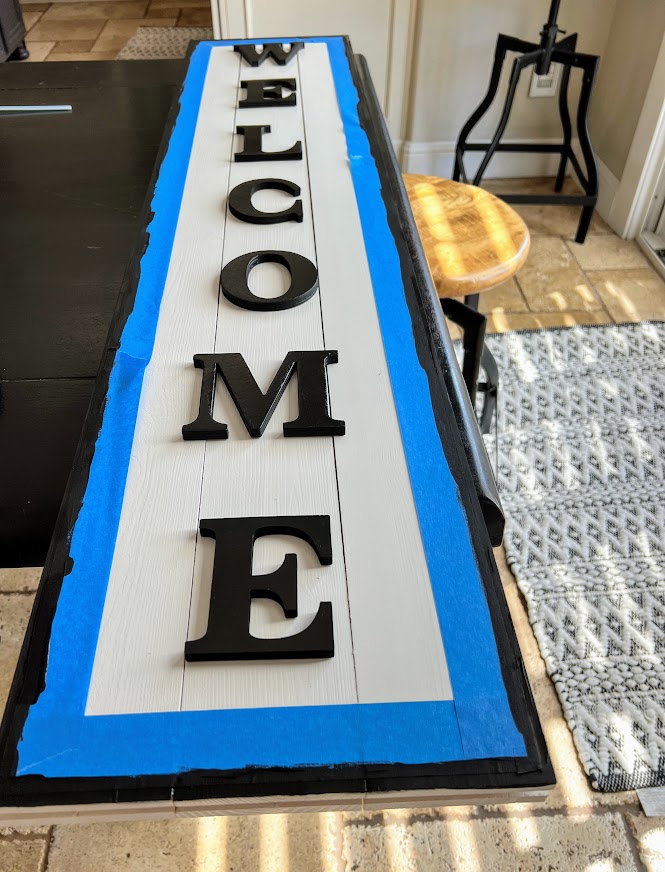
Remove the tape after your paint is dry and you have your very own easy diy welcome sign.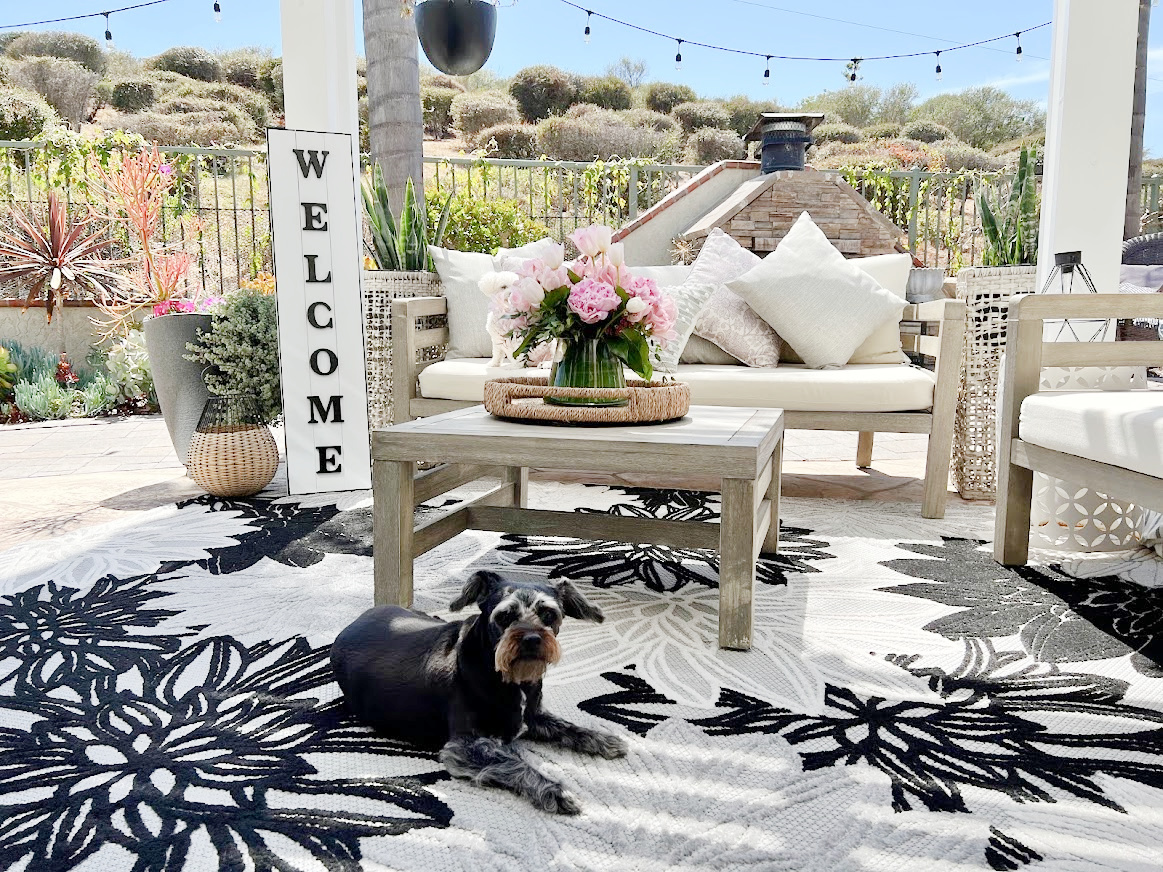
The carpet is from Costco and I purchased it about 2 months ago.
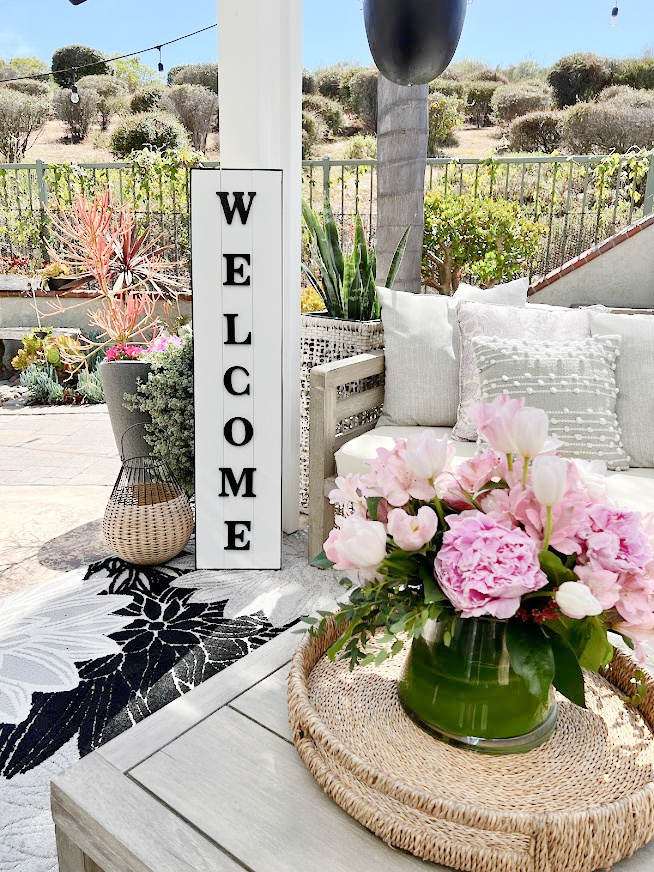 Over the past week, I have been receiving the most beautiful flowers from friends, family and hospice, for my mom’s 1 year anniversary on Mother’s day. I feel so loved and so blessed on a daily basis.
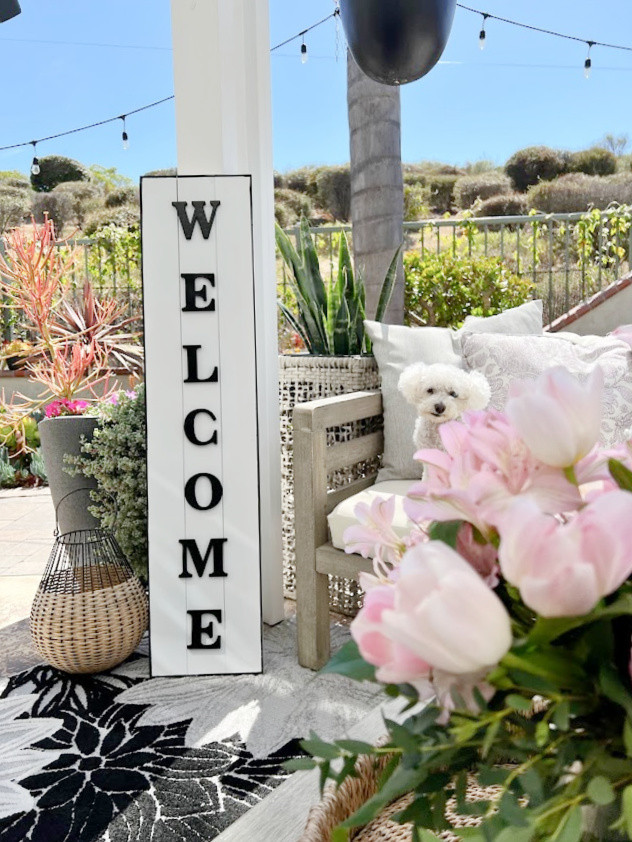
To get a picture of just the sign with no dogs, I had to lock them inside the house.lol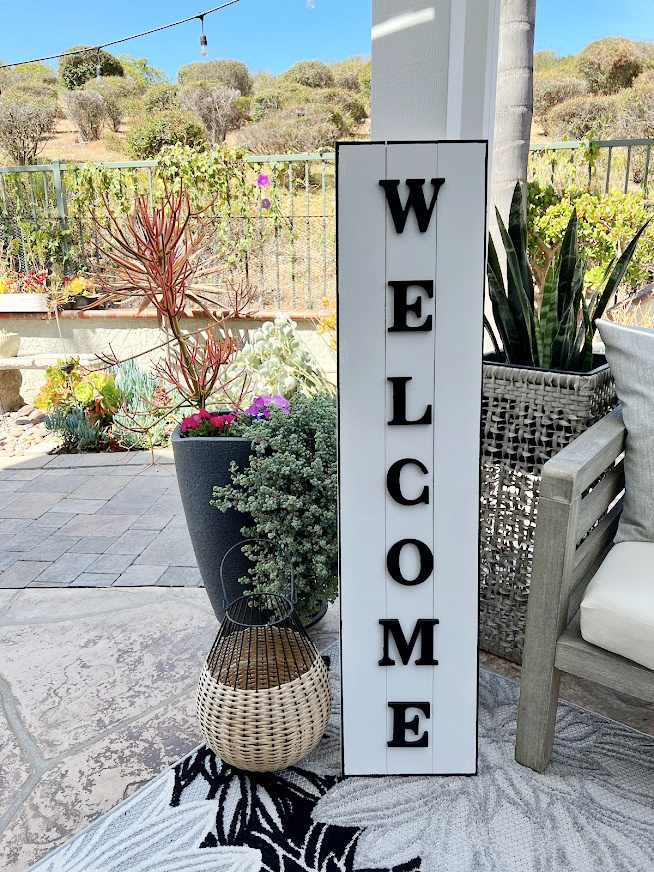
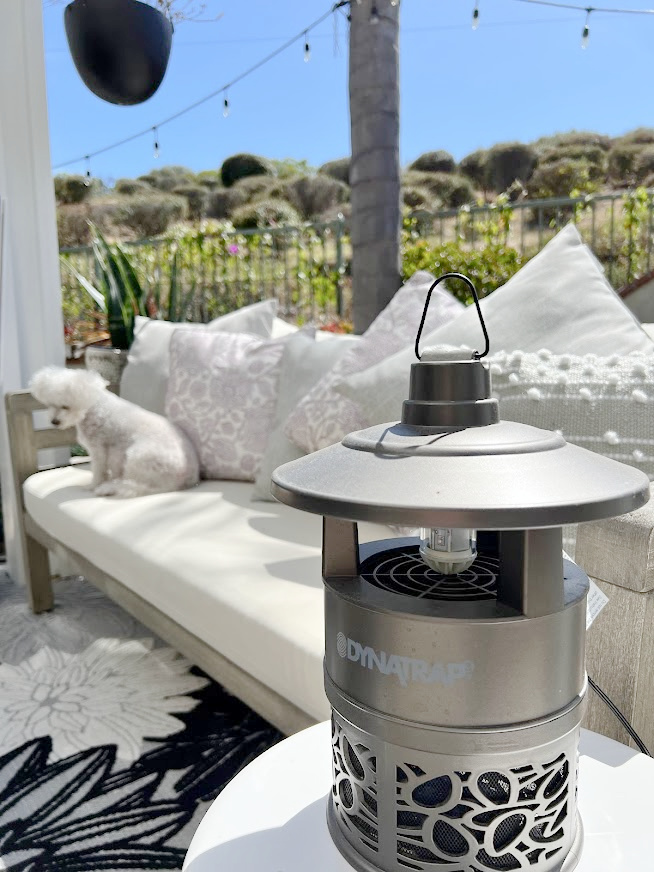
Oh, I want to share this little machine with you, the Dynatrap! Its UV light and quiet fan attract and trap insects without zapping, it’s the best thing ever. They have different sizes based on the size of your yard. I’ll admit, I get excited when I empty out all of the bugs every week.
Options:
The good news is this board is truly so versatile, here are a few other ideas for you:
Use vinyl letters instead of raised letters or letter stencils
Get creative with the paint color, and match it to the color of your home
Do you have a grand front porch, then make a huge front porch welcome sign
Have some scrap wood laying around? Skip the trip to the store and make a rustic welcome sign I would use wood stain prior to adding your letters.
This DIY wood welcome sign is an easy project, will give your guests a warm welcome and will brighten up any space.
Let’s see what everyone else created with their thrift store finds!
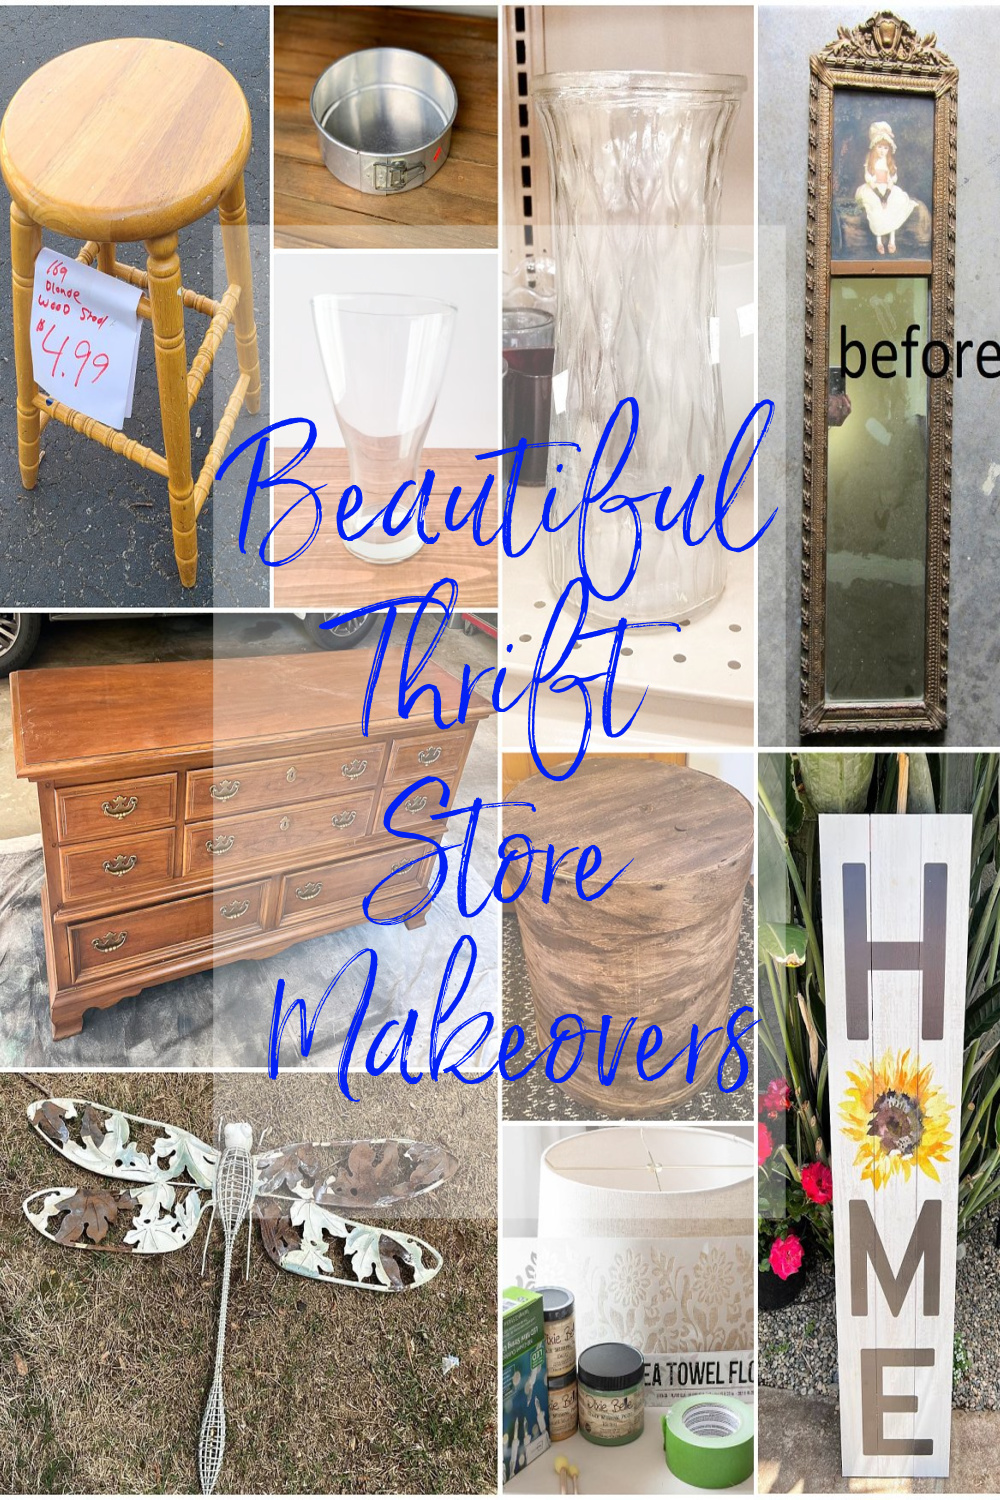
DIY Nautical Farmhouse Planter
Making Boho Vases from Clear Glass Vases
How to Strip & Bleach Wood Furniture
Metal Garden Dragonfly Refresh
Round Wooden Box Sunflower Table
Lampshade Makeover Idea for Front Porch
Thank you so much for stopping in today, I appreciate it more than you know!

Looking for more spray paint tutorials, click right here!


Ok, the sign is great, but THOSE DOGS!!! How cute are they! Thanks for the info on the bug zapper. We finally have had some warm days around here and already the bugs are out and about!
Thanks Pam, I love my pups but they are a lot of work lol. Yes, the bug zapper is the best and very rewarding to empty
The sign looks much better! Not mass produced like before. Pinned!
Thank you Carlene
This is an awesome makeover, Kristin! And your little furries are so cute! Pinned 😊
Thank you so much Cindy
It really looks so much better, Kristin! You’d never know it was a sunflower Home sign underneath…and your dogs and yard make such wonderful photo accents!
Thank you Sarah!
Kristin,
What a great project. That’s a great deal on those letters, and adding the tiny border made such a huge difference!
pinned!
gail
Thank you Gail!
Love your sign transformation!
Thank you Maryann
I love a good sign project using a recycled sign! So cute and great tutorial!
Thank you so much Sue! Have a great weekend!
I’m not sure what is cuter…the sign or the pups! This new look totally updated it and made it look modern. I really love the added touch of the black border. It’s perfect for your gorgeous porch. I am checking out the bug zapper! Like that it is quiet.