
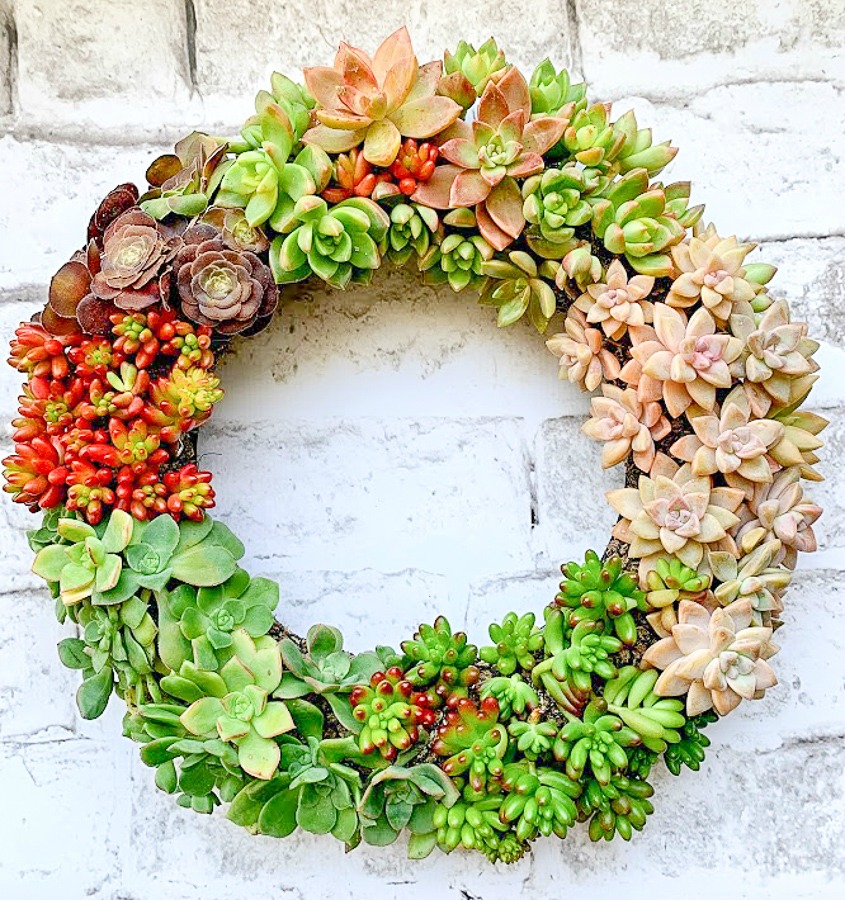
DIY Succulent Wreath
Learn how to make a stunning succulent wreath using a moss base with my easy-to-follow tutorial. Using vibrant succulents and about an hour of time I was able to create a beautiful living wreath.
I have had my eyes on beautiful succulent wreaths lately but they come with a hefty price tag so I decided to make my own DIY Succulent Wreath. It was actually very easy but it does take a few hours but the end result was so worth it. Since we have an abundance of succulents in our yard my only cost was the moss living wreath form. For my next wreath I might try making my own wreath form, we shall see, this just seemed so much easier.
Supplies Needed
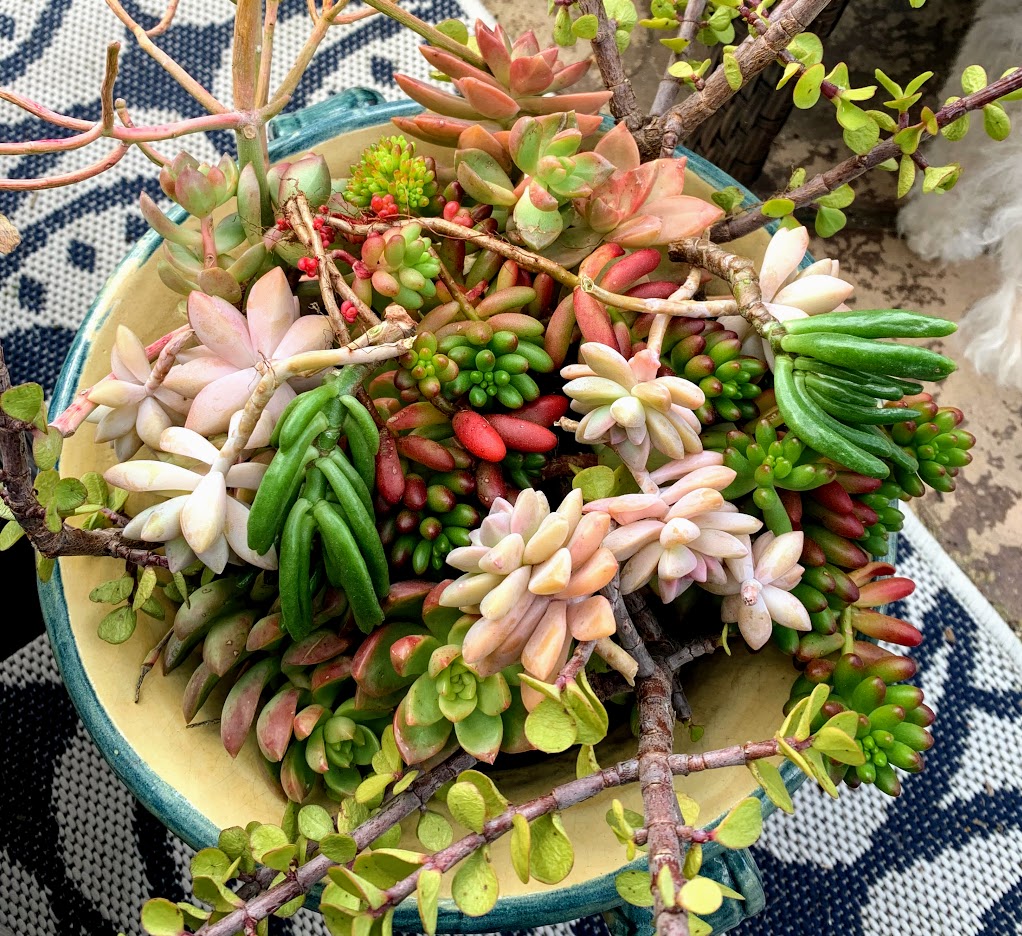
- Succulent cuttings (about 100)
- Scissors or shears
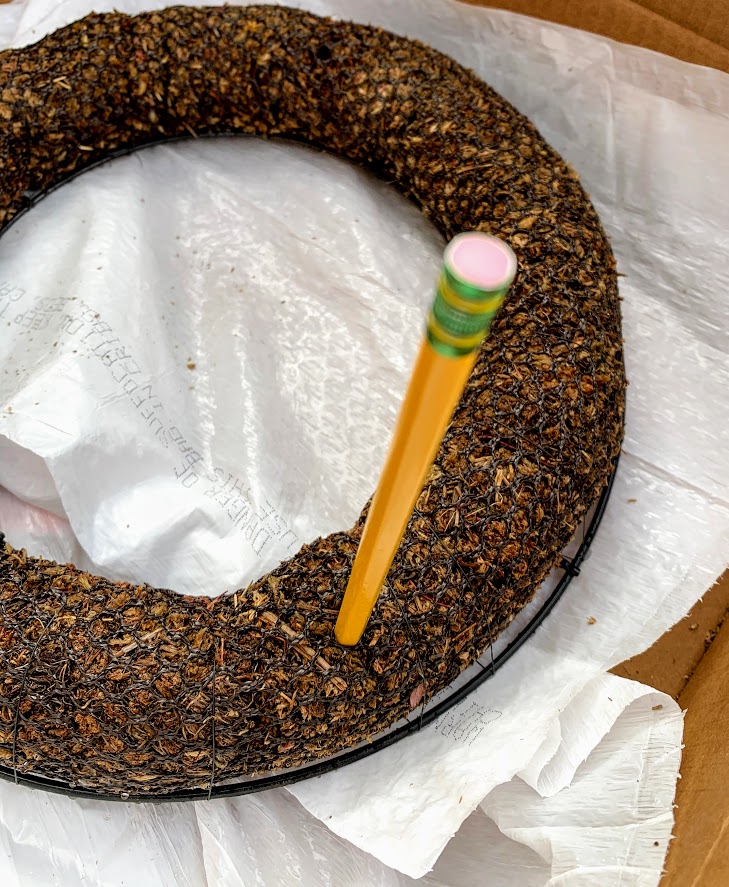
- Mesh-covered moss wreath form (see below)
- Pencil or screwdriver
- Floral Pins
- Floral wire (if you are going to hang it)
Sphagnum Moss Living Wreath, 12 in I purchased this one on Amazon, this was on Prime so I received free shipping
15″ Sphagnum Moss Living Wreath Here is another one with great reviews but you will have to pay for shipping
Directions:
Note: Attach the florist wire to the back of the wreath frame if you plan to hang it.
-
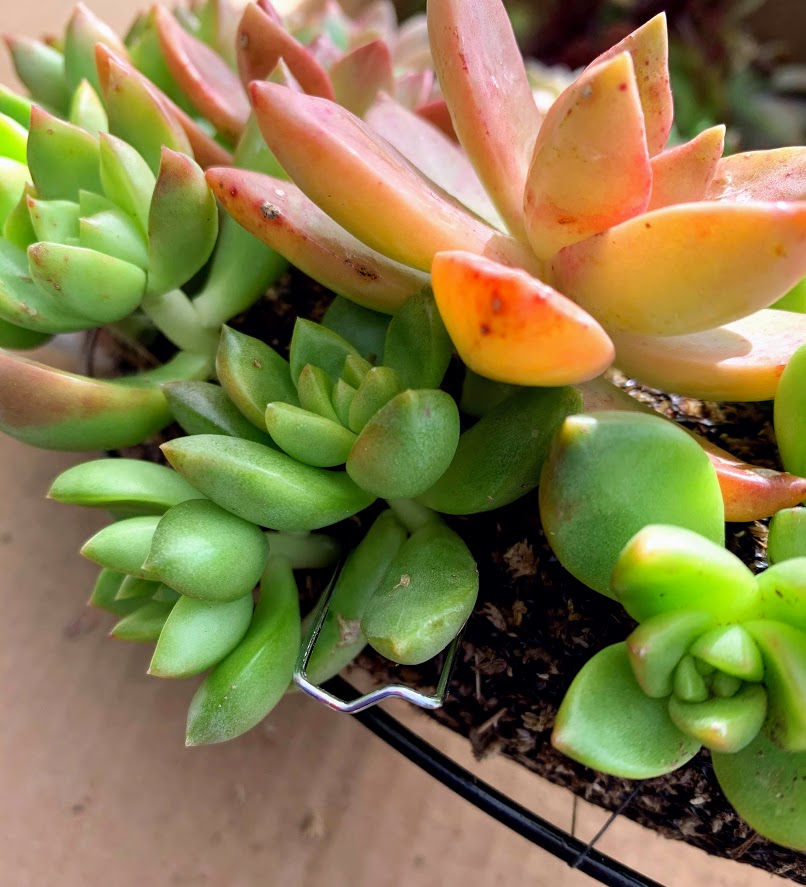
Clip cuttings of succulents approximately 2 inches long and leave them out for a few days. This will allow the cuttings to dry and new roots will be able to grow from the stem. We have a ton of succulents in our yard so I just clipped away. Otherwise, you can purchase them online or at your local nursery.
-
When you are ready to start on your wreath, soak the wreath in water for 10 minutes. Once fully soaked, gently squeeze out excess water and place it on a work surface you won’t damage. I used a box covered with plastic.
-
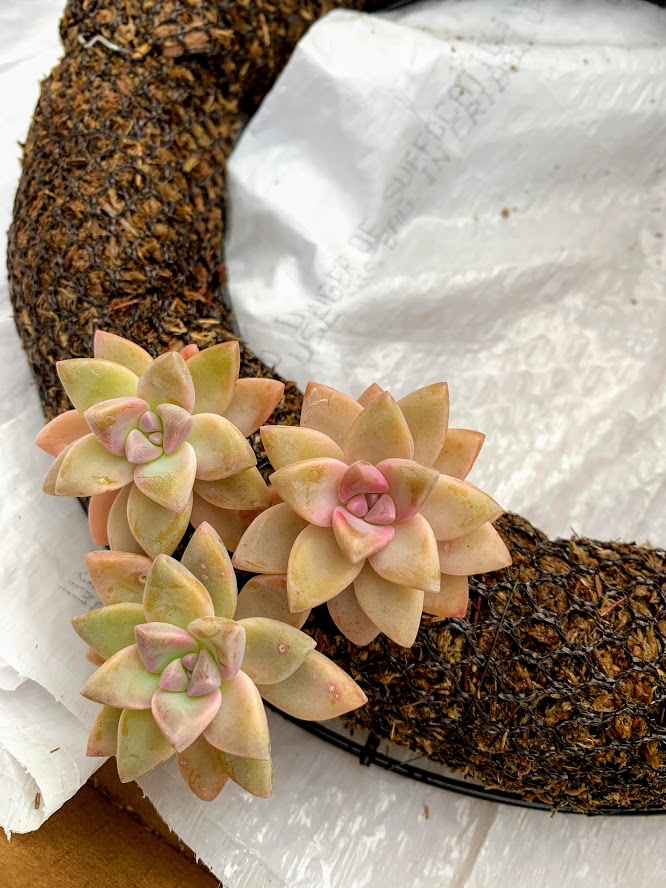
Using a pencil or screwdriver, poke holes through the netting of the moss wreath where you want the succulents to be inserted. Place succulent roots into holes, and secure them with floral pins, if necessary. Repeat this process until the whole wreath is filled up, don’t forget about the sides that will be seen. I had 1 type of succulent that needed bigger holes, I simply enlarged the opening by sniping the mesh around the hole with scissors. Keep going until your wreath form is filled to your liking!
TIPS:
I would suggest not bunching them too tightly as they will be continuously growing and you will need to trim every once in a while. If the exposed areas bother you, fill those areas in with moss. For this particular wreath, I bunched them pretty close together so you could get a good idea of how the final outcome will look, versus waiting about a month to put the tutorial up.
Keep the wreath flat for about 2-3 weeks, this will allow the succulents to root and not fall off. (this could take up to 8 weeks)
Whenever you feel the wreath is getting dry, soak the entire wreath in a basin of water for about 15 minutes. Fertilize about once every 6 weeks and mist as needed in the summer months.
I like to group the succulents by variety, you can also do it by color, there is no right or wrong way.
Succulents do best in filtered all-day sun just not hot direct sunlight.
If you’ll be displaying your wreath on a wooden door, cover the back of the wreath with plastic or something that will protect the wood from moisture.
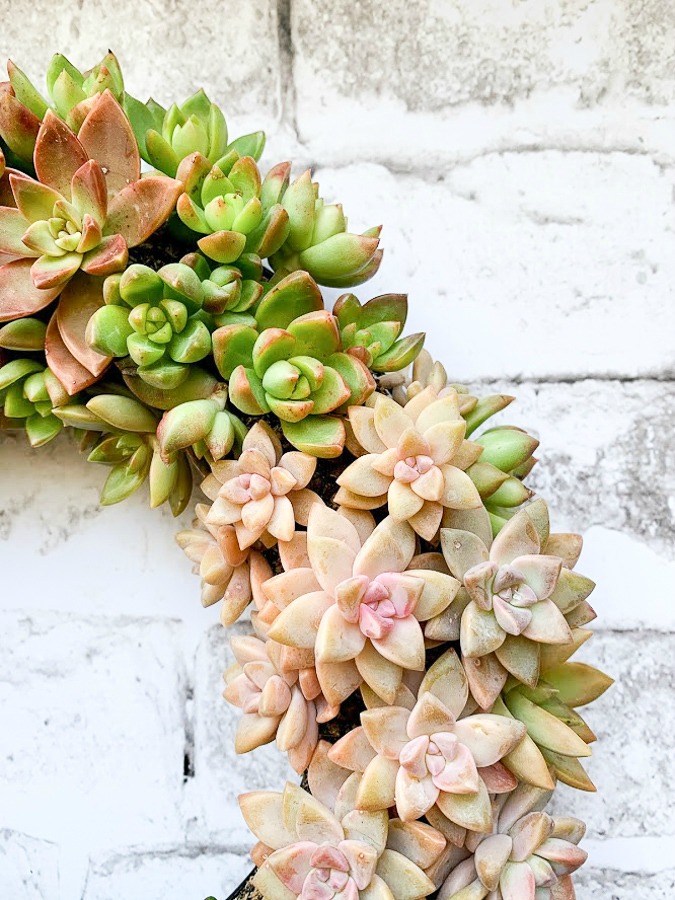

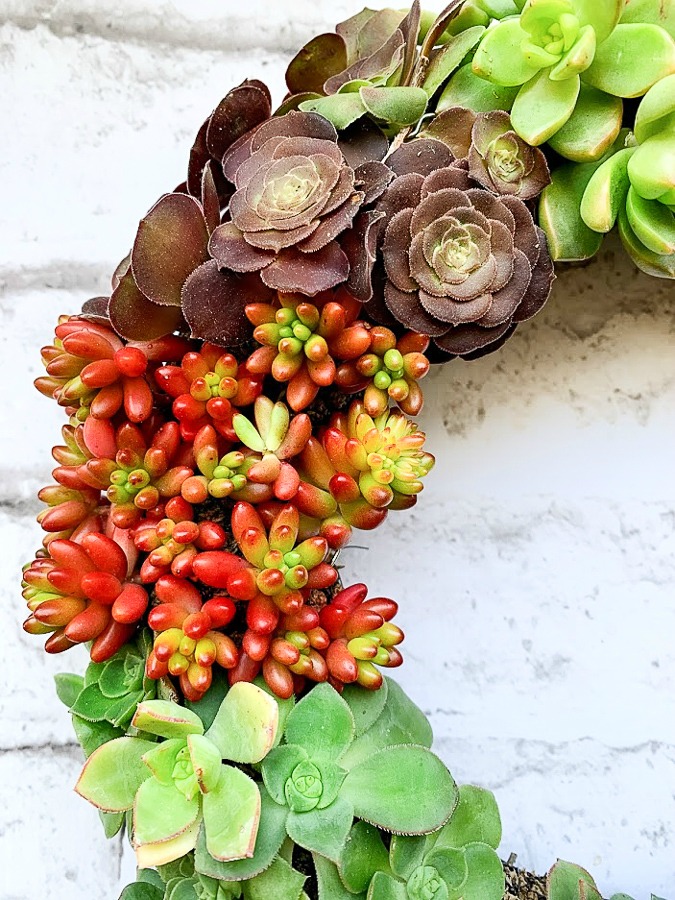
This DIY Succulent Wreath would make the most beautiful gift and will add color and life wherever it is displayed!
You can find more of my succulent projects below, thanks so much for stopping in today!


You’re so lucky to be able to get the cuttings from your yard. Your wreath turned out so beautiful!
Thank you so much Allyson! We have so much that I have to give away a ton of clippings a few times a year
I love these types of wreaths and yours is so beautiful! I love all the different colors, too. You’re so lucky to live in a climate where you can grow these in your yard. Great tutorial!
Thank you so much Heidi, it was fun to make!
This is so amazing! My daughters love love love succulents! Your blog is beautiful and full of great ideas. If you have time I would love for you to start linking up with us!
https://theeverydayfarmhouse.com/embracing-home-and-family-link-party-7/
Thank you, Jennifer!