
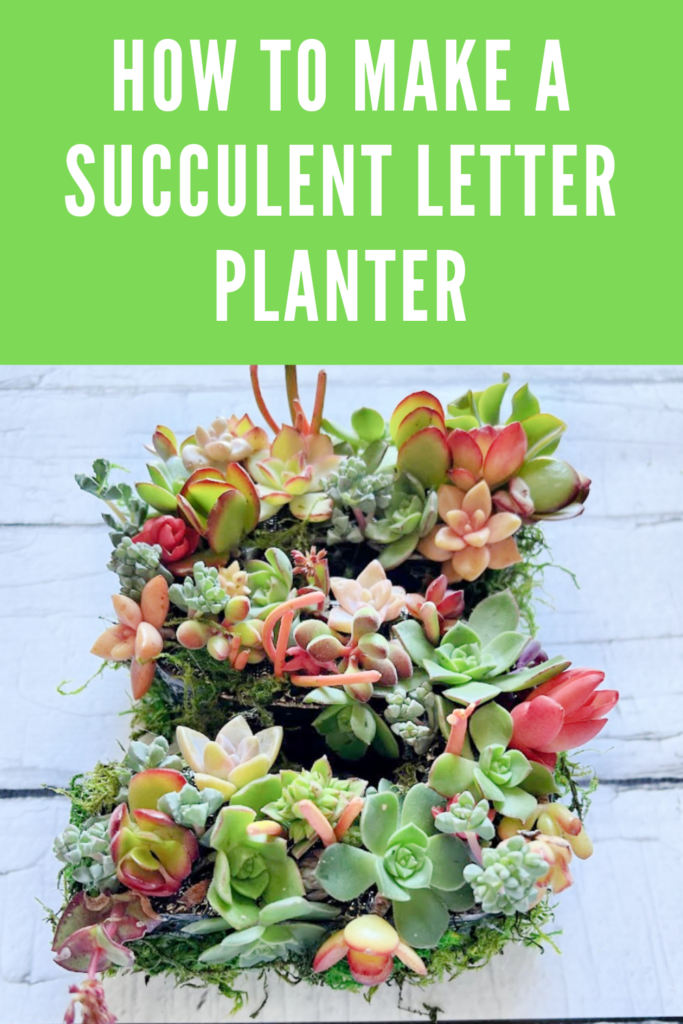
How To Make a Succulent Letter Planter Arrangement
A Step-by-Step Guide on how to make a DIY Succulent Letter Arrangement using succulent clippings and a thrifted metal letter.
If you have been here for a while, you know my love for succulent plants, they are low maintenance and nearly impossible to kill. For today’s thrift store post, I am sharing how to make succulent planters using a letter. We are fortunate to have a succulent garden in our backyard that I can just cut my clippings, however, if you don’t have access to free succulents, your local garden center should carry them. You could also always use faux succulents.
I found my letter at our local thrift store for $1.50. The moment I saw it, I knew what I wanted to do with it. When my girlfriend and I went to the great junk hunt, they had wooden letters filled with beautiful succulents but they were super pricey but so pretty!
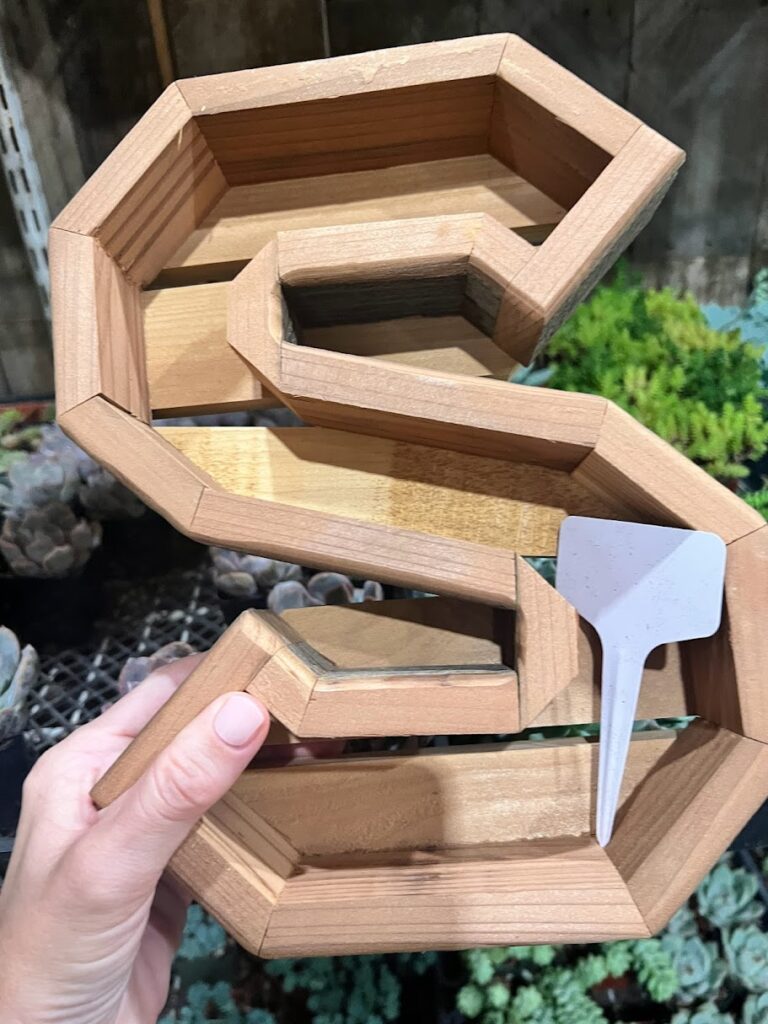
For my particular succulent wall planter, I had to get a little creative, as I did this in reverse order if that makes sense. I was adding the soil on the bottom of the letter instead of the top, otherwise, my letter would be in the wrong direction. You will find most letters that you can purchase online to be a wood letter or a wire letter, I’ve added some links below for you to see. Here is my before:

Let’s dive into how to create your own DIY Succulent Letter Arrangement.
Affiliate links are listed below

Materials Needed:
Floral letter or there are a few you can buy online: Letter wire metal wreath frame or this one from Walmart
Assorted succulent cuttings or faux succulents
Succulent soil, Cactus Palm soil is the best
Moss (optional)
Small pebbles (optional)
Scissors
Gather your succulents
Choose the letter that will be the base for your arrangement. You can find these at craft stores, flea markets, thrift stores, or online retailers. Next, gather an assortment of succulent cuttings. Choose a variety of shapes, sizes, and colorful succulents to add visual interest to your arrangement. You will want small, but sturdy succulent cuttings; thin stems will work the best. Many people will tell you to dry their cuttings out before using them. I have a little secret, I never have, and I have been making beautiful wreaths and planters for years, and have never had a problem with them thriving.
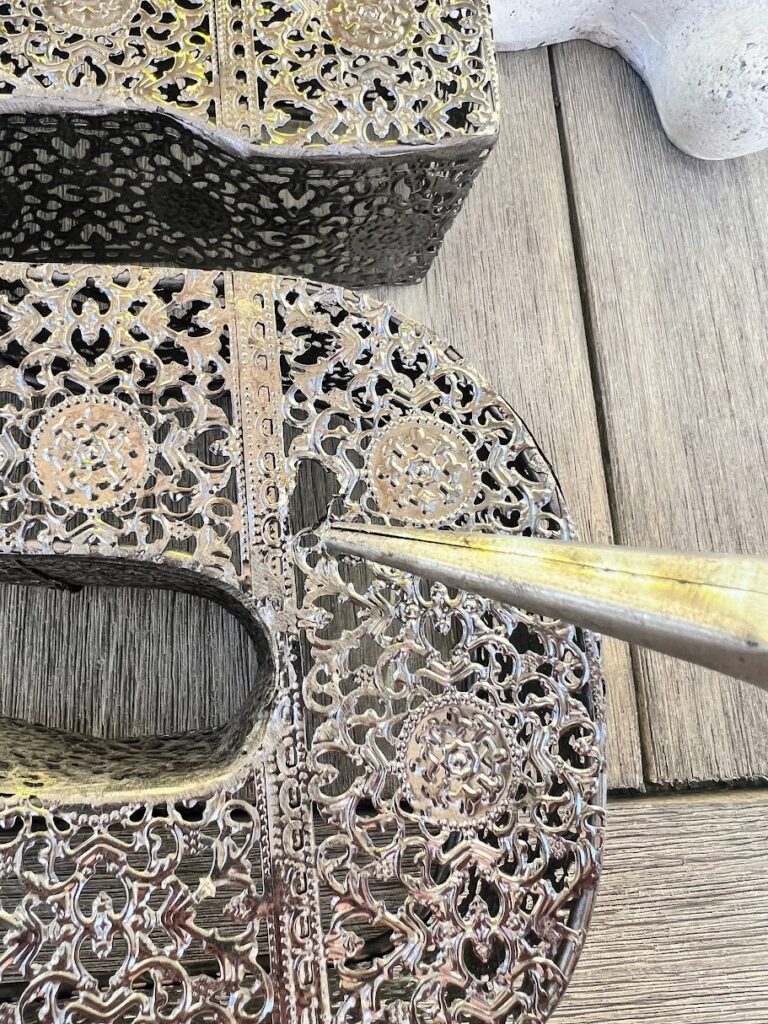
Make wider openings in the metal
You might need to make the holes of the metal mesh a little bigger, I simply used wire cutters and made small cuts making the openings bigger.
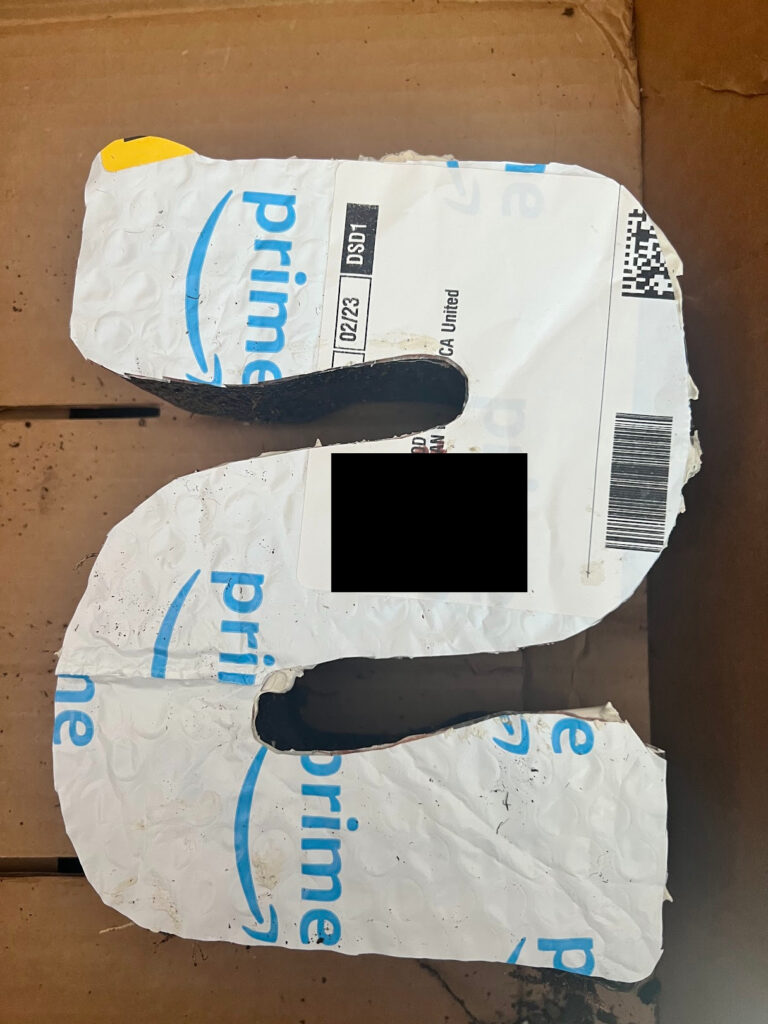
Trace your letter
Trace your letter on some type of plastic or weed barrier. Something that will allow for a drainage hole. Cut it out and set it aside.

Fill the letter with dirt and pebbles
Add the cactus Palm soil followed by a layer of pebbles to help keep the water from the roots of the succulents. This will also allow for good drainage.
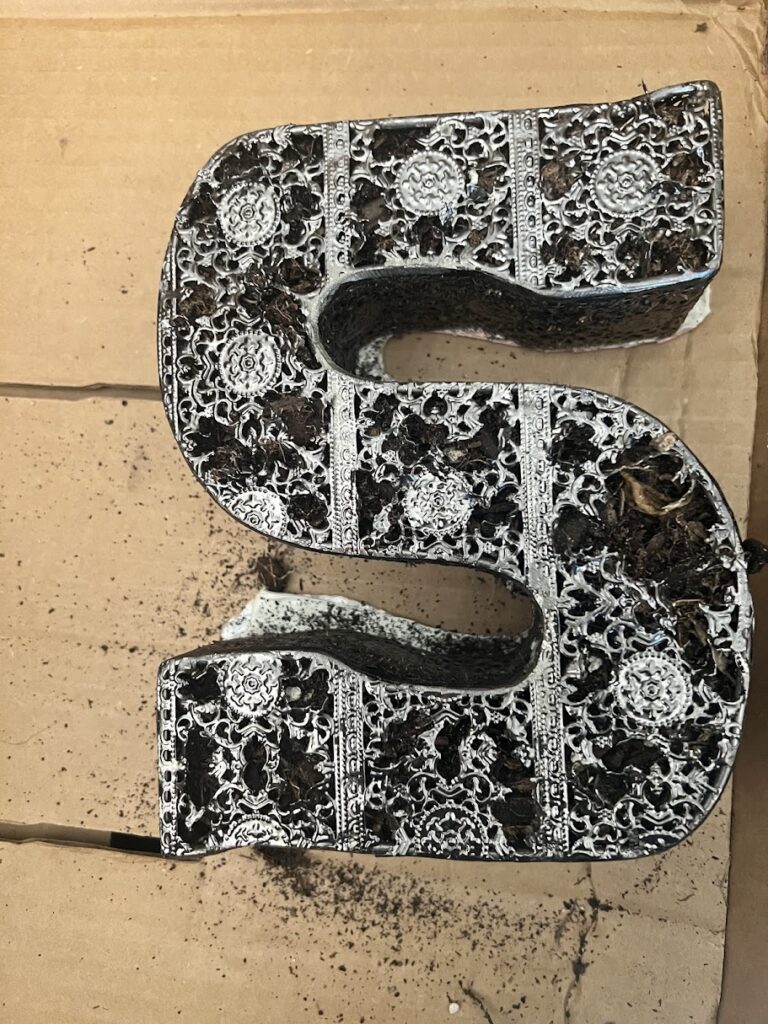
Glue the traced-out letter to the bottom of your letter, I used liquid nails. Add a few holes so the water can drain out.
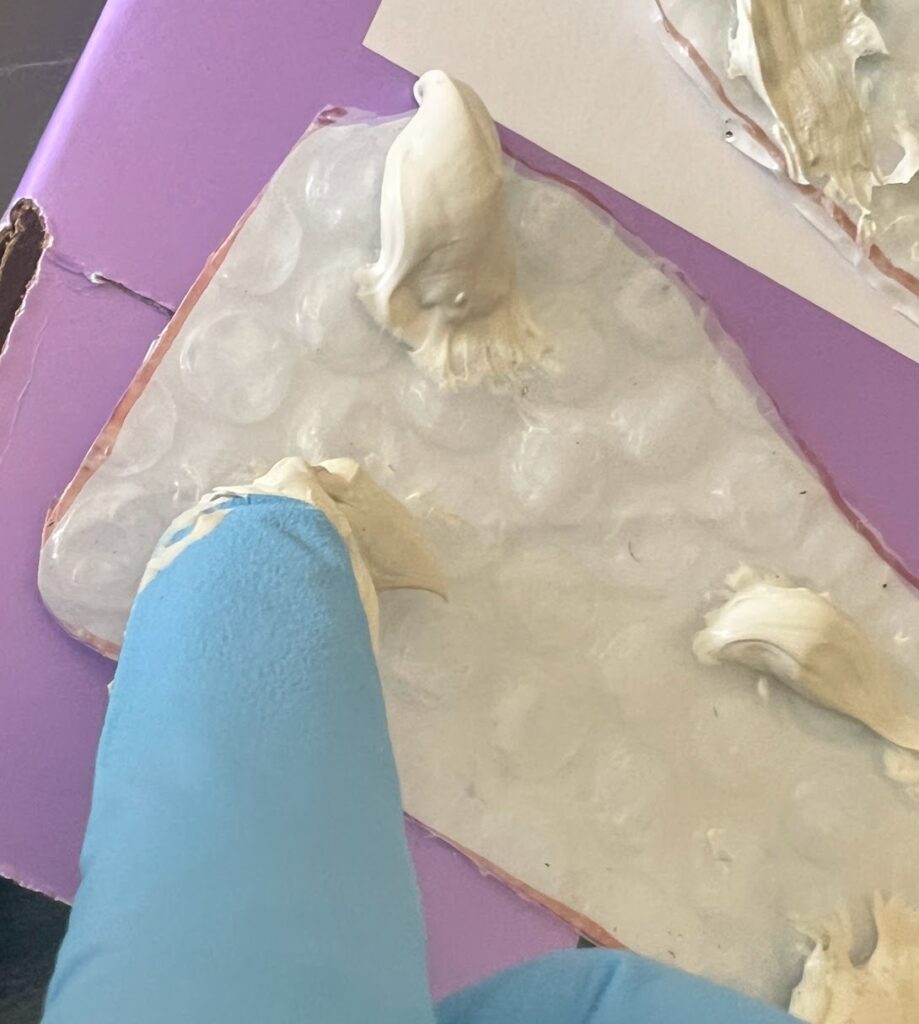
Repurposing at its finest, and hiding our address lol.
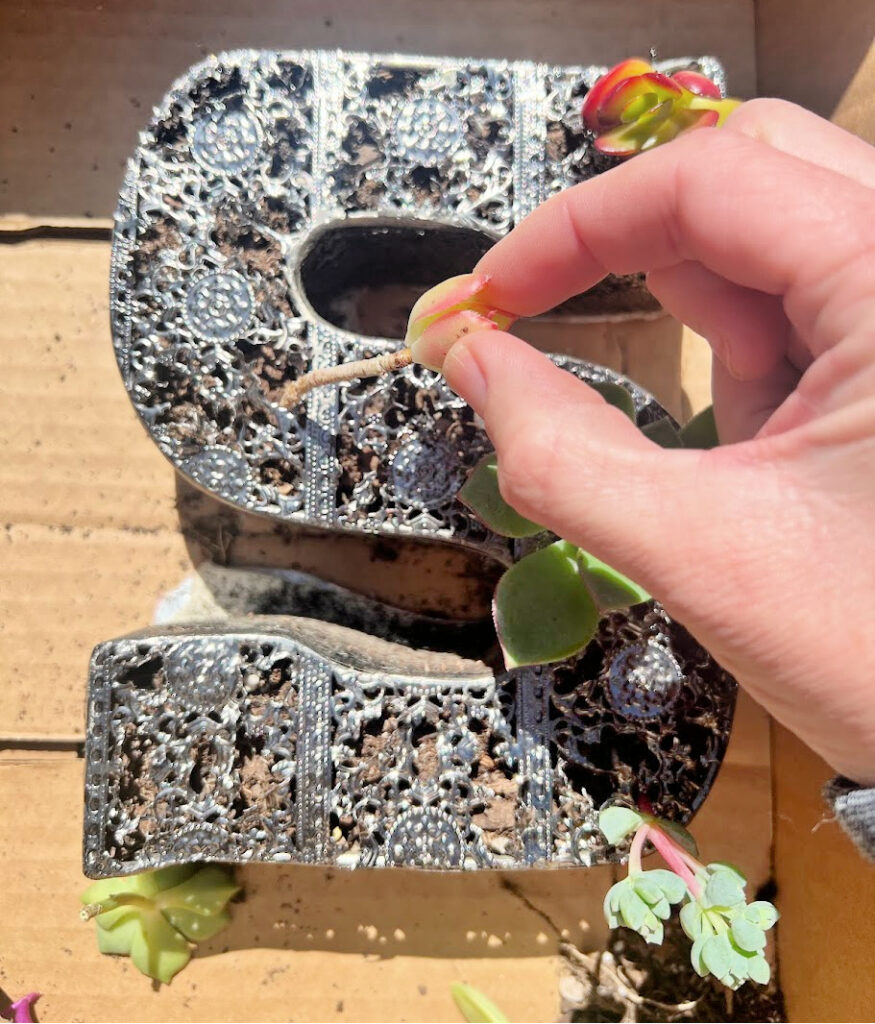
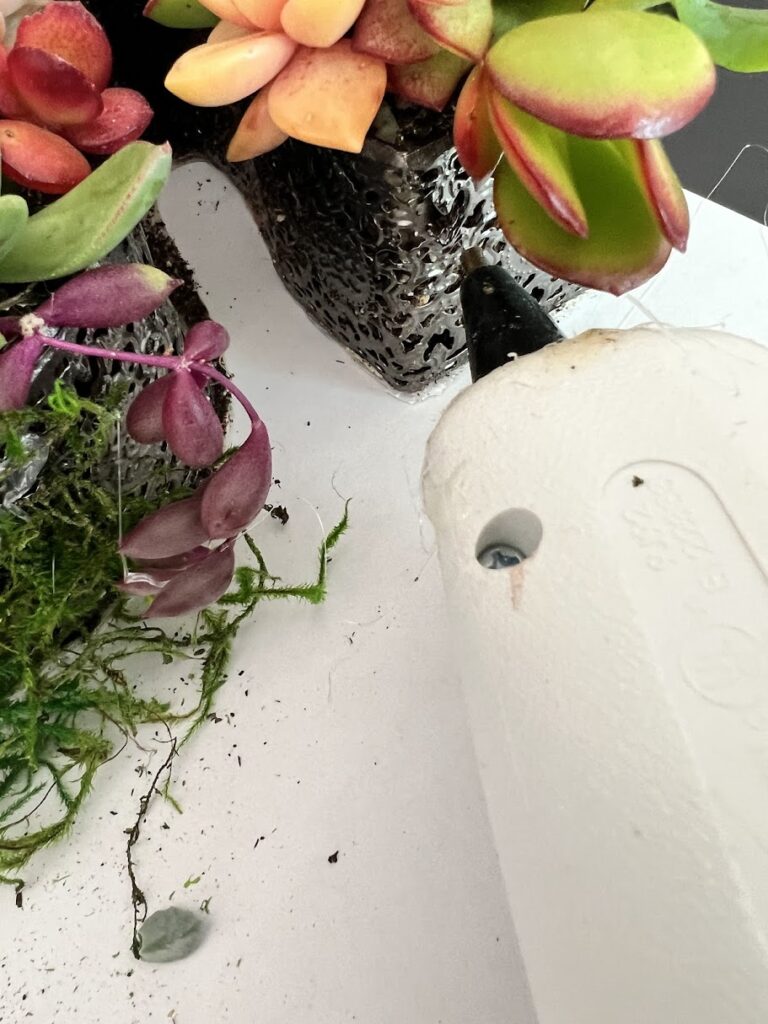
Plant Succulents
Once the letter is prepared, it’s time to plant the succulents. Simply push the succulent roots through the metal holes, into the soil. If necessary, you can secure them with floral pins. Repeat this process until the letter is filled up. There is no wrong or right way to do this.
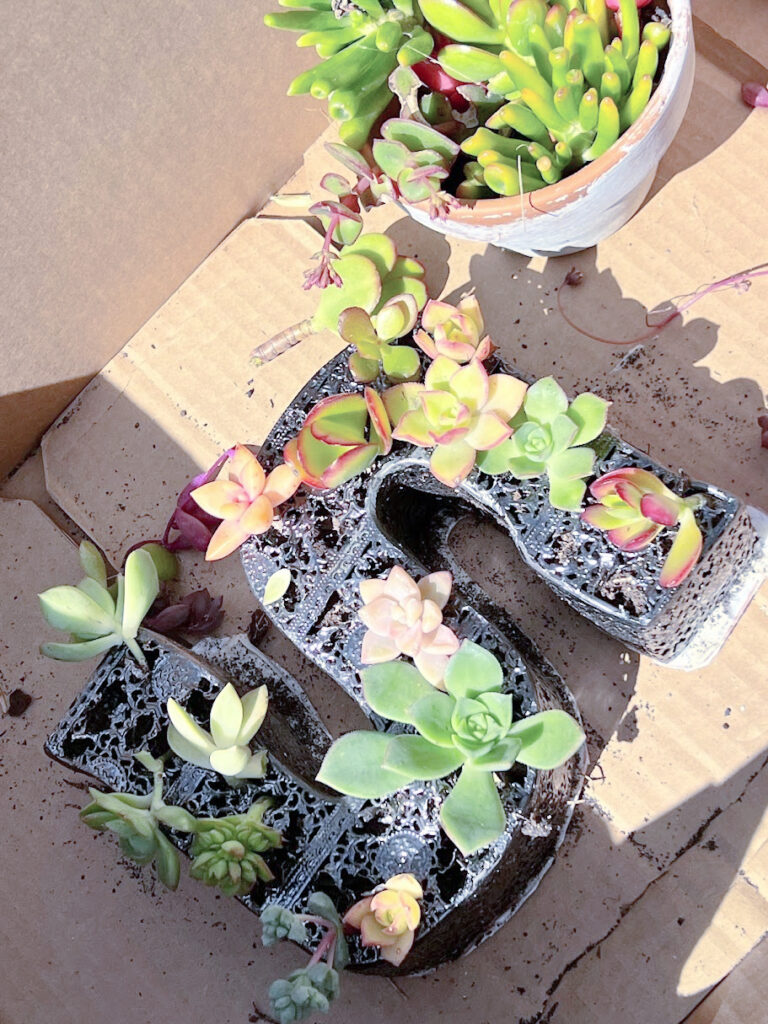
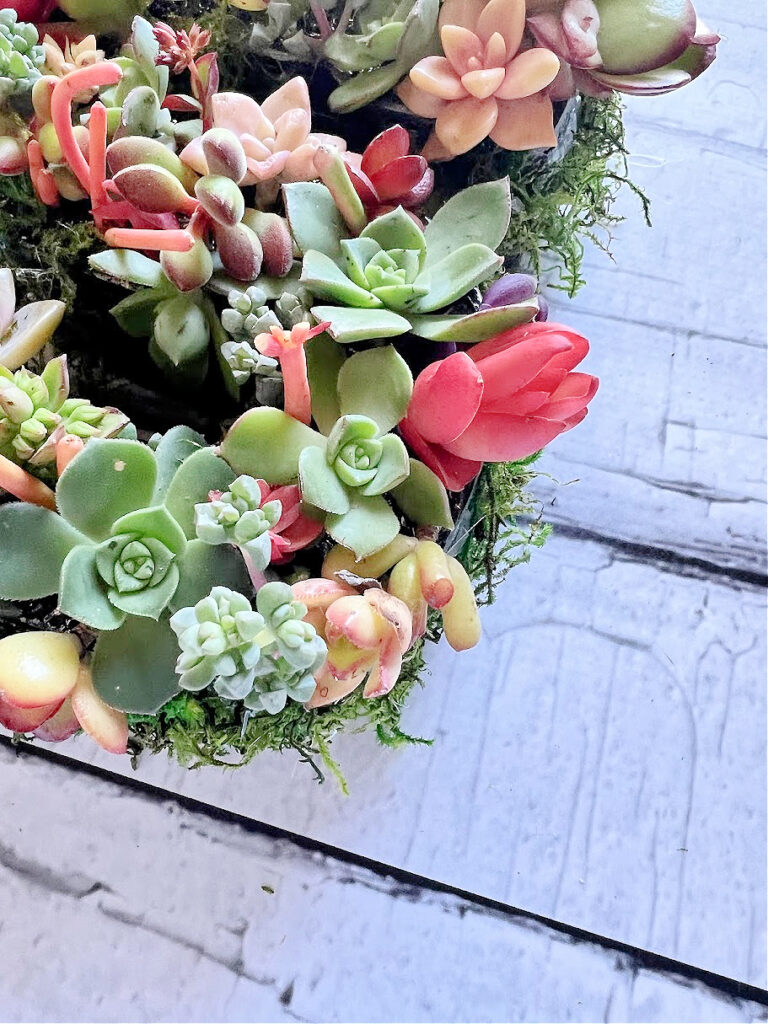
Fill in the Gaps
If you notice gaps, you can glue pieces of moss to fill in these spaces and create a lush, cohesive look. For a more finished look, you can add moss to the outside of the letter.
I would suggest not bunching them too tightly, as they will be continuously growing, and you will need to trim them every once in a while. If the exposed areas bother you, fill those areas in with moss. I did bunch them pretty close together so you could get a good idea of how the outcome will look, versus waiting about a month to put the tutorial up.
Caring for your beautiful succulent arrangement
Succulents thrive in bright, indirect light. Full sun can sometimes burn the plant. Place your letter planter in a location that receives adequate sunlight throughout the day. Water the succulents sparingly, allowing the soil to dry out between waterings. Overwatering can lead to root rot. Monitor the growth of your succulents and trim or propagate them as needed to maintain the desired shape and size, making sure to clip off any dead leaves or plants.
A spray bottle to lightly mist the succulents works great with this small of an arrangement.
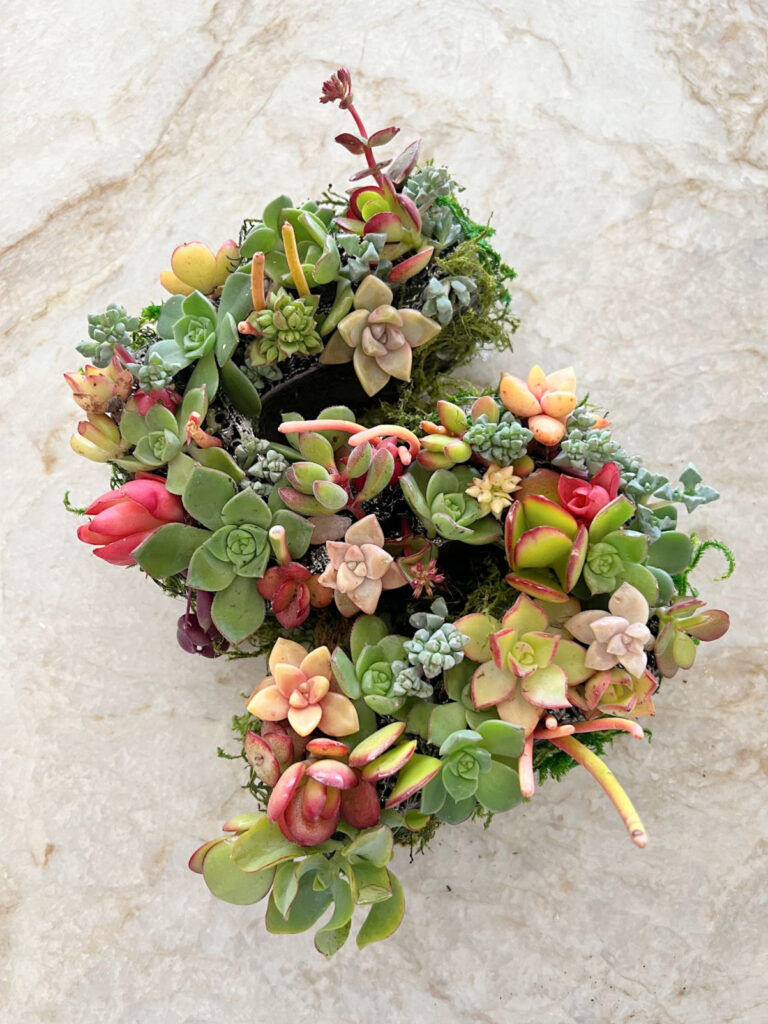
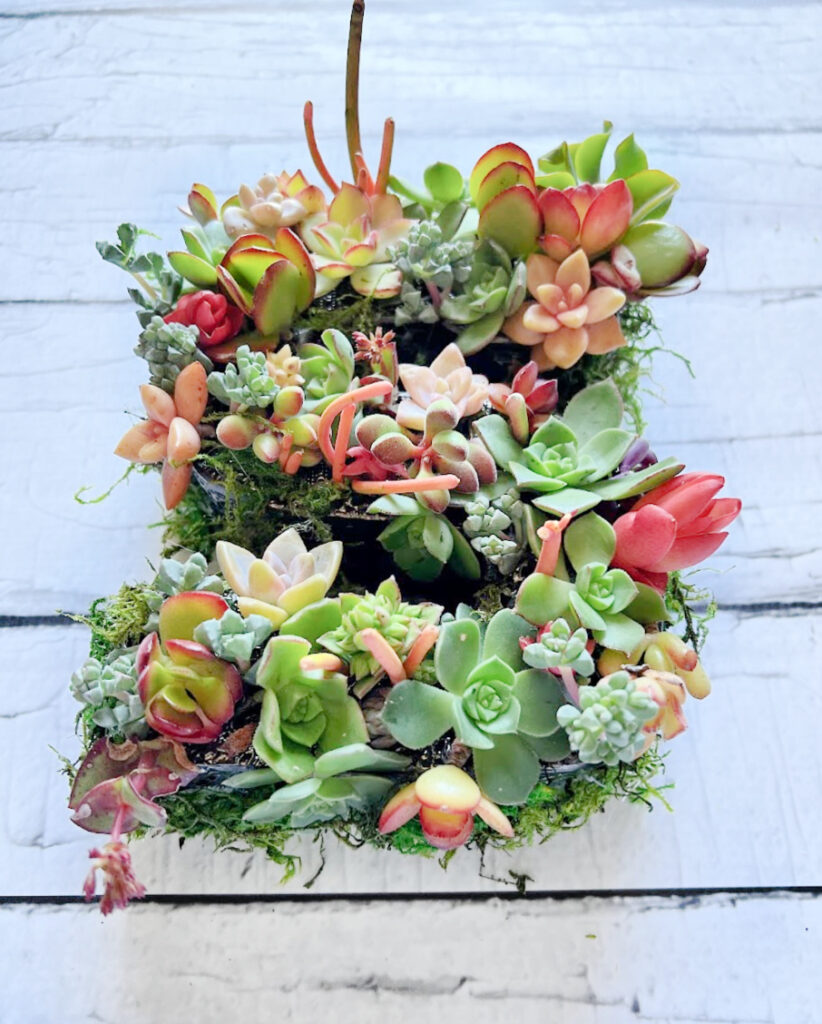
This was such a fun project that did not take a long time, It took me a little under 2 hours. With just a few materials, you’ve created a stunning piece of living art. They make for great gifts for any time! Birthdays, memorials, bridal showers, Mother’s Day, weddings, baby showers.
And of course, you could simply purchase a premade one!

It’s that time to see what everyone made over for April!
Our Monthly
Thrift Store Decor Team
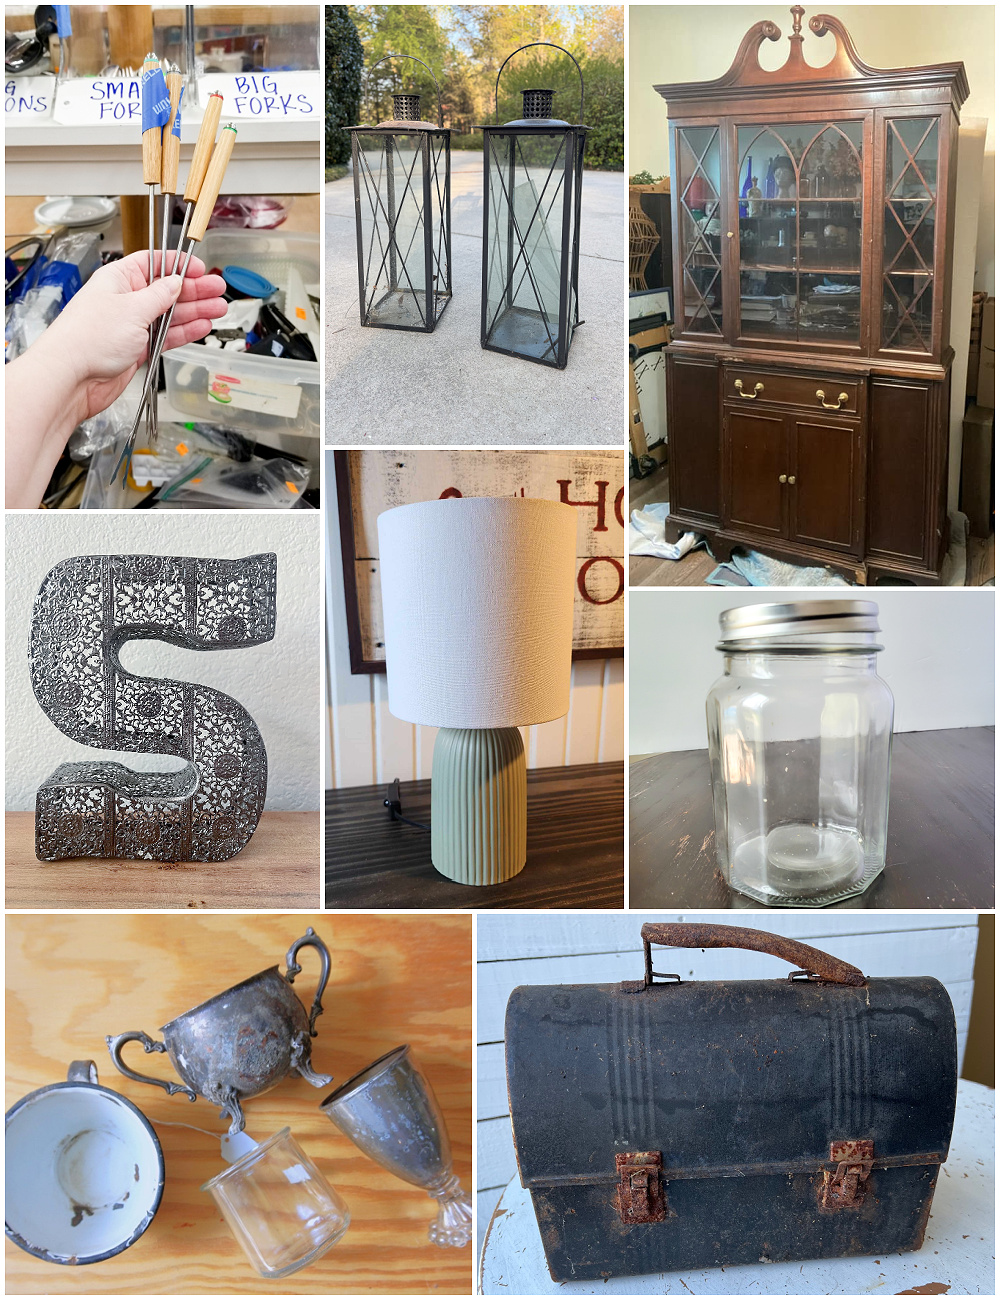
- Sadie Seasongoods –Fondue Forks as Plant Labels or Herb Markers
- Our Southern Home –Restoring an Outdoor Lantern
- Shop at Blue – Upcycled MCM China Cabinet
- My Uncommon Slice of Suburbia –Succulent Letter Arrangement
- My Repurposed Life – Lamp Refresh
- Domestically Speaking – Candle for Mother’s Day
- Petticoat Junktion –Spray Paint Faux Succulents
- Organized Clutter – Metal Lunchbox Planter
A Step-by-Step Guide on how to make a DIY Succulent Letter Arrangement using succulent clippings and a thrifted metal letter.
If you have been here for a while, you know my love for succulent plants, they are low maintenance and nearly impossible to kill. For today’s thrift store post, I am sharing how to make succulent planters using a letter. We are fortunate to have a succulent garden in our backyard that I can just cut my clippings, however, if you don’t have access to free succulents, your local garden center should carry them. You could also always use faux succulents.
I found my letter at our local thrift store for $1.50. The moment I saw it, I knew what I wanted to do with it. When my girlfriend and I went to the great junk hunt, they had wooden letters filled with beautiful succulents but they were super pricey but so pretty!
For my particular succulent wall planter, I had to get a little creative, as I did this in reverse order if that makes sense. I was adding the soil on the bottom of the letter instead of the top, otherwise, my letter would be in the wrong direction. You will find most letters that you can purchase online to be a wood letter or a wire letter, I’ve added some links below for you to see. Here is my before:
Let’s dive into how to create your own DIY Succulent Letter Arrangement.
Affiliate links are listed below
Materials Needed:
Floral letter or there are a few you can buy online: Letter wire metal wreath frame or this one from Walmart
Assorted succulent cuttings or faux succulents
Succulent soil, Cactus Palm soil is the best
Moss (optional)
Small pebbles (optional)
Scissors
Gather your succulents
Choose the letter that will be the base for your arrangement. You can find these at craft stores, flea markets, thrift stores, or online retailers. Next, gather an assortment of succulent cuttings. Choose a variety of shapes, sizes, and colorful succulents to add visual interest to your arrangement. You will want small, but sturdy succulent cuttings; thin stems will work the best. Many people will tell you to dry their cuttings out before using them. I have a little secret, I never have, and I have been making beautiful wreaths and planters for years, and have never had a problem with them thriving.
Make wider openings in the metal
You might need to make the holes of the metal mesh a little bigger, I simply used wire cutters and made small cuts making the openings bigger.
Trace your letter
Trace your letter on some type of plastic or weed barrier. Something that will allow for a drainage hole. Cut it out and set it aside.
Fill the letter with dirt and pebbles
Add the cactus Palm soil followed by a layer of pebbles to help keep the water from the roots of the succulents. This will also allow for good drainage.
Glue the traced-out letter to the bottom of your letter, I used liquid nails. Add a few holes so the water can drain out.
Repurposing at its finest, and hiding our address lol.
Plant Succulents
Once the letter is prepared, it’s time to plant the succulents. Simply push the succulent roots through the metal holes, into the soil. If necessary, you can secure them with floral pins. Repeat this process until the letter is filled up. There is no wrong or right way to do this.
Fill in the Gaps
If you notice gaps, you can glue pieces of moss to fill in these spaces and create a lush, cohesive look. For a more finished look, you can add moss to the outside of the letter.
I would suggest not bunching them too tightly, as they will be continuously growing, and you will need to trim them every once in a while. If the exposed areas bother you, fill those areas in with moss. I did bunch them pretty close together so you could get a good idea of how the outcome will look, versus waiting about a month to put the tutorial up.
Caring for your beautiful succulent arrangement
Succulents thrive in bright, indirect light. Full sun can sometimes burn the plant. Place your letter planter in a location that receives adequate sunlight throughout the day. Water the succulents sparingly, allowing the soil to dry out between waterings. Overwatering can lead to root rot. Monitor the growth of your succulents and trim or propagate them as needed to maintain the desired shape and size, making sure to clip off any dead leaves or plants.
A spray bottle to lightly mist the succulents works great with this small of an arrangement.
This was such a fun project that did not take a long time, It took me a little under 2 hours. With just a few materials, you’ve created a stunning piece of living art. They make for great gifts for any time! Birthdays, memorials, bridal showers, Mother’s Day, weddings, baby showers.
And of course, you could simply purchase a premade one!
It’s that time to see what everyone made over for April!
Our Monthly
Thrift Store Decor Team
- Sadie Seasongoods –Fondue Forks as Plant Labels or Herb Markers
- Our Southern Home –Restoring an Outdoor Lantern
- Shop at Blue – Upcycled MCM China Cabinet
- My Uncommon Slice of Suburbia –Succulent Letter Arrangement
- My Repurposed Life – Lamp Refresh
- Domestically Speaking – Candle for Mother’s Day
- Petticoat Junktion –Spray Paint Faux Succulents
- Organized Clutter – Metal Lunchbox Planter

Very clever repurpose of the metal letter! You filled it so full that it’s gorgeous.
Thank you Carlene!
Wow, Kristin! I have so many ideas from this single post! The Amazon envelop!! Genius! I was looking for something to line my garden scale trays with. Bingo! I just can’t every have enough succulent projects. Pinned!
Thank you Sue, it was a fun little project to make 🙂
Love succulents! And I love your letter project… would make such a great gift.
Thank you Maryann!
You are truly the succulent whisperer. I have so enjoyed all of your succulent projects through the years. This one is just fabulous. Thanks for the growing tips. I just repotted mine last week, but I need to move them because I relocated them to a dining table outside that is in full sun.
You are so sweet Christy, thank you!