DIY tufted headboard
I am super excited to welcome Sincerely Jean today! Patti has an amazing tutorial on how to make this beautiful DIY tufted headboard!
~Take it away~
Hello My Uncommon Slice of Suburbia readers! It’s Shari, Tami, and Patti from Sincerely Jean. Today, we are so excited to share Patti’s DIY tufted headboard project! We hope you enjoy it!…
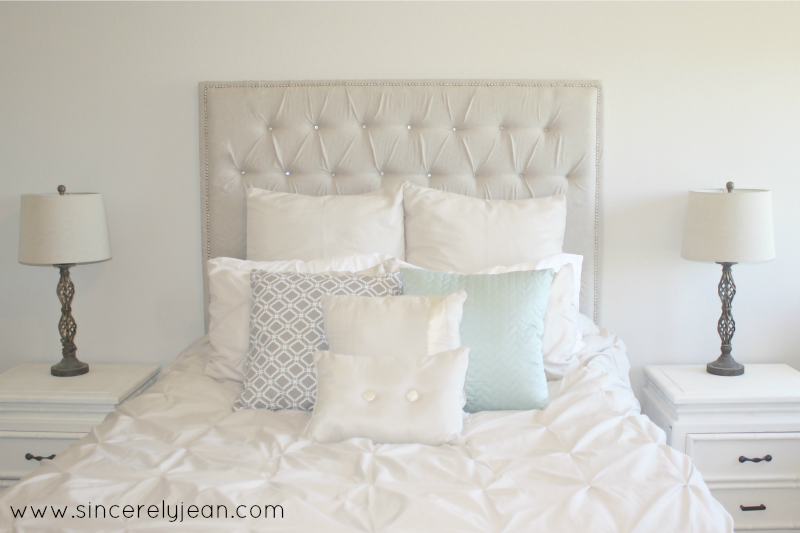
I absolutely love tufted headboards! They are so classy and I feel like they add a perfect touch of elegance to your bedroom. I have always wanted one but the downside is that the price is not my favorite, they can get pretty pricey. So I used our motto, if you can’t buy it, make it! Today we are here to show you exactly how to do that. This project is not as hard as it looks and will save you a lot of money!
Materials Needed:
- 1/2” ply wood
- 2×4 (qty 3)
- 3 inch thick foam
- Fabric of your choosing
- 2 1/4 inch screws
- 2” screws
- Washers
- Clear plastic jewels
- Nail head trim
- Adhesive spray
- Nail gun
- Drill
- French cleat for mounting on wall
First start by deciding how big you want your headboard to be depending on the size of your bed. Our bed is a queen so I made it a few inches wider at 63” for the width and then I wanted it to be pretty tall so 42” for the height. You can get your 1/2 inch plywood at Home Depot or Lowes and have them cut the dimensions there. I found my plywood for 75% off because it had some purple paint on it, I was so excited!
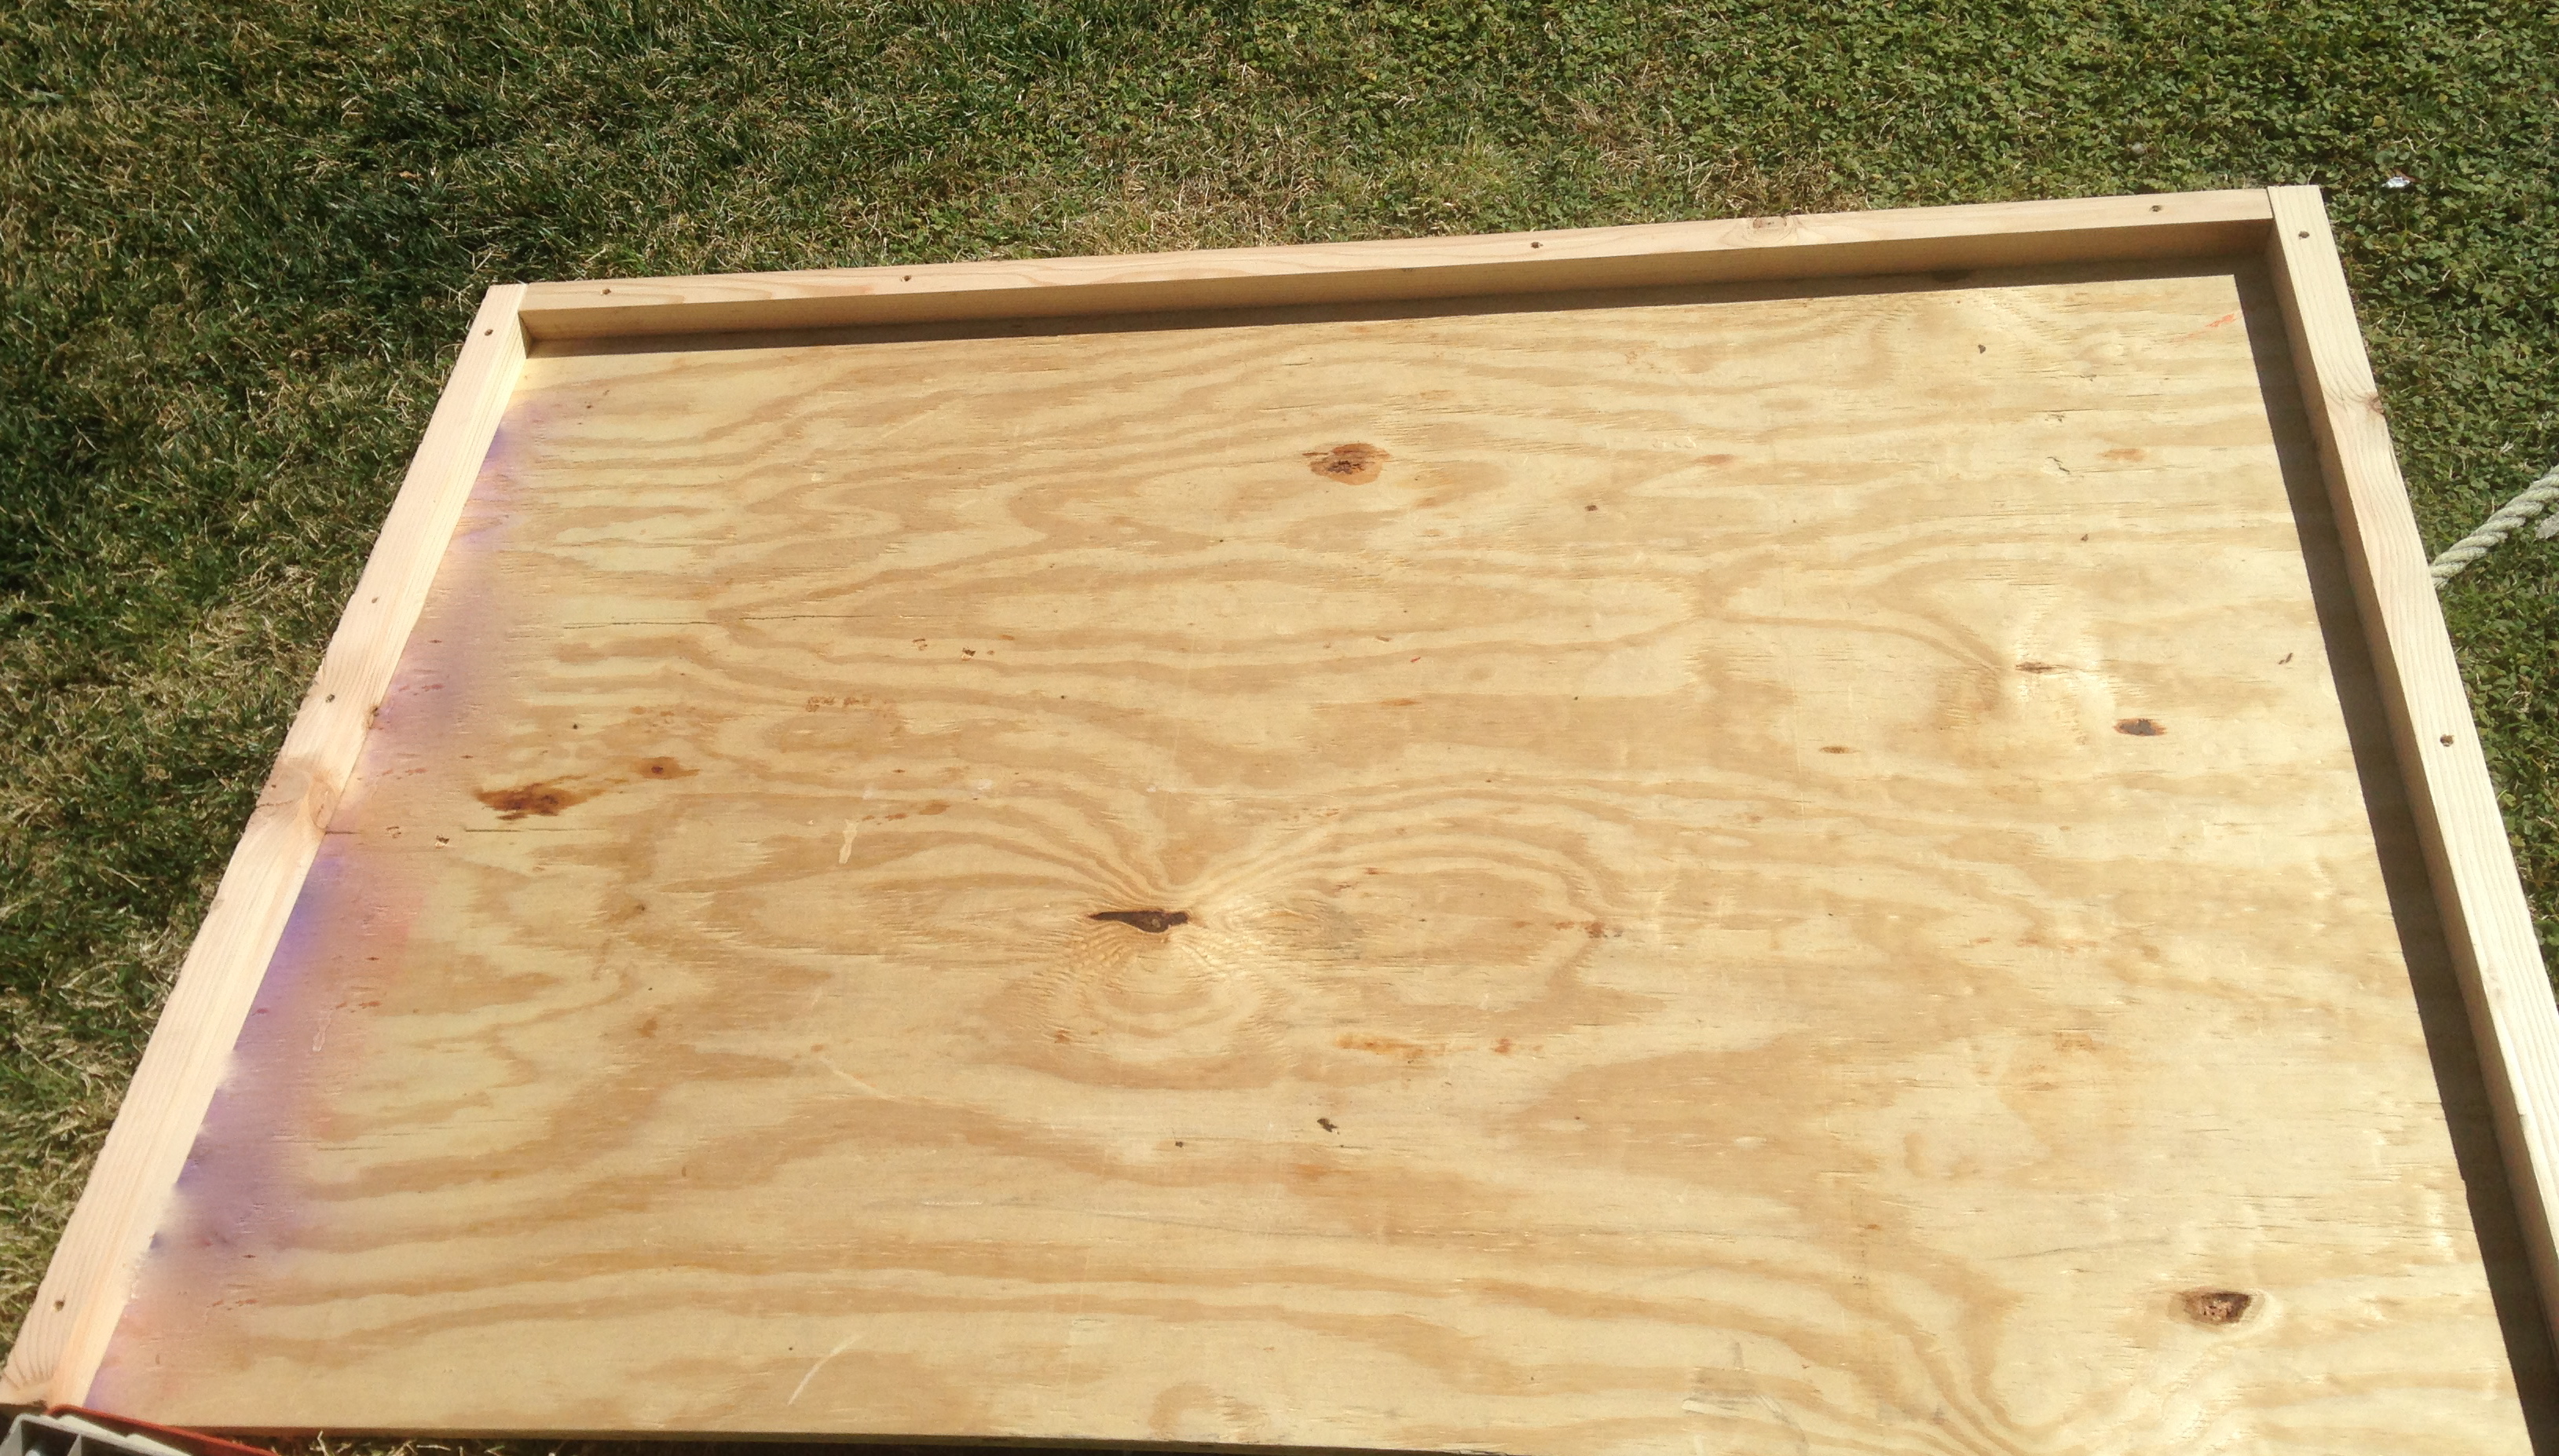
Also have them cut your 2×2’s. Your going to need them to frame the board. One on top and two on the sides. You do not need any for the bottom. So my dimensions for the side 2×2’s were 42” (same as the height of the board.) Then for the top 2×2 I took 4 inches off at 59” so it would fit perfectly in between the two side ones.
Use your 2 and 1/4 inch screws to attach your 2x2s. Place your 2×2 on the front of your board and flush to the edge of the top of your board. Screw in three places (middle and ends). I used drill bits first so it wouldn’t crack the wood. Take the other two and make it flush with the sides of your board. Screw in 3 places (middle and ends) as well.
Once your frame is made, add your 3 inch foam. You can find this at Home Depot or Lowes. I had some lying around so I used two different kinds but it still worked great. With your adhesive spray, spray a generous amount on your plywood and then place on your 3 inch foam. Let it dry completely.

Once dry, drape your fabric over the whole thing and start stapling on the bottom of your board. There was a fabric sale going on at my local fabric store so I bought mine there. I love sales! Okay, so I used my favorite staple gun that you can find HERE. It has done a great job on all the projects I have used it on. Make sure you pull the fabric while you staple so its nice and taut. When you get to the corners fold fabric over so it looks neat.
Now its time for tufting. Tufting is pretty hard and time consuming in my opinion so I did it an easier way. I used screws and washers. I used the Everbilt #8, 2in wood screws, and #8 flat washers. Make sure you use washers or the wood screw will just disappear through the fabric. (I learned the hard way hehe.) I started in the center of my headboard and with a pencil I marked the spot. I decided to use 7 inch measurements because 7 goes into both 63 and 42 evenly. So from my center spot I measured 7 inches over and placed another mark. I did this all the way across that middle row. Then go back to your center spot and measure 7 inches above that and 3.5 inches over. That will be the start of your next row. Measure every 7 inches over and mark. Then go back to your center spot again and measure 14 inches above that and mark it for the start of your third row. You want every other row to be aligned with each other. Keep continuing that pattern until you’ve covered your board. Take your screws and washers and drill where you marked. It’s your own preference on how deep you want your tuft to go (which is caused by how deep your screws go in.) Just make sure your screws don’t go through the back of the ply board. As you drill in your screws start making those diamond shapes in your fabric.
We’re almost done I promise!
I really like when tufted headboards have jewels inside the tufts rather than buttons. It is also so much easier than to fabric almost 50 buttons! I used clear plastic jewels that you can find HERE. On top of each screw you hot glue a clear jewel. I loved the way it turned out and the process was so fast!
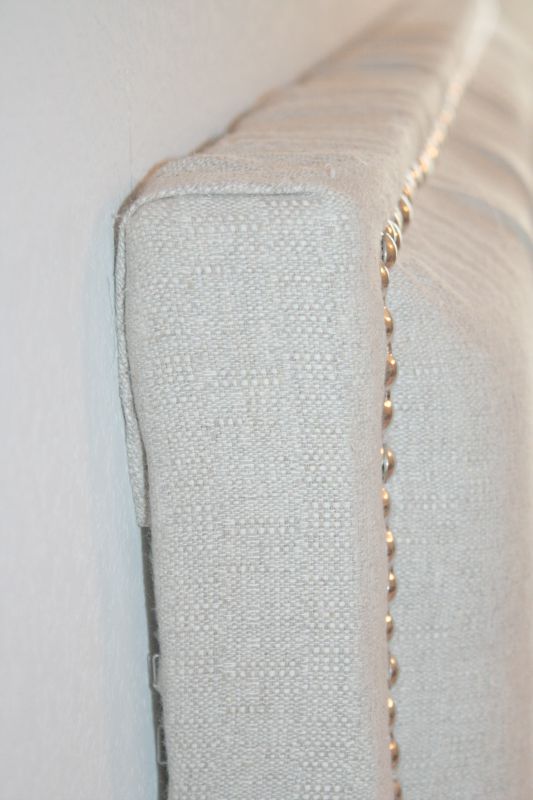
Now we use the nail head trim. This really transforms your headboard because it makes the frame pop out. I used this nail head trim that you can find HERE. This way is SO much easier and you get such a better turnout then trying to push your own thumb tacks in one by one. Start at the bottom side of your board, 2 inches in and go all the way around your frame.

YOU’RE DONE! Woo-hoo, that was some work huh? But it’s not too bad for what you get out of it!
When it comes time to mount it to the wall, the easiest way is to use a metal cleat. I bought a french cleat that you can find HERE. They hold up to 200 lbs so I felt comfortable that it would be secure. I read the directions on the package on how to mount and placed it exactly in the middle. Measure it on your wall so that your headboard is exactly above your bed. TADA!
Enjoy your beautiful and inexpensive headboard!
Thank you SO MUCH for joining me today and welcoming Sincerely Jean, make sure to stop by and say hello!
Blog | Instagram | Pinterest | Facebook | Twitter With a passion for DIY, recipes, fashion, and fitness, three sisters from Las Vegas started their blog, Sincerely Jean. Shari, Tami, and Patti’s mission is to help you be the best you!