
Update a Rolling Ice Cooler With Wheels Using Spray Paint
We have a fun and creative project on how to update a rolling ice cooler with a fresh coat of spray paint. With a little time and effort, you can transform your dull and outdated cooler into a stylish accessory for your backyard!
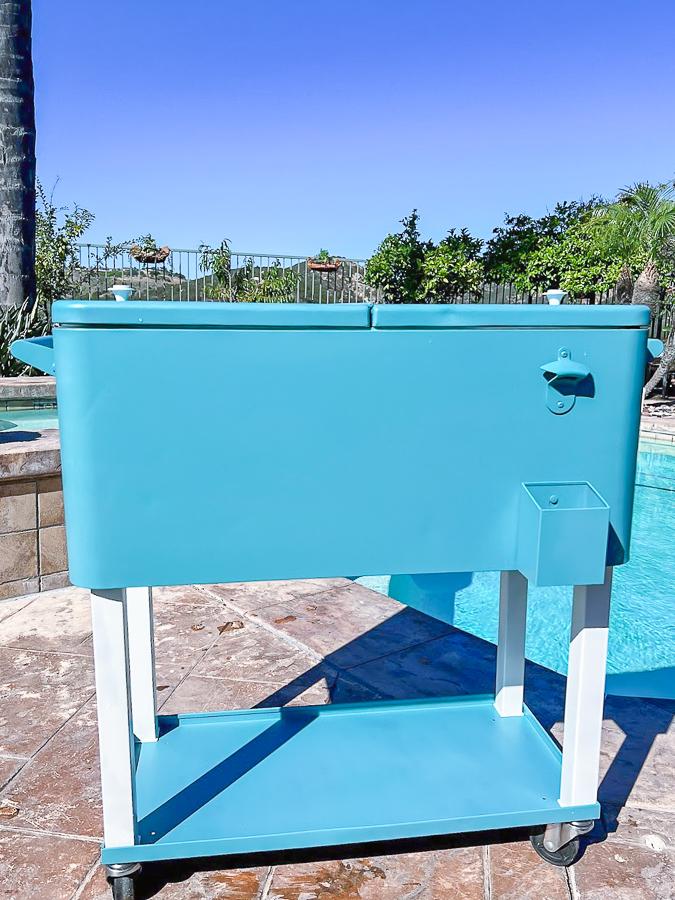
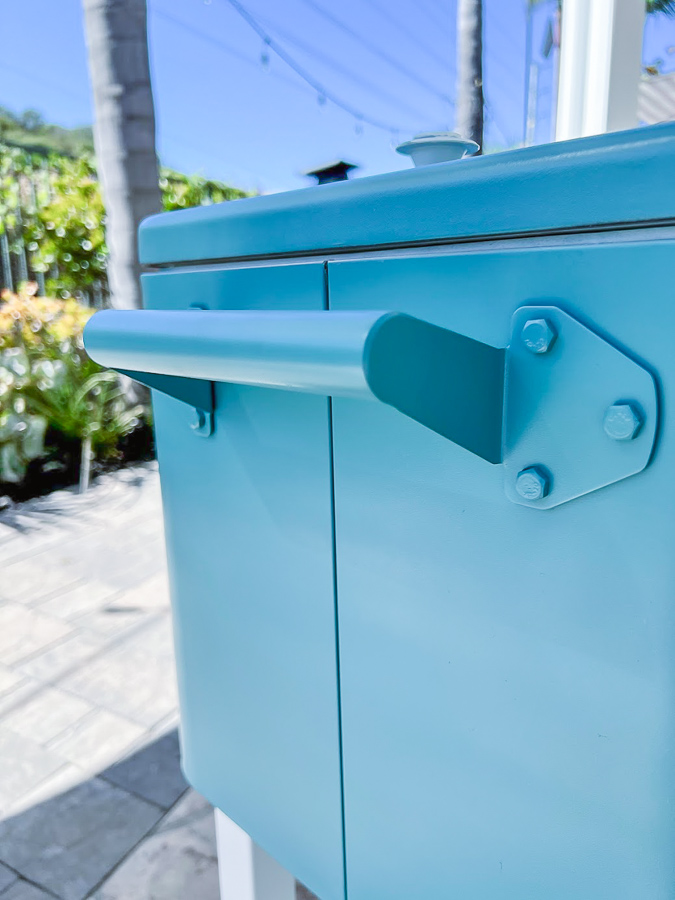
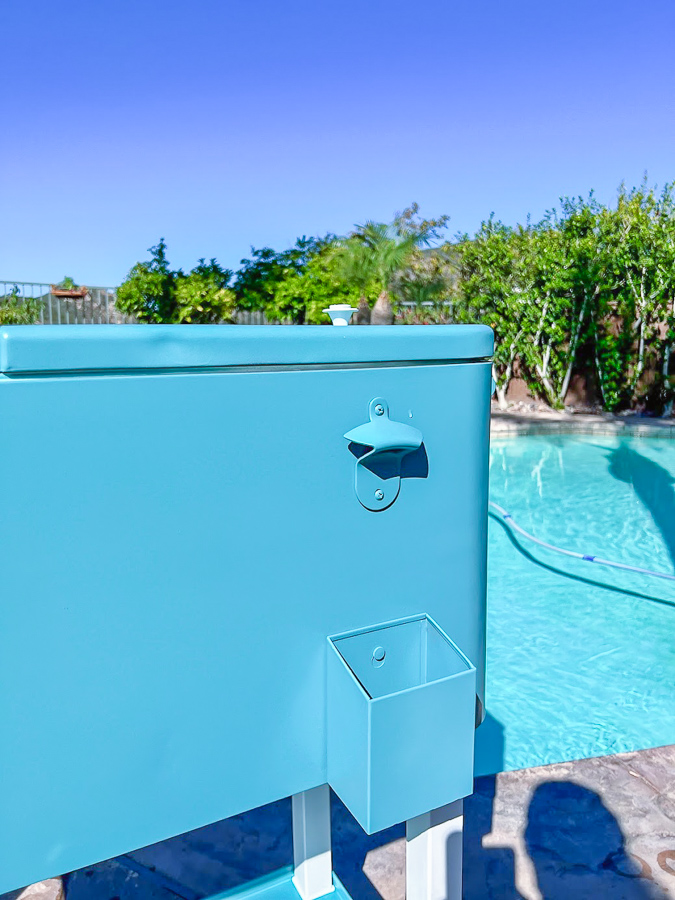
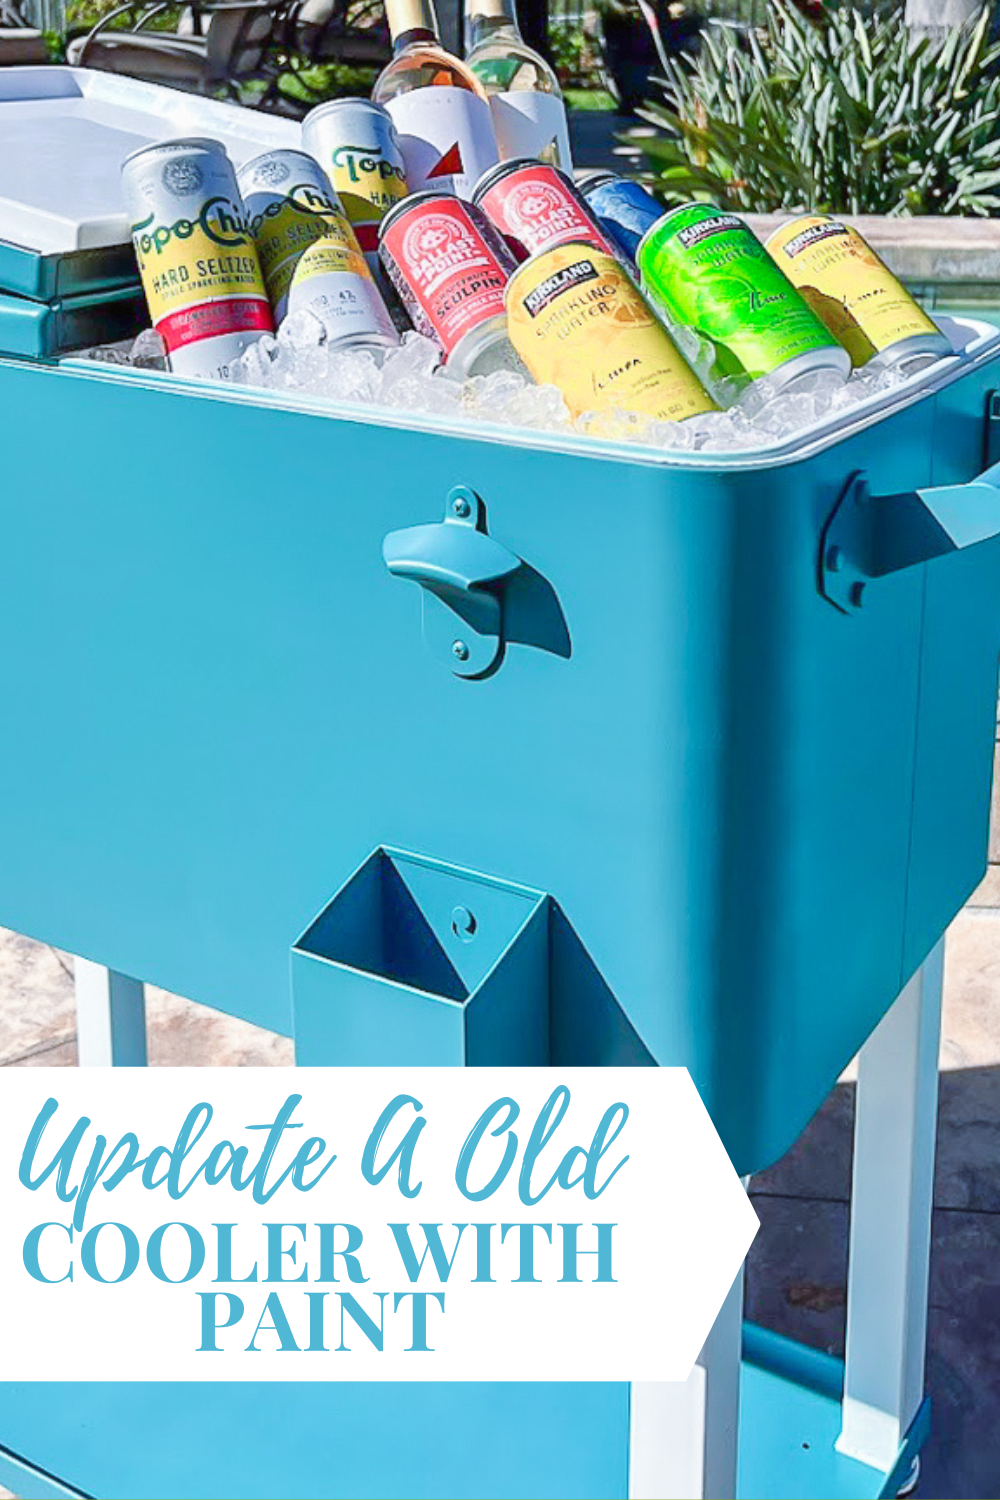
One of our favorite things to do is entertain friends and family with backyard barbecues. So when my neighbor offered us this rolling cooler I knew we would put it to good use! It was in great condition, minus a few small dents and just a little dirty so I decided to give it a fun retro vibe, think 1970’s VW Bus!
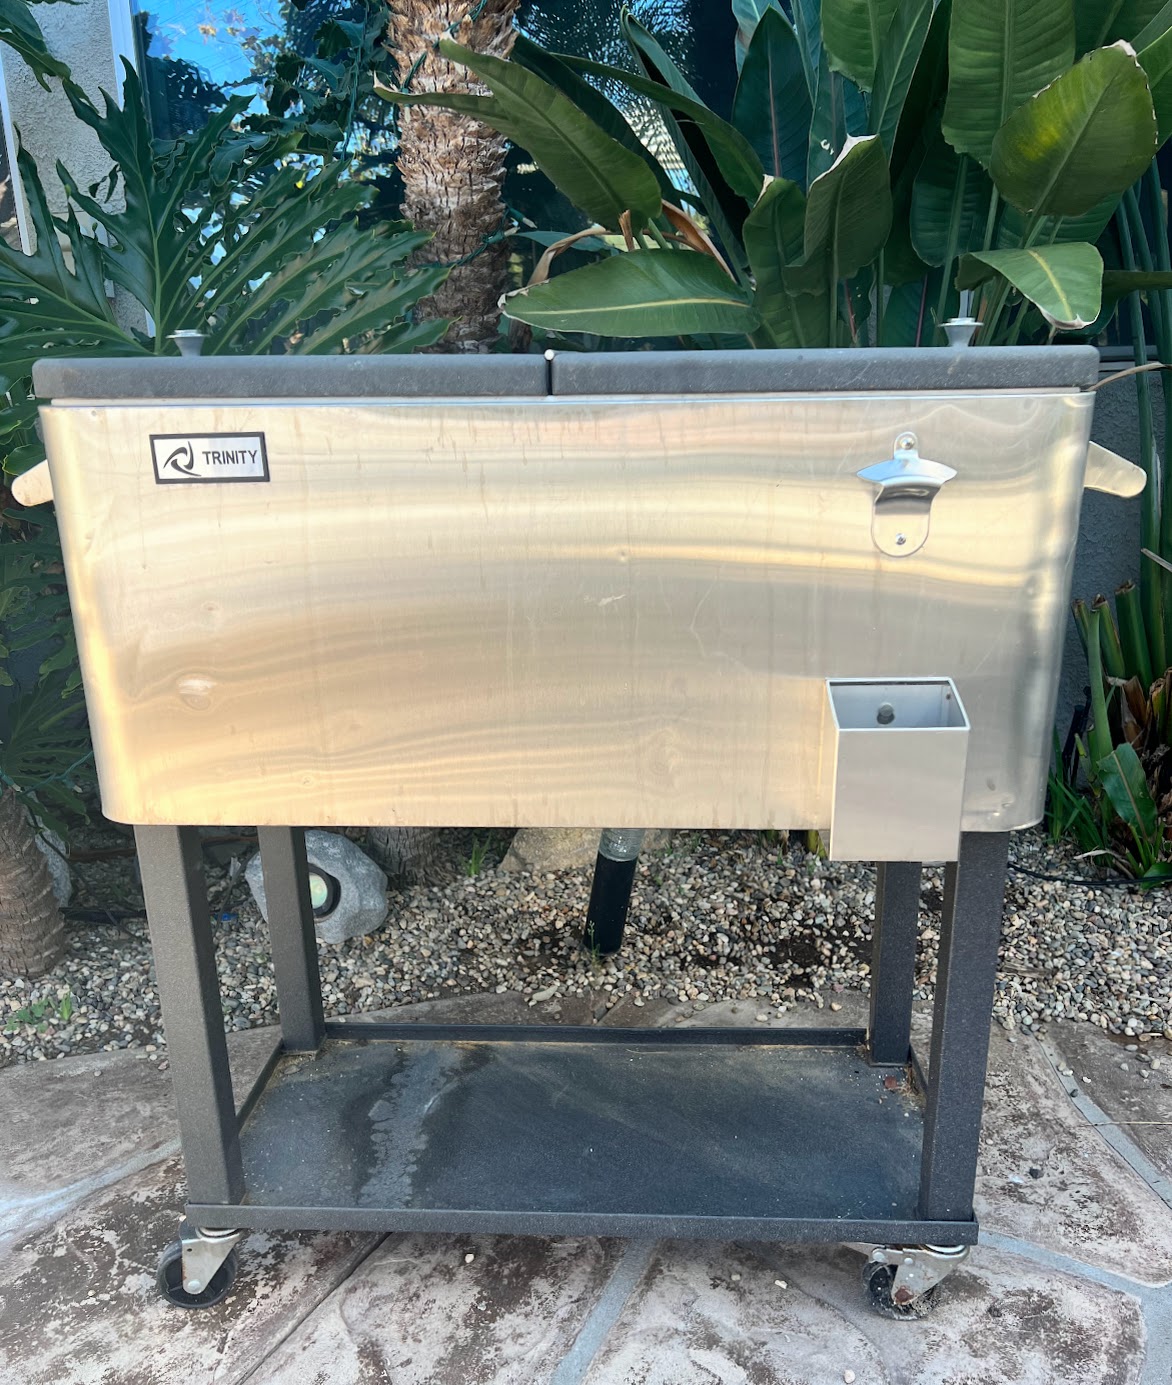
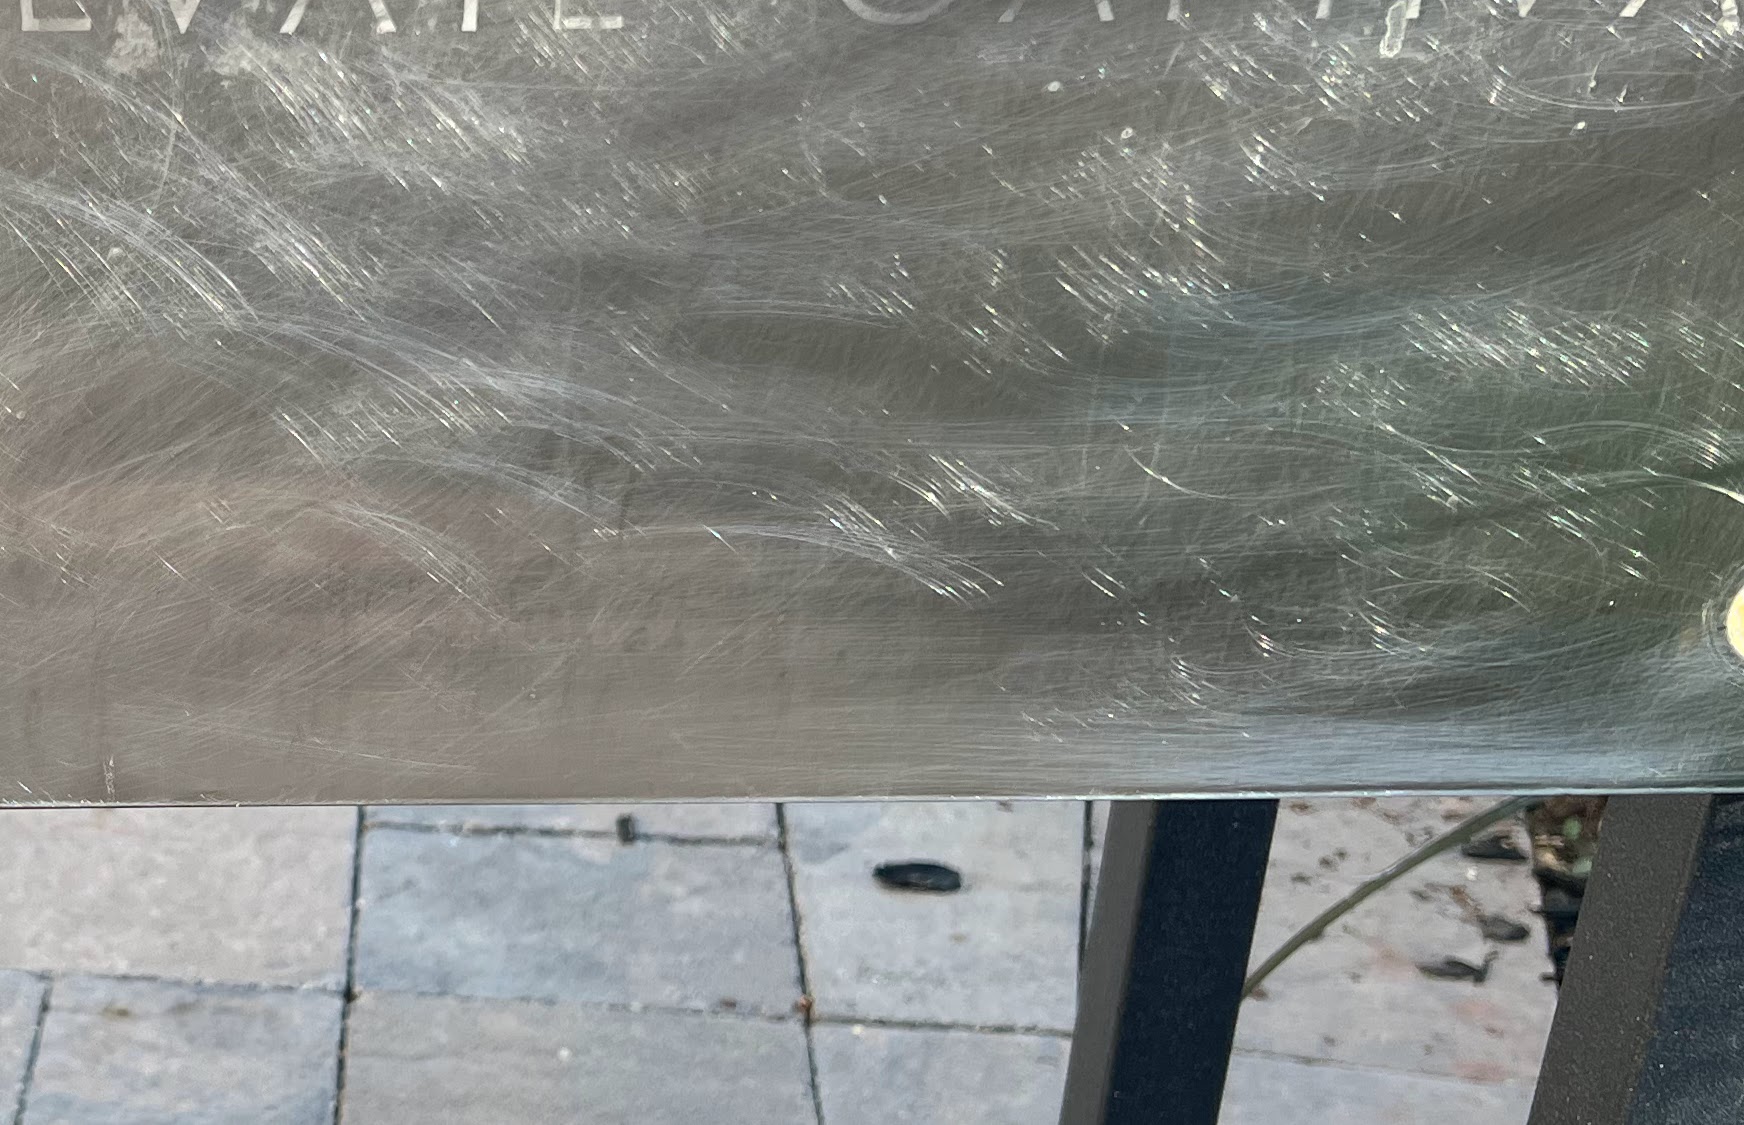
Here is the before
Affiliate links are listed below
Materials Needed
Before we dive into the step-by-step process, let’s gather the materials you’ll need for this project:
Rolling ice chest with wheels *This one was large capacity with high-performance insulation
Sandpaper (medium and fine grit) 180 to buff the cooler and 400 to smooth after painting
Painters tape
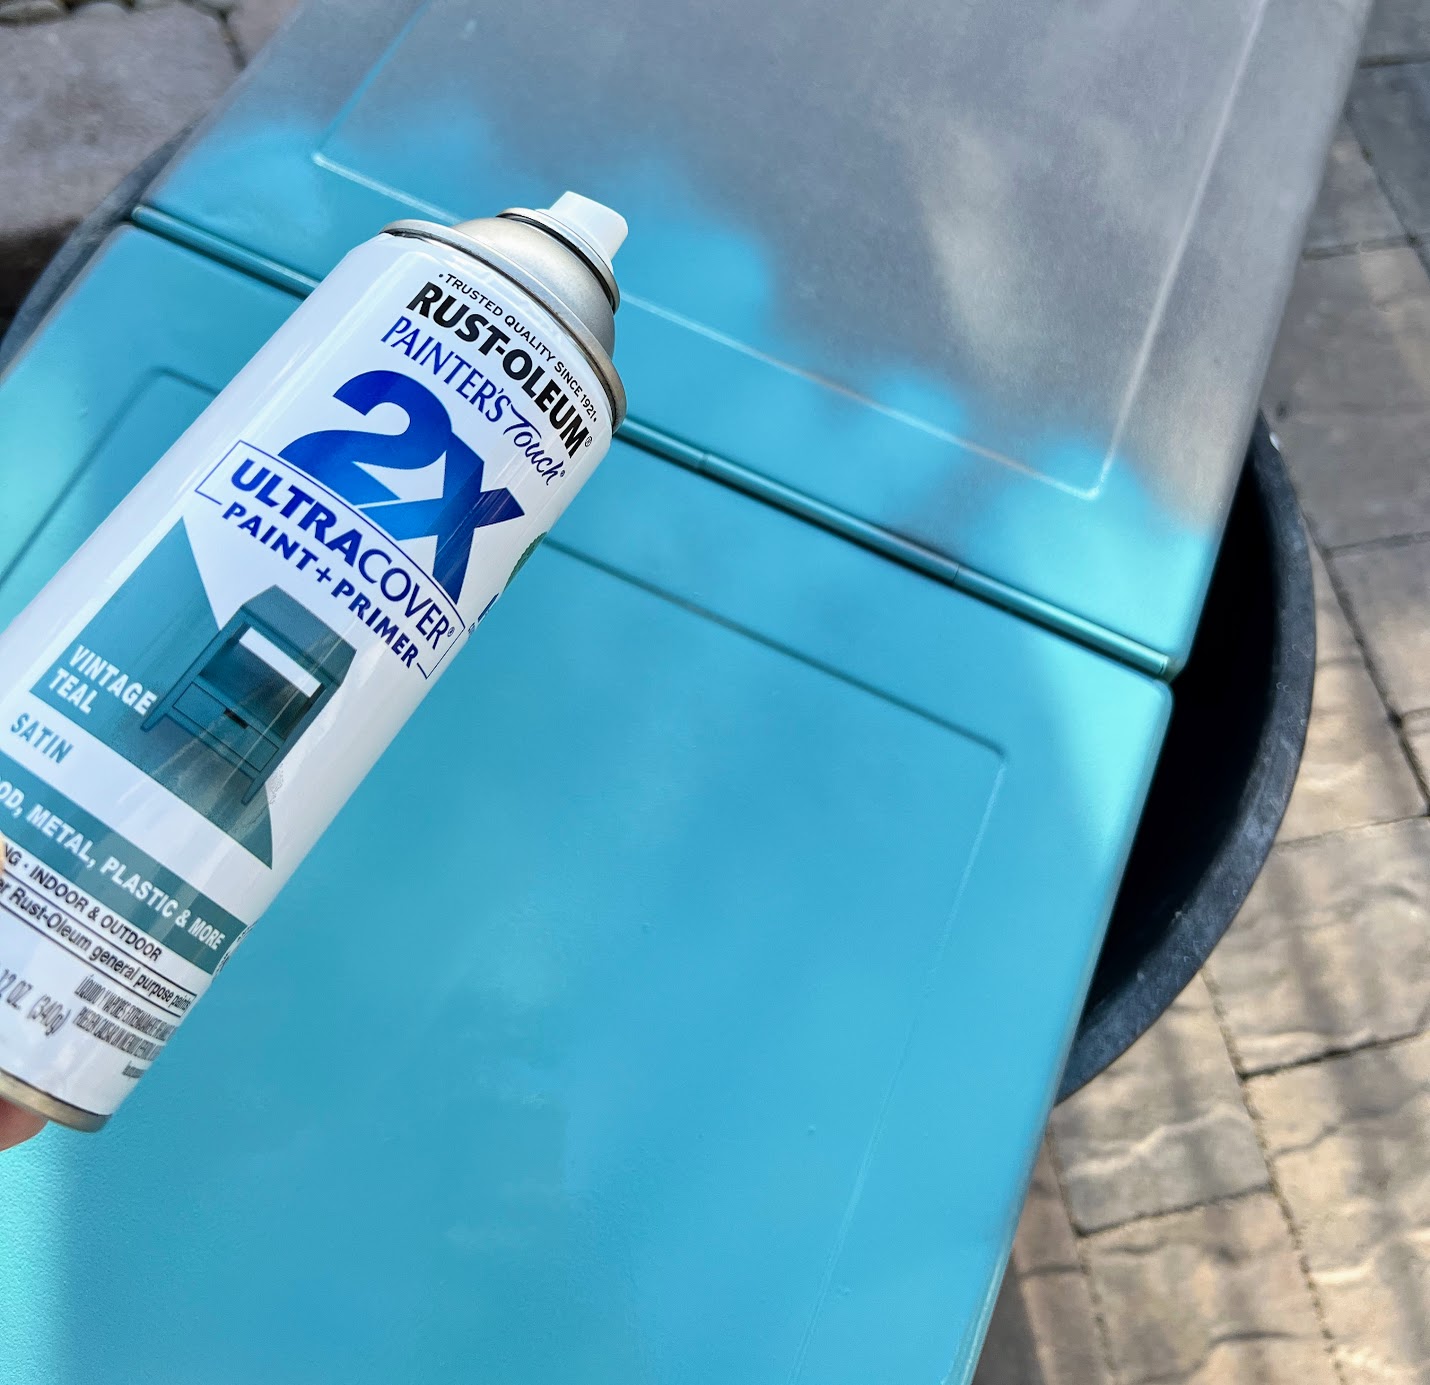
Rust-Oleum’s Ultra Cover 2X spray paint in the color vintage teal satin finish
Rust-Oleuim’s Ulra Cover 2x Spray paint White satin finish
Drop cloth or newspaper for the workspace
Cleaning supplies (soap, water, and or a brush)
Razor to remove stickers (optional)
Goo Gone or mineral spirits (if stickers were removed)
Tools like a screwdriver to disassemble the chest
Sealer (optional)

Preparation
Start by choosing a well-ventilated area to work on your ice chest, preferably outdoors. Lay down a drop cloth or several layers of newspaper to protect your work surface. If weather conditions are not great you will need to spray paint in a garage or a covered tent.
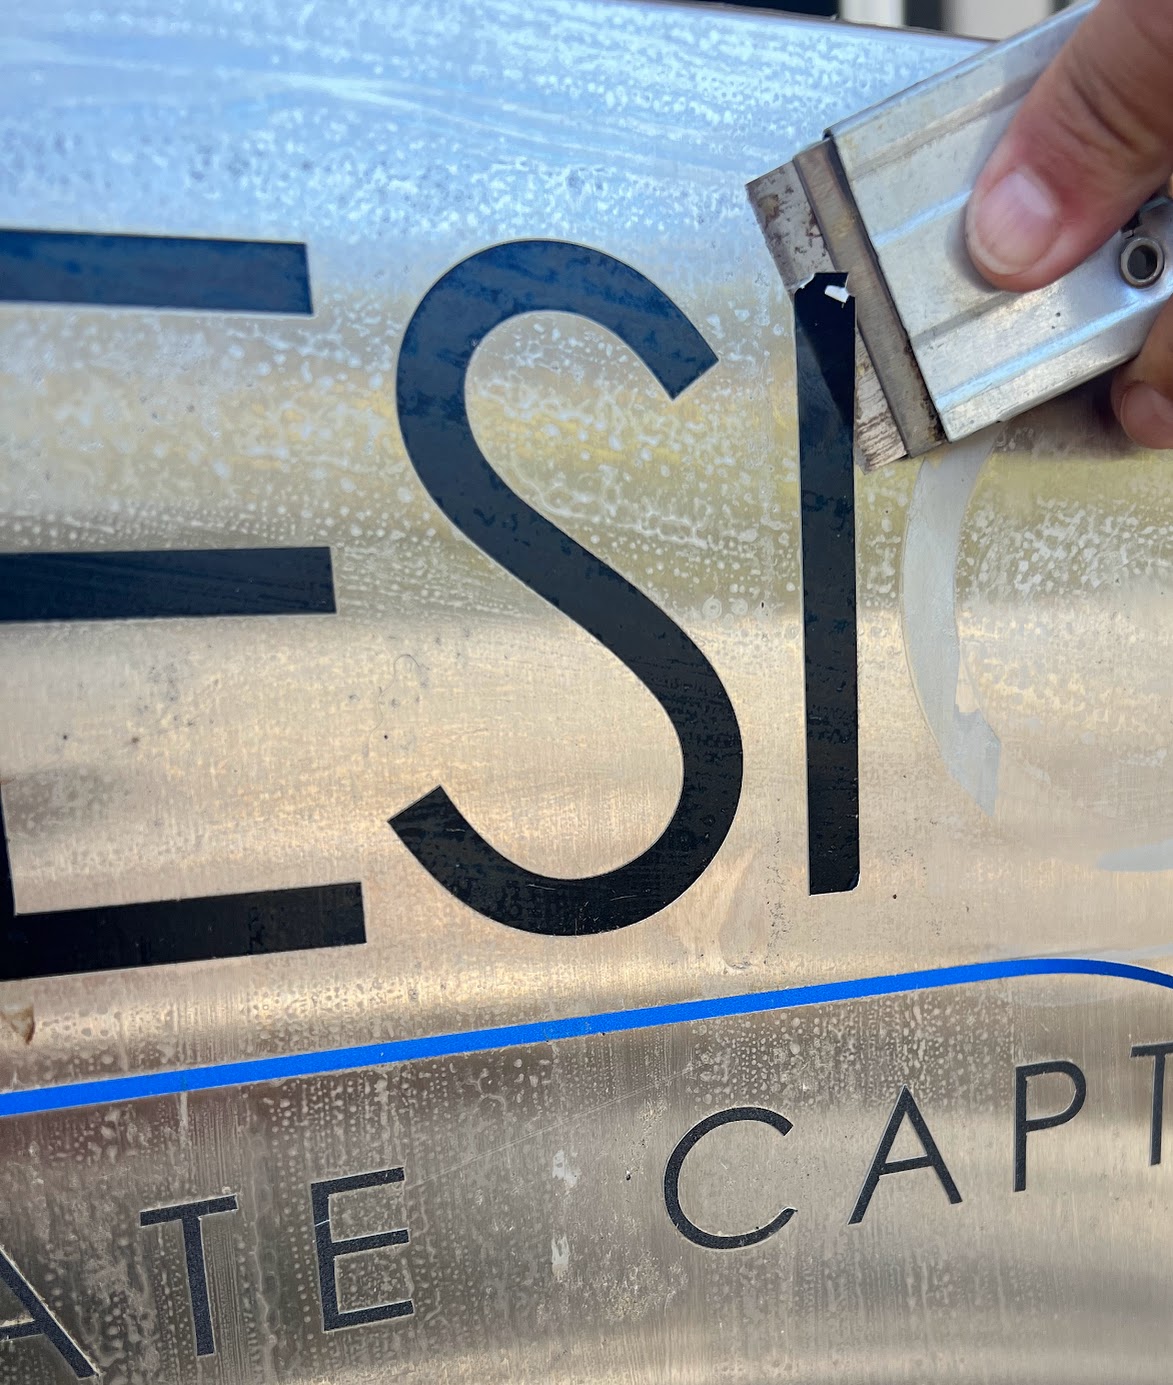
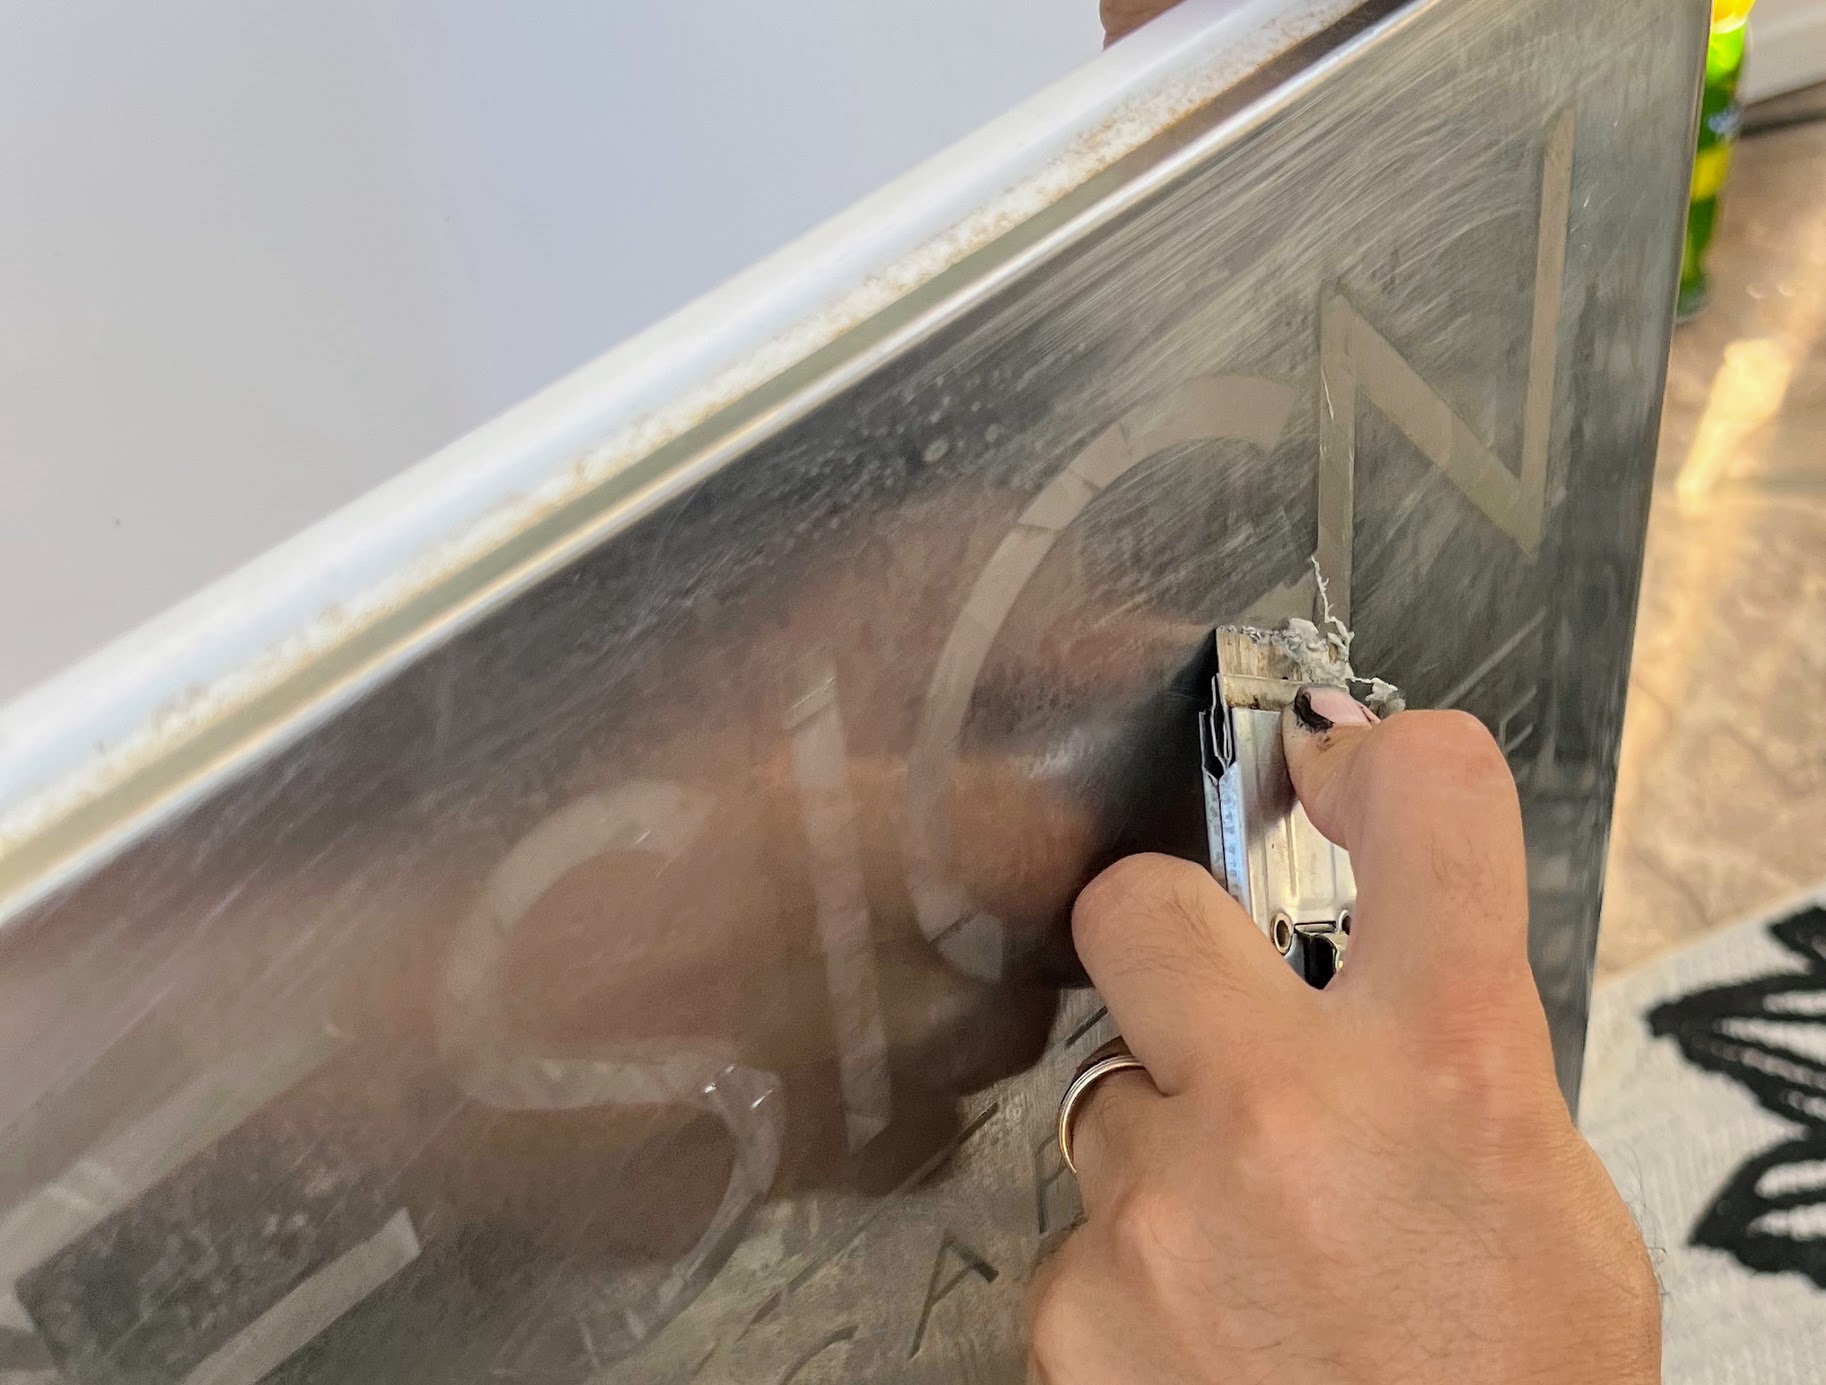
Next, thoroughly clean your ice chest inside and out. Use soap, water, and a brush to remove dirt, and grime. Use a razor to remove any residual stickers or adhesives. You might need to use Goo Gone to get everything off. Allow it to dry completely before proceeding. I would recommend taking apart the old cooler including the legs, wheels, bottle opener, and any other accessories attached to the cooler.
Sanding
To ensure proper adhesion of the spray paint, lightly sand the exterior surface of the ice chest using medium-grit sandpaper. This will create a rough surface for the paint to grip onto. After sanding, wipe away any dust with a clean, dry cloth. Note: You can also use steel wool, grade zero or one, to scuff the surface so the paint has something to adhere to.
Tape
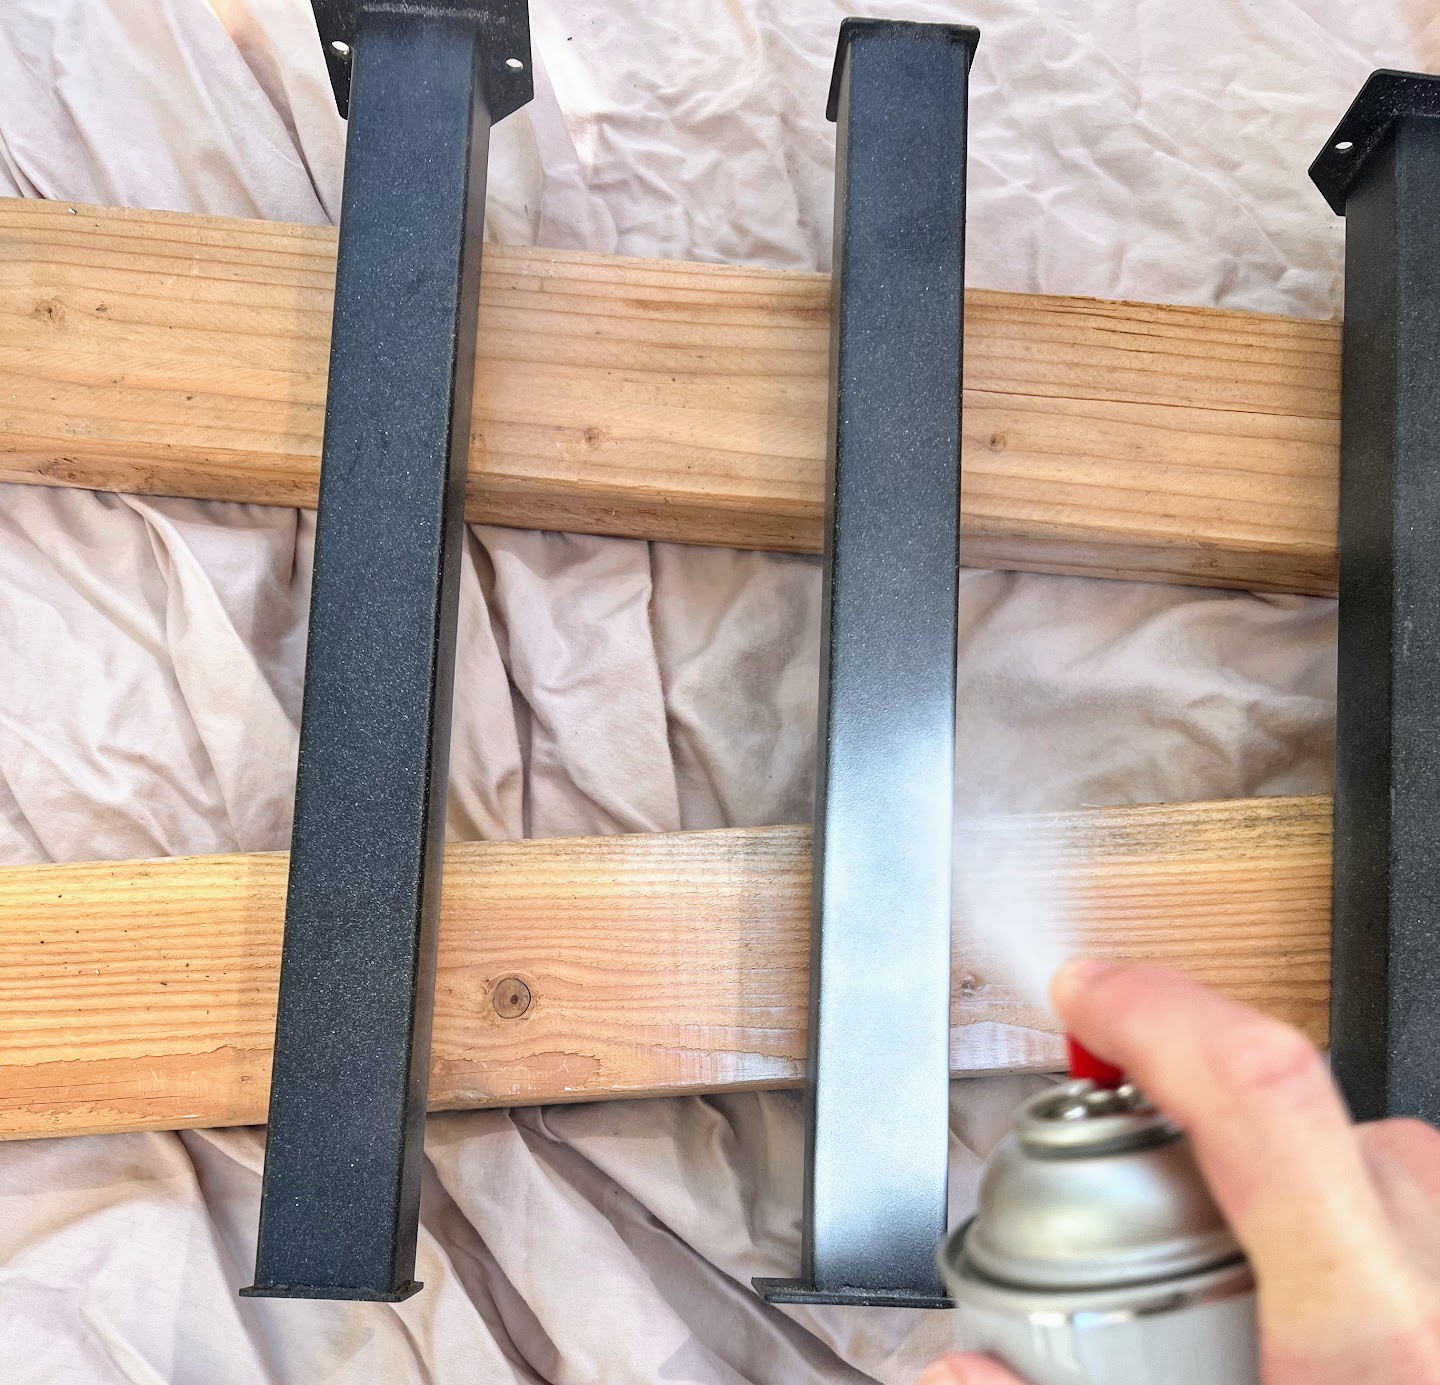
Use painter’s tape to cover any areas you don’t want to paint, such as handles, hinges, or wheels. This step ensures that these parts remain functional and free of paint residue.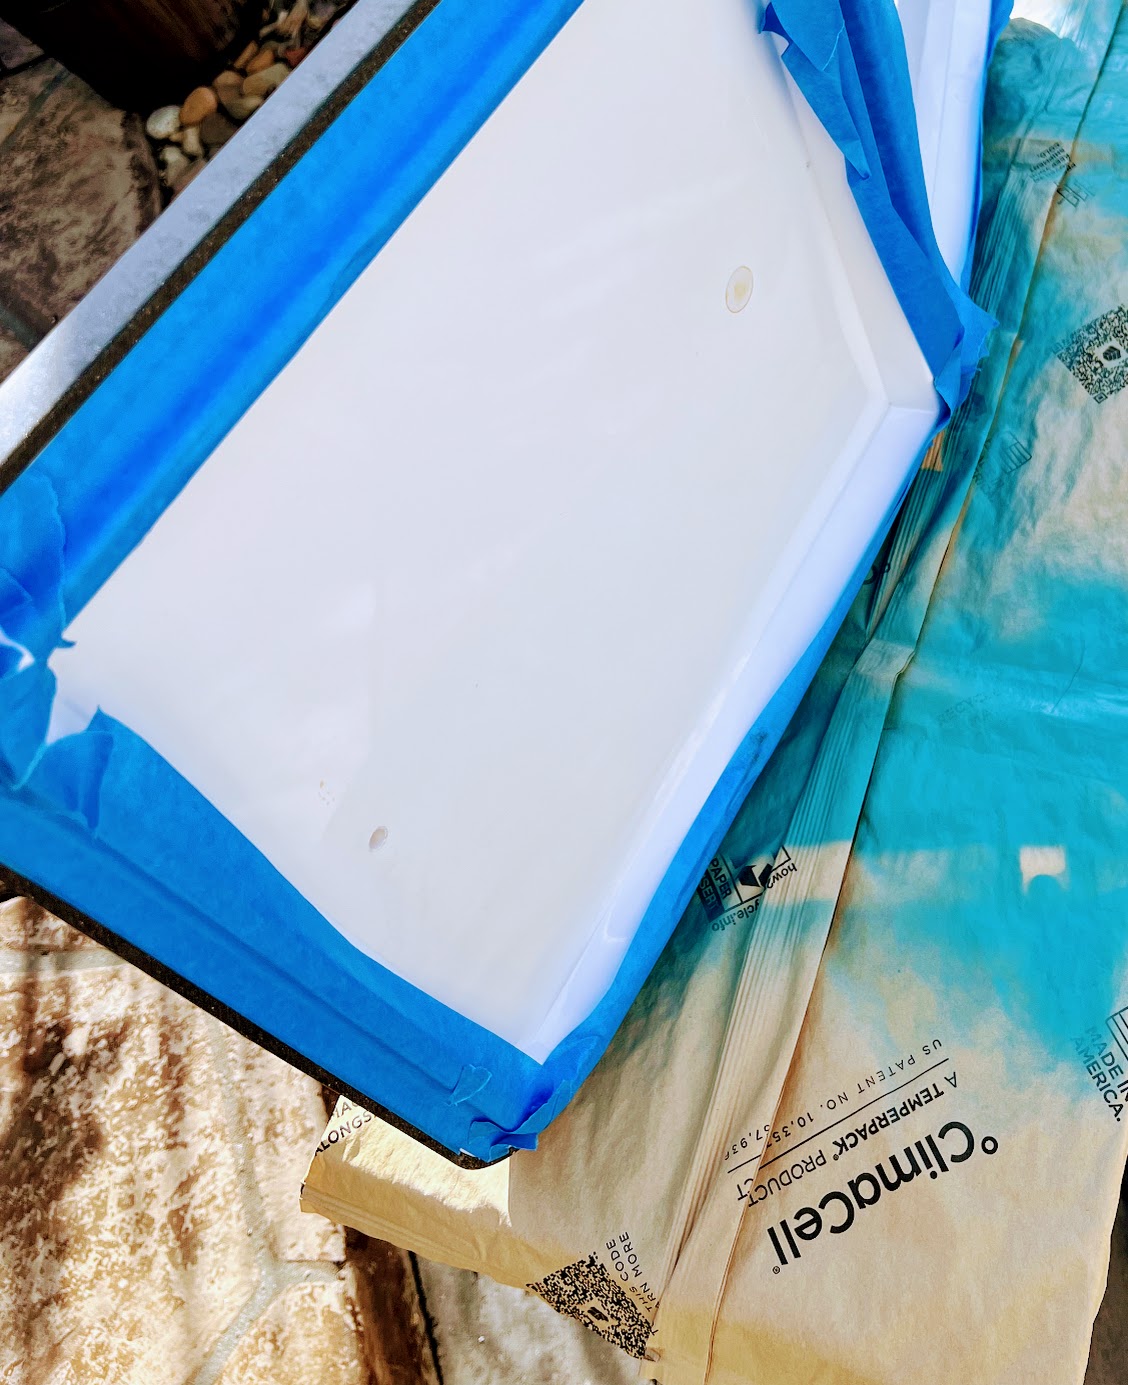
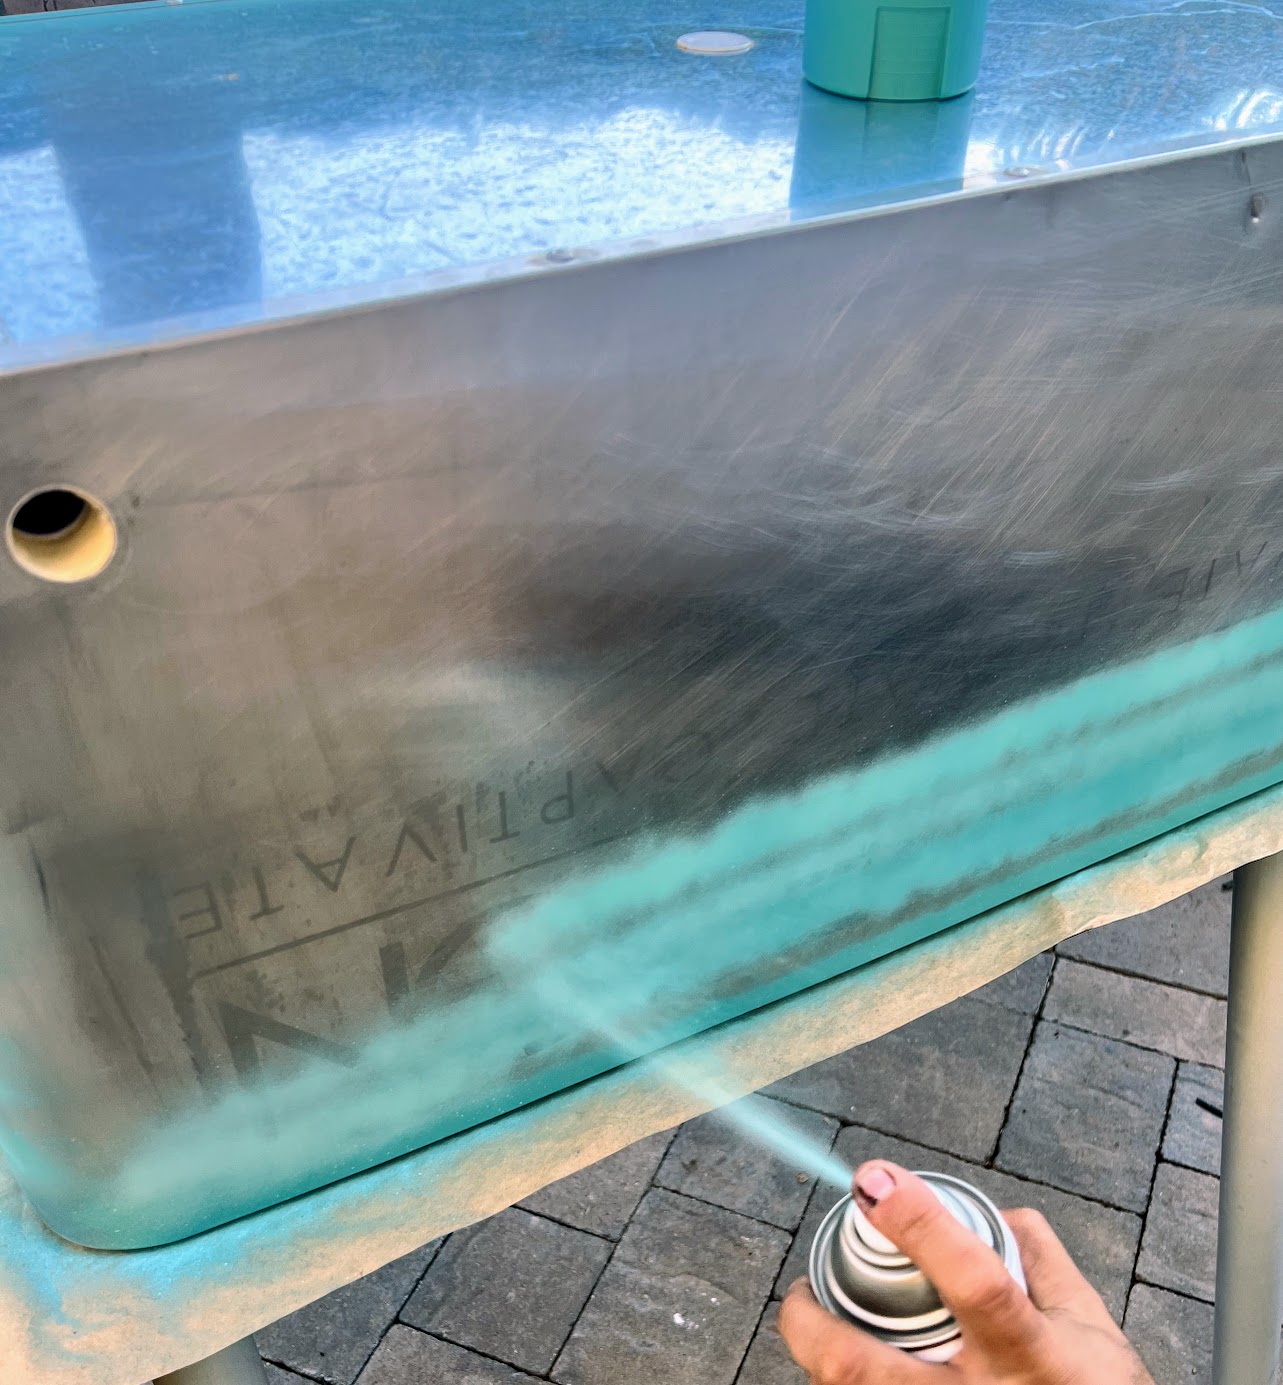
Begin Spray Painting
I chose Rust-Oleum’s Ultra Cover 2X because it bonds to plastic and metal with twice the coverage. Follow the manufacturer’s instructions for drying times, typically around 15-30 minutes.
My hubby helped me a ton with the paint since he’s a pro at spray painting all the things for his truck!
You can opt for a single color or get creative with multiple colors, patterns, or even stencils. I painted the legs white to give it more of that retro look.
 .
.
I gave it light sand in between coats with the 400 grit sandpaper to get rid of any rough spots that sometimes can happen. 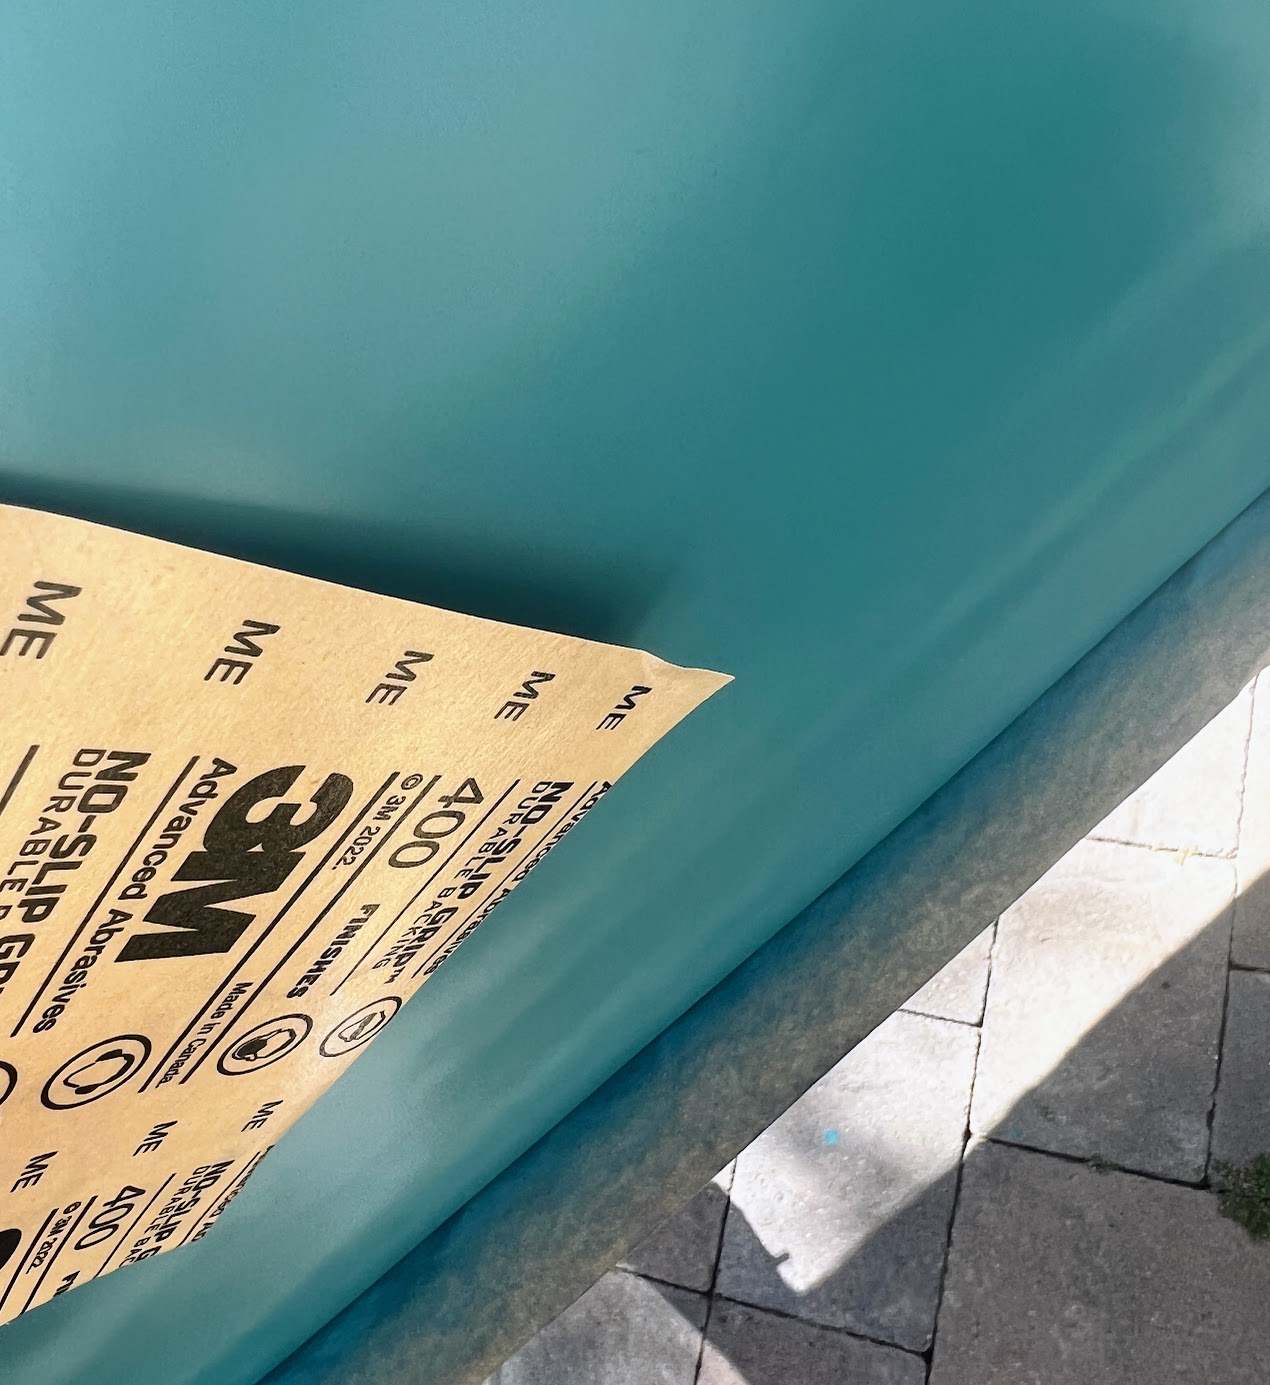
Once you’re satisfied with the paint job, let it dry completely for several hours or overnight. Then, remove the tape carefully.
Protect with a Sealer
To protect your newly painted ice chest from the elements and wear and tear, it’s a good idea to finish with a clear acrylic sealer spray. This will provide a protective coat and give your cooler a glossy finish.
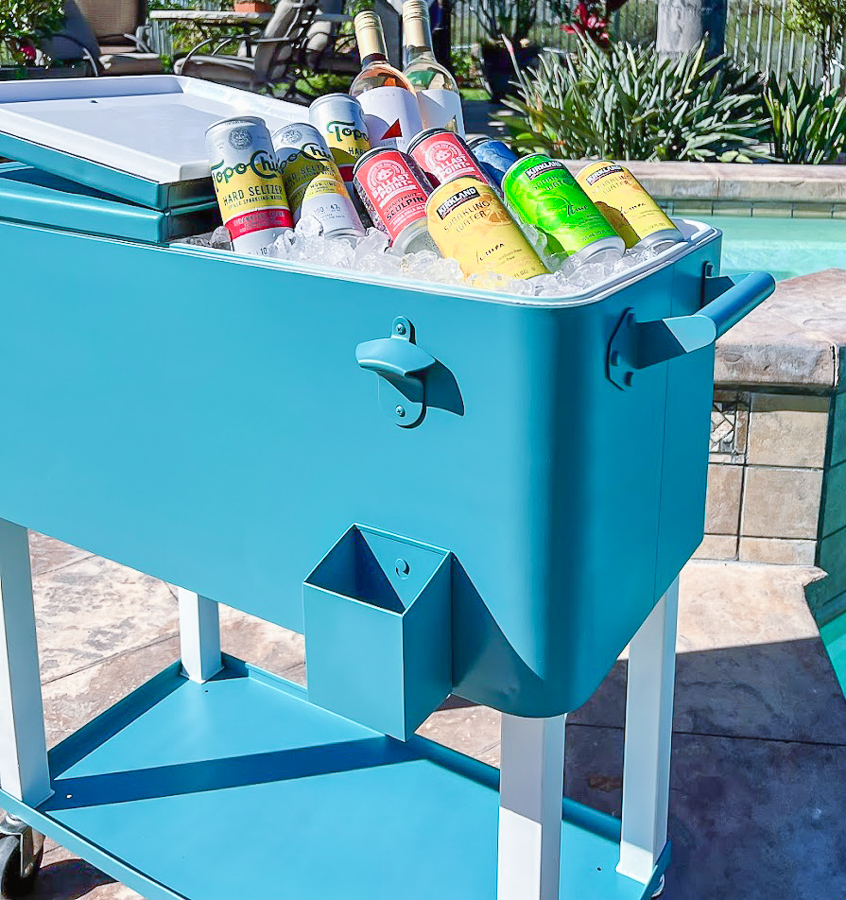
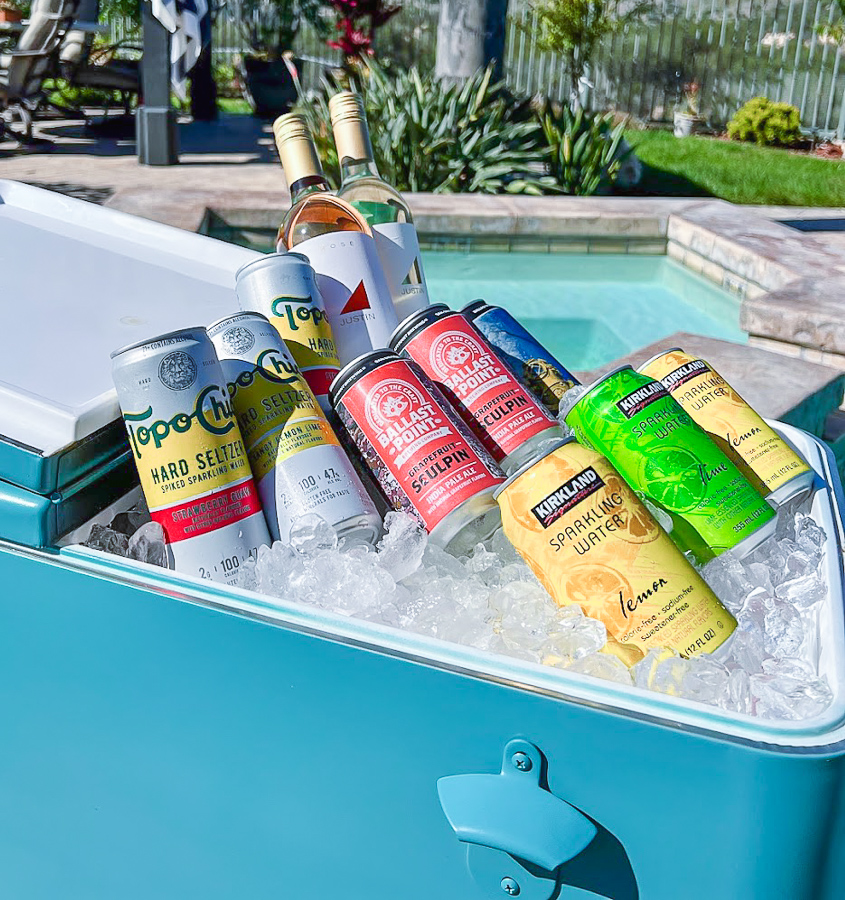
You can put all sorts of items in this from water, soda, alcoholic beverages, and sparkling cider! You can use the tray at the bottom for cups and napkins!
So if you ever run across one of these at the thrift store or marketplace, make sure to grab it, local store prices are selling them close to $200 new.
Enjoy your new and improved revamped rolling ice chest!
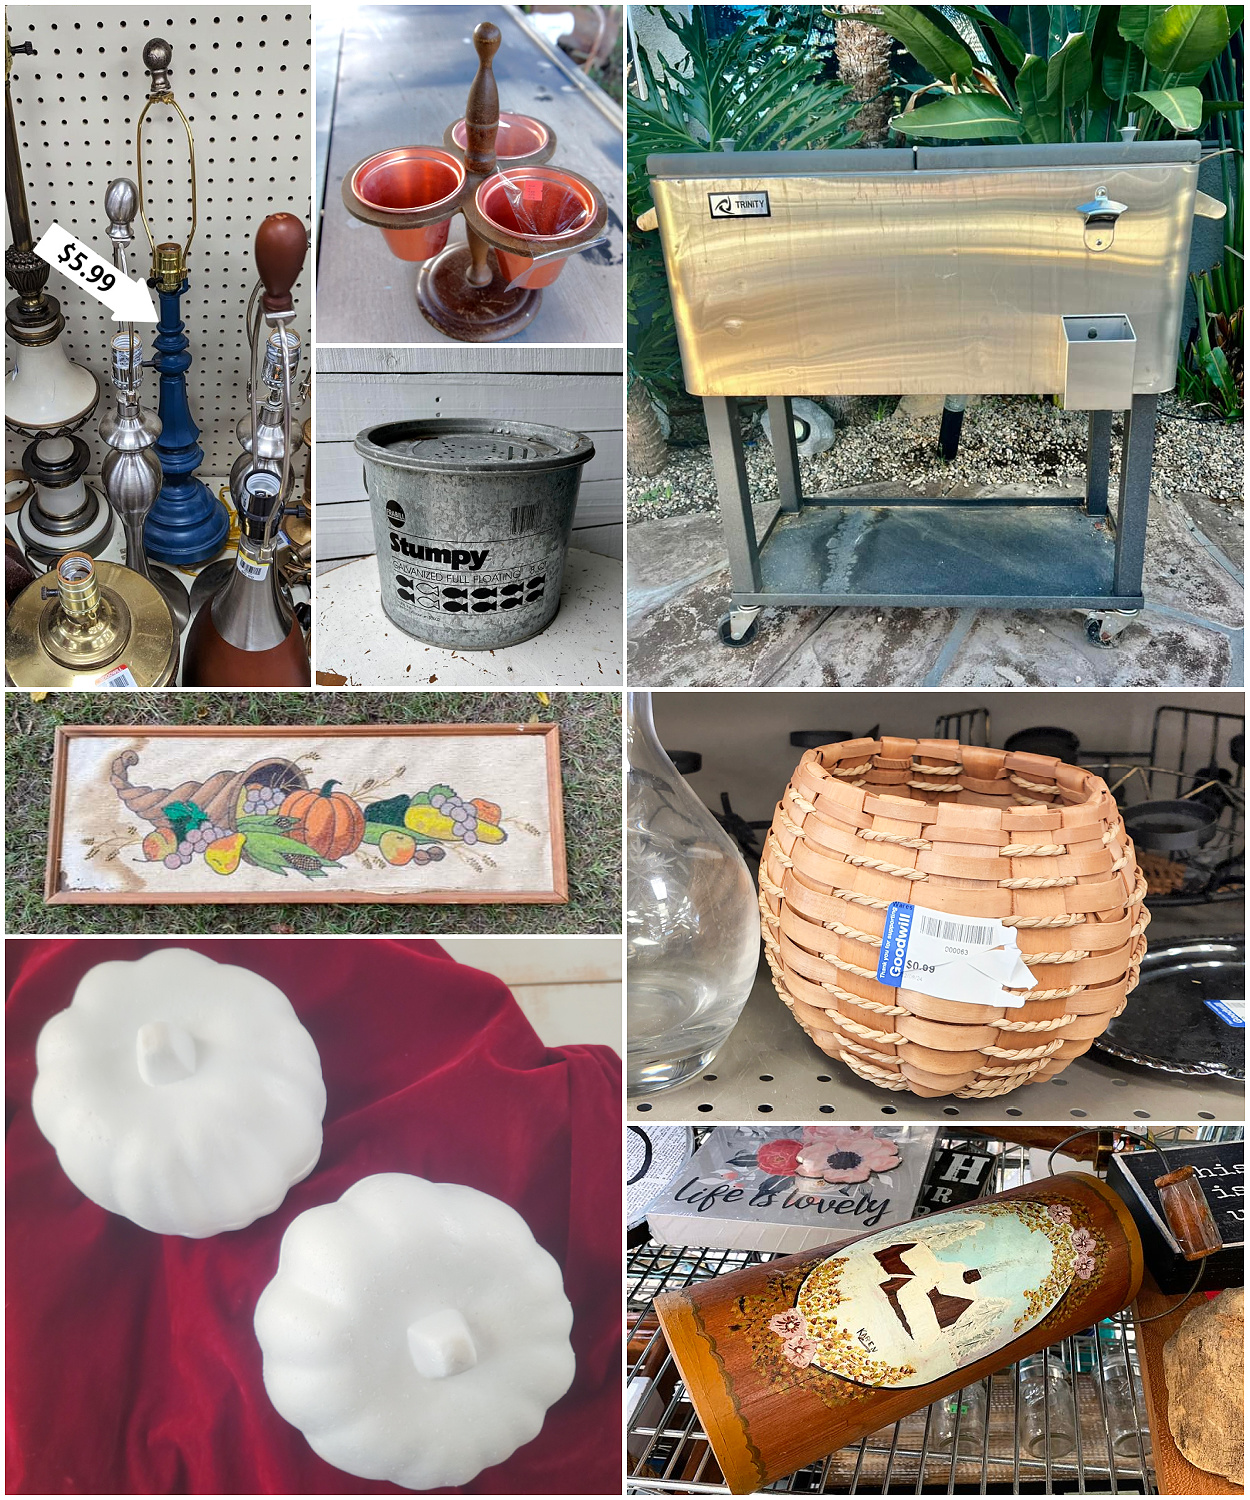
It’s time to check out all of the other thrift store projects for the month of October, I can’t wait to see what all the ladies made over this month! Thank you so much for stopping in today!
Painting A Thrift Store Lamp My Repurposed Life
Thrift Store DIY Upcycle Petticoat Junktion
Minnow Bucket Pumpkin With Dollar Tree StencilOrganized Clutter
Updating a Rolling Cooler With Spray Paint My Uncommon Slice of Suburbia
Updating Fall Thrift Store Art Shop At Blu
Boho Pumpkin with All-Natural Craft Supplies Sadie Seasongoods
DIY Velvet Pumpkins Domestically Speaking
Vintage Wooden Bucket Makeover House of Hawthornes

.


What a great makeover, Kristin- and such thoughtful neighbors! It looks fab now, just like you said- a retro VW bus vibe. And now I want a Topo Chico!
Ha Ha, Love a Topo Chico by the water!
You cannot go wrong with teal beside the pool! Great way to update the cooler!
Thank you Pam!
I love this makeover! Such a gorgeous color and something you’ll get so much use with.
Thank you Maryann!
Much much better! Love the color!
Thank you Carlene!
Love the color you chose! I definitely see the VW bus inspiration, which is really fun.
I love that color Kristin! It’s perfect. Thanks for all the great tips to make this project come out perfect.
pinned
gail
Wow! What a fantastic transformation. I love those wheeled coolers, but yours is my favorite!