
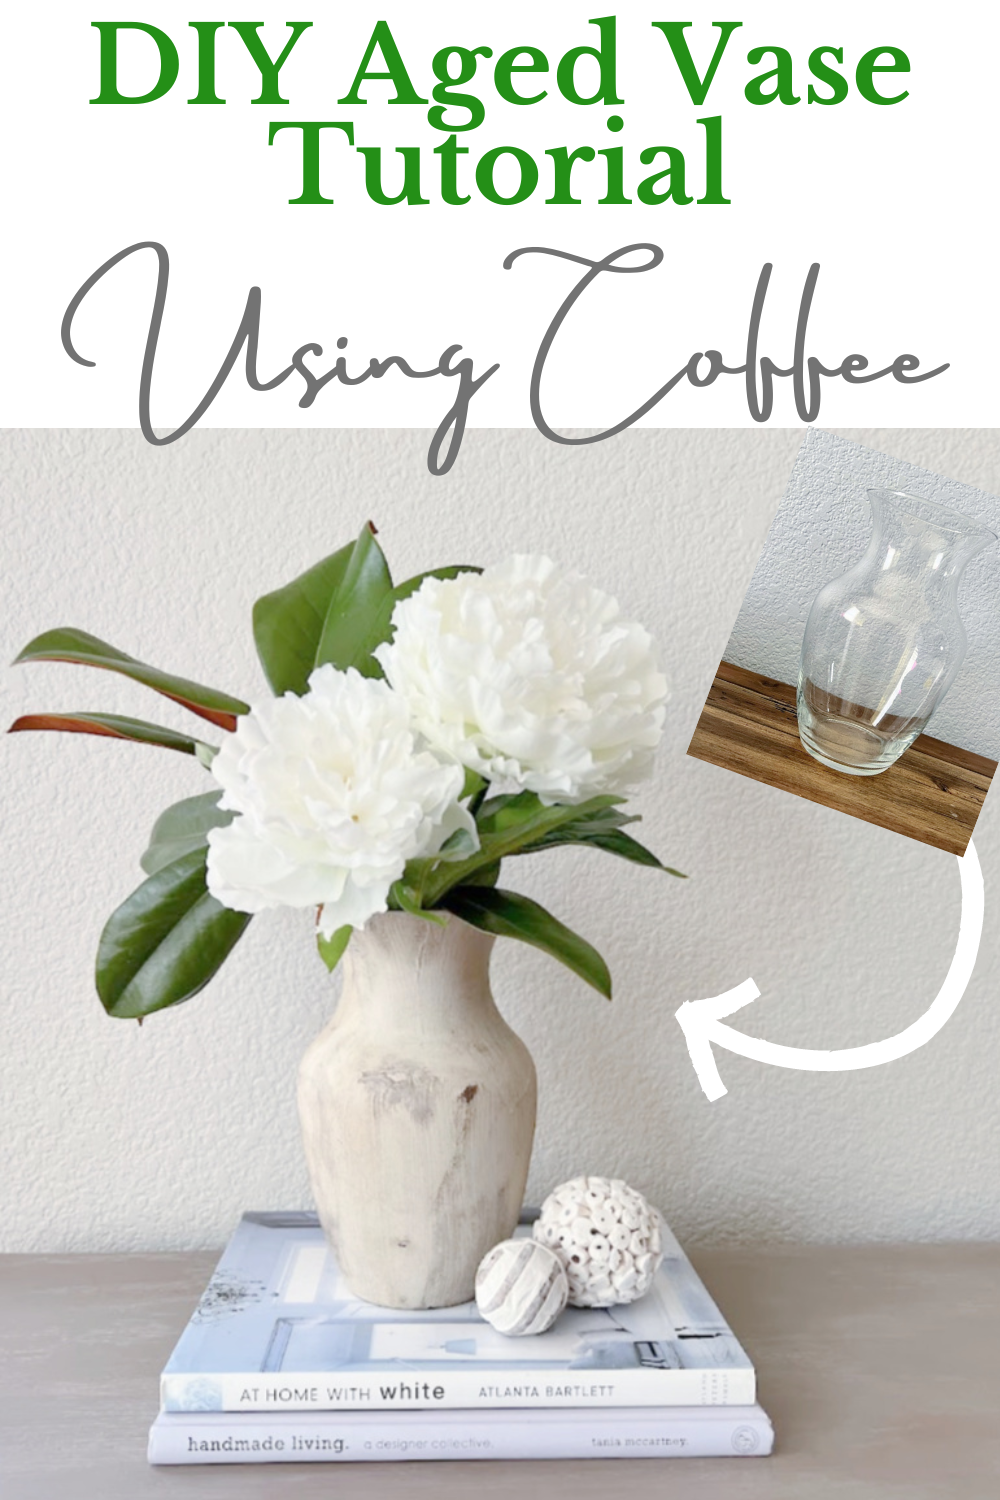
DIY Aged Vase Tutorial using Coffee, Baking Soda & Paint
Today I’m sharing how to give a glass vase an aged look by using coffee grinds, (yes, you heard that right, coffee) baking soda and paint, most of these items, you most likely have laying around the house.
I have always had a love for Aged Pottery and Old World design, thankfully it has made a huge comeback in the past few years. However, Authentic vintage pots and vases are extremely pricey, so I went on a mission to make my own.
The best part, this was such an easy DIY project and it completely transformed the look of this glass vase!
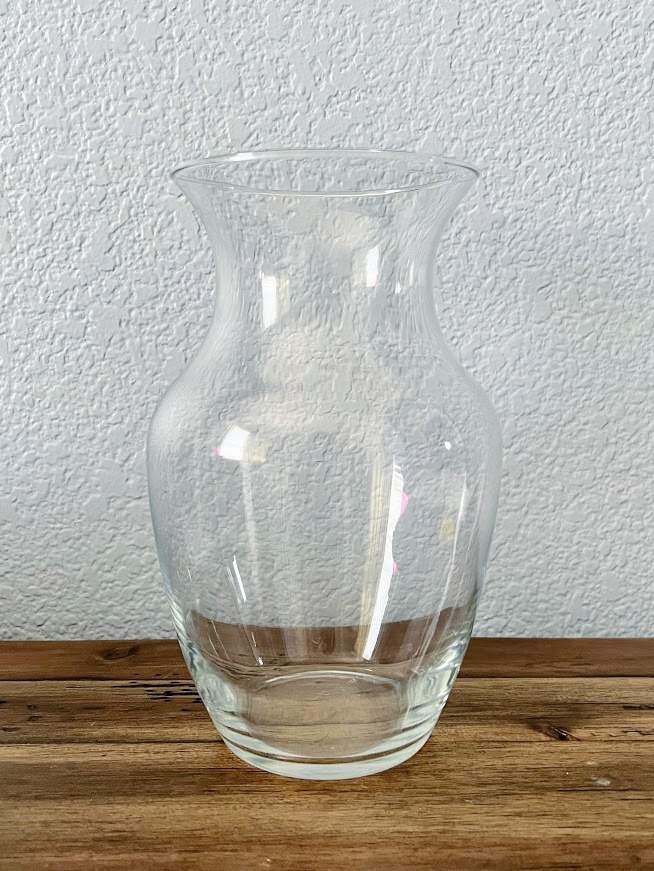
I honestly can’t remember the last time I purchased a vase at full price. It is one of those items I always stock up on when at my local thrift store, they usually cost around 50 cents, if you don’t have any luck at the thrift store, the dollar store usually carries them or you could shop your local garage sales for some old glass vases.
It’s thrift store decor day so scroll all the way to the bottom of this post for more beautiful thrift store makeovers!
Affiliate links are listed below
Supplies
Pot / Vase
Spray Paint
Baking Soda
Paint or chalk paint
Coffee Grounds
A Stir Stick
Sand Paper
Paintbrush
Plastic cup
Sealant (optional)
Disposable Gloves (optional)
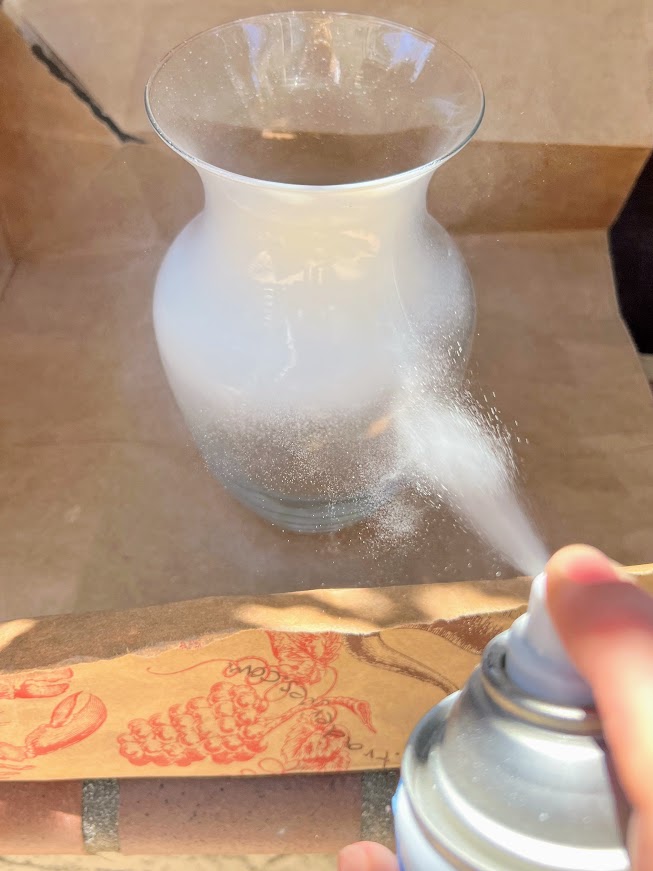
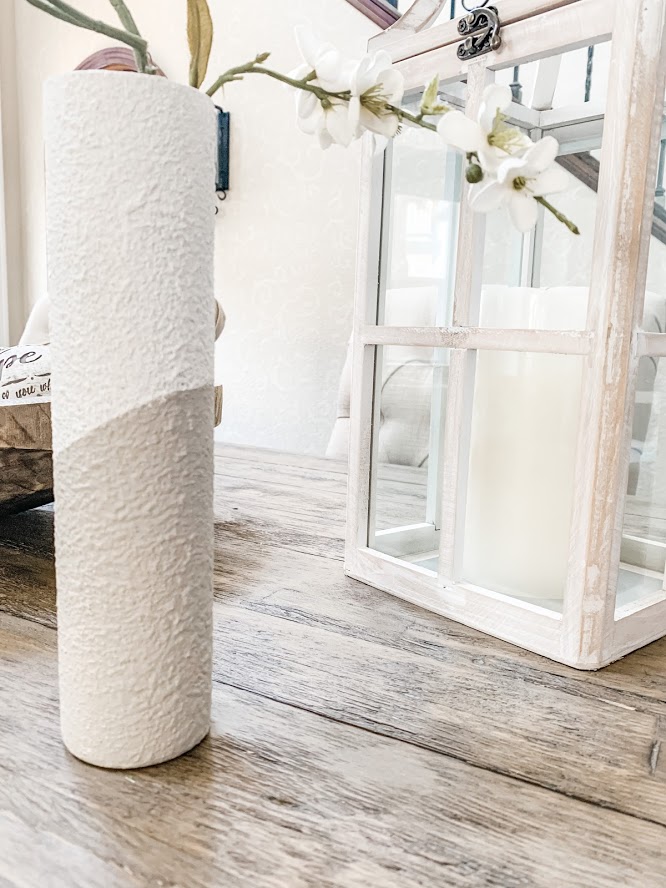
Step 1 – Spray paint the vase
First thing, give your vase a base layer using spray paint, you will want to cover the entire vase. I used Rustoleum primer and paint in 1, in the color white.
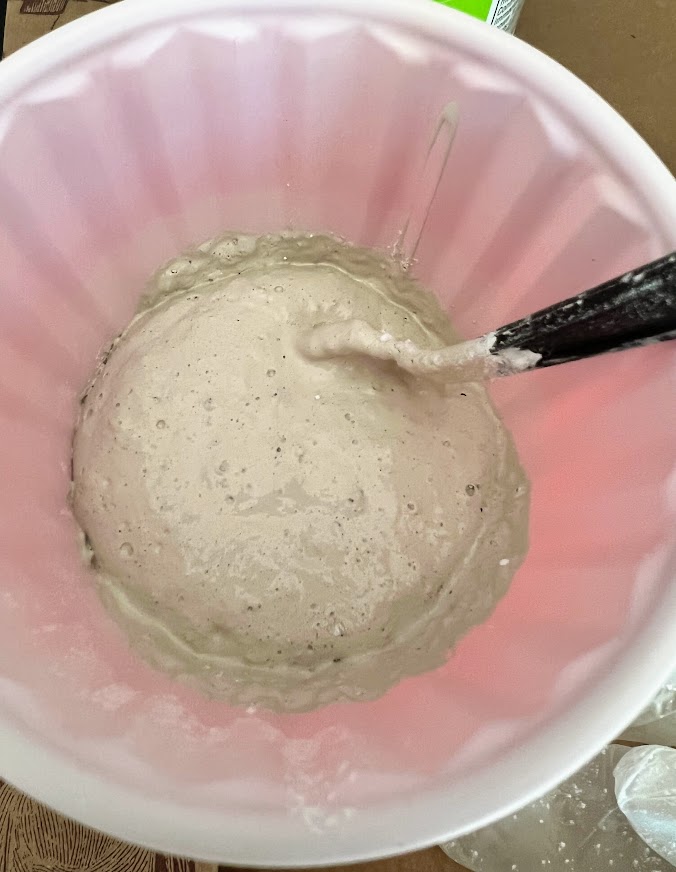
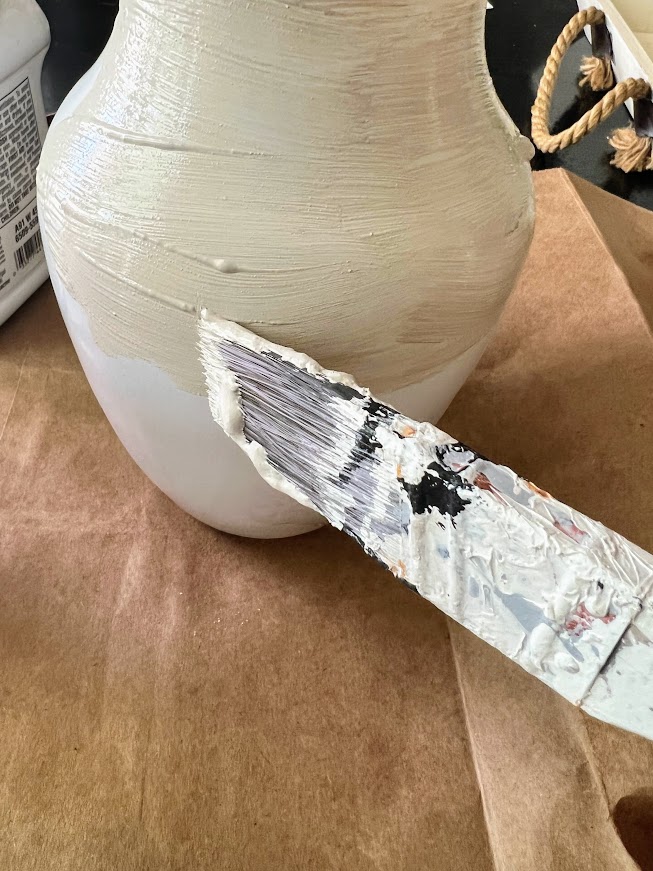
Step 2: Mix baking soda and paint to create texture
Combine the baking soda with the paint, I would use either white paint or tan color paint. The color I used was Bleeker beige. The combination of the two creates a thick paint that will add a little texture to the vase. Eyeball the amount of baking soda that you add in until you have reached your desired consistency. The more baking soda, the thicker and more texture you will have. Mine was pretty thick. It dries up quickly, so you will need to use this right away. Using a paintbrush, brush the mixed coat of paint onto your vase. You will want to change your brush strokes in varying directions so that your brush marks are not perfect. Because my mixture was thick, I only needed one coat, if you have a thinner mixture you may need a second coat, just make sure it dries in between coats.
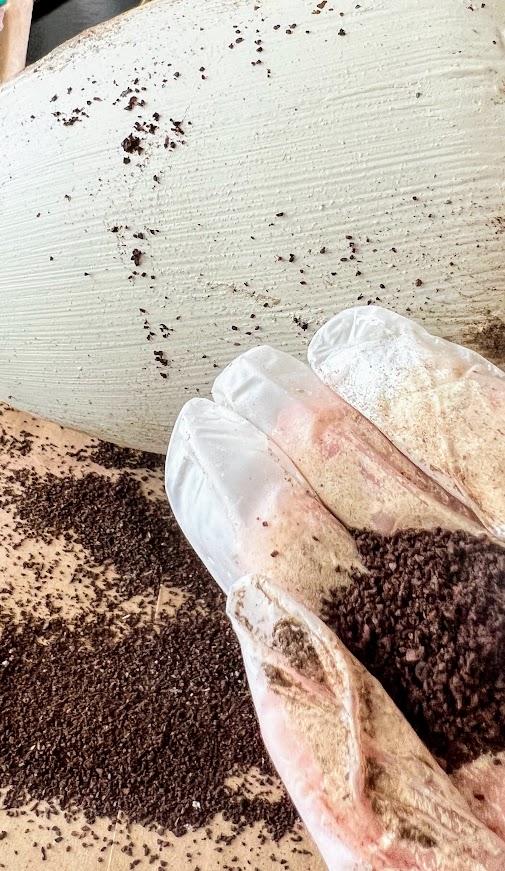
Step 3: Rub coffee all over the vase
I would use a pair of disposable gloves for this step since it’s pretty messy. Pour some coffee grounds into the palm of your hand and start to rub the grounds into your vase using your fingers in a circular motion. There really is no right or wrong way, just keep rubbing the grounds into the vase until you are happy with how it looks. I found if you use a little bit of water, and wet your fingertips with the coffee grounds on them it comes out to look like more of a stain. (You could also use a damp paper towel as well)

In the places where it was a little too dark, I just added a little bit of my paint mixture right over it and smoothed it out. Continue adding/removing the coffee grounds mixture until you have achieved your desired look.
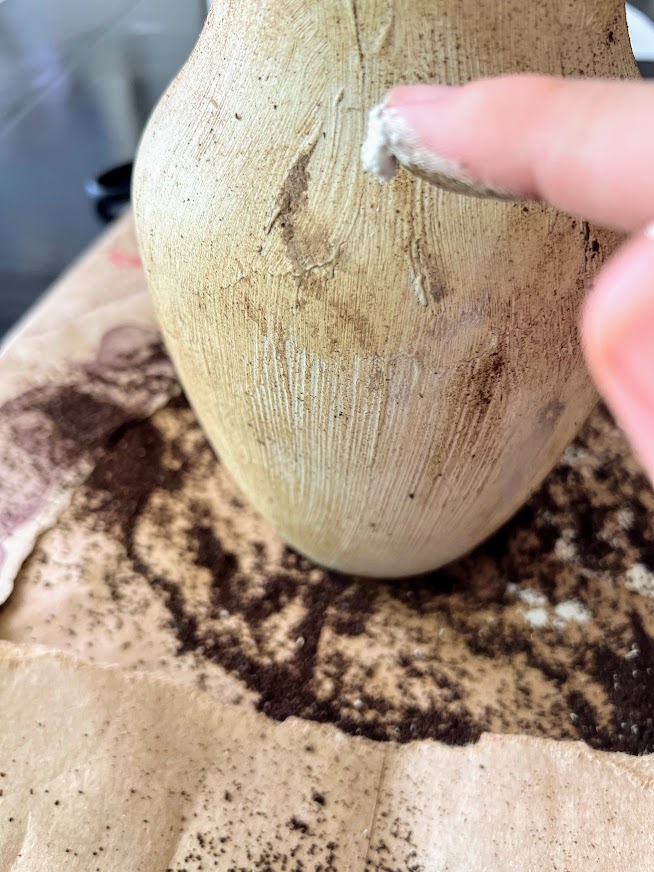
Again, no right or wrong way, just have fun with it.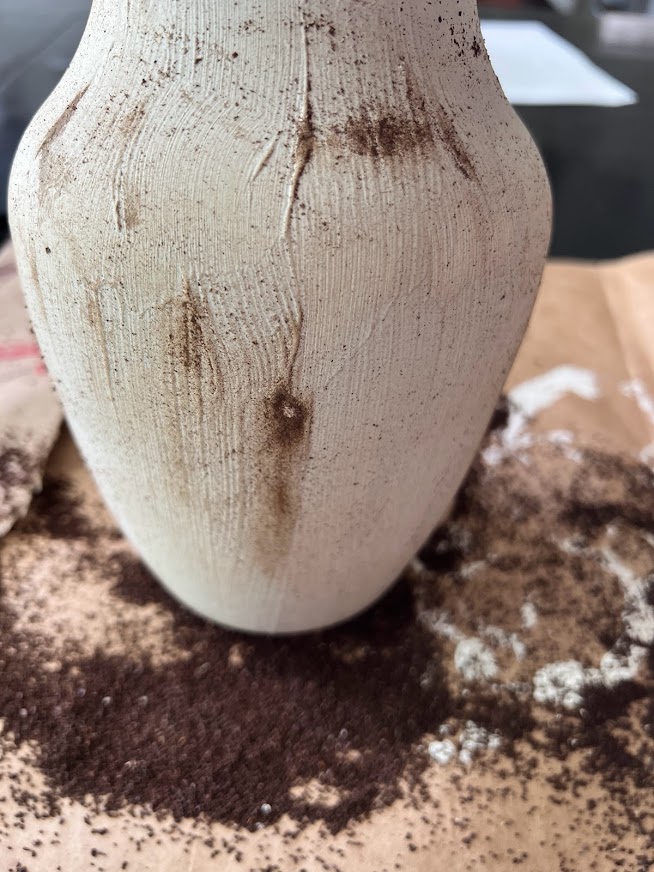
Step 4: Seal your vase
This step is optional, however, if you are going to be using your vase outside, or if you will be pouring water inside the vase, I would seal the vase. If you are only going to be using faux flowers then you can skip this step. Seal water base paint with a water-based sealer and oil-based with an oil-based sealer.
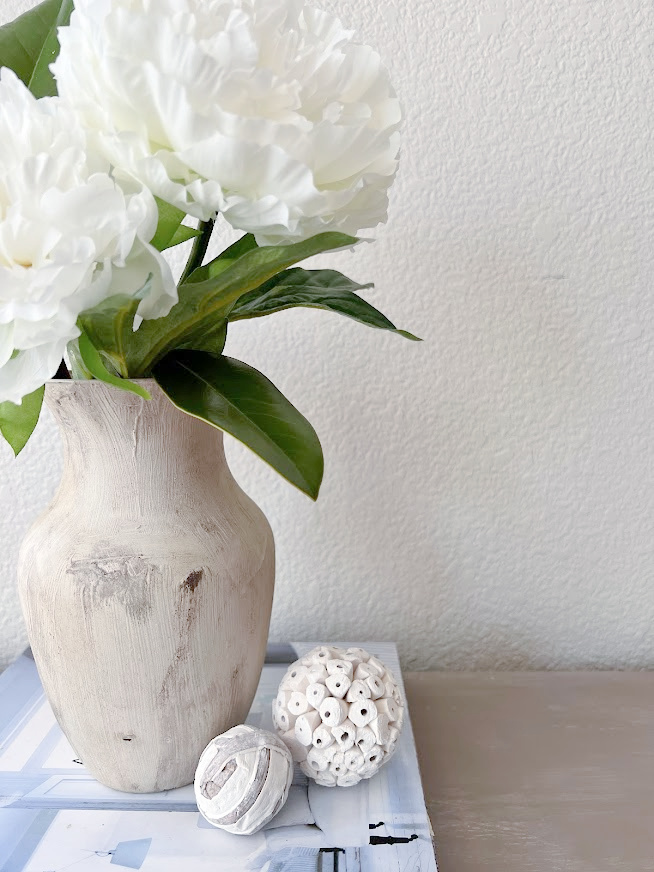
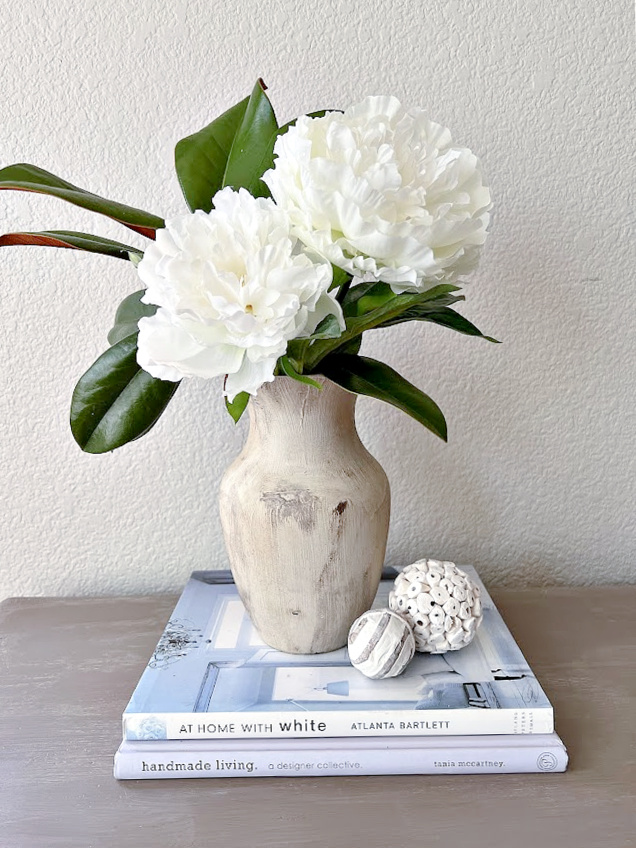
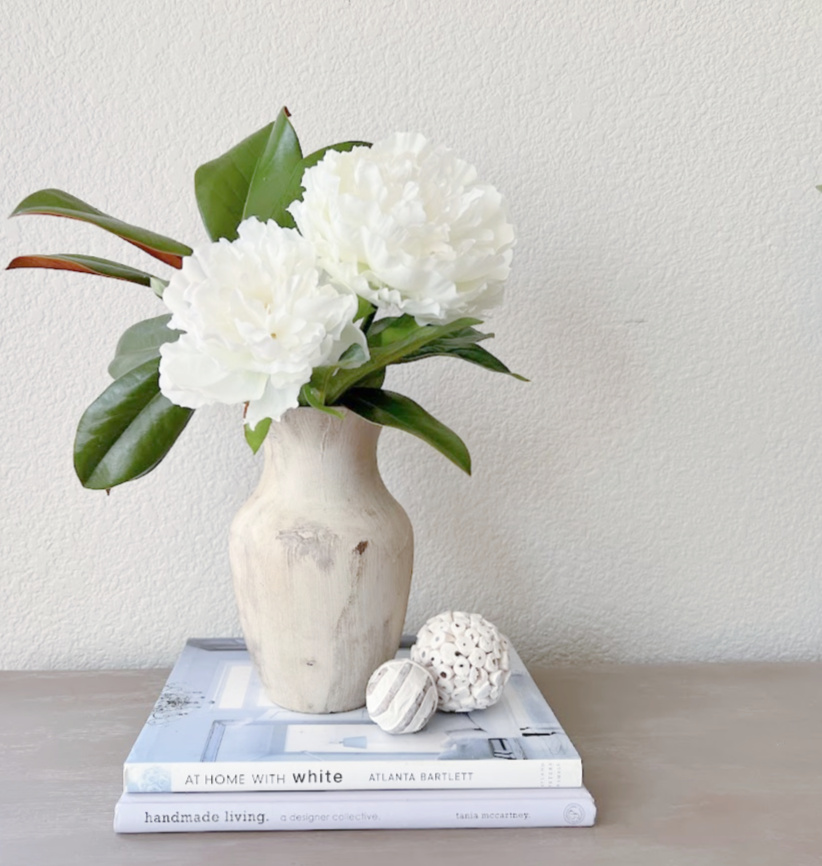
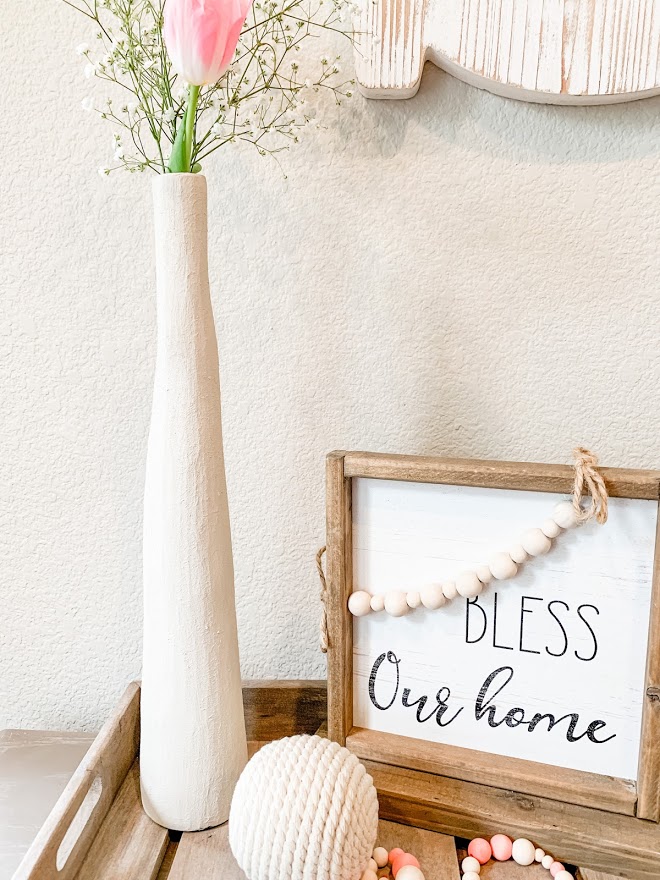
I love the way it turned out, it fits in perfectly with our home decor, you could place it on a coffee table, end table, or on some bookshelves for a little vignette. Your aged pottery piece will look beautiful wherever you place it. My son actually thought I had purchased a ceramic vase and loved it. He recently finished a ceramics class at school and couldn’t tell the difference.
I know there are a lot of different methods to aging vases, from using a little dirt, plaster of Paris, chalk paint, etc. The end result will be about the same with varying different looks.
I have a piece of pottery sitting outside that is an ugly green that I think I will make over using this method. I’ll let you know how it turns out. How about you, what would you like to age using this easy technique?
Take a look at all of the beautiful makeovers from our talented thrift store ladies! Just click on the link below the picture to take you to each project.
DIY Color Block Vase – Domestically Speaking
Three-Legged Table Makeover – My Repurposed Life
How To Antique An Urn – Petticoat Junktion
DIY Aged Vase Using Coffee and Baking Soda – My Uncommon Slice of Suburbia
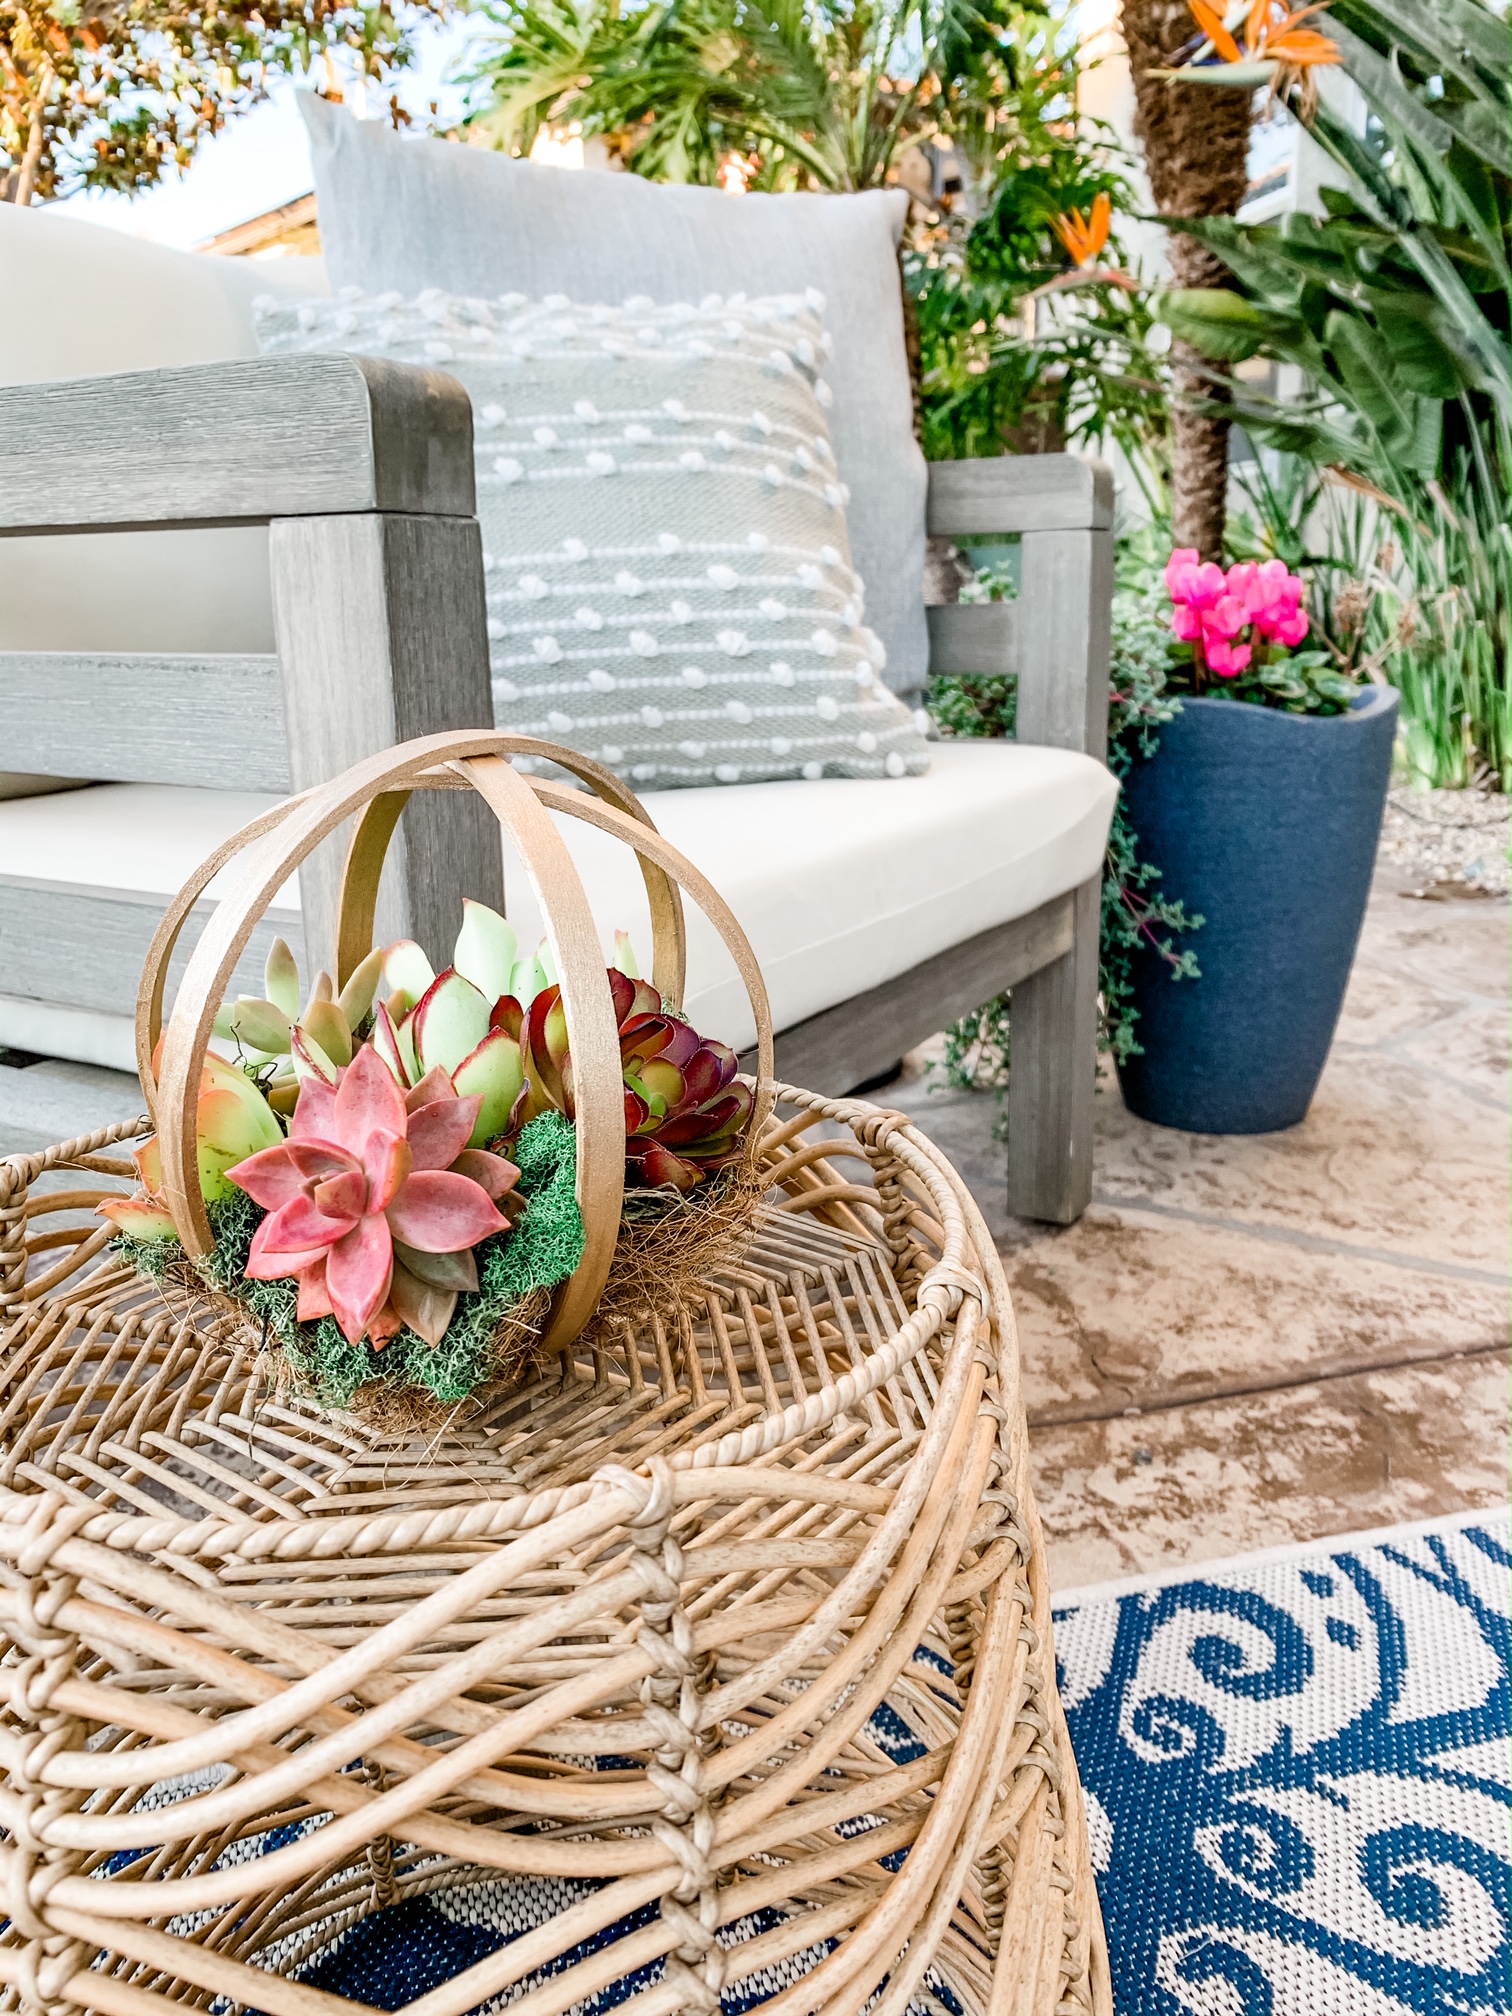
Coastal-Inspired Coffee Table Tray Decor – Sadie Seasongoods
DIY Faux Enamelware Basin – House Of Hawthornes
DIY Boho Painted Furniture Idea – Reinvented Delaware
Upcycled Vintage Nesting Tables – Shop At Blu

Here are a few more textured items I have created using different techniques, I think the coffee idea is definitely my favorite.
Stoneware Vase using Textured Spraypaint
DIY Textured Stoneware Using Baking Soda
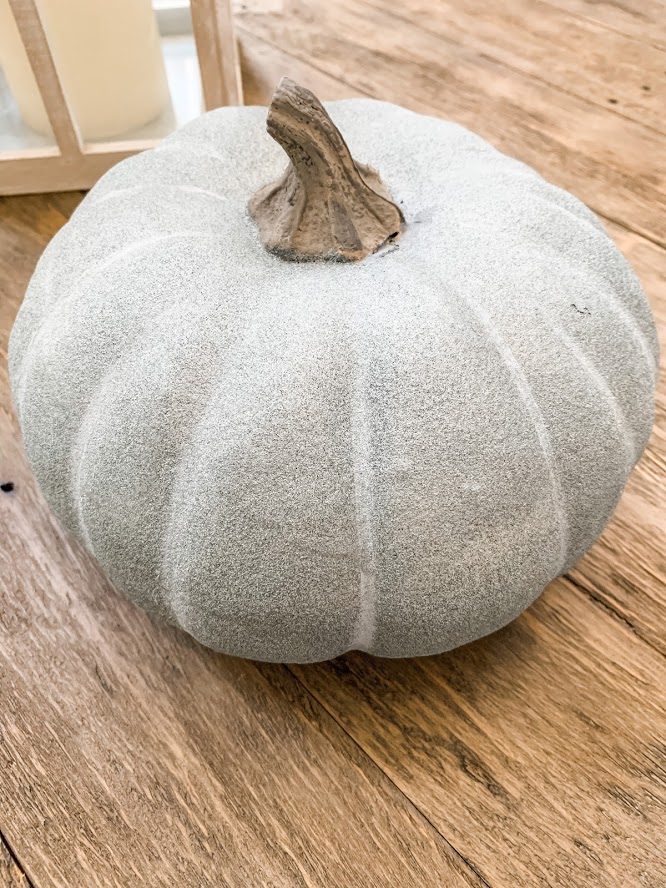
Concrete pumpkin using Textured Spraypaint
Thank you so much for stopping in today, have a wonderful rest of your week.


Kristin, your vase really is authentic looking! I’ve seen many of these tranformations and this is my favorite by far! Gotta try!
Thank you so much Sue, it really is so simple!
Omgoodness, this looks so real!! I have one of these vases and some leftover coffee grounds from this morning – I could do this today! Or maybe I should work!! Pinned 😊
Thank you Cindy, I know so easy, I might makeover a large vase that is sitting outside today but have so many other things that need to be done lol
Kristin I love how this turned out!!! Totally need to try the coffee method.
Thank you so much Maryann xo
This looks amazing. That vase looks like it is 100 years old! Great tutorial with photos that clearly explain and show the process. Thank you for sharing.
Thank you so much, Anna, I appreciate you stopping by and for your sweet comment, have a beautiful weekend!
OK you’re freaking me out with the coffee grounds! That is such a neat look! I need to try that one!
Ha Ha, thank you Pam, it was a fun and easy project 🙂
I love this idea so much!! I’m sharing it my weekly Saturday roundup!! Great idea!!
You are so sweet, thank you so much! xo
Kristin,
Wow! What an amazing transformation on a regular ole glass vase! The texture was great, but the coffee grounds really made the difference.
pinned!
gail
Are the coffee grounds dry or used? I want to give this a try this weekend!!
Hi Tes, they were dry, let me know how it turns out!