
How To Install Peel and Stick Tiles
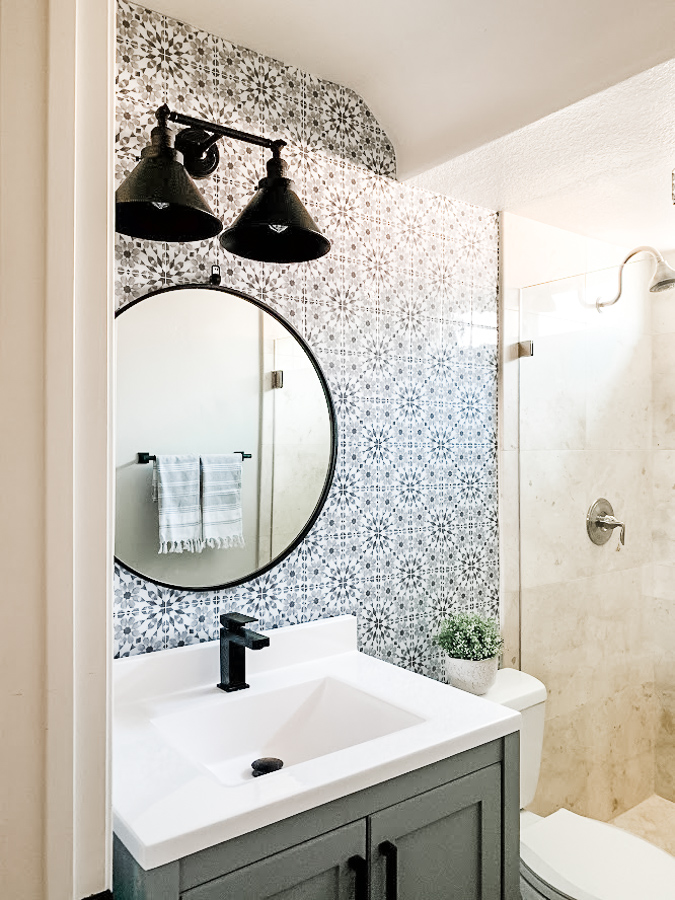
I have been wanting to give our downstairs bathroom a mini makeover so I decided to apply Peel and Stick Vinyl Tiles on one accent wall. It had been almost 10 years since our bathroom burned down in a fire so it was ready for some small changes. I am absolutely in love with the way it turned out. Everyone that has seen it can’t believe they aren’t real and I have to actually show them a sample tile so they can feel it! This was definitely a more cost-effective alternative to real Moroccan tiles, BUT, I am not going to lie, it wasn’t as easy as I thought it would be. (I will explain more later) I do love that, for the most part, it was a pretty easy way to enhance your home’s interior decor, just make sure to bring some patience!

Supplies Needed
Razor or Scissors
Ruler
Tape Measure
Pen
Level
Peel and Stick Tile
Note: Since posting on Instagram this pattern has sold out, hopefully, they will re-stock soon. At the bottom of the post, I have another tile that looks to be similar.

Directions
The surface needs to be clean, smooth, and dry. If you recently painted you need to wait for 4 weeks.
Decide where you want to start, I began in the left corner by the shower. It requires a precise eye when setting the first tile, how straight the remaining installation looks depends in large part on the accuracy of the first row.
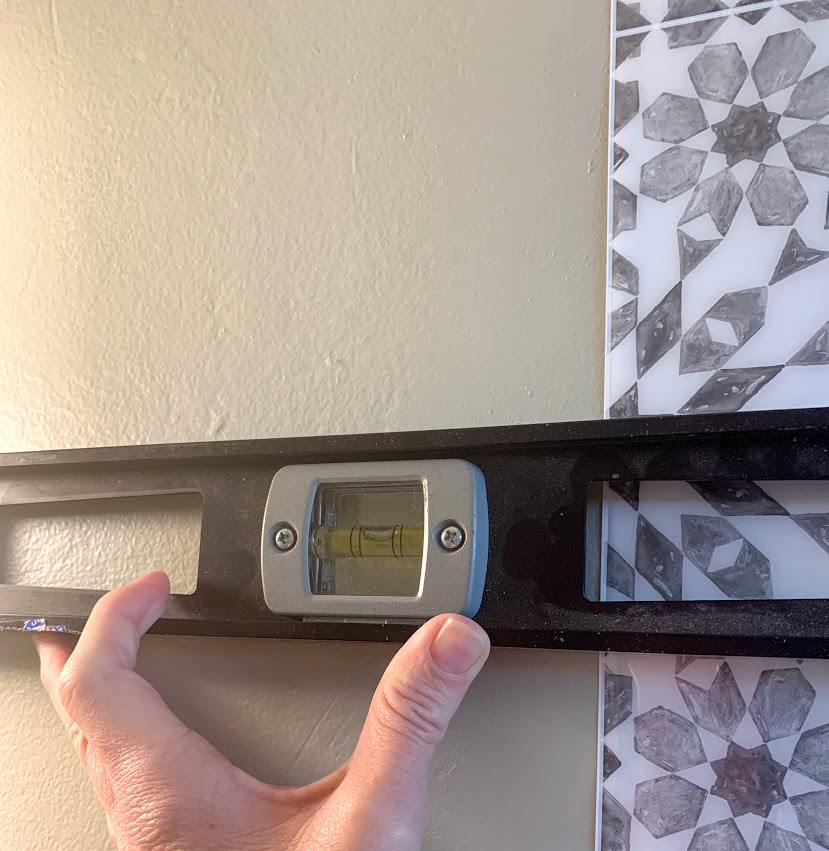
Use a level to draw a horizontal line as a guide during the application. This is where it got tricky, our walls are not straight AT ALL! Had I known that in the beginning I would have started in the middle of the wall and worked my way out on each side. It wasn’t until I was about 3 rows deep it became apparent. However, I’m just going to continue on with the tutorial as though the walls are straight.
Remove the backing of the tile and press lightly to align the first tile then press firmly on the wall.
Take the protective sheet of the front and smooth it out, I used the ruler for this.
The adhesive is very strong, once you place it, it sets in within seconds. If you make a mistake and have to take the tile off, the paint from the wall will come off with it and you most likely can’t reuse the tile. Make sure to take your time and mark where you want the tile to go.
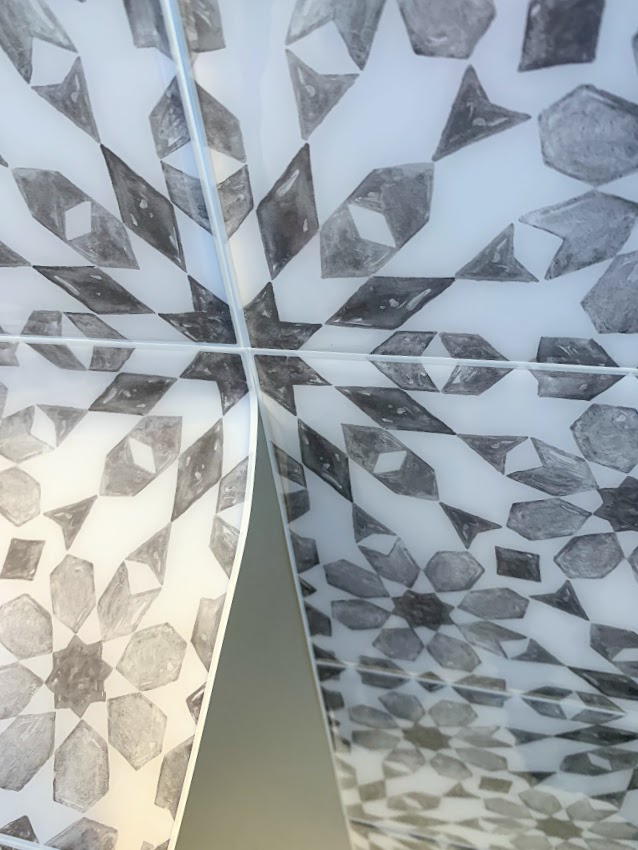
For the remaining tiles, evenly overlap the grout lines for a seamless look
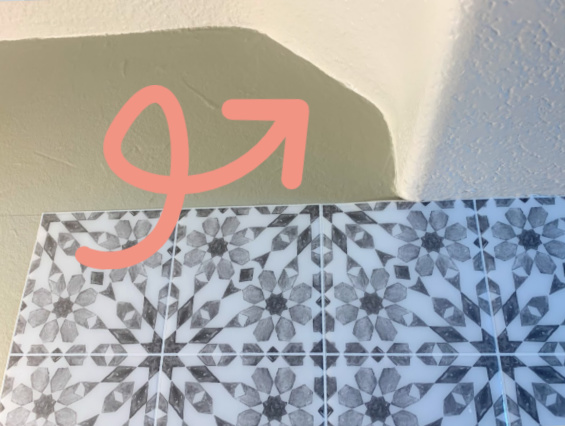
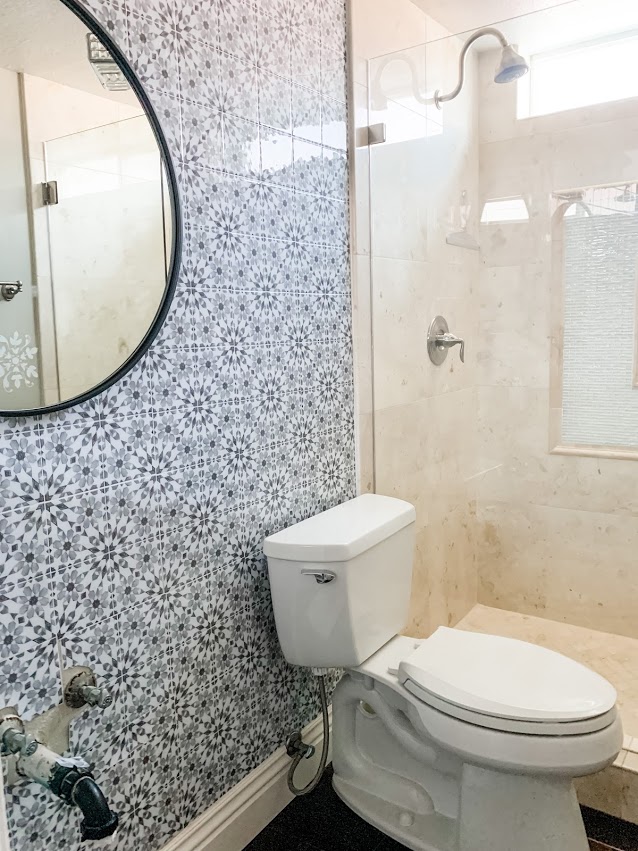
When you get to electrical outlets or in my case plumbing, I used a ruler to measure the height and width of each box and transferred that measurement to the piece of tile so I could make the appropriate cuts using scissors or a razor.
When I got to the weird angle, I cut out a template until it was perfect then cut the tile using that template.
Because this tile had “grout lines” and the pattern had to match up, the project was not a breeze but it sure was quicker and cheaper then if I hired out to have real tile installed. Plus, I would be afraid to see what my tile laying skills are so this was definitely worth it. I would say it took me about 9 hours, I split it up between three days. If I had ordered tile with no pattern, let’s say subway, I’m sure I could have knocked this out in about 3 hours.
Clean tiles wipe the soap and water.
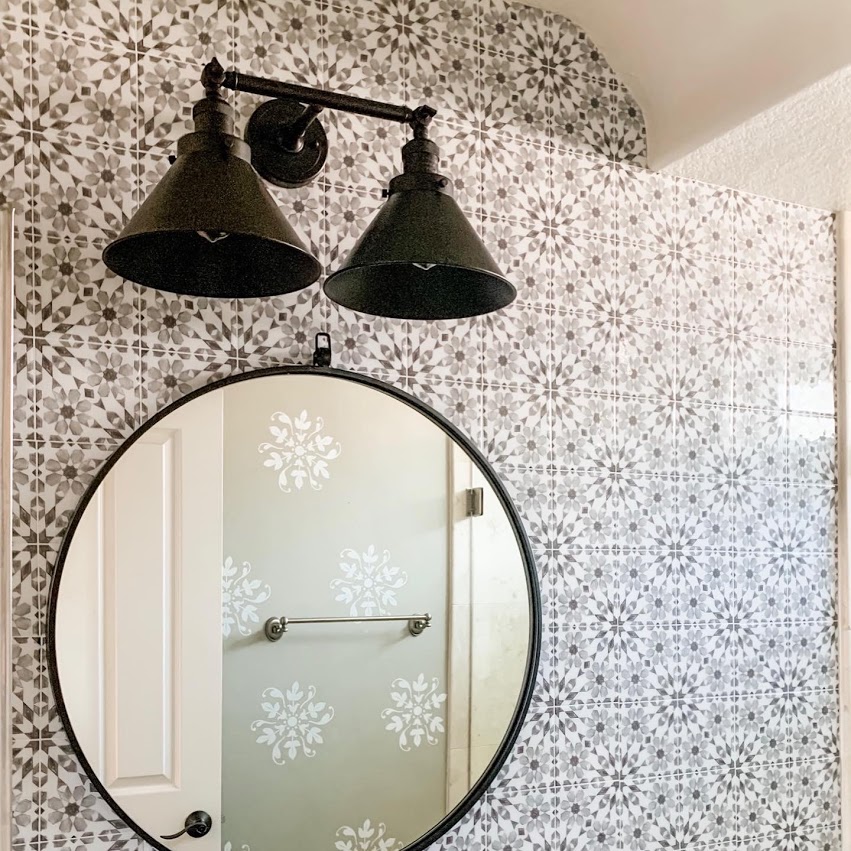
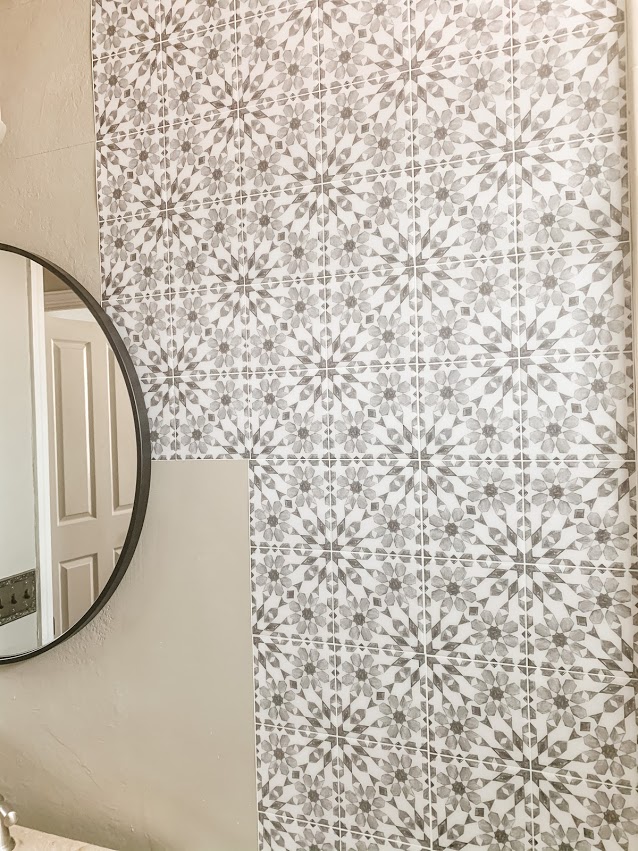
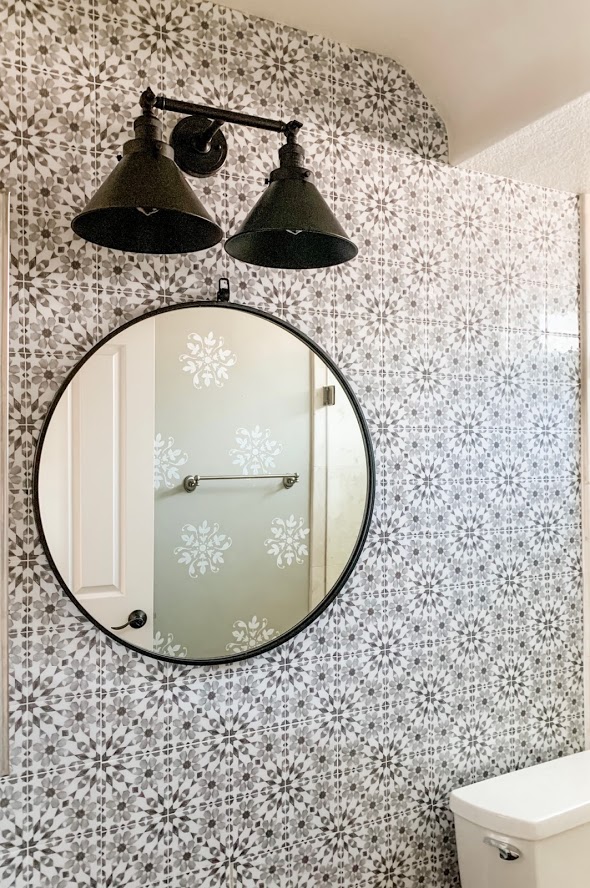
I updated our light fixture with this bathroom vanity light from Wayfair and a brand new mirror.
The design on the opposite side of the bathroom will be coming off soon. It’s a sticker so I need to figure out the best way to take it off.

As you can see below, I didn’t get too precise with the plumbing cut-outs as know one will ever know.
I have to say, these tiles are amazing! They really do look real and are a wonderful solution for a quick and inexpensive update.
If you would like to check out the full reveal, you can head on over to this post

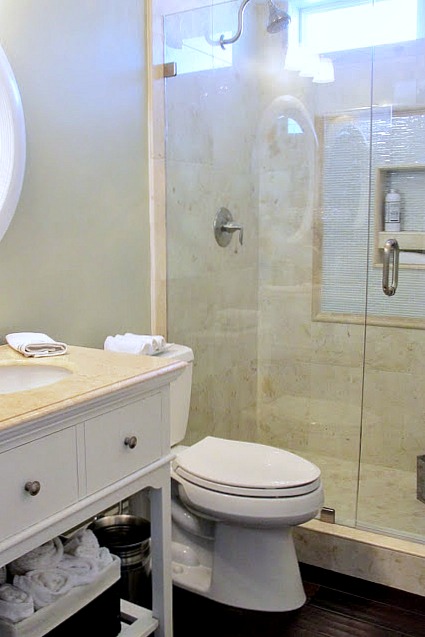
Here is what the before looked like:
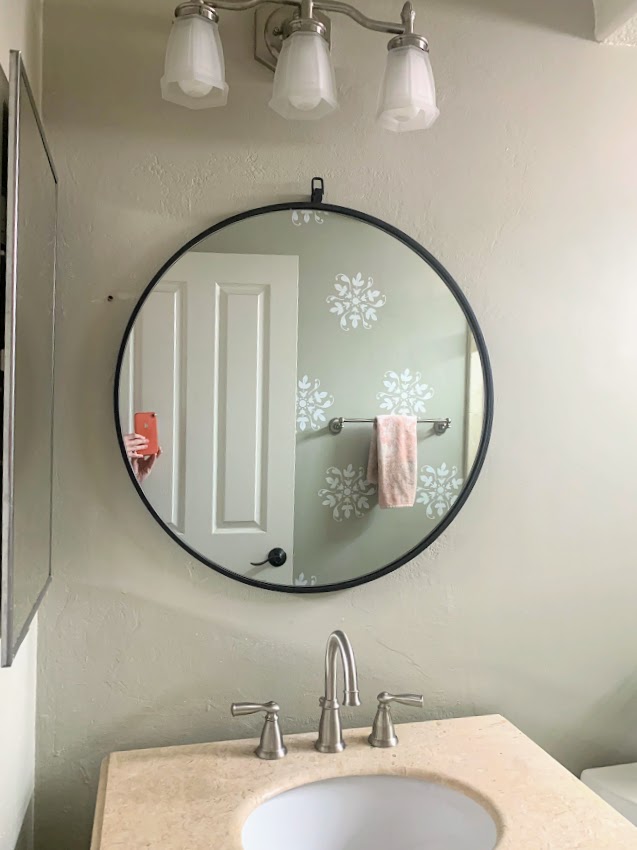
I forgot to take a picture with the old mirror, here is one from a few years back.
A few years back the sink in the vanity cracked so we filled it for a quick fix. When we pulled out the vanity so I could install the tiles we noticed all of the plumbing had corroded, yikes. So now I’m on the hunt for a new vanity, would you pick black, grey or white? I would love your input!
Thanks for stopping in today, I hope everyone is staying healthy and happy!
I’ve added a few tiles below that look similar but I have not tried the product.
Beautiful tile & great job!!!
IMHO I’d go with a black vanity!❤️
Thanks Cathy!!!
Your choice of pattern was excellent for your space. It sure does change the look! So fun and updated!!! Well done!!!
Thank you so much Michele
I love your floors. Did you do them, and if so, where did you buy them?
Wood floors:
Hi, thank you so much! We purchased them at a local store and had them installed, here is the info
Mohawk
STYLE: Brindisi Plank
COLOR: Cognac Hickory
5-inch x 1/2-inch wide planks
I purchase the exact tiles last year & am just getting to this wall. I have 2 electrical outlets very close to the accent wall. What color wall plates would you use being so close to the black accents (wall-mounted makeup mirror will be black). TIA
Hi, we went with white outlet covers. I did not want them to stand out. Send me a picture when you are finished, good luck 🙂