
DIY Mini Succulent Garden In A Sugar Mold
Learn how to create your own rustic DIY mini succulent Garden in a Sugar Mold.
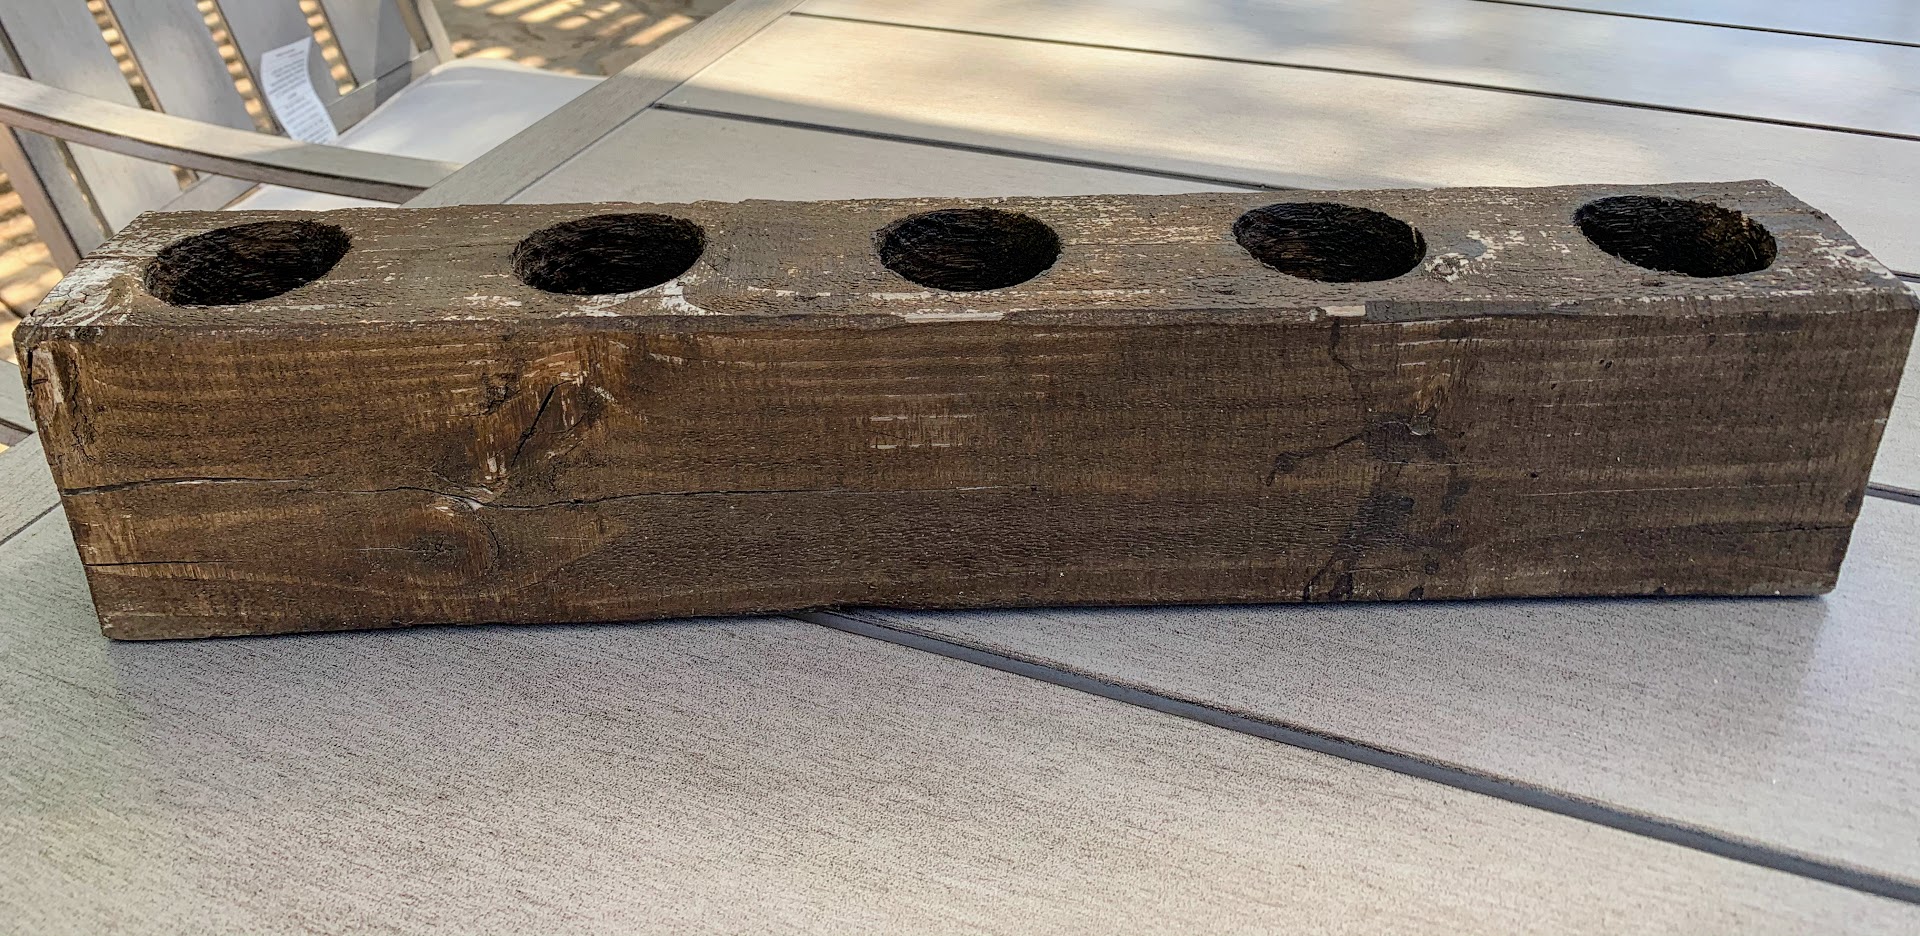
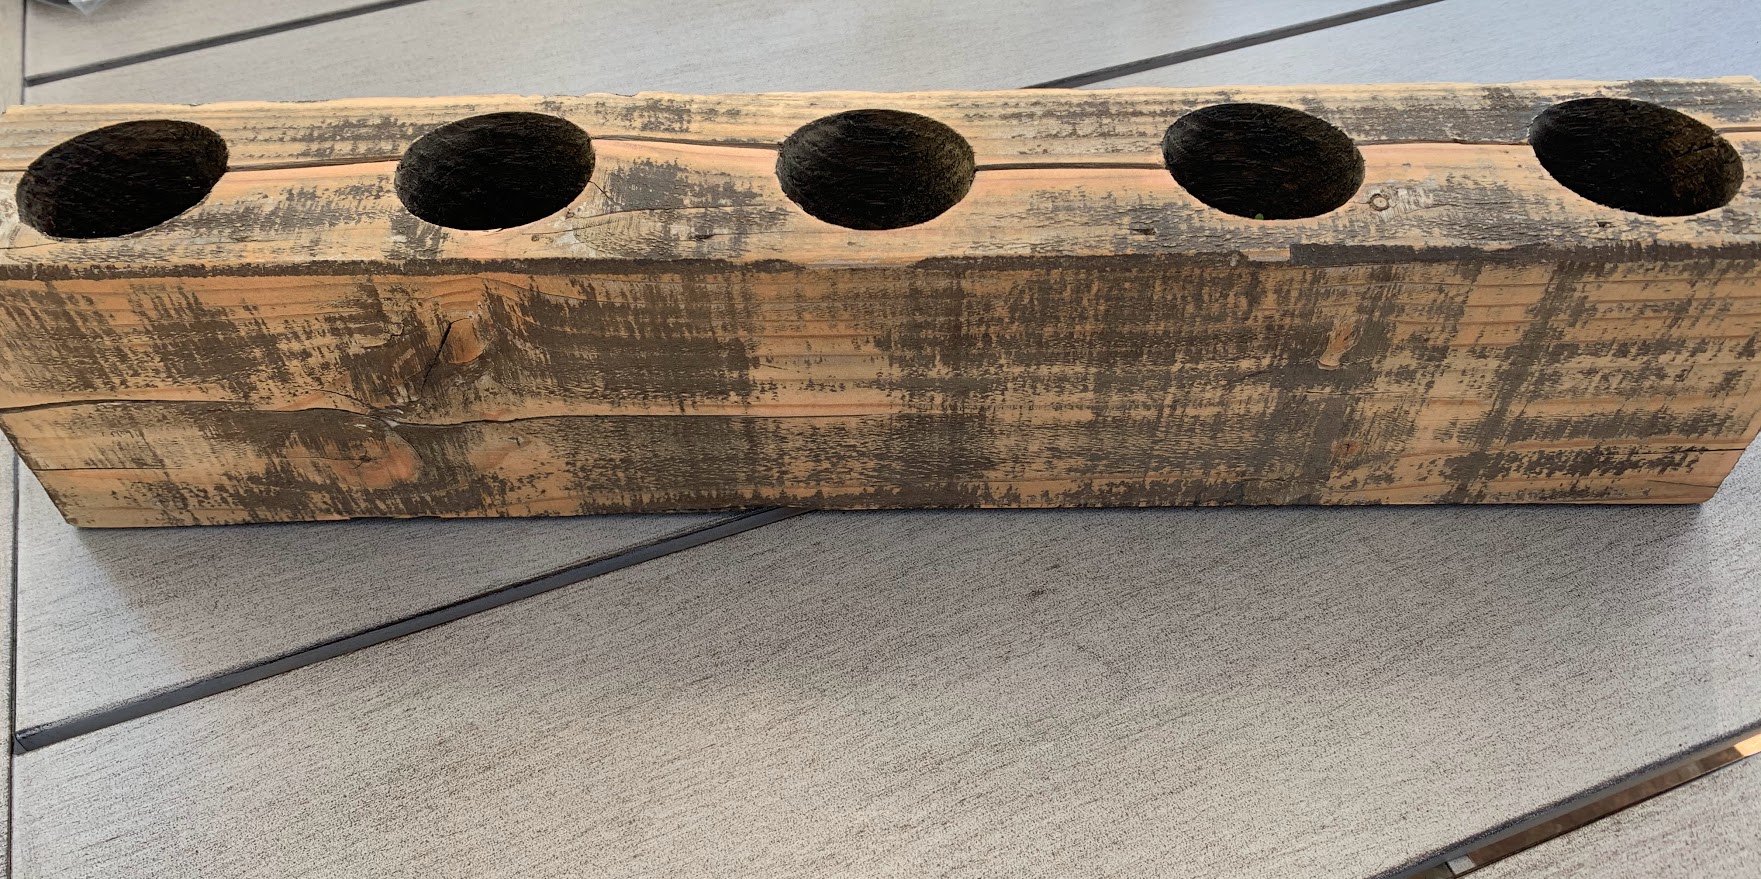
I have had a love for sugar molds for many years now, not just because I love how they look but it’s a piece of history that you can bring into your home decor. This particular one is not an antique sugar mold, I found it on Facebook Market Place after someone had used them for beautiful centerpieces at their wedding. I purchased 2 of them for $5 a piece. Not too bad considering most start at around $20 on etsy. I’ve used them for various displays over the past few years but today I decided to sand them down to fit the aesthetics of our home a little more and turn them into little mini succulent gardens.
A little history on Sugar Molds. They are made from blocks of wood with small holes into which Raw sugar cane syrup was poured into the cone shaped depressions. Once it dried, the syrup formed raw sugar cones that would be wrapped in paper and sold to consumers. Pieces of the cone were then chipped away as need for cooking.
Here is the before
Affiliate links listed below
I left the sanding and bleaching tutorial at the end, for those that feel like skipping it.
Supplies Needed
Wooden Sugar Mold
Sugarmold Tin Inserts (Optional)
Pea Gravel or moss
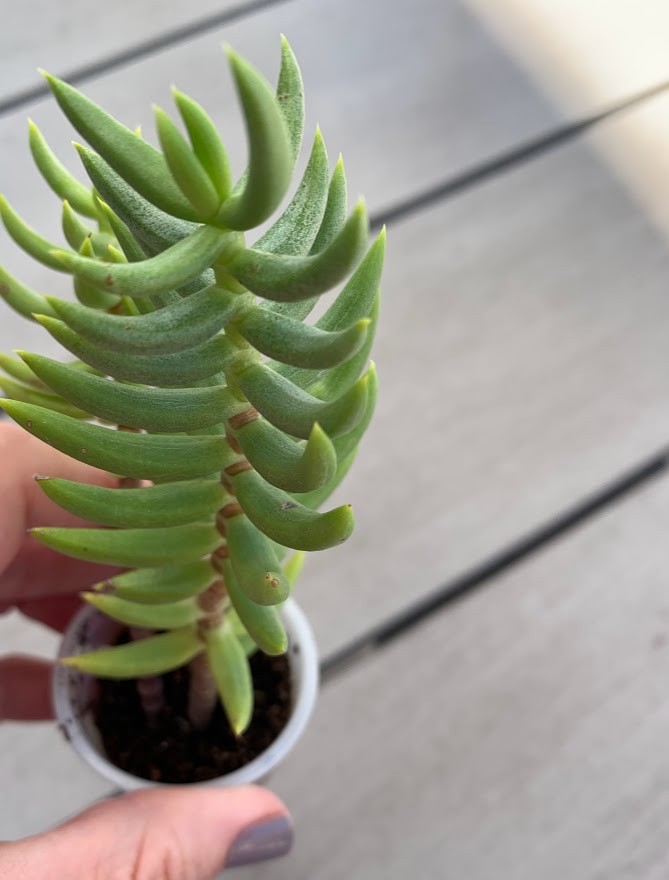
Succulents You could use real or Artificial Succulents (You can find faux ones at Hobby Lobby and Amazon)
Organic Potting Soil for Succulents
TIP: I have used the kid’s little medicine dispensers that come on the top of liquid Tylenol and little plastic shot glasses found at the dollar store for my inserts.
Directions
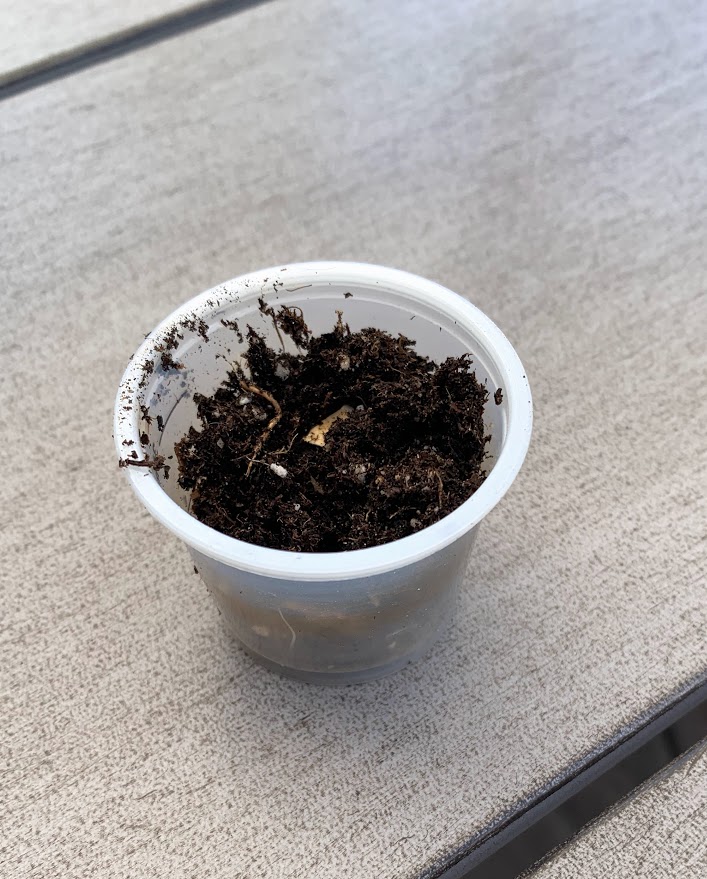
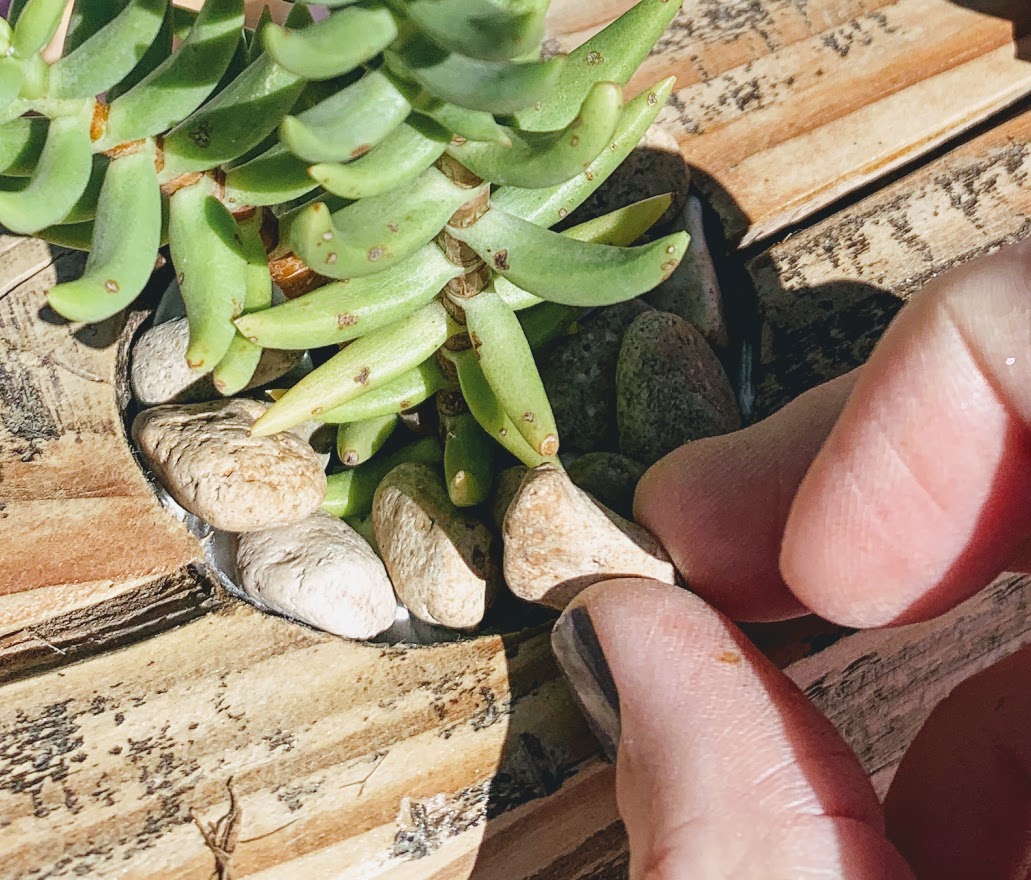
Place the cactus soil on the bottom of your inserts, fill it about 3/4 up.
Plant your favorite succulents. Don’t be afraid to use all sorts of succulent cuttings; different colors, shapes, and sizes.
Your next step is to place the inserts in the bottom of the hole of your mold. You can place a paper towel around your insert if the succulents are wobbly.
Cover with pea gravel or you could use moss as well
Put them in a space where they will get some light and spray them with a little water about once a week.
Seriously, that’s it, so simple.
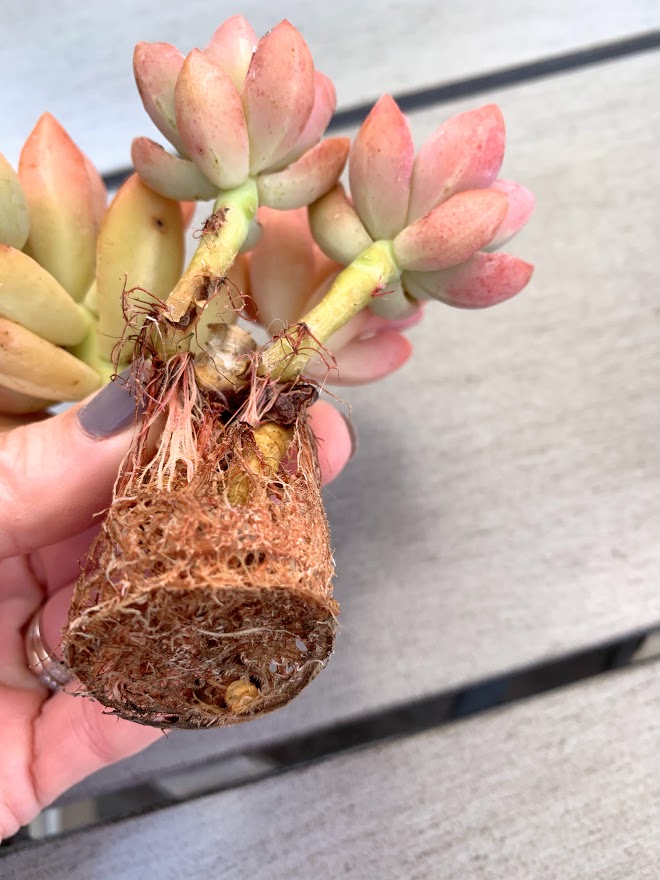
I also wanted to show you the succulents that I have had in the little medicine holders with no dirt the last few months and they did just fine. Realistically, you could skip adding the dirt if you wanted to. They literally just created their own roots and stuck together
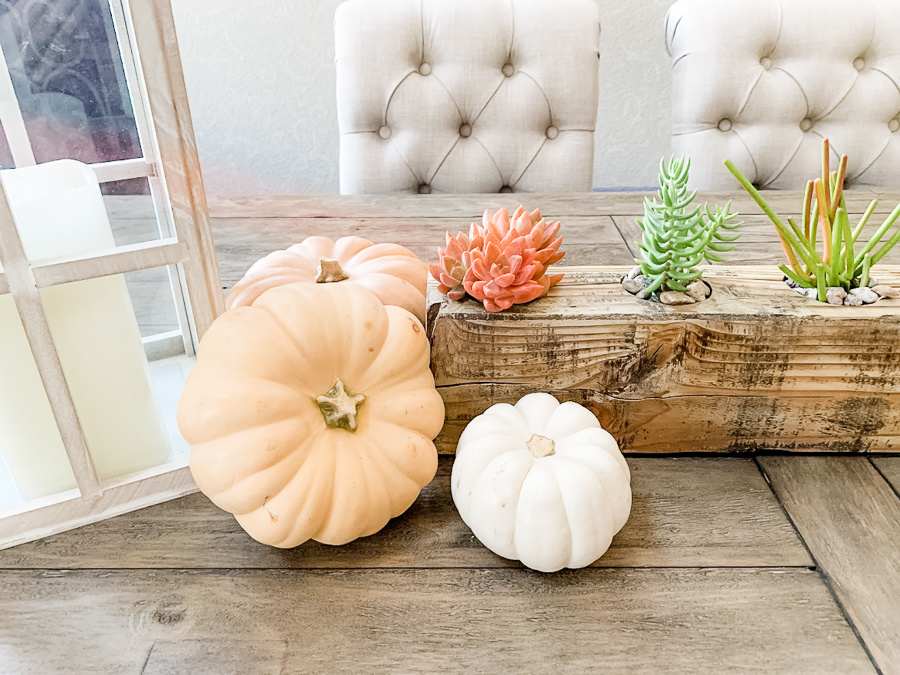
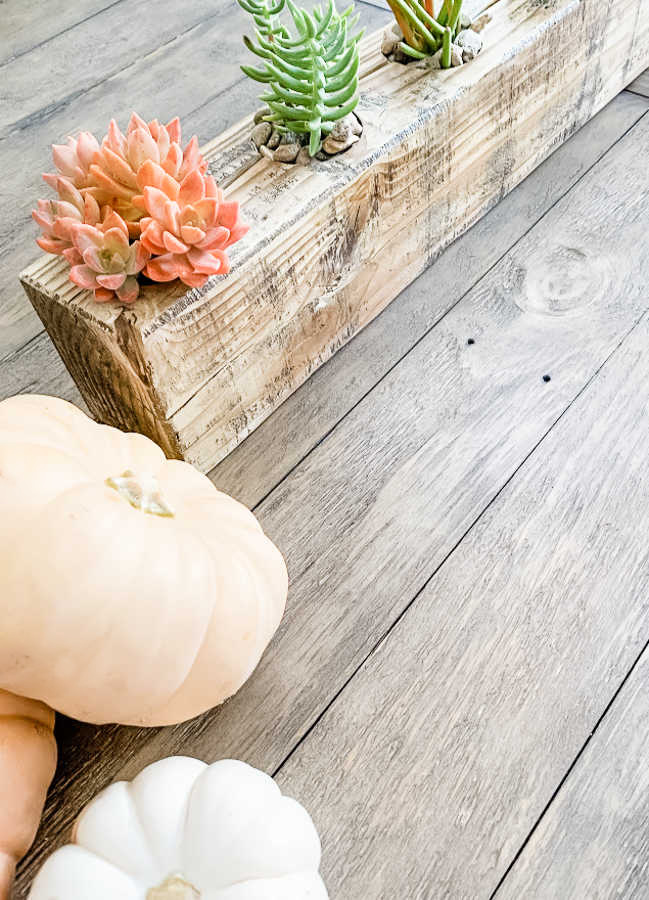
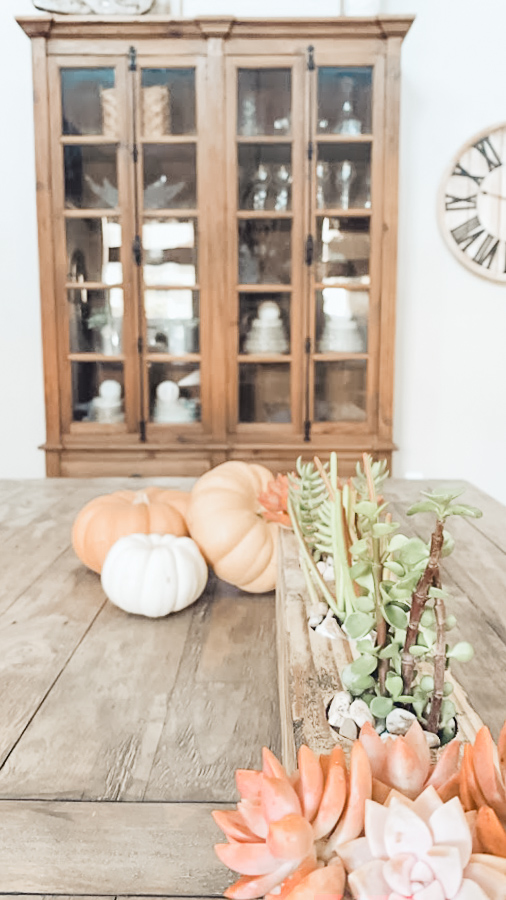
And here it is, such a fun little table display for Fall.
Here is the before and after, see below how to bleach the wood.
If you want to lighten the color of your sugar mold this is what you will need.
Supplies:
Gloves Mask Protective Eyewear
Sander and Sandpaper
Rag
Dropcloth of some sort
Household bleach
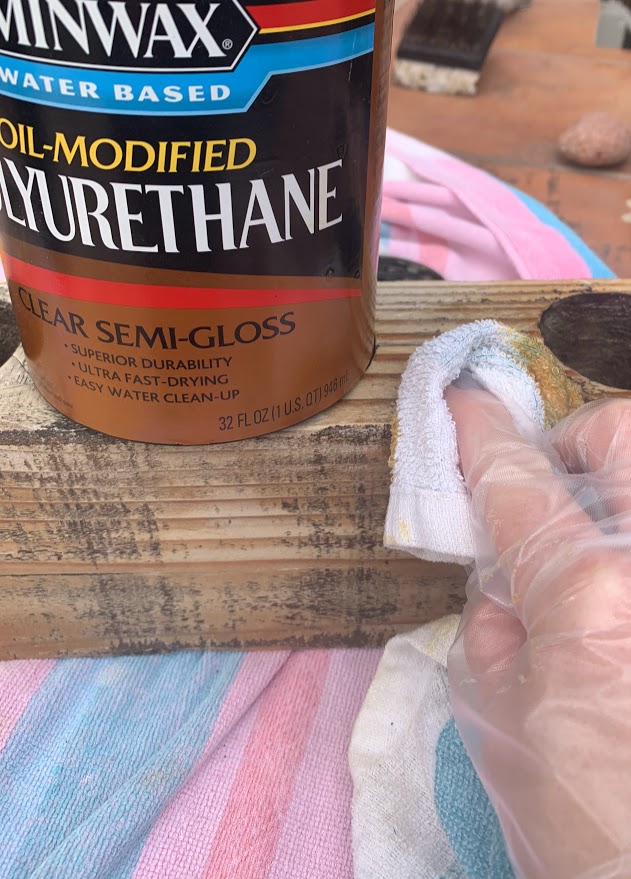
Clear semi-gloss Polyurethane
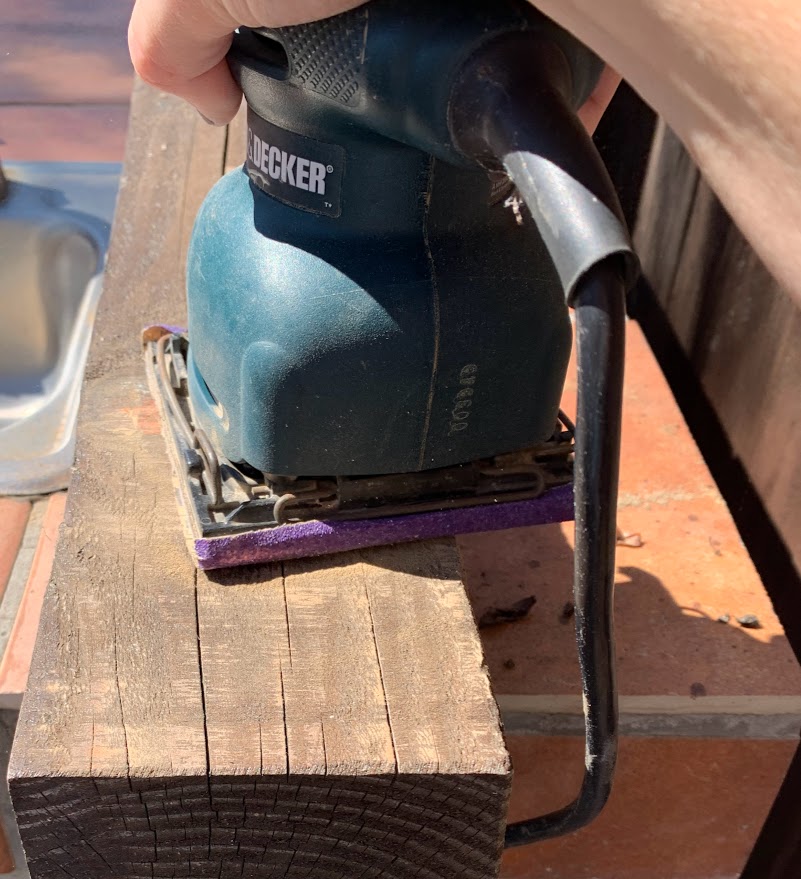
Directions on how to bleach wood
Sand your piece down
Now if you had something large like a piece of furniture I would use a stripper and then sand whatever did not come off. This piece was small enough that sanding did the job just fine.
Using a rag, pour bleach on it and wipe onto the wood evenly.
Let the Bleach dry
Repeat until you are happy with the color. I gave mine 4 coats of bleach, you can see how the wood gets lighter.
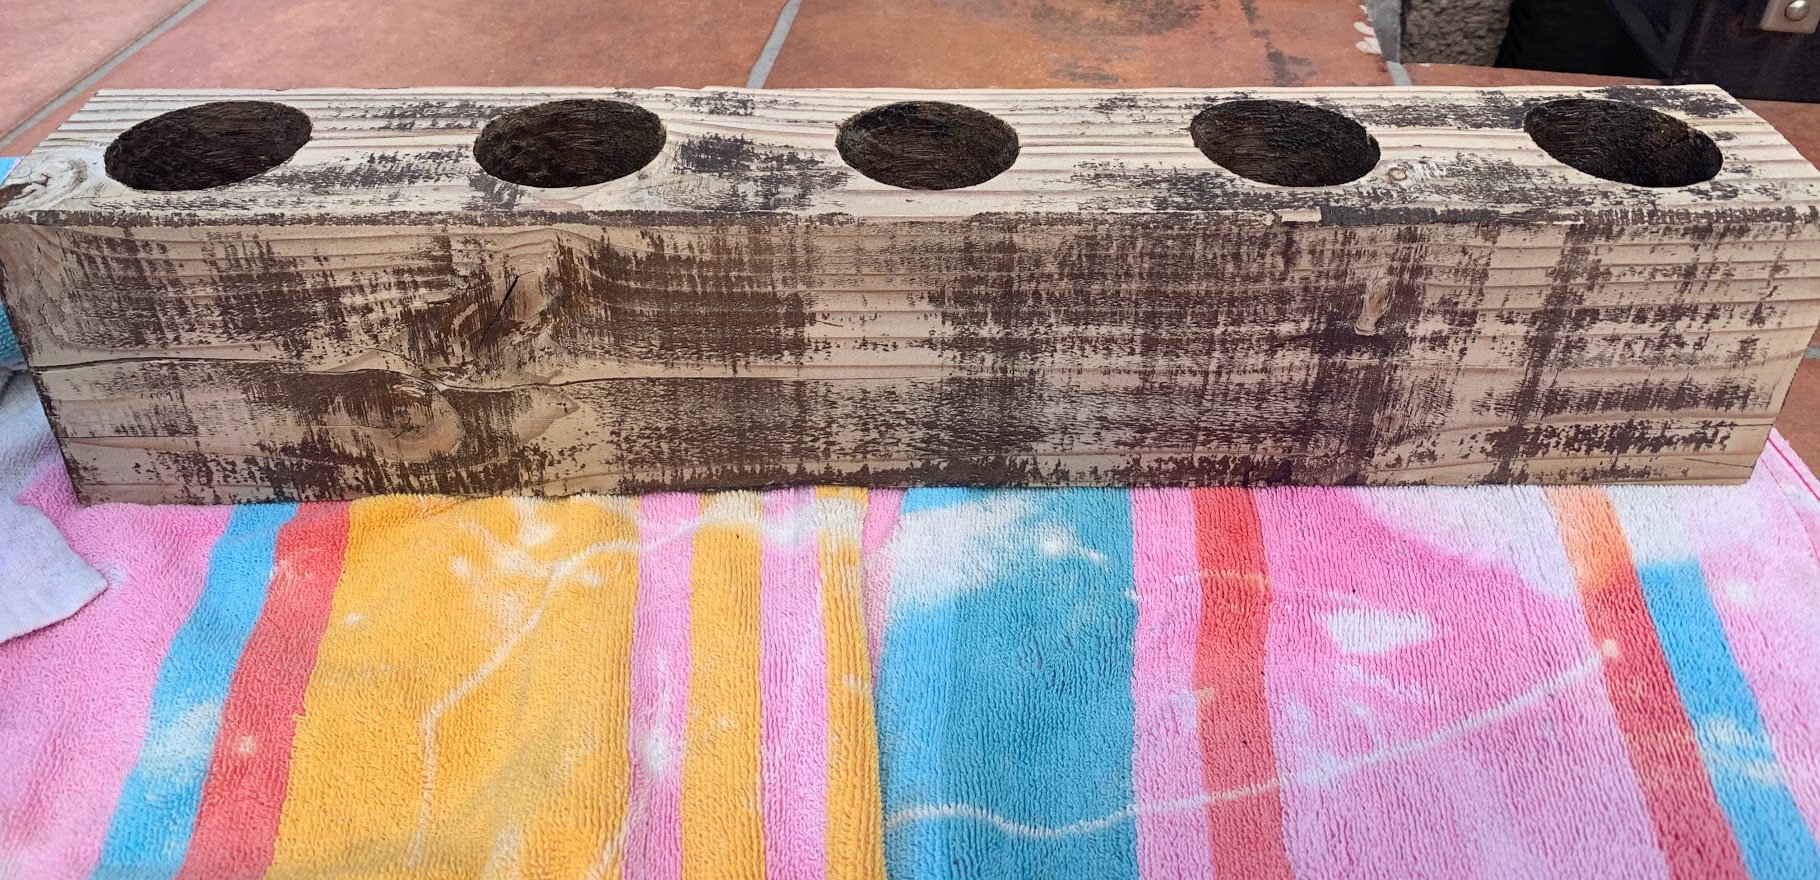
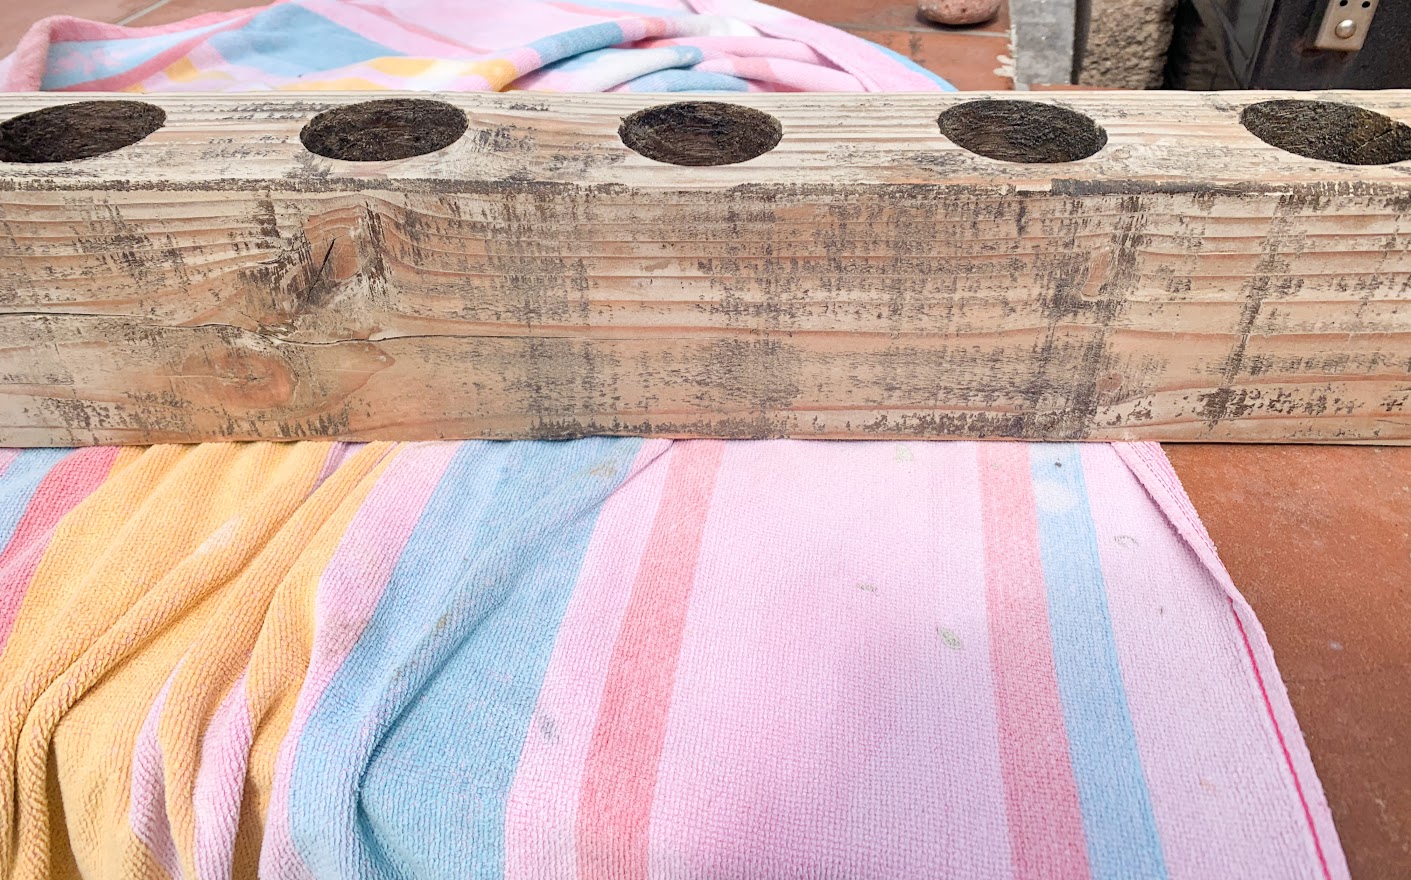
Once the last coat was dry, I sanded the whole piece again for a smooth and even finish.
Lastly, I applied a coat of clear semi-gloss Polyurethane.

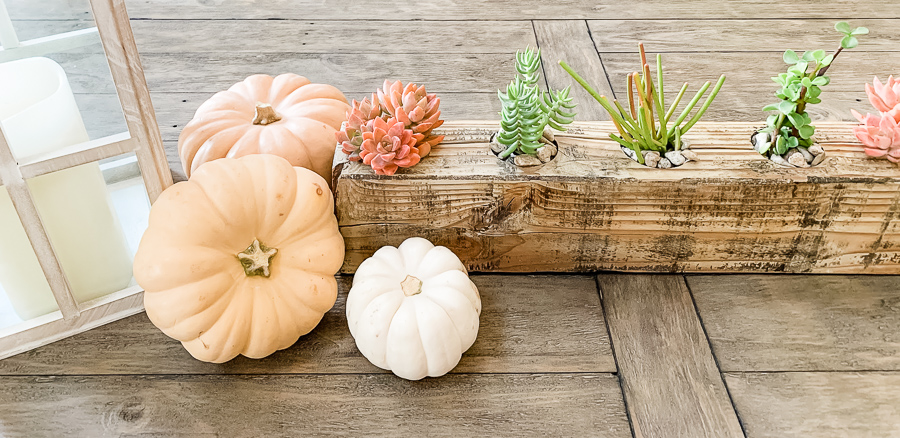
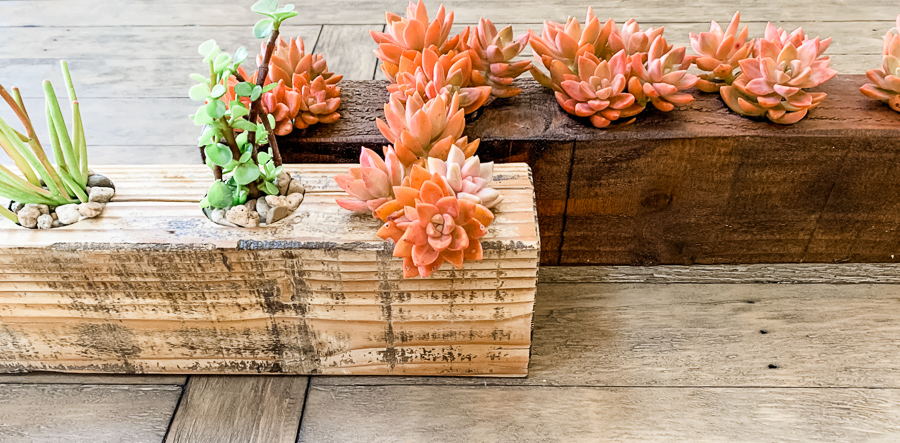
I love how it makes the piece look more vintage and worn.
There are so many different ways to decorate with sugar molds; candle holders, dyed eggs for Easter, potted plant holders. You could also use it as a storage organizer; utensils, pens, crayons, scissors, you name it, the possibilities are endless.
NOTE: Every piece of wood is a little different so you may not know what your end result will be. For that reason, I would also test a little inconspicuous spot if possible before starting the process.
Let’s see what all of my talented blogging friends did with their thrift store finds this month!

Thrift Store Metal Pumpkin Domestically Speaking
Bar Stool Makeover My Repurposed Life
Rustic Home Decor Wall Sign Petticoat Junktion
How to Update Thrift Store Art Our Southern Home
DIY Mini Succulent Garden In A Sugar Mold My Uncommon Slice of Suburbia
Boho Candle Holder (and Crazy Brass Cleaning Hack!) Sadie Seasongoods
Quilted Mason Jar Makeover House Of Hawthornes
Goodwill Shadowbox Fall Decor Makeover Organized Clutter
What to do with Old Shutters Reinvented Delaware
How to Make Pumpkins from Scrap Wood Shop At Blu
Thank you So much for taking the time to stop in today, it really does mean the world to me!
Here are some more thrift store makeovers for you to browse.


The sanding really brought the sugar mold to life!
Thank you Carlene
Kristin, succulents are my favorite! Am i’m loving the bleached wood in the sugar mold. Now that I see those succulents will survive tiny planters, my head is racing!
I know, I thought they would eventually die with no dirt and I was surprised they lasted that long but even more surprised they rooted together. They are a hard plant to kill, that’s why I love them
Kristin,
I’ve never come across a sugar mold, but this is a great alternative for an expensive one. You got a great deal! Thanks for sharing your tips about using what you have (tylenol cups) etc.
Your mini succulent garden is perfect!
I am torn between which finish I like better. 😉
pinned!
gail
I still love the dark one as well, I think I’m just loving the change for now 🙂
So pretty Kristin! I’d love to make one of my dining room table.
Thank you Maryann!
Very, very cute, Kristin!!
Thank you Sarah!
I haven’t tried to bleach wood yet but you’ve inspired me to give it a try! I love the look it gives the sugar mold. Those molds make such a cute container for succulents! Pinned😊
Thank you so much Cindy, so fun to do this tour with you!
Your sugar mold was the perfect way to add a mini succulent garden to your fall table! The pumpkins beside it are lovely, too! So fun to see you at Tuesday Turn About… I’ll be featuring you at this week’s party! Pinned!