
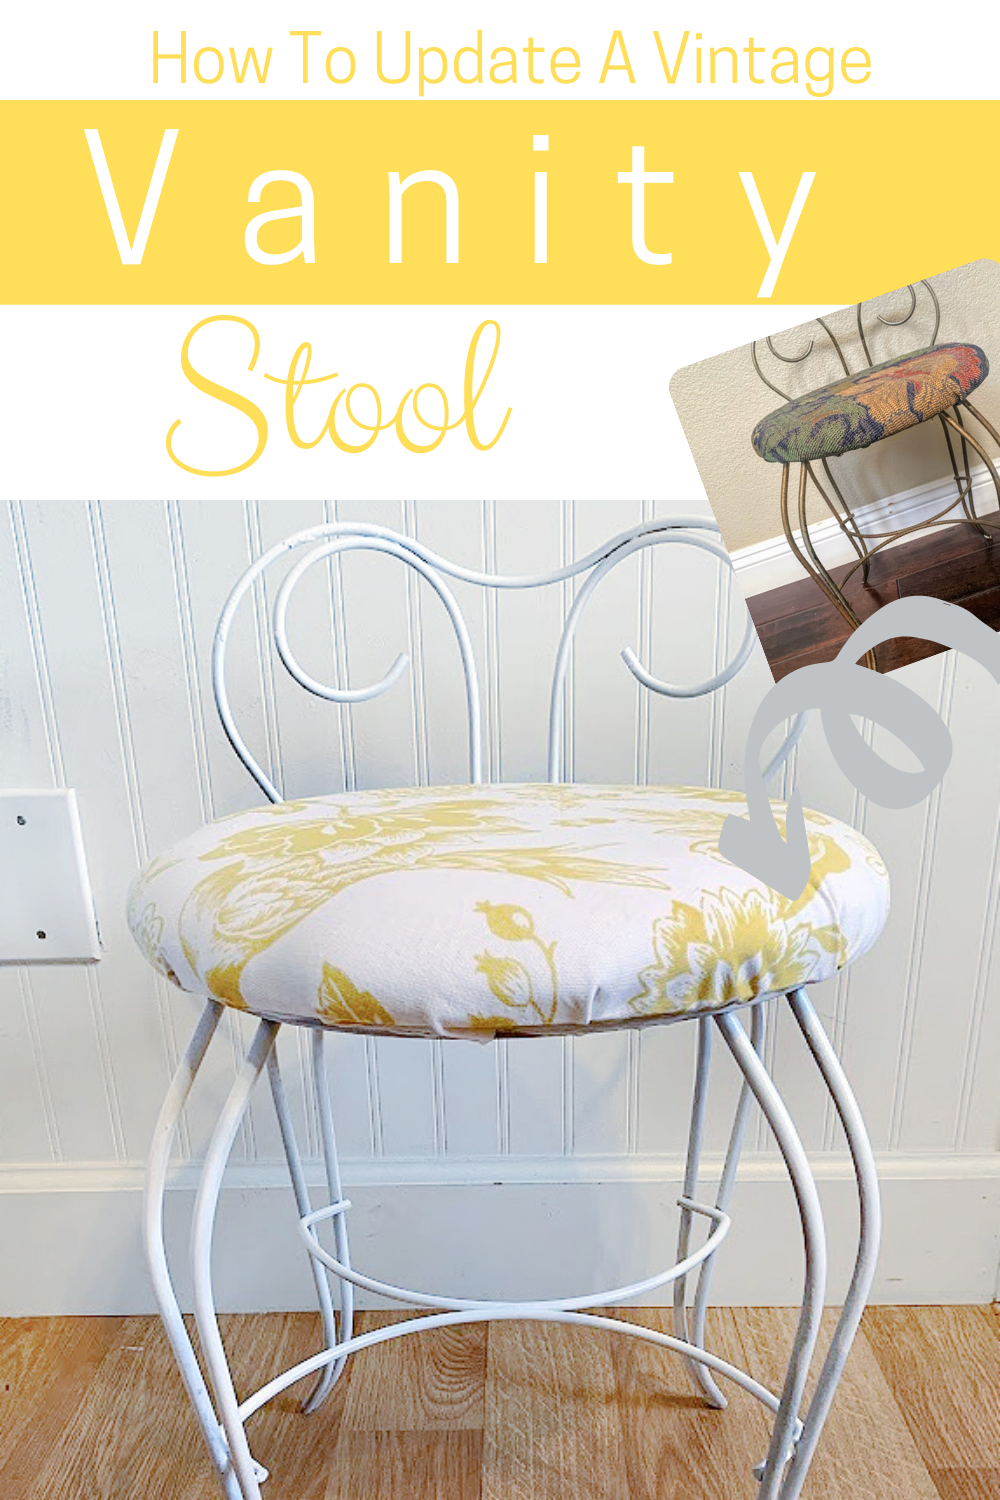
Vintage Vanity Stool Makeover
It’s thrift store decor day and I am sharing how to makeover a Vintage Vanity Stool. I found this piece at a hospice resale shop for $5. I couldn’t pass it by, as it reminded me of my mom’s stool that she sat in every morning to do her hair and make-up. I did a little digging I think this was made in the 1950s-60s, however, the more layers I took off, it could be older, I’m not sure.
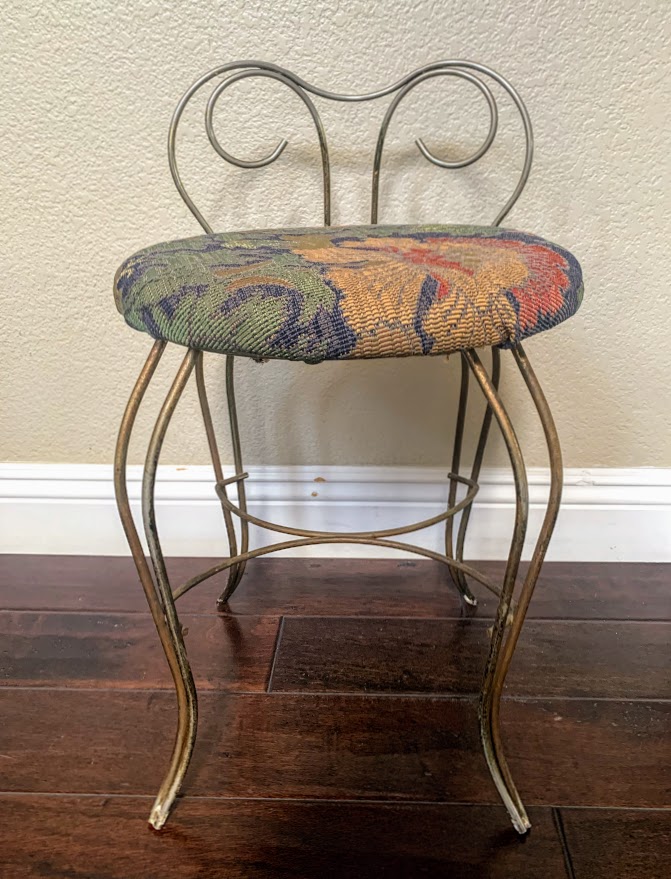
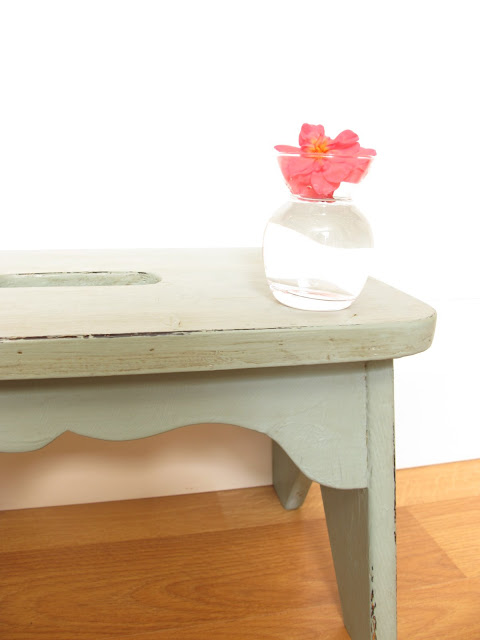
Before
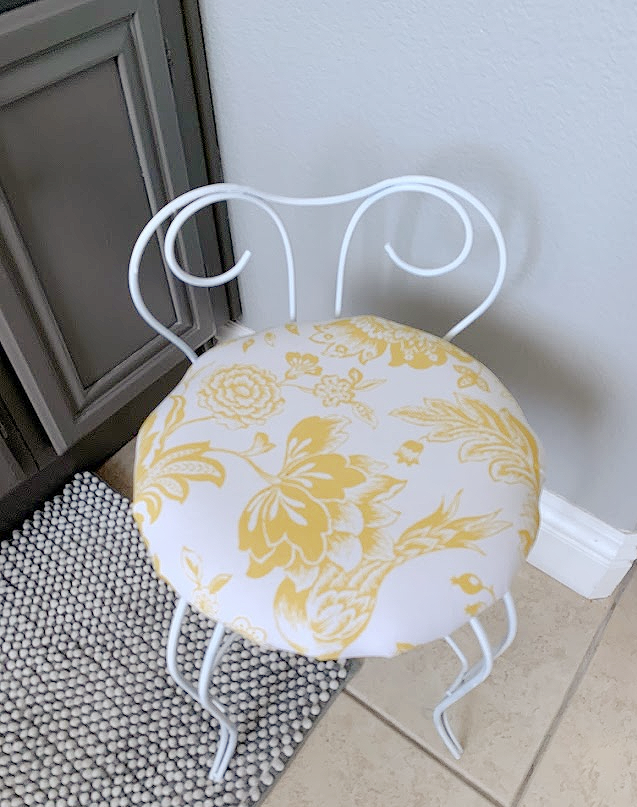
I had envisioned painting it black and even purchased some black and white striped fabric but when I started the process of making this piece over, something pulled me away from those dark colors and I went with some brighter colors.
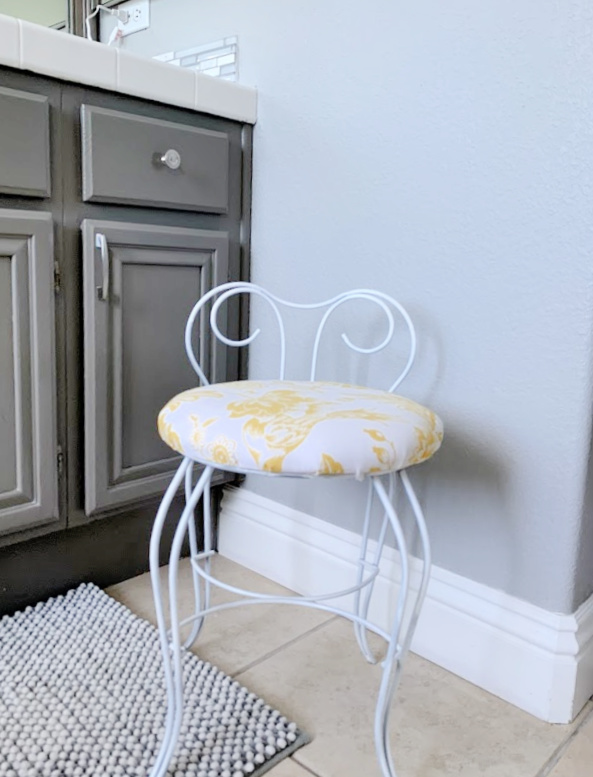
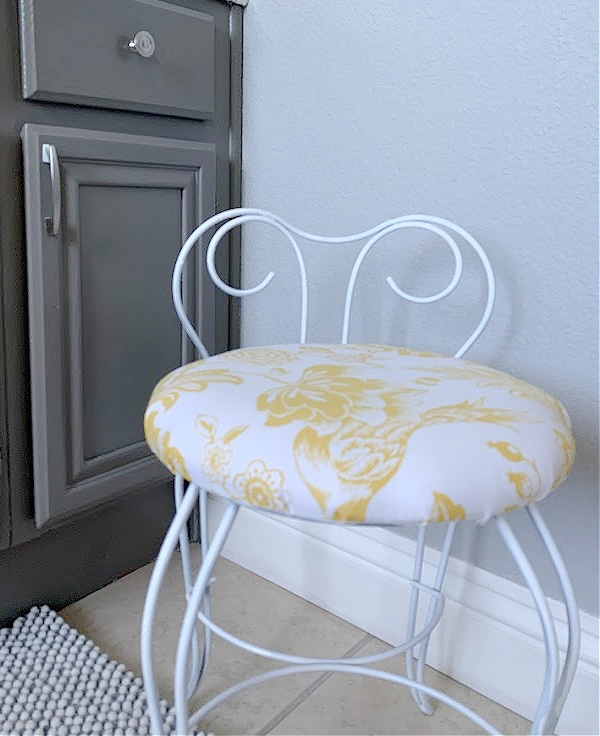
After
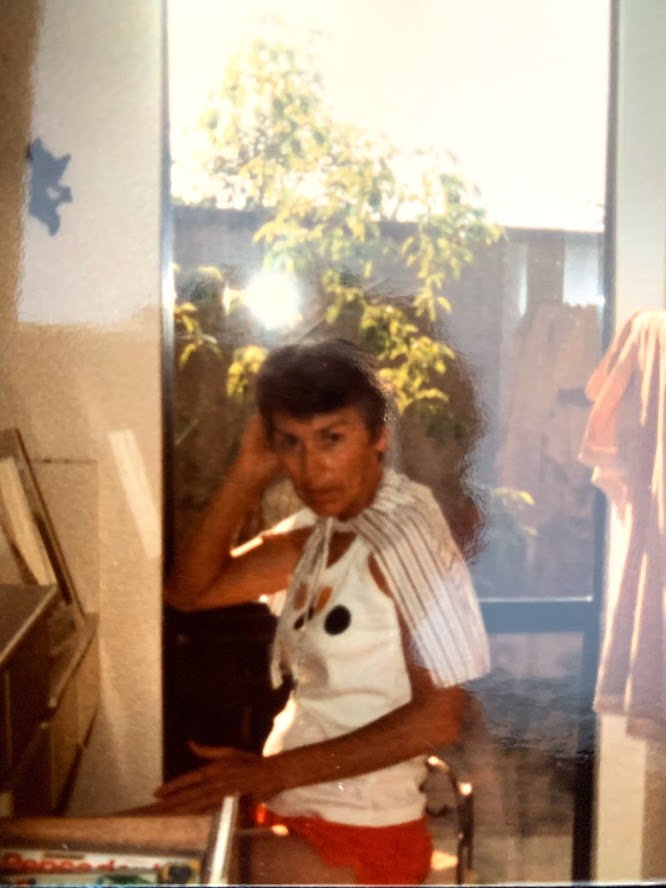
Here is my mom in the 70’s I’m so glad I found this picture! I need to give an update on her, so many have asked, it’s just such a hard journey and not easy to talk about.
Affiliate links listed below
Supplies
- Drop cloth/Sheet or Trash Bag
- Screwdriver
- Tack Puller or a flat head screwdriver
- Spray Paint
- Material for upholstering
- Scissors
- Upholstery Staple Gun
- Foam (if it needs replacing)
Directions:
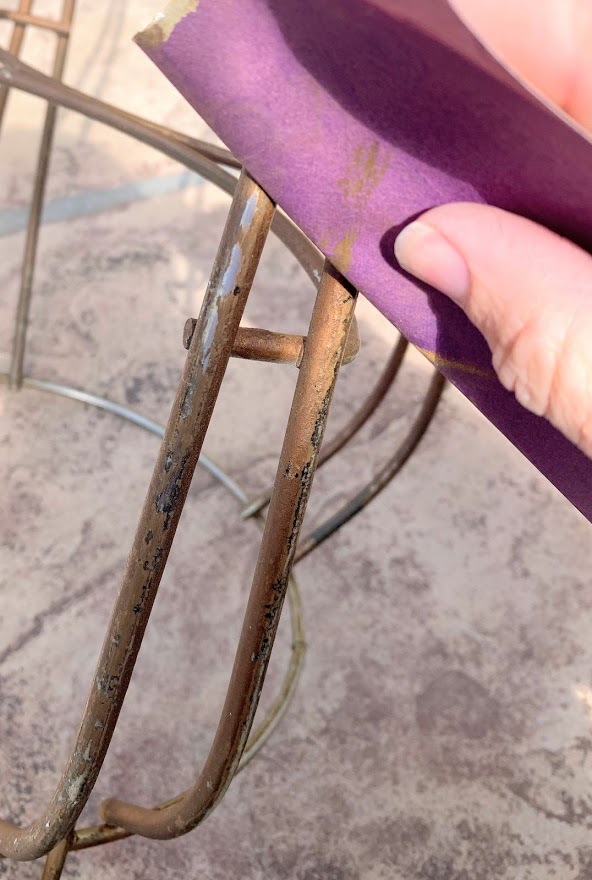
First, disassemble the chair by unscrewing the screws under the seat.
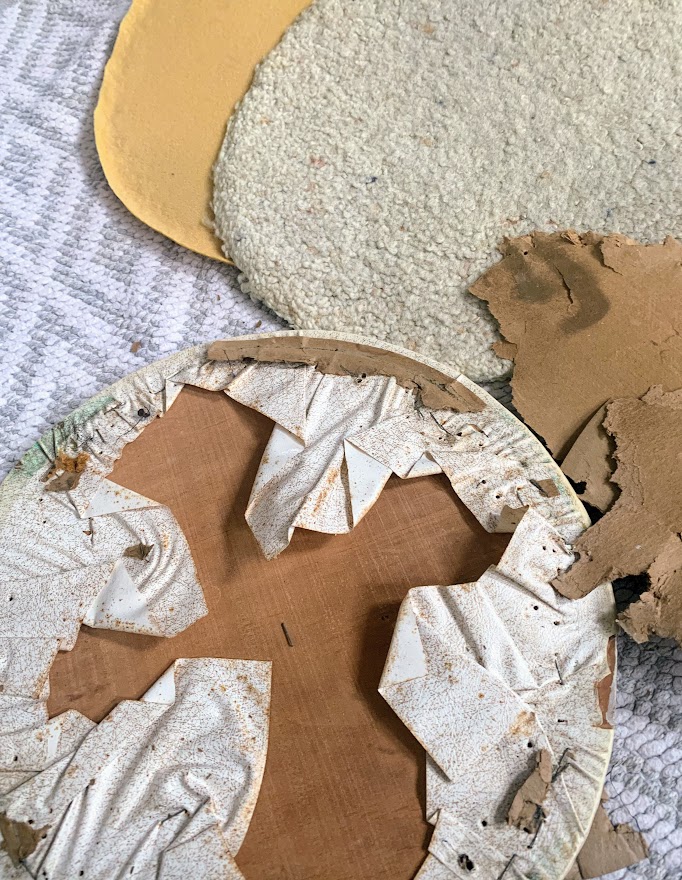
Using a tack puller or flat head screwdriver, remove the old fabric and foam from the seat.
It was at this exact moment when I came across layers and layers of different material (including carpet) I realized this piece might actually be antique but I’m just not sure.
Prep your piece by cleaning it well with a damp cloth. You can also lightly sand the piece if you need to using 220 grit sandpaper. In my case, it looked like at some point someone had painted this stool so I had to sand it down.
Place your piece on a drop cloth and start spray painting. Apply two coats, allowing each coat to dry well.

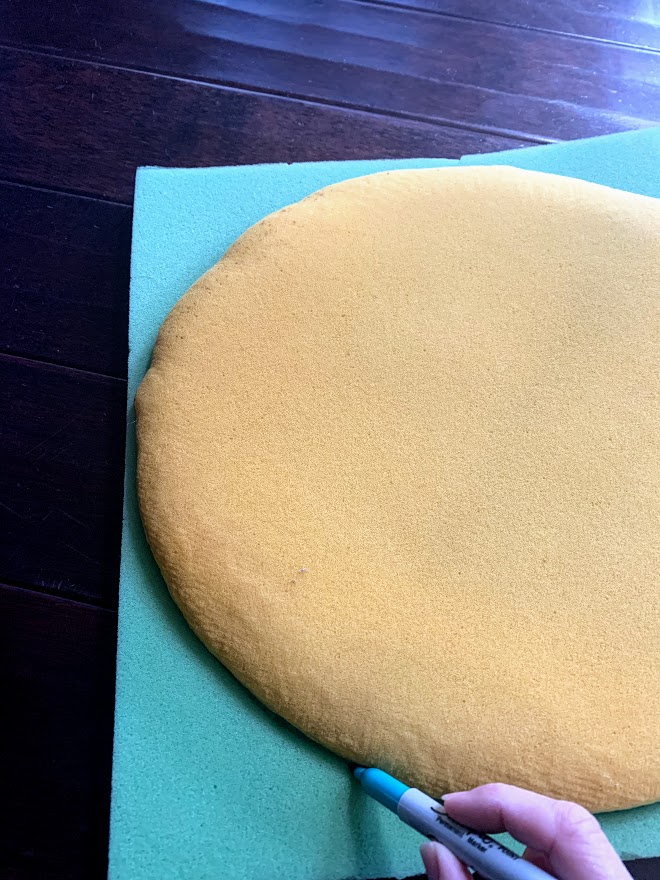
If you need to replace the foam, place the old foam on top of the new foam, trace using a sharpie and cut accordingly.
Measure the fabric the same way as you did the foam and cut, allowing a 3-4 inch fold allowance.
Place your fabric face down on a hard surface, followed by the foam and then the wood.
(Note: You can glue the foam to the wood using spray adhesive if you would like)
Grab the first corner of your fabric and pull it onto your stool seat.
Pulling tightly, begin stapling your fabric to the underside of the wood.
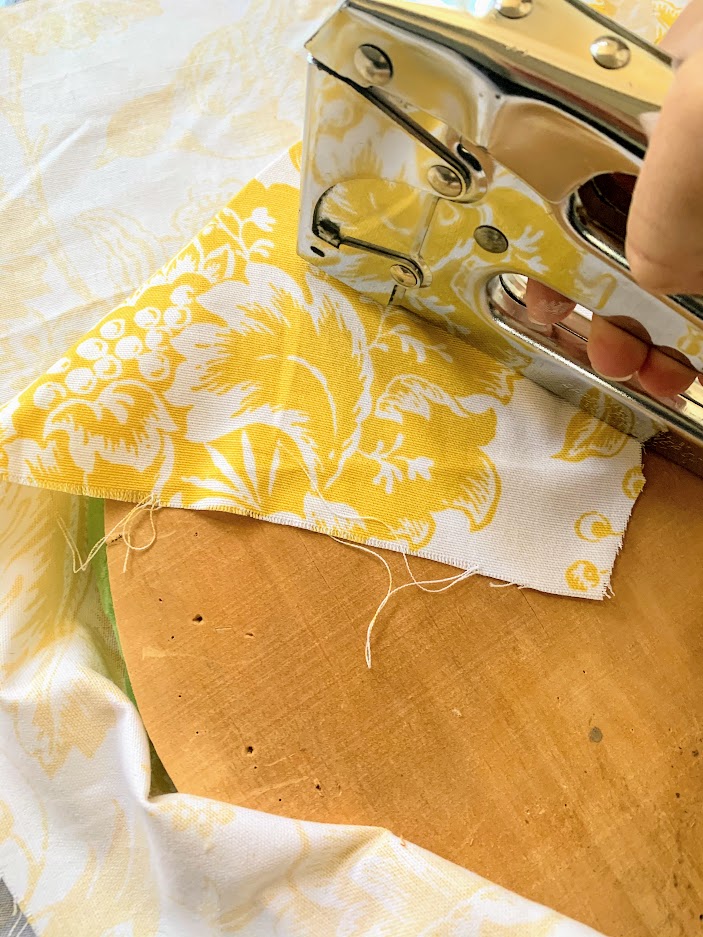
It’s best to start with stapling the fabric on one side of the stool, and then switch and staple the opposite side. This helps keep the fabric right where you want it. Continue until all of the fabric is secure and in place
Trim any excess fabric
Take your cushion and screw it back into the chair.
Voila!

So the next time you find a little piece of furniture, find the potential in it and make it over. Small projects like this can be quite simple and very rewarding!

Vintage Vanity Stool Makeover
Concrete Planter Makeover
Seed Storage Box from a Wooden Recipe Card Holder
Thrift Store Coffee Table Makeover
TV Tray Makeover
Inexpensive Kitchen Wall Decor
Repurposed Tobacco Basket Project


Love the fabric you used!!! Thinking of you and your mom!
Thank you Maryann!
What a sweet makeover, and I’m happy to know a good thrift store find can bring back such fond memories of your mom. I often think of my Nana when I’m thrifting and see things she used in the kitchen.
take care,
gail
pinned!
Thank you so much Gail, it’s always fun to go to the thrift store and find things my grandparents had that I wished I had kept.
That fabric is amazing! Great way to upcycle the stool. I think half the reason I thrift is to recreate the home I grew up in 🙂
What a fabulous makeover! I really love that fun yellow fabric. Been thinking of you and your mom. What a fun photo that you found!
Thank you so much CHristy!