
How to install double stacked crown molding

There is something about crown molding, it adds such elegance to a room. If you hire out it can get pricey, you can save so much money by installing it yourself. I can’t take much credit for installing the crown in the guestroom/office, I left the task up to my hubby, I was just his sidekick.
He opted to use 2 different types of baseboards cutting them at a 45-degree angle. We used this method in the kitchen and my husband found the cuts to be so much simpler than the cuts you are forced to use with the crown. He’s able to butt the molding right into the corner versus making difficult cuts with crown molding.
Paint all your trim first
You know the rule; measure twice cut once
45-degree cuts

The tape serves as a marker so we know where the studs are in the wall. The nails serve as a guide when installing the molding to keep it straight and it helps hold the molding up.

Nail the board into the studs

In our case, we did this process all over again since we are stacking the molding

Use wood putty to fill all visible nail holes. We used caulk to cover any small gaps at the joints. Wait for the putty to dry and sand it smooth with fine sandpaper. Paint over nail holes, you will be left with a seamless appearance!
If the molding must end in the middle of a wall, cap it with a return. In our case, we have a vent so we added two returns. Cut the piece so that it comes to a point at the bottom edge. Avoid splitting the small piece by gluing the return in place rather than nailing it.


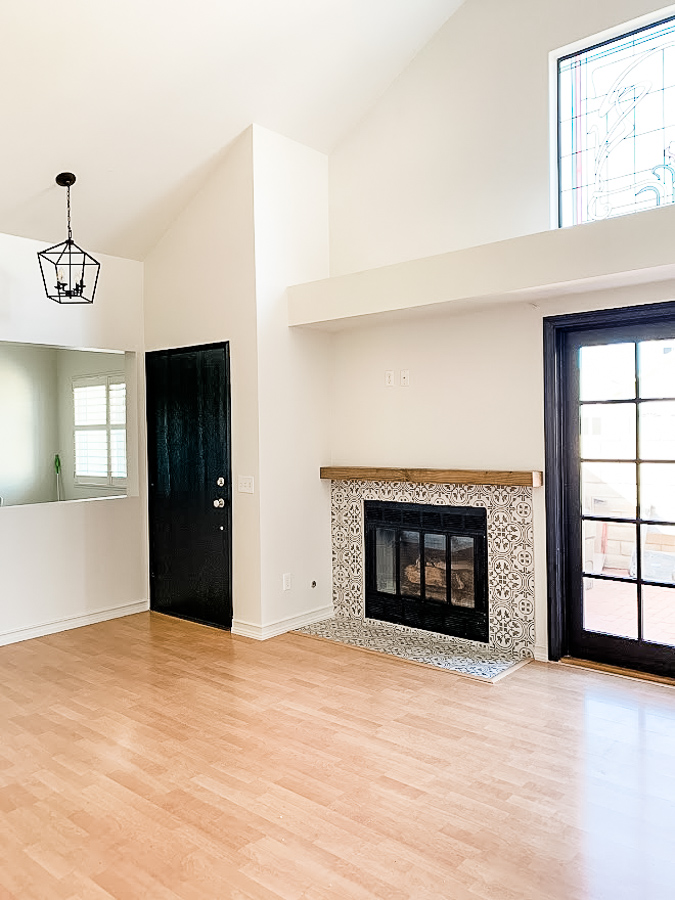
Before

After
Love it! Beautiful crown. We had to do a similar thing with the edge of our crown because we have closets on one wall of our bedroom with doors that go tot he ceiling, so we couldn’t’ have crown on that side.I thought it was going to bother me, but it’s fine.