
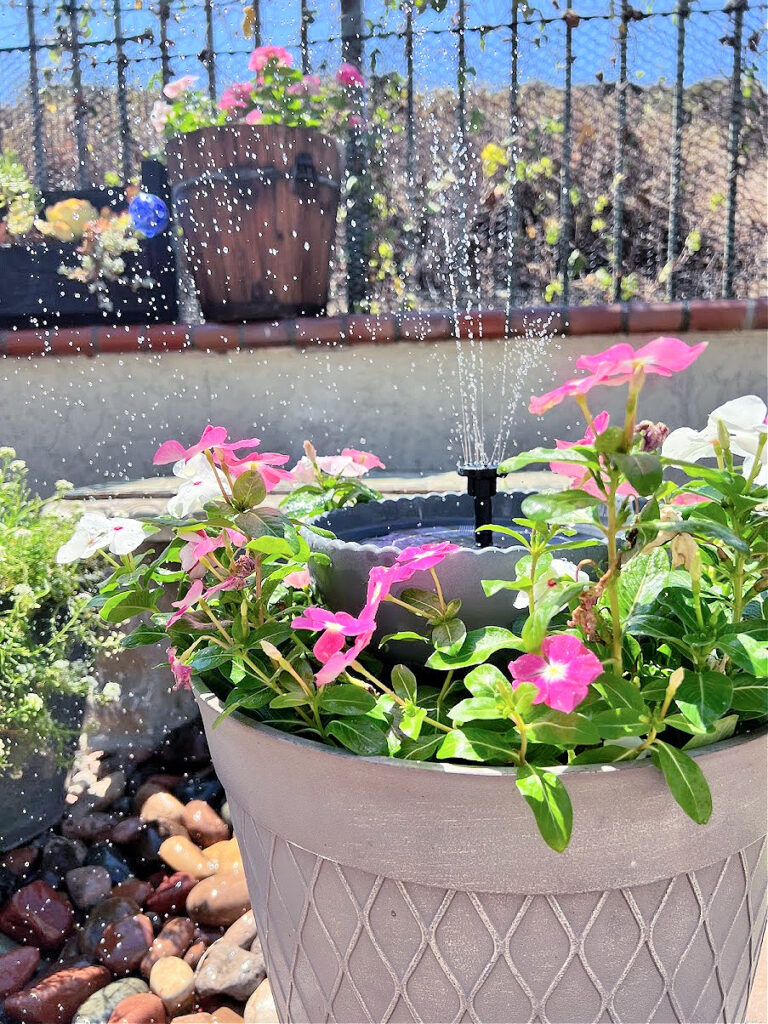
Easy To Make DIY Solar Powered Water Planter Feature
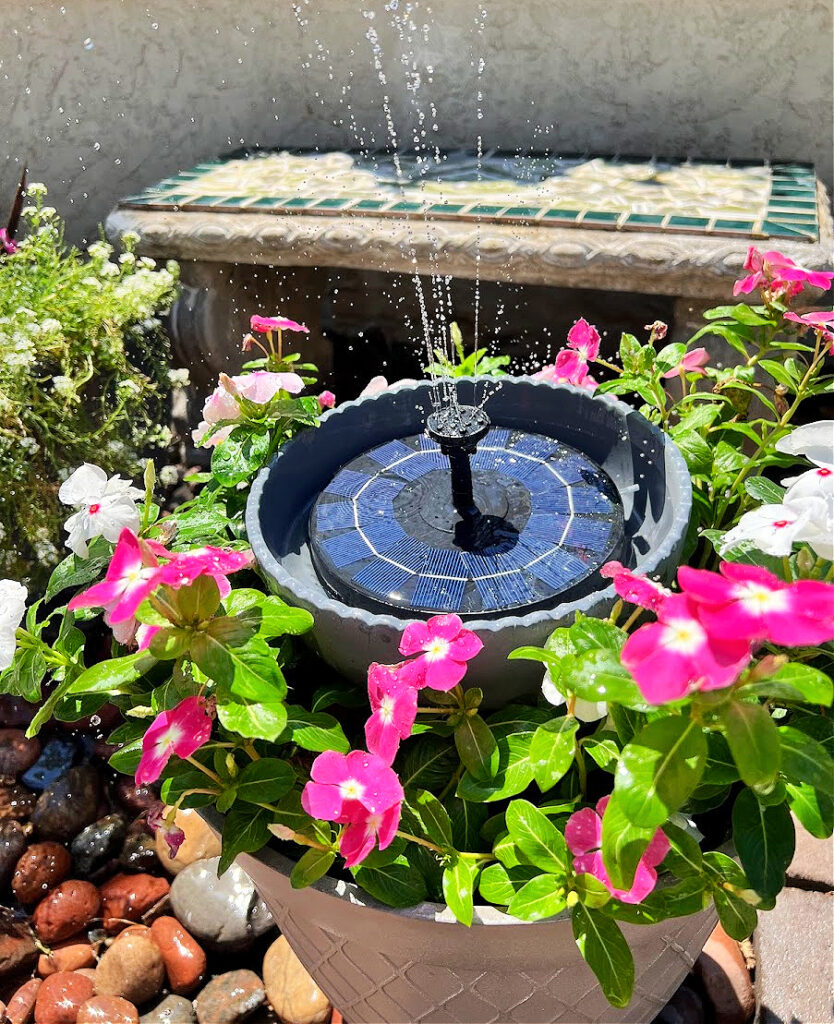
My easy-to-follow tutorial teaches how to create a beautiful DIY solar water fountain planter. Combining water and gorgeous flowers is a great way to add beauty and tranquility to your outdoor space! This easy DIY project is cost-effective and comes together in less than 30 minutes. A little bonus, the birds love it, and it’s become their little bird bath in the mornings.
It has been HOT here in San Diego, it’s the first heat wave of the Summer, power outage and all. I feel bad to complain since our weather is usually perfect, some (my family) might say I was a little grumpy, lol. I’ve had my post written for a week and woke up early on Saturday so I could finish the project before the sun came out. Our upstairs AC is on its last leg, and 90+ degrees on the second story, yuck. Thank goodness for the ugly window fans. We will be back to beautiful weather on Friday!
Grab your $9 solar pump here for this easy project!


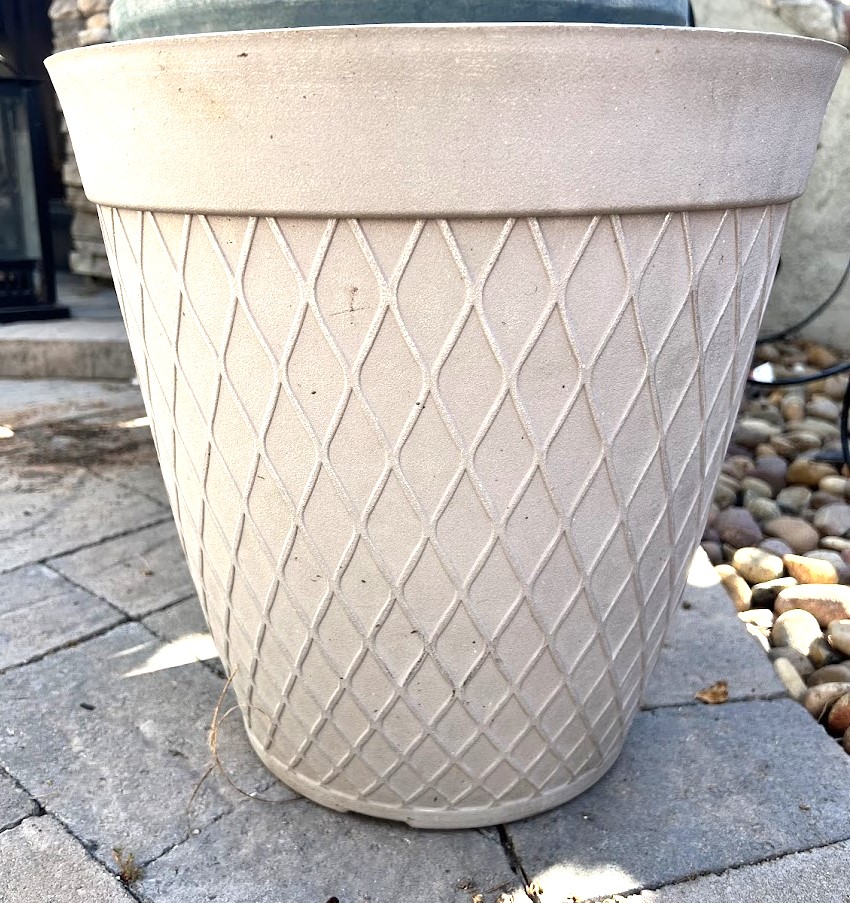
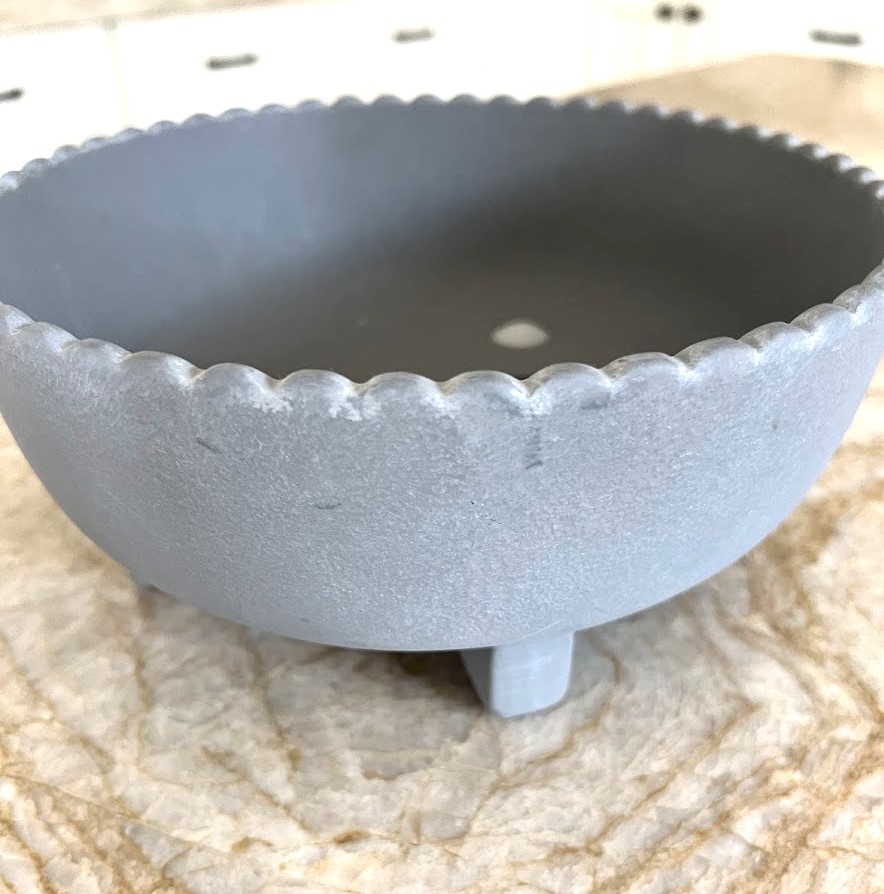
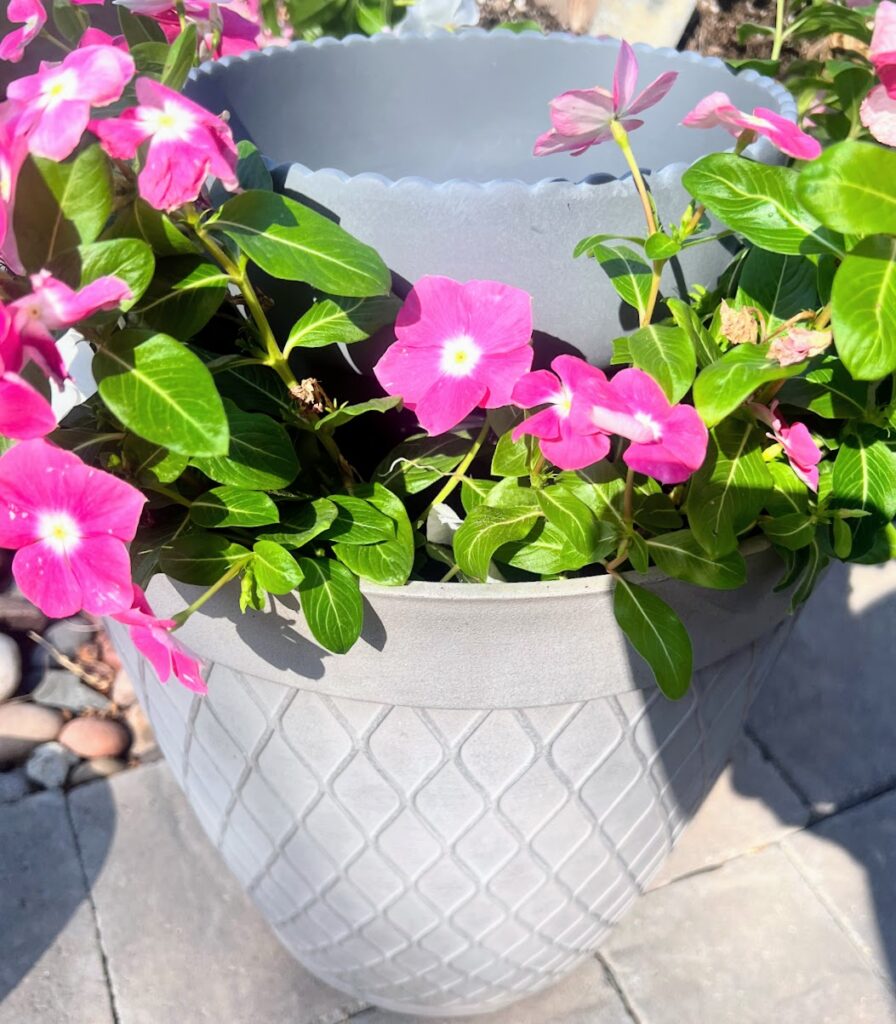
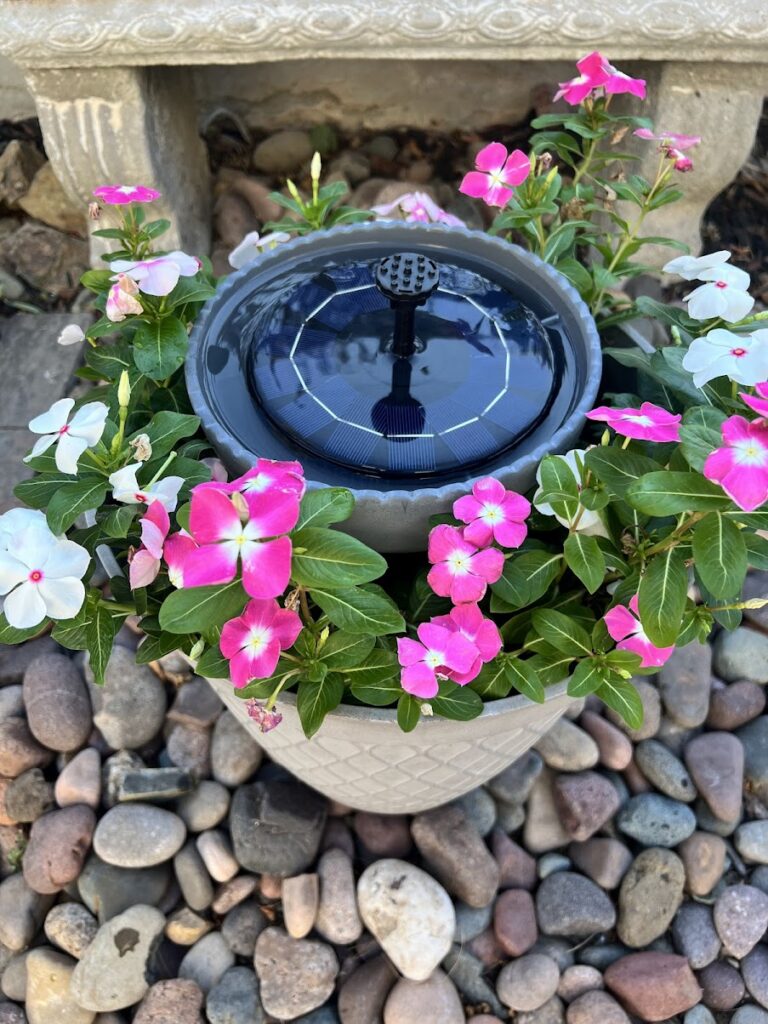
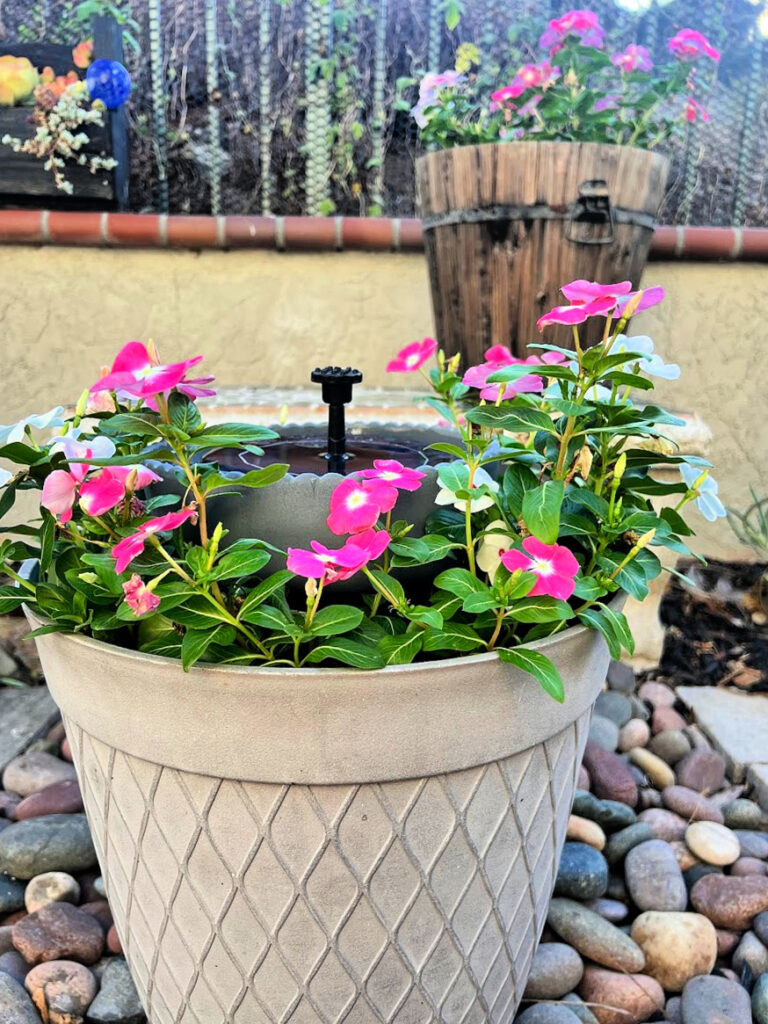
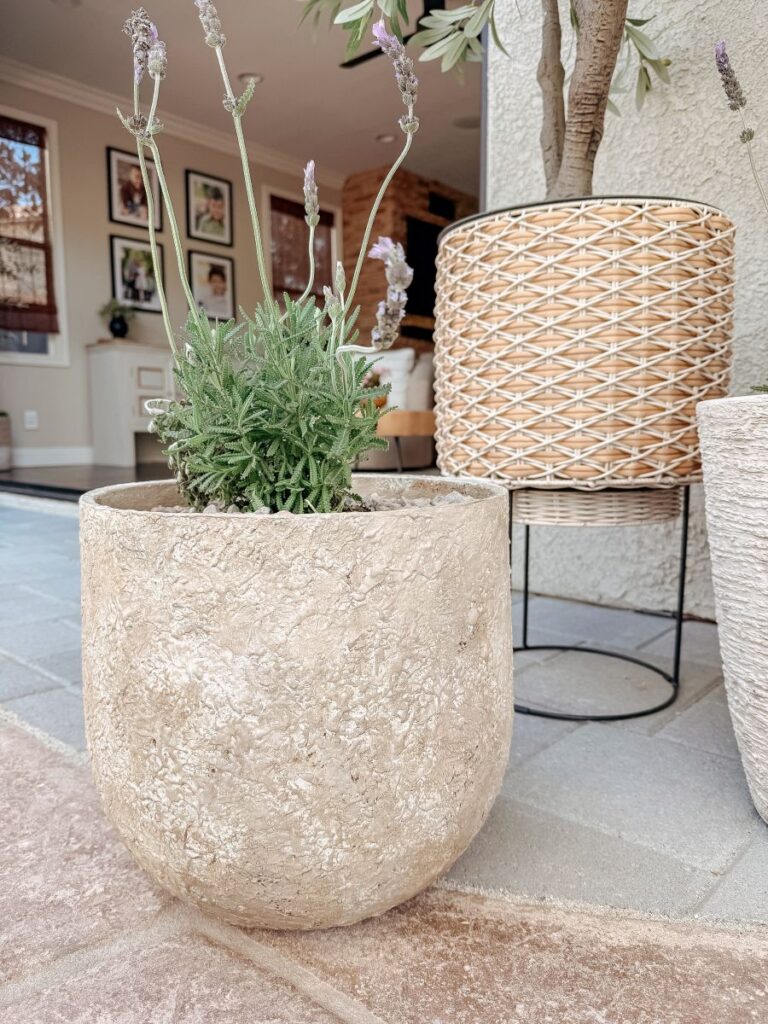
I was lucky enough to be given this pot by a neighbor a while ago. It was still in perfect shape; it just needed a little cleaning. I thought about spray painting it a different color, but it complemented the basin perfectly. For the basin, I used our catch-all outdoor pot, which I purchased a few years back, placed at our front door.
I want to preface this tutorial that you need a sunny location for your DIY water fountain, as this pump needs full sun for the fountain to work. You won’t be able to enjoy your solar-powered fountain on cloudy days.
Materials:

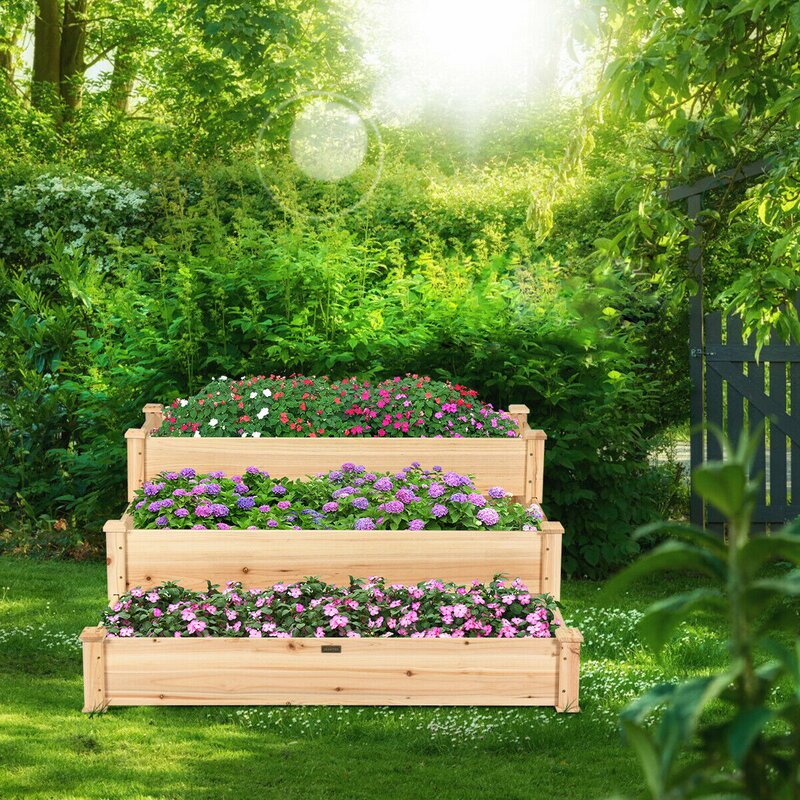
Medium to large Garden Planter
Smaller garden planter or basin. (with no drainage holes and needs to be a waterproof container)
Plants
Potting Soil
This solar pump has a battery backup
Step 1: Choose Your Pots
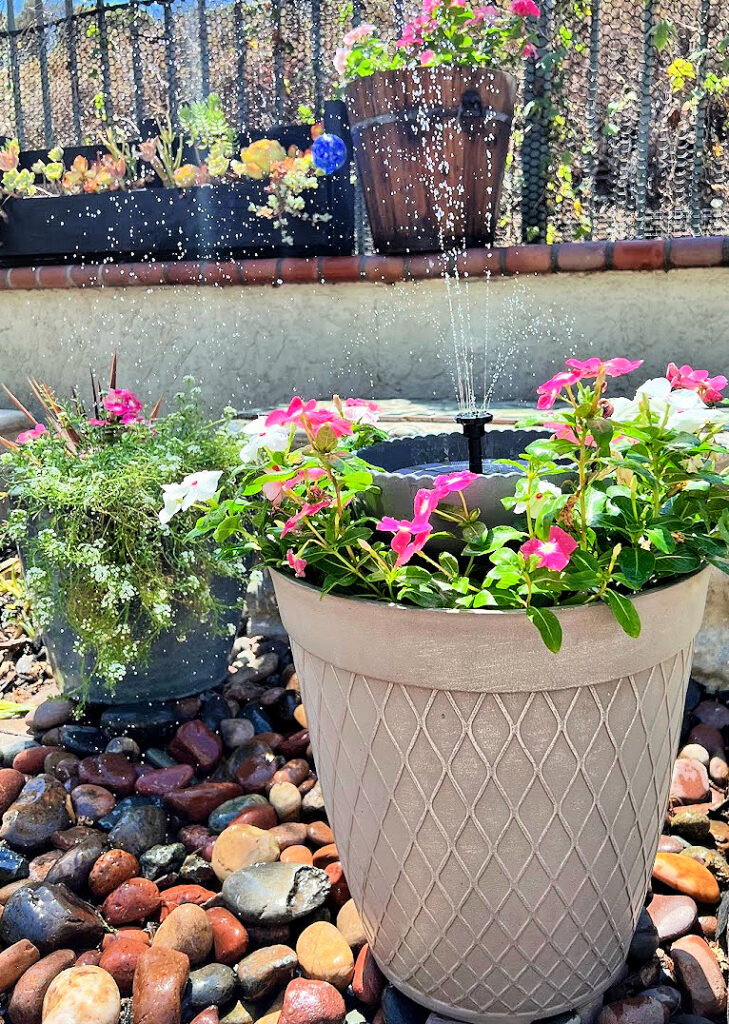
You will need 2 pots; the bottom pot will be larger than the upper pot. There is no right or wrong size for your pots. The larger pot has to be able to fit your flowers and still have room in the middle for your smaller pot. The smaller pot also needs to be large enough to fit the pump. Since this pump allows you to adjust the water flow with different nozzles, I could have used a larger top pot, but I liked the way this little basin looked.
You can use a brand new large pot, or you can repurpose a large planter that you already have on hand or purchased at a thrift store pot, no right or wrong way.
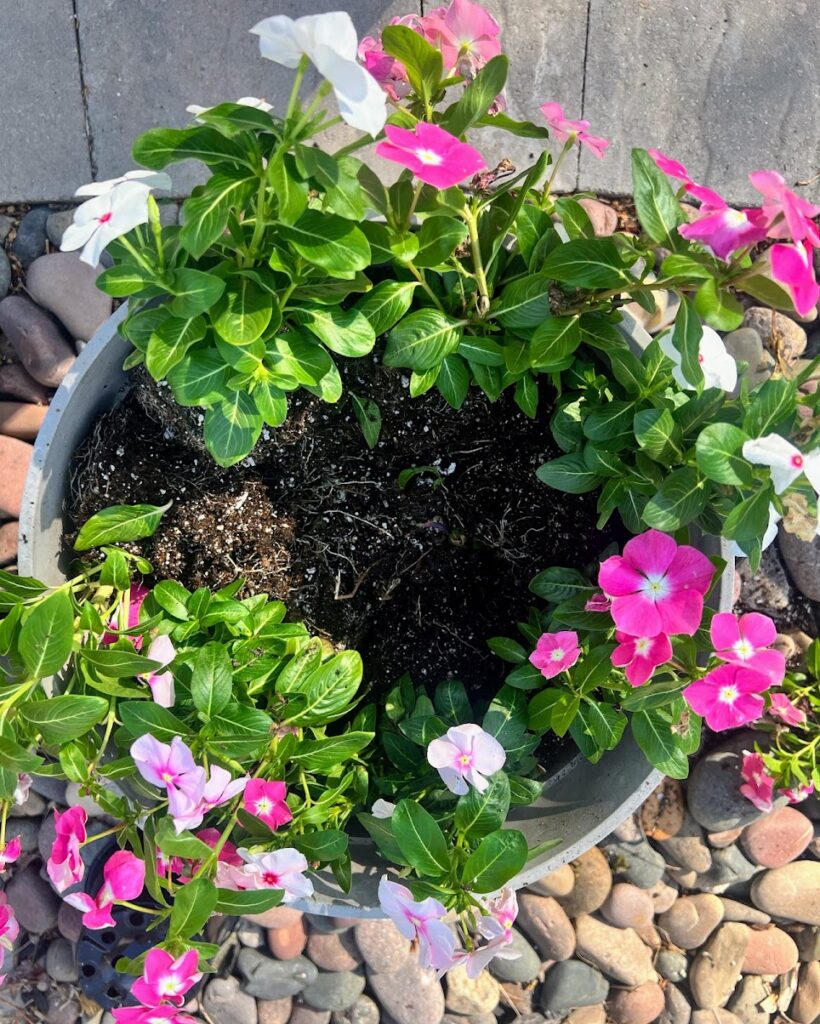
Step 2: Add Soil and plants
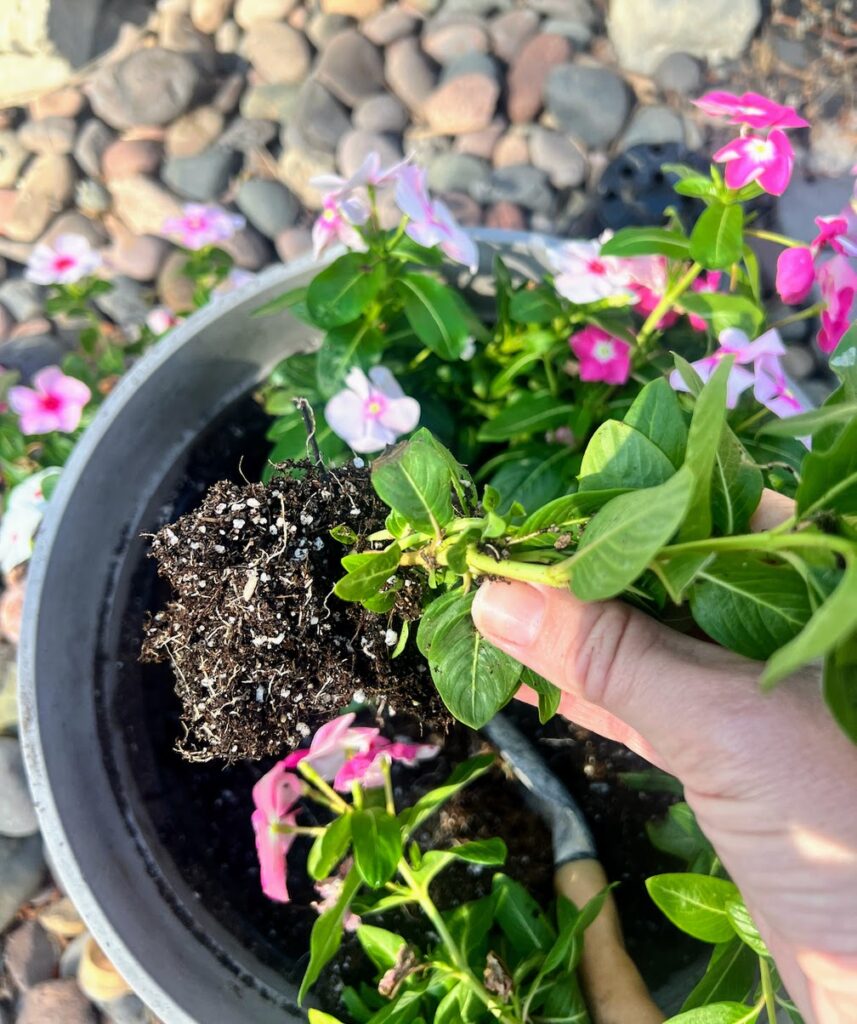
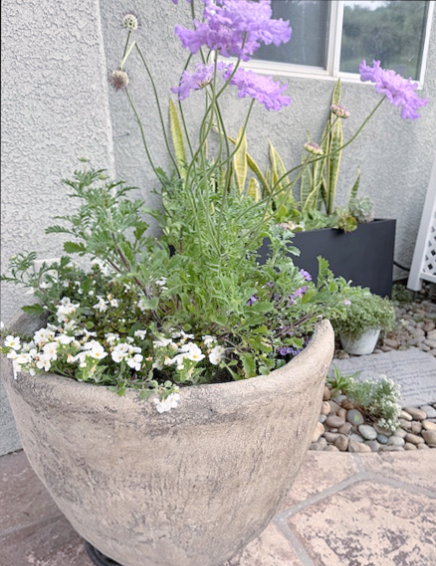
If your pot is extra large, you can add filler to your pot before adding the soil. Plastic water bottles, milk jugs, wood, etc., will all do the trick. Add your soil a little less than 3/4 of the way up. If needed, place your smaller basin or planter in the middle of the large pot so you know how much room you need. Plant your flowers all around the outer edge. Top with more soil.
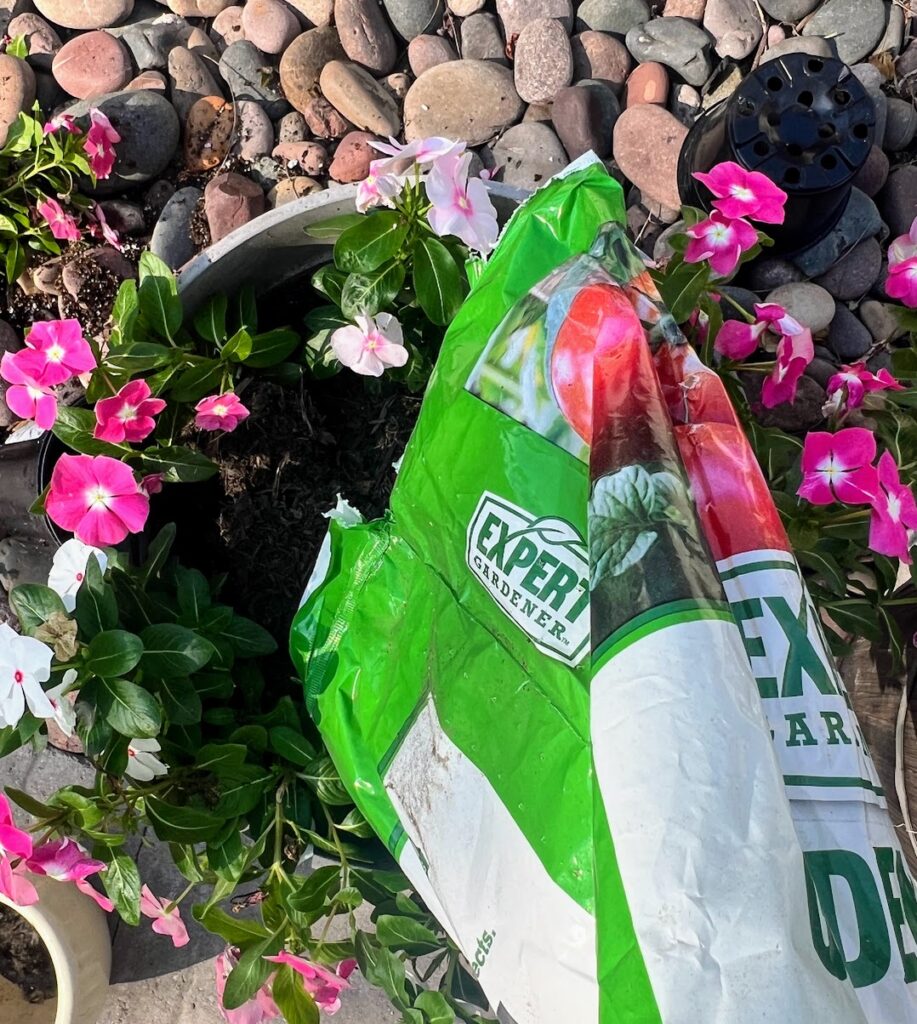
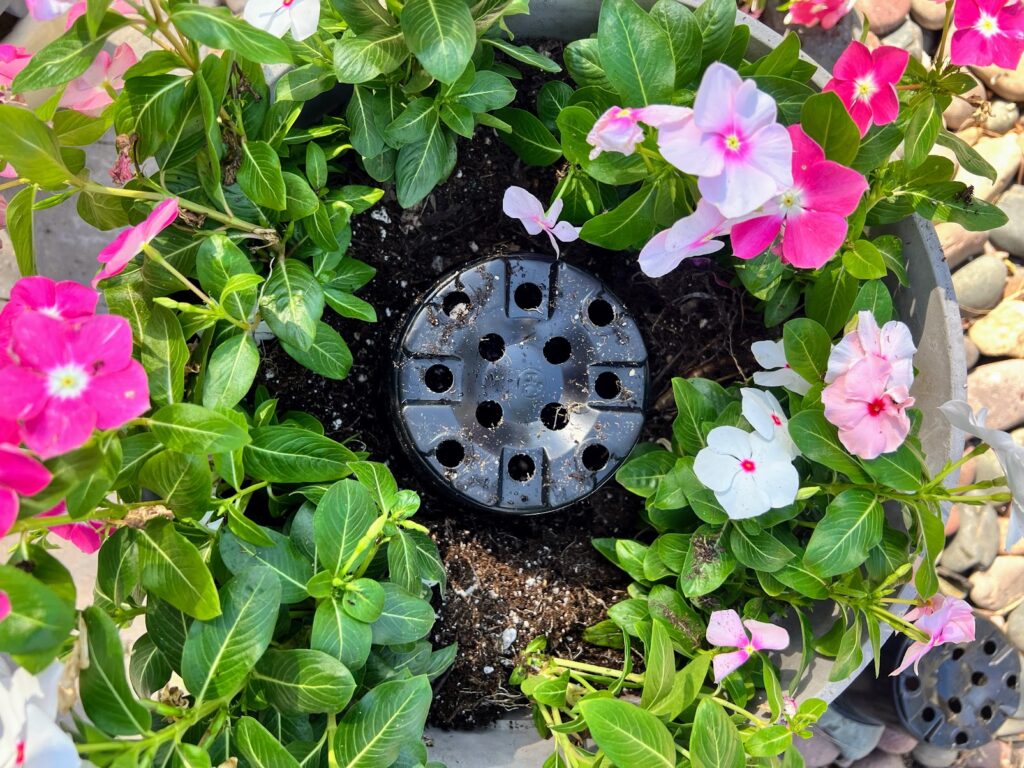
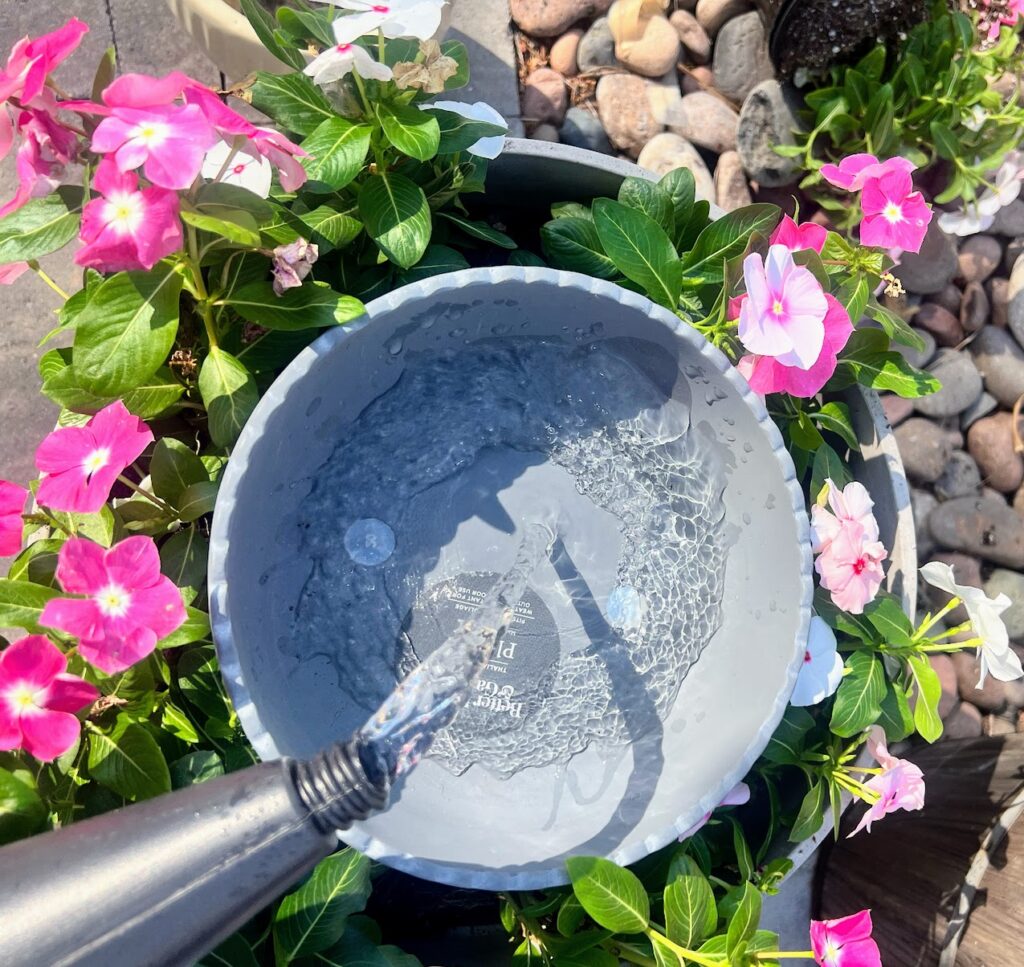
Step 3: Fill the small planter with water and add a pump
Fill the small flower pot with water, about three-quarters full, and add your pump. The pump has different spray nozzle heads that affect the width and height of the spray. Choose the one that works best with your design.
Step 4 – How To Keep The Solar Pump in the Center of the Pot
If you don’t want the pump to move around, you can add the tubes to the side of the pump. This will prevent water spray, and you won’t have to constantly add more water.
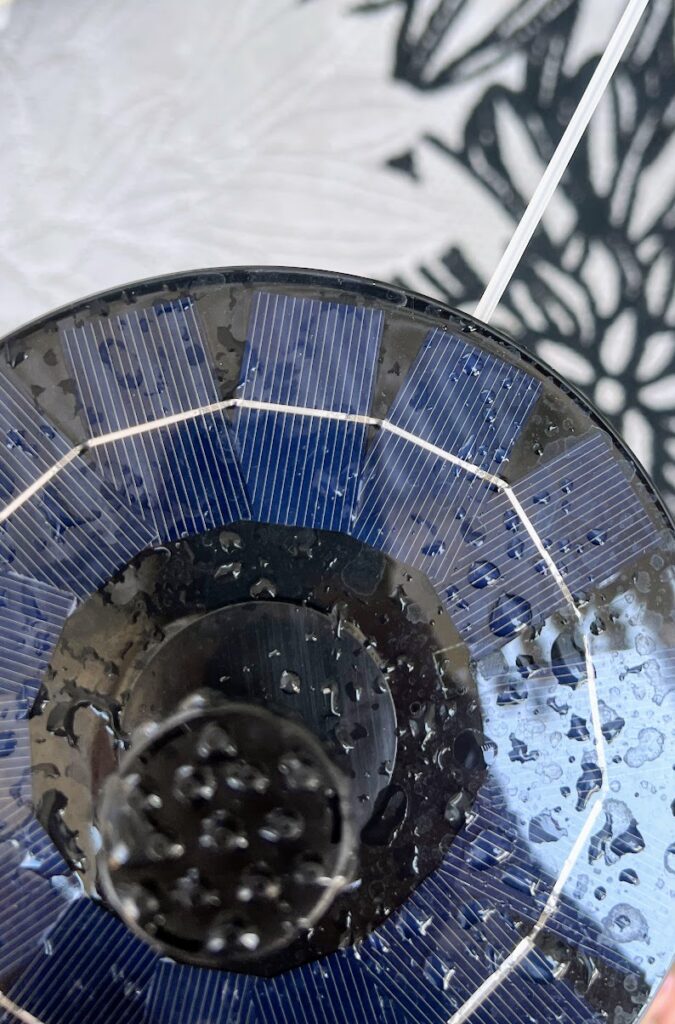
Ignore the sticker, I couldn’t find the goo gone, and I couldn’t get the sticker up. Knowing it would be covered, I left it. Blame it on the weather lol
Step 5: Tips
Arrange small river rocks or decorative stones around the pump.
Add water plants or aquatic plants
Ensure the flower pot fountain has direct sunlight; trees and buildings can create shadows, preventing your pump from working.
You could use an old galvanized tub as your planter, or a large bowl as your water container.
Maintenance:
Regularly check the water level and top it up as needed.
Clean the pump and basin periodically to prevent algae buildup and maintain proper flow.
I loved creating my diy water feature. My favorite part of my day is listening to the sound of the water first thing in the morning while drinking my coffee, well, before it was 100 degrees by 7 am. Temperatures are supposed to drop by Friday, woo hoo!!

Solar Powered Water Fountain Pump With Battery Backup
A solar fountain pump with battery backup charges in the sun and stores energy so it keeps running even when clouds roll in, up to 4–6 hours of battery life. I wouldn’t rely on it for a fully covered patio, but if you have a spot that gets partial shade or occasional cloudy days, this is the one to get. You can find it here!
Frequently Asked Questions
How long do solar water pumps last?
A good quality solar water pump typically lasts 2–4 years with proper care. The key is keeping the pump clean and free of algae buildup, and storing it indoors during the winter months if you live in a cold climate. The solar panel itself can last much longer — often 5+ years.
Do solar water fountains work on cloudy days?
Unfortunately, no — solar water pumps need direct sunlight to operate. On overcast or cloudy days, the pump will slow down or stop completely. This is why choosing a sunny location for your planter fountain is so important. Here in San Diego, we have plenty of sun, so it runs almost every day! However, they do sell backup batteries for fountains, you can find that here.
How often should I clean my solar water fountain?
I recommend cleaning the pump and basin every 2–4 weeks to prevent algae buildup and keep the water flowing well. Simply remove the pump, rinse it under clean water, and wipe away any debris. Top up the water level at the same time — especially in hot weather when evaporation is faster.
What size pot do I need for a solar water planter fountain?
There is no right or wrong size — it really depends on the look you want. You need a larger outer pot to hold your flowers and soil, and a smaller inner basin that fits the pump and holds water. The inner basin needs to be waterproof with no drainage holes. I used a medium-sized outer planter and a small decorative basin for mine.
Can I leave my solar fountain out in winter?
If you live in a climate where temperatures drop below freezing, bring your pump indoors for winter — freezing water can damage the pump mechanism. In mild climates like San Diego, you can leave it out year-round. Just drain the basin if a cold snap is coming and refill when temperatures warm up again.
Will birds use my solar water planter as a bird bath?
Yes! This was one of my favorite surprises — the birds absolutely love it. The sound of moving water attracts birds naturally, and they use it as a little bath in the mornings. It adds such a lovely and peaceful element to the garden that I never expected when I first built it.
Time to check out all of the amazing makeovers!

Chandelier Repurpose Idea For Fall Petticoat Junktion
Solar Powered Water Planter Feature My Uncommon Slice of Suburbia
Fall Wooden Crate ProjectShop At Blu
Upcycling a Pair of Halloween Pillows Sadie Seasongoods
DIY Cheese Box Wreath For Fall House of Hawthornes
Bathroom Wall Cabinet Makeover My Repurposed Life
Lamp Makeover with Rub ‘n Buff Our Southern Home
Thank you so much for stopping in today! Let me know if you have any questions in the comments below, I’m always happy to help.
How to turn a file cabinet into a planter


Wow, that’s ridiculously hot! It’s actually been sort of cool for September here in Ohio. Love the fountain. Very creative!
Thank you so much Pam, I am ready for cooler days 🙂
This is gorgeous! I love the scalloped planter. I have the white one you linked to on a patio table. They are fabulous containers. Nothing beats the sound of a little water movement. The solar aspect means you can put it anywhere!
Thank you so much Christy, it was a fun and easy project! I love the scalloped planter too, wish I bought more last year!
Kristin
My friend has one of those in her birdbath. I like it a lot better in the planter. I would love to have something like this at The Hideaway, but we have too much shade. 🙁
I love what you did, so pretty!
Pinned!
gail
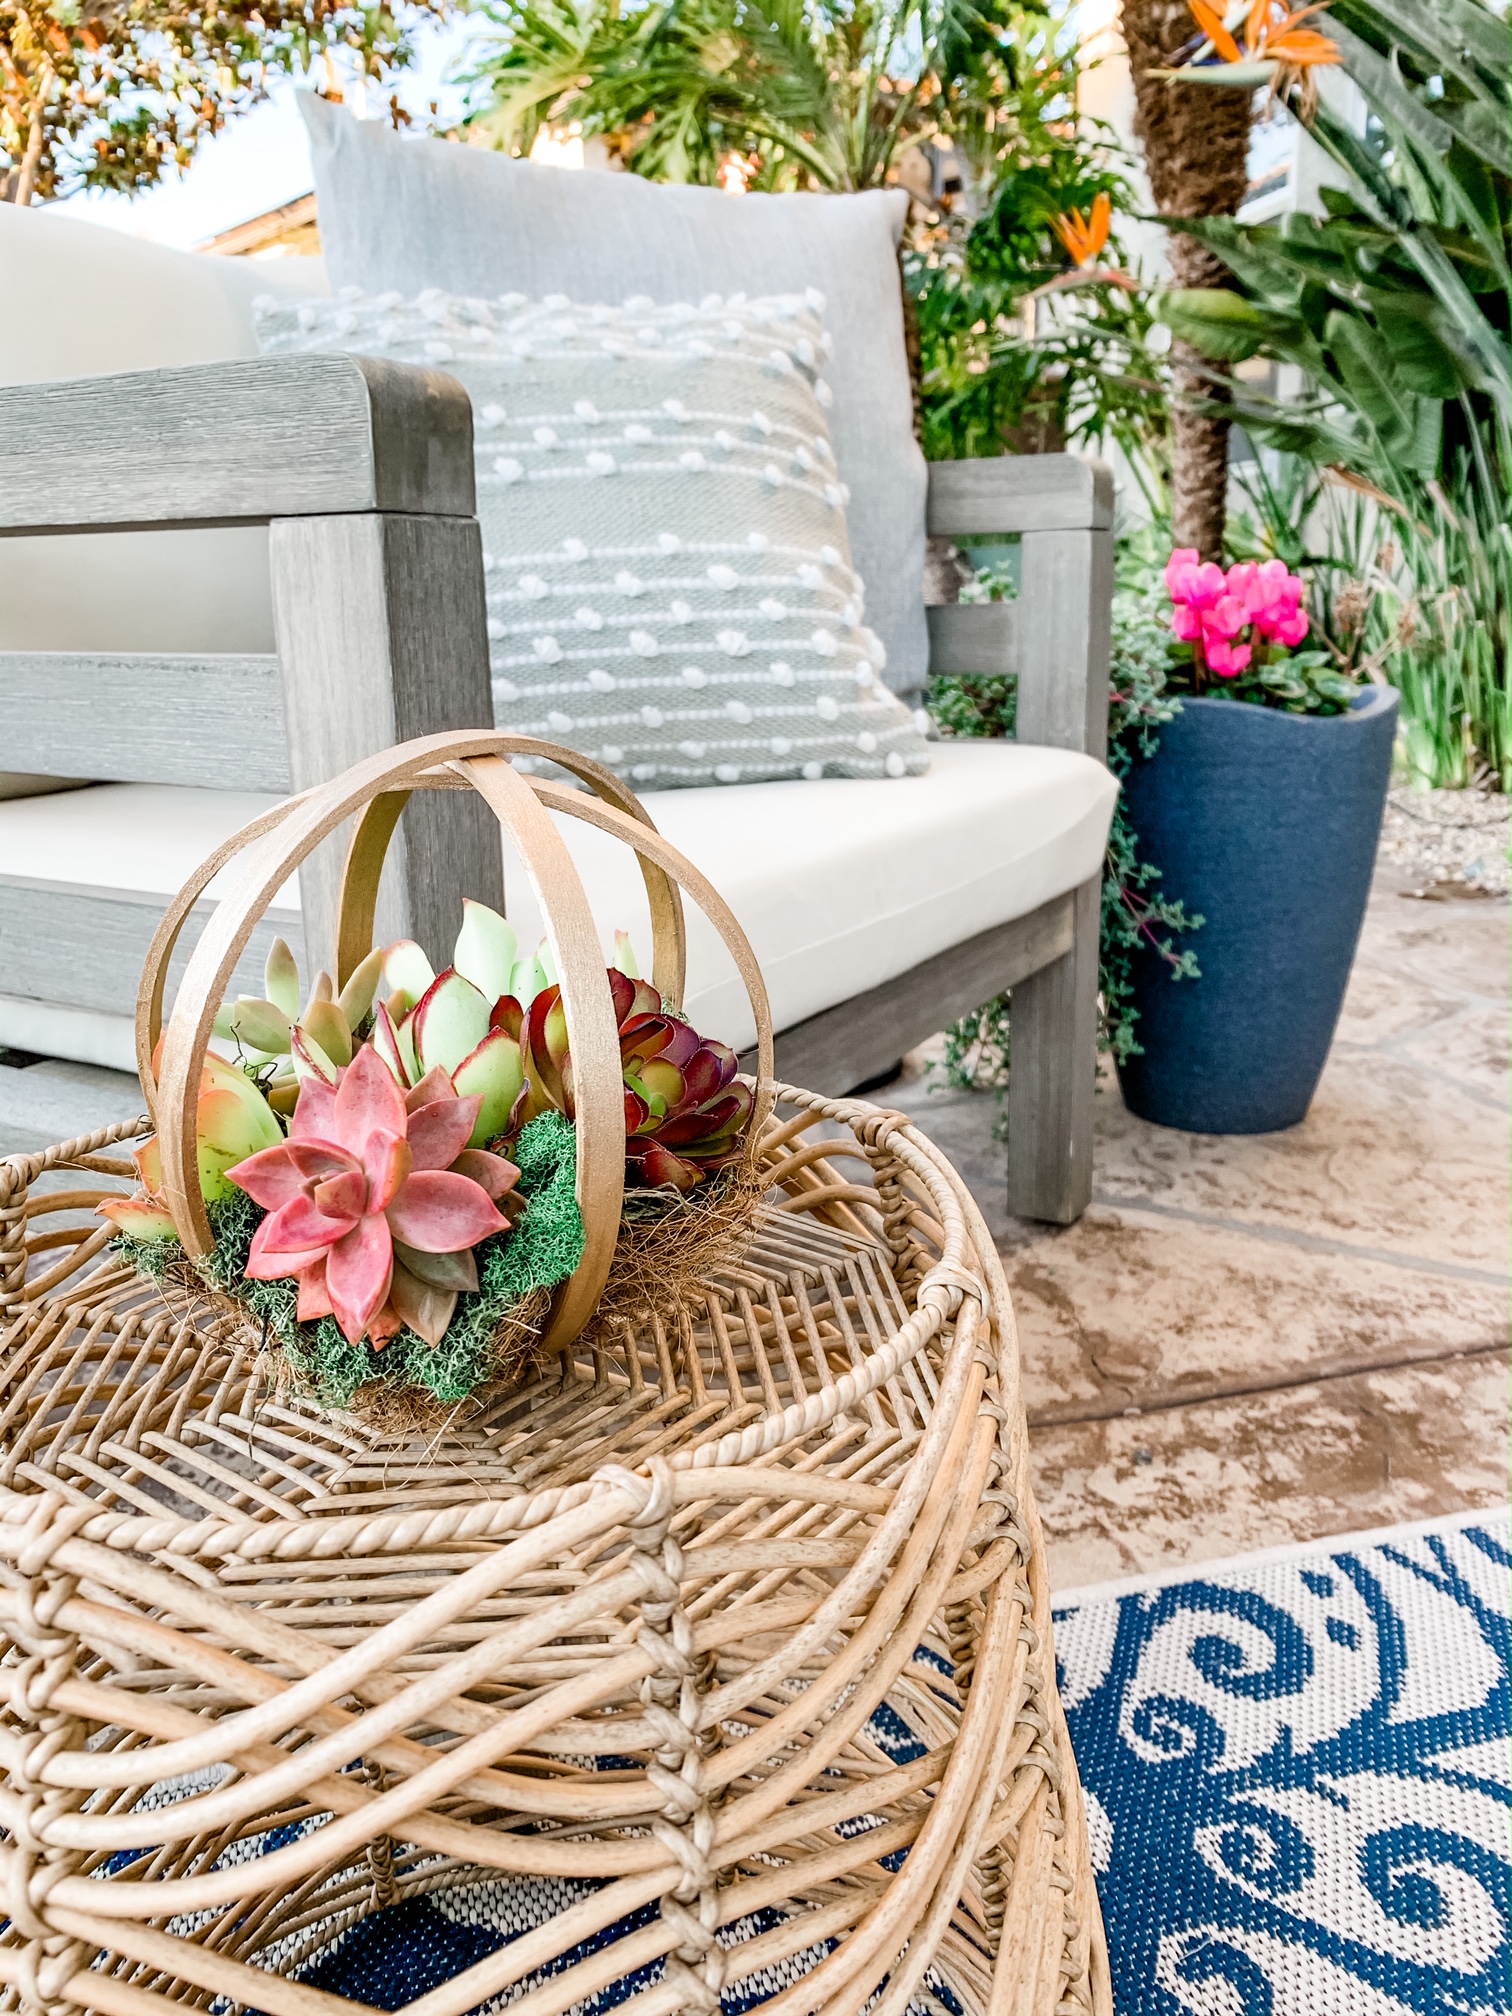
Thank you so much Gail, I did think about putting it in the bird bath but then I would have to take out the succulents and they were too rooted in lol.