
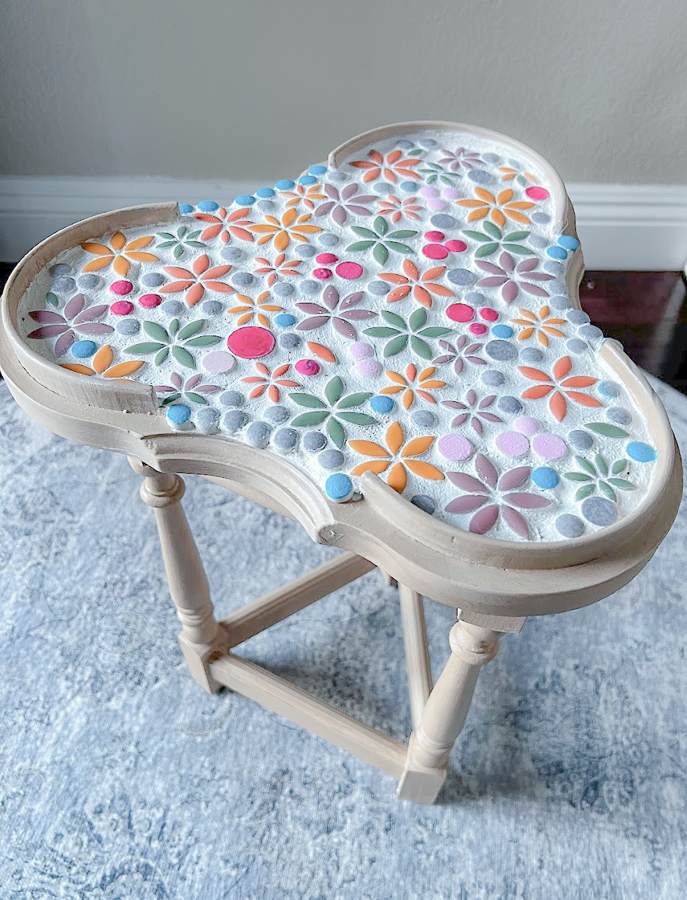
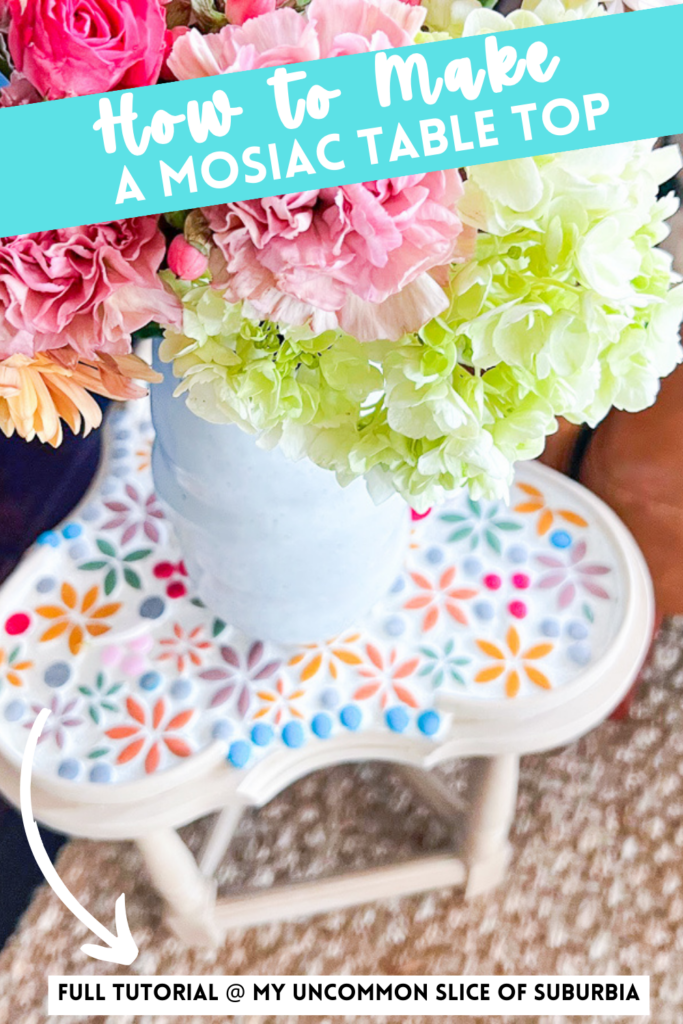
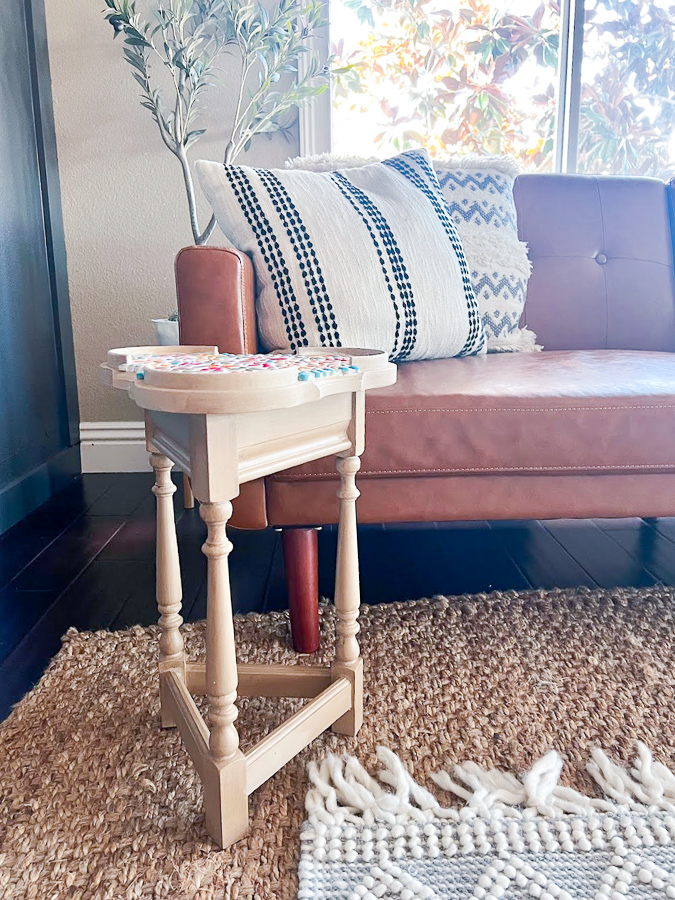
DIY Floral Mosaic Side Table Using Glazed Petal Tiles
Create a floral mosaic side table using glazed petal tiles in various colors. It’s such a great way to update an old or outdated accent table in your home! This was a fun little project but make sure to bring your patience. It’s not hard at all, just a little tedious with all of the tiny tiles.
Affiliate links are listed below
Update: It looks like all the petal tiles on Etsy are currently sold out. However, I’ve found some comparable tiles on Amazon. You can find them here!
This little accent table belonged to my grandparents. It then made it to my mom’s house after my grandmother passed in 2016 at the age of 100! Such a beautiful life she lived! After my mom’s passing in 2021, I took this little table to my house. It brings back so many great memories! A few years ago, I was painting some side tables for my brother and sister-in-law that belonged to my parents, and I decided to paint the accent table at the same time. I love it, but I’m ready to give it an updated makeover to match the loft/office space.
This is the first makeover, you can find that tutorial here.

And this is the original
![]()

Supplies
Check Amazon as well for a variety of colors
Mosaic tiles in pink
yellow
green
orange
A table
Tile adhesive I used gorilla glue
White Grout
Sealer
Putty knife for applying adhesive
Container for mixing grout
Sponge
Towel
Gloves
Directions
Prepare The Table
Use a primer or sealant to protect the surface of your table from warping due to moisture.
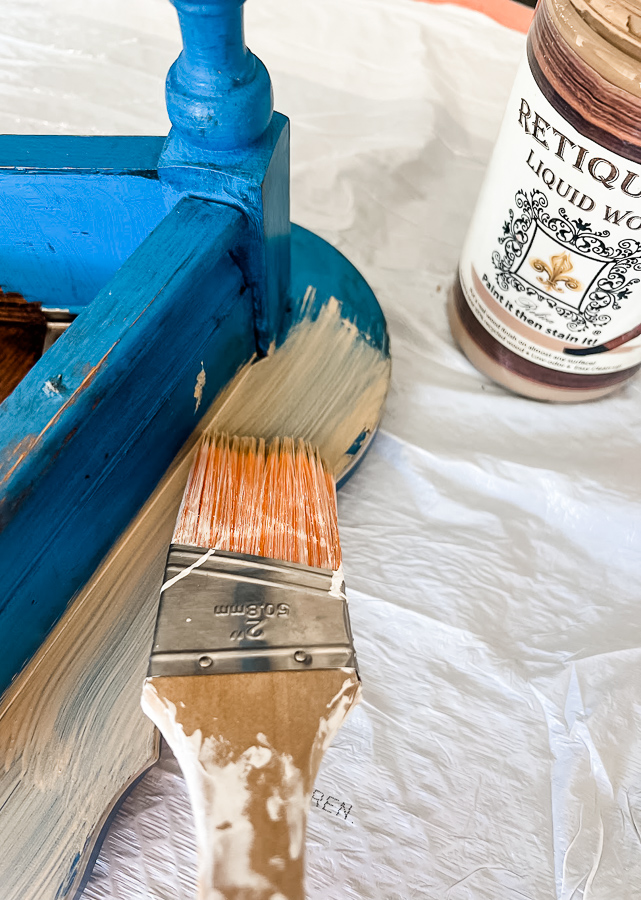
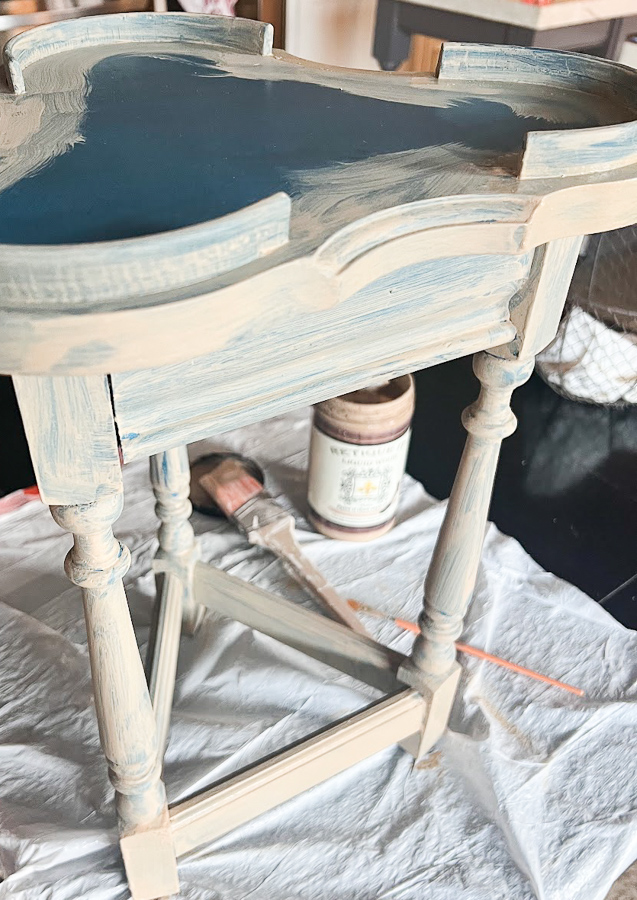
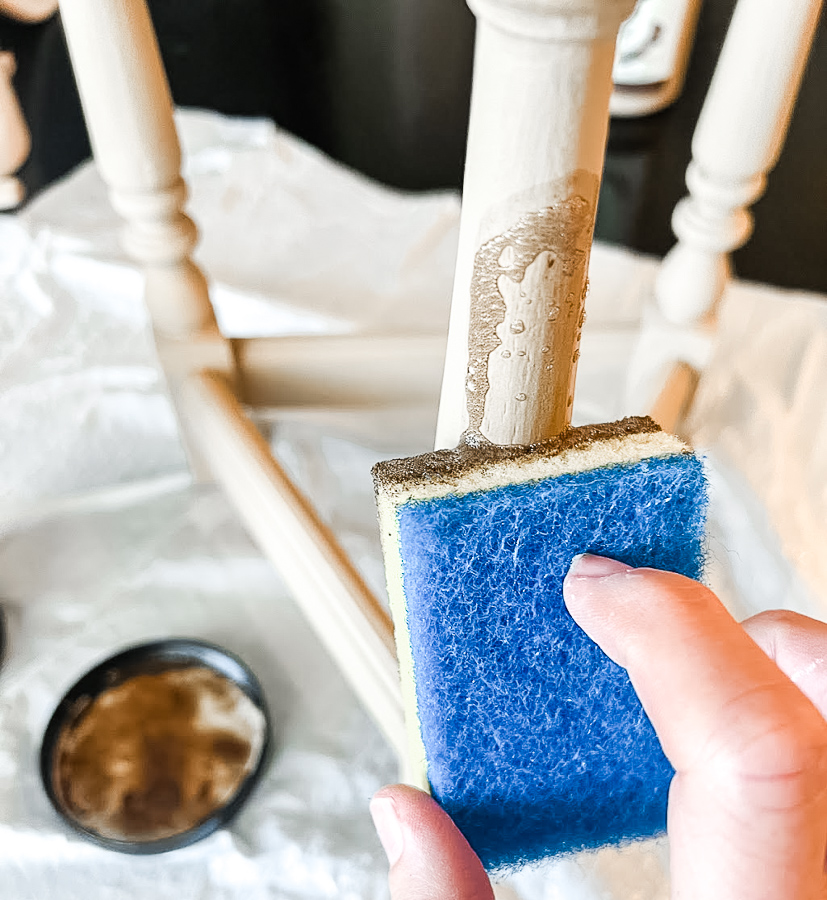
Optional: Prime and paint the rest of the table to the color of your choice.
Note: If your table is not smooth and even, you will need to sand the table first.
You can find exactly how I painted this table here. I used the same method as my nightstands, using the Retique IT products.
Planning Your Design:
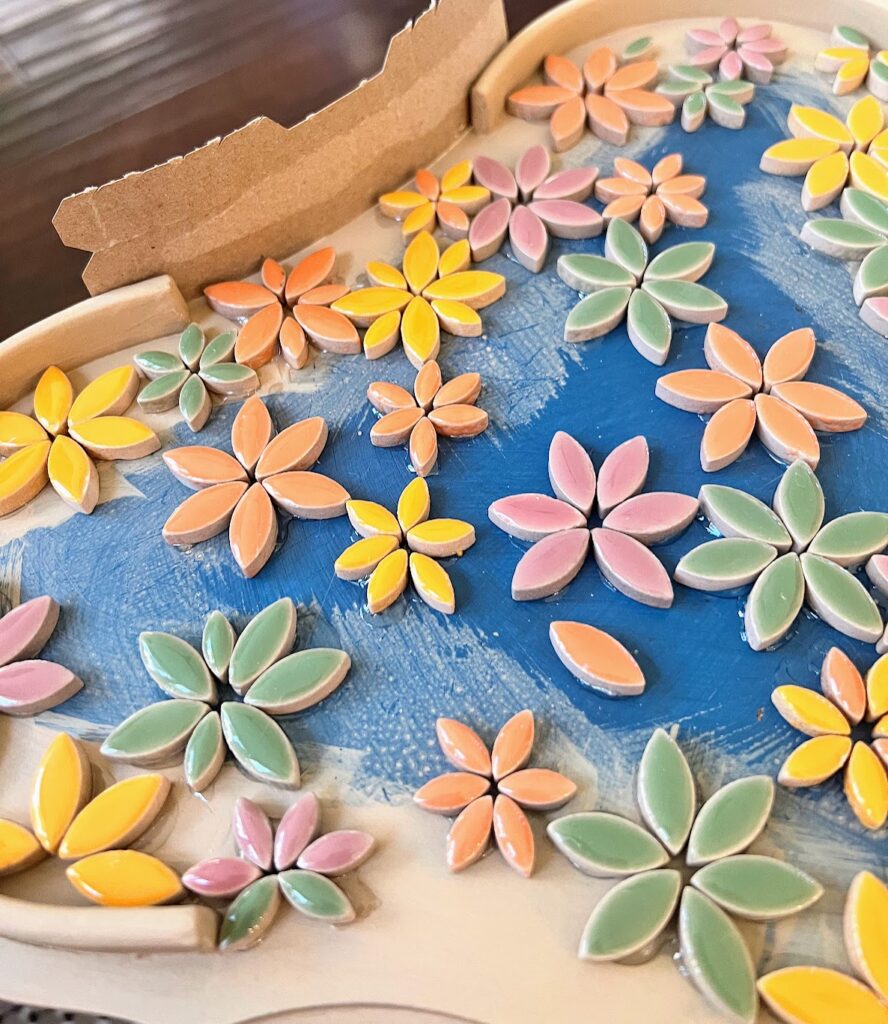
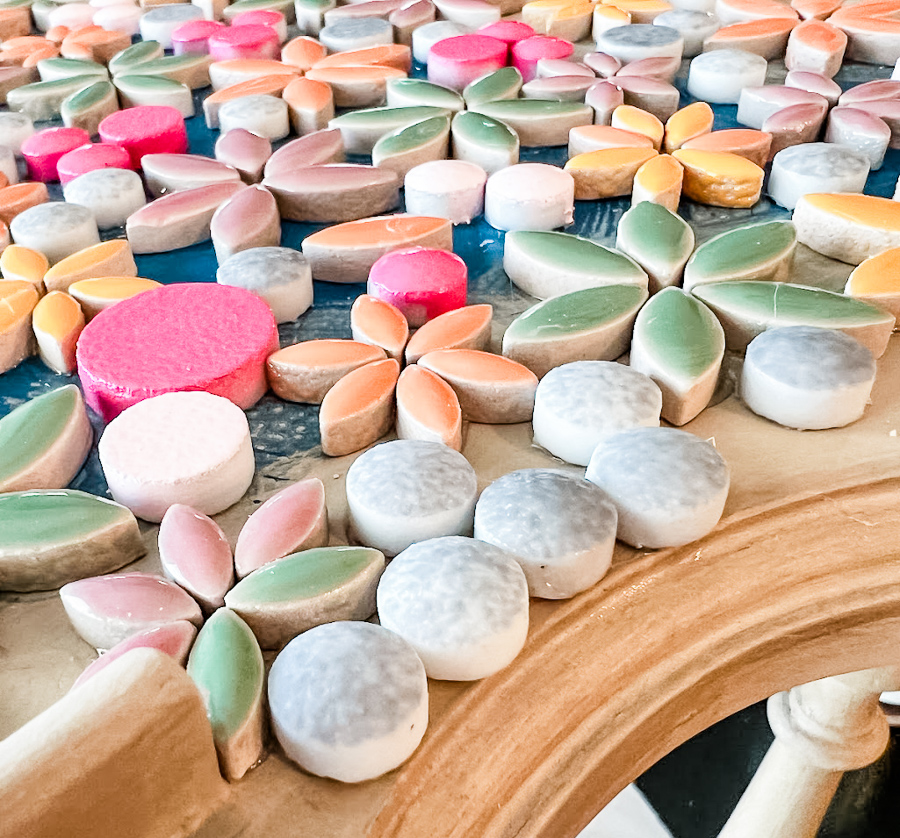
Play around with the pieces until you are happy with the floral design. I quickly realized I did not have enough supplies, and there was no way I could get them shipped here in time for the blog post. I shed a few tears, thanks to menopause, and my sweet husband ran out to the store and brought these home. I spray-painted them in various colors and sealed them. If I had left the table with just the petal tiles, too much room would be in between each tile, causing the grout to crack, and I just did not want to risk it.
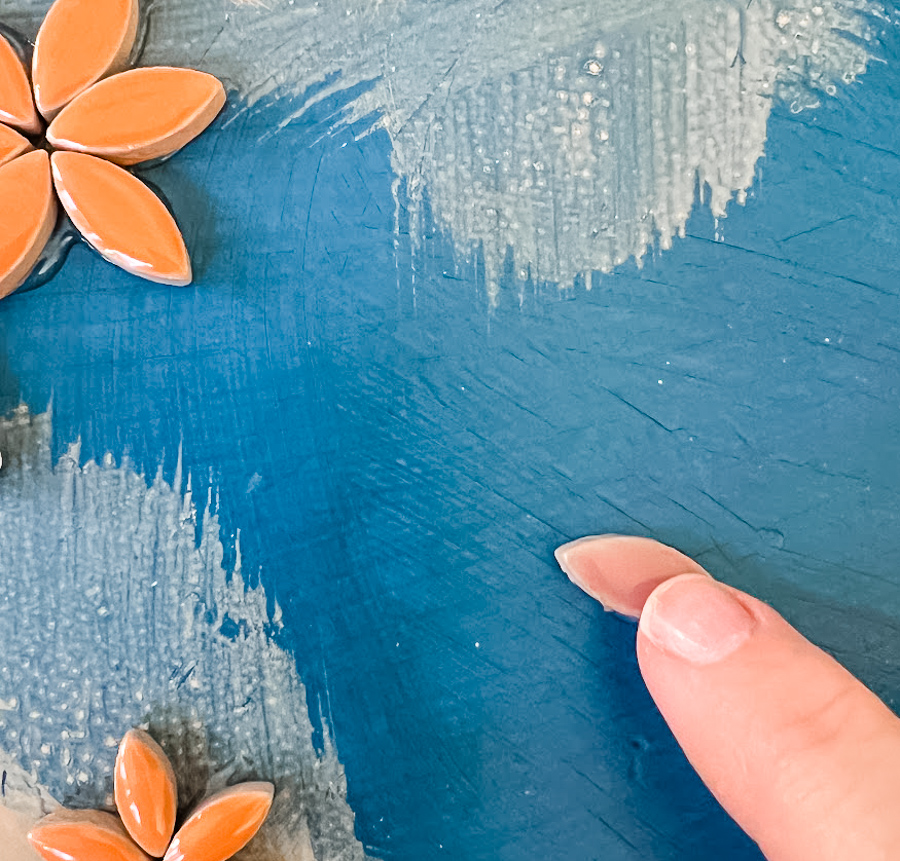
Glue your tiles
Glue all of the tiles down by adding the glue underneath each tile and gently push it down, making sure that the glue doesn’t squeeze out from underneath. I started my floral pattern on the outside and worked my way to the middle.
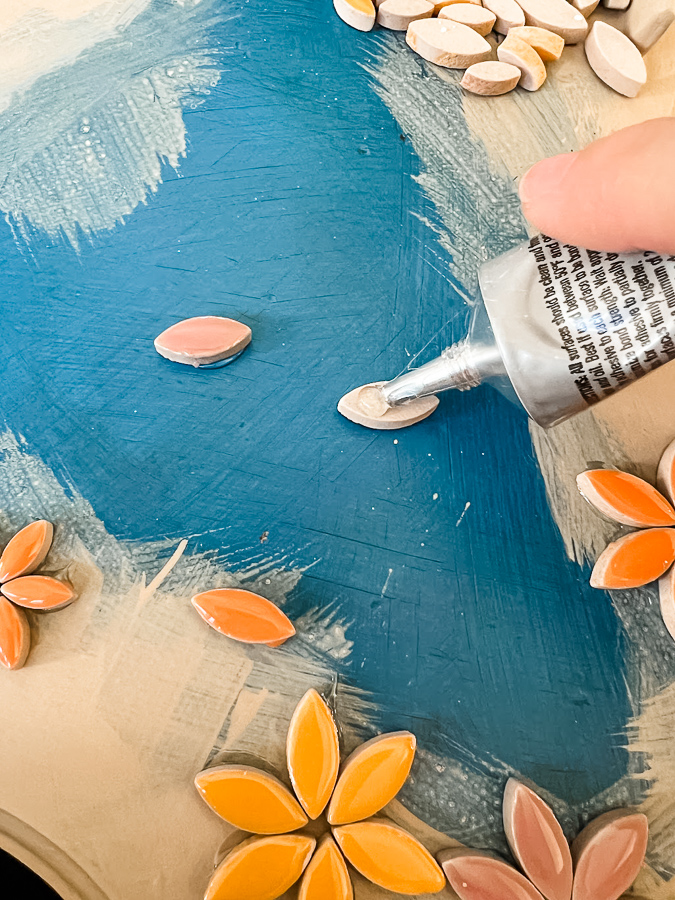
Allow the glue set, this took about an hour, however, this could take up to 24 depending on the brand of glue you use.
I realized halfway through that the whole table did not have a border. Uggg, so I put up cardboard to mimic a border and added extra little tiles to create a border.
Prepare Your Grout
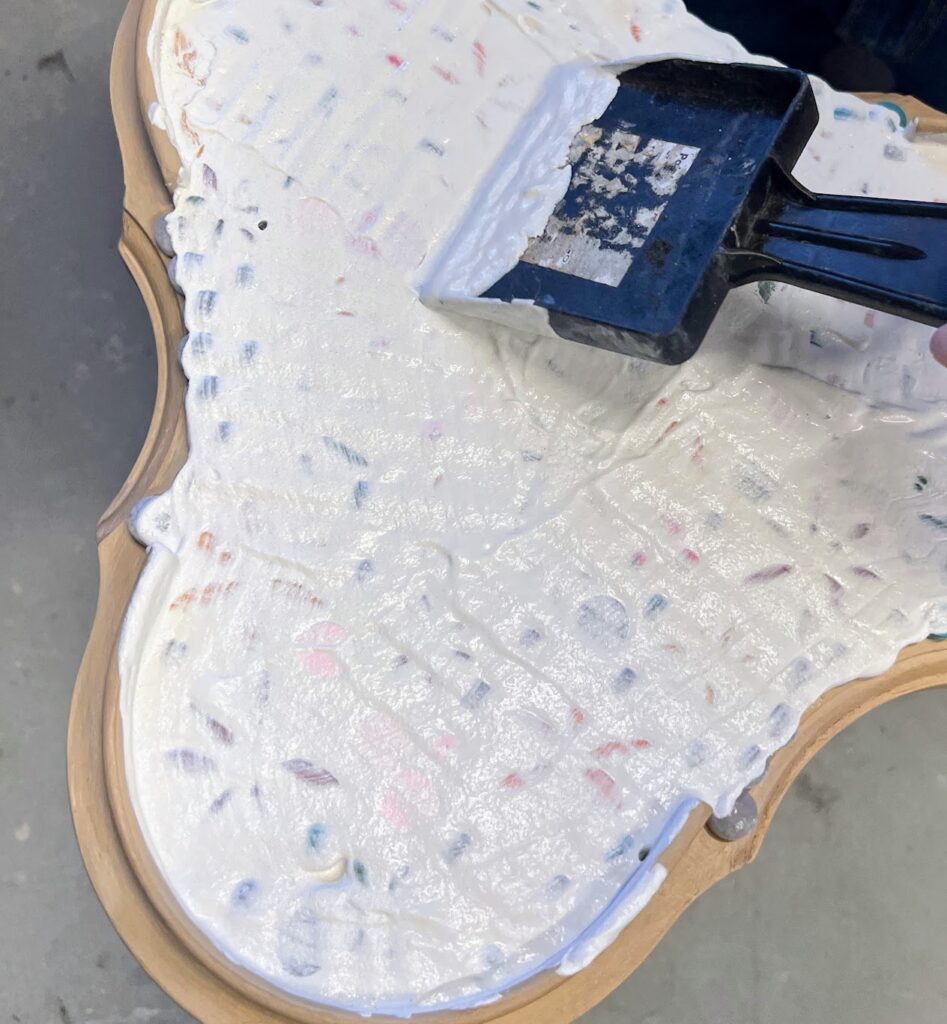
Mix the white sanded grout and water in a canister according to the directions on the package, use a stirring stick until it is the consistency of natural peanut butter/toothpaste. We have a drill with a tool specifically for grout, but a stir stick will work as well.
Use a sponge and/or putty knife to spread the grout onto the surface of the mosaic table top ensuring all of the gaps are filled up.

Remove excess grout from the mosaic top with a damp sponge or putty knife, Let the grout dry for 30 minutes. If you feel that some areas are drying quicker than the rest, mist it with water, this prevents cracks.
Allow the grout to cure according to the manufacturer’s instructions
Wipe Your Table
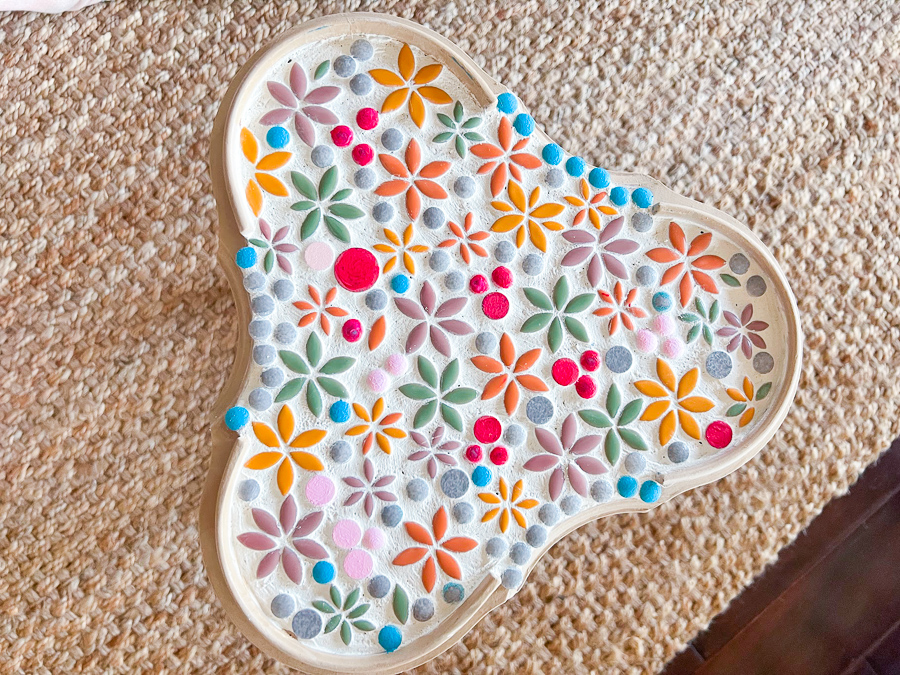
Use a damp sponge or a wet cloth to wipe away the excess grout from the top of the tiles. I also wiped away any grout on the table.

Seal (optional)
If you are going to use your table outdoors, apply a sealer once the tiles are dry.
I love how this DIY Floral Mosaic Side Table turned out and all of the little details, I think it’s my new addiction, I just need to practice a little more!
This project was a little trial and error. It reminds me a lot of my Grandma and I think she would love it! She always wore bright colors with lots of floral prints, of course, she sewed all of her clothes!

Tips and Suggestions
If you prefer, you could create something similar using broken dishes and create one large flower.
This would be beautiful on an outdoor coffee table, just make sure it’s sealed.
You could also create this design on a metal side table, just make sure your adhesive works with metal.
There are lots of opinions on what type of grout you can use. They recommend using a sanded grout for grout lines over 1/8-inch width, as the fine sand in the grout provides a tight, and stable lock and prevents cracks. Unsanded grout for grout lines under 1/8-inch width, as the lack of sand allows the grout to pack better into thin seams. Just be careful with sanded grout as it can scratch tiles.
Time to see what everyone did for this month’s thrift store challenge!
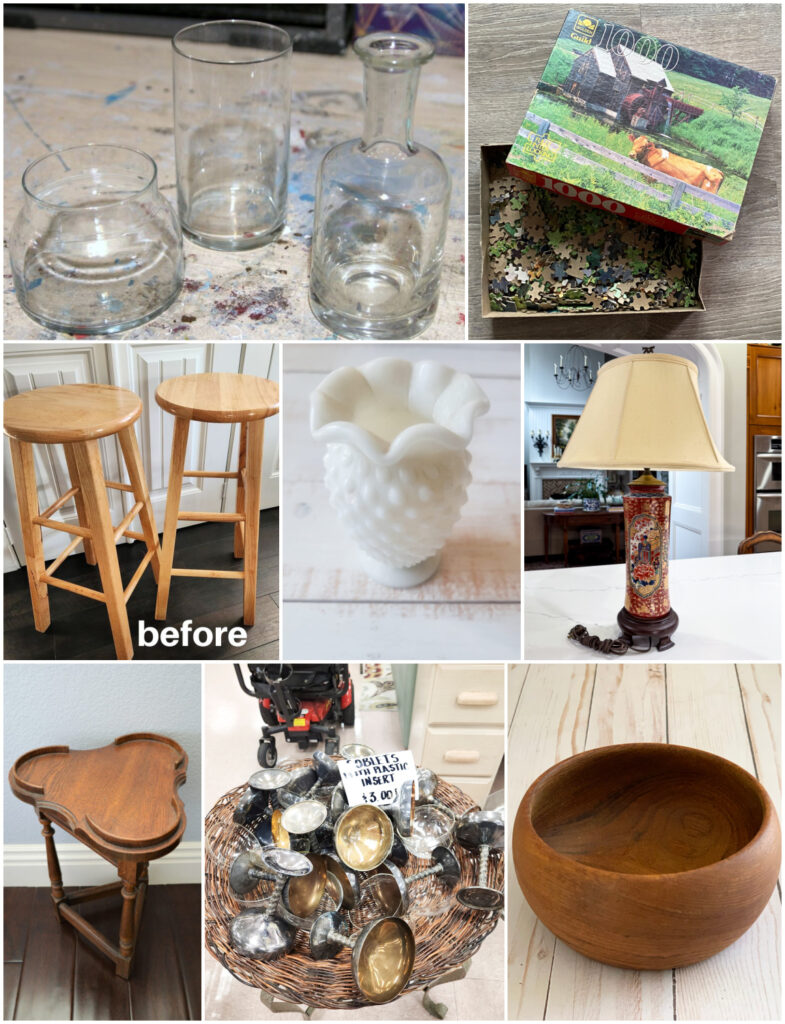
Petticoat Junktion Metallic Gold And Clear Glass Vases
Shop At Blu Valentines Puzzle Heart Decor
My Repurposed Life Bar Stools Into Nightstands
Domestically Speaking DIY Hobnail Milk Glass Candle
Our Southern Home Updating a Thrift Store Lamp
Sadie Seasongoods Winter Scenes in Silver Plate
House Of Hawthornes Teak Wooden Bowl Makeover
Thank you so much for stopping in today, and wishing you all a very happy Valentine’s Day!
Oh Kristin, this project makes my heart so happy! You have used your grandmom’s table is different forms. The colors are absolutely so happy. So many possibilities with these beautiful tiles!!! Pinned.
Thank you so much SUe! These tiles are definitely are a show stopper.
This is sooooo cute! The shape of th3 table really makes it. And such a good husband 😁.
Thank you so much Susan, yes, he is a keeper! I was ready to throw in the towel till he showed up with the perfect round tiles. 🙂
A lot of love was put into this table. It came out so pretty. I looked at the Etsy site and they have some beautiful tiles. Thank you for sharing the technique.
Thank you so much Cheryl. I loved these tiles, I did a lot of research and they were priced really well too 🙂
This table is darling. I don’t know if I have the patience to do that!
Ha ha, definitely tested me a little lol
Kristin,
I love those flower petals. They are perfect for your little family heirloom. I’ve never done a project like this. Although you did a great tutorial, I’m not sure I have it in me! 🙂
Pinned!
gail
Thank you Gail, it was a fun little makeover, although not too hard, it took a lot of time.
This is precious! I could so see it in the new nursery for the soon-to-arrive grandbaby. Would so coordinate with the wallpaper. The top of the table shape was a perfect choice because it even looks like a flower.
Thank you so much Christy, I’m so excited for your family!
This is beautiful and what a great tribute to your Grandma! I have never worked with tiles – patience is not my strong suit – but have always wanted to – I think you have given me the inspiration I needed!! Great job and thanks for sharing.
You are so sweet Cathy, thank you so much!! Would love to see it when your finished. Thank you so much for stopping by and have a wonderful rest of your week.
I want to do a patio on the side of our home like this. With this flower motifs. Is it suitable? I wont finish it in 1 day how to protect it until its grouted?
Hi Nikola- thank you so much for stopping by the blog! While the mosaic petal tiles work great for a tabletop, they won’t be suitable for an outdoor patio floor due to wear and weather exposure. These are only used for crafts. I suggest visiting Home Depot to explore outdoor-rated tile options that will perform better long-term for your space. I love the idea and it’s going to be gorgeous!! Send me a picture when you are all done 🙂