
How To Make A Balloon Garland
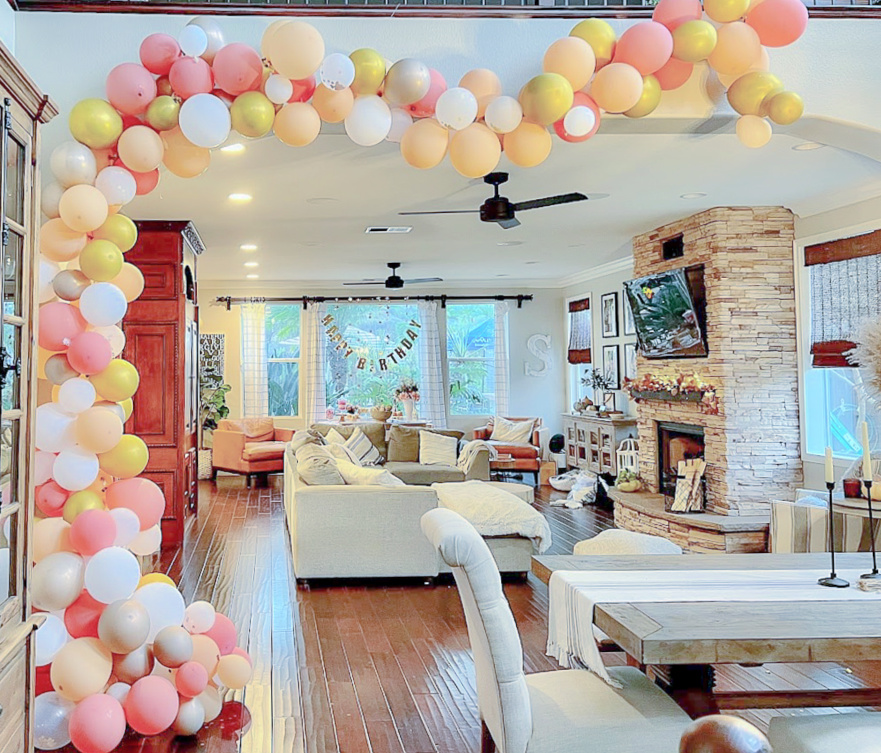
If you are looking to put the wow factor into your next party, then consider making a balloon arch or a balloon garland as your party decoration! Whether you’re hosting a birthday party, bridal shower or baby shower a balloon arch will definitely make a huge impact! Balloon arches make for the perfect backdrop for pictures, and add color and dimension to your party set-up.
We celebrated my 50th last weekend with (almost) all the people that are near and dear to my heart. I figured it had been 20 years since we celebrated big so why not!
I know these arches can look a little overwhelming but trust me, If I can do it, you can too, don’t let anyone discourage you from creating one. Besides I have you covered with everything you need to know with all my little tips and tricks with my step-by-step guide to help walk you through the process.
I’m going to individually list everything for you but they now sell the balloon garland kit which comes with everything you need. All I needed was the pump (borrowed) and fishing string (Optional) and a little help. My amazing sister-in-law was up for the challenge and we got this done in about 5 hours. For a regular-sized arch, I would say it would take about 2+ hours.
Affiliate links are listed below.
Supplies
TIP: Buy more balloons than you think you’ll need!
I mixed these this kit and this kit to create my arch. Or you can buy everything seperaly, listed below
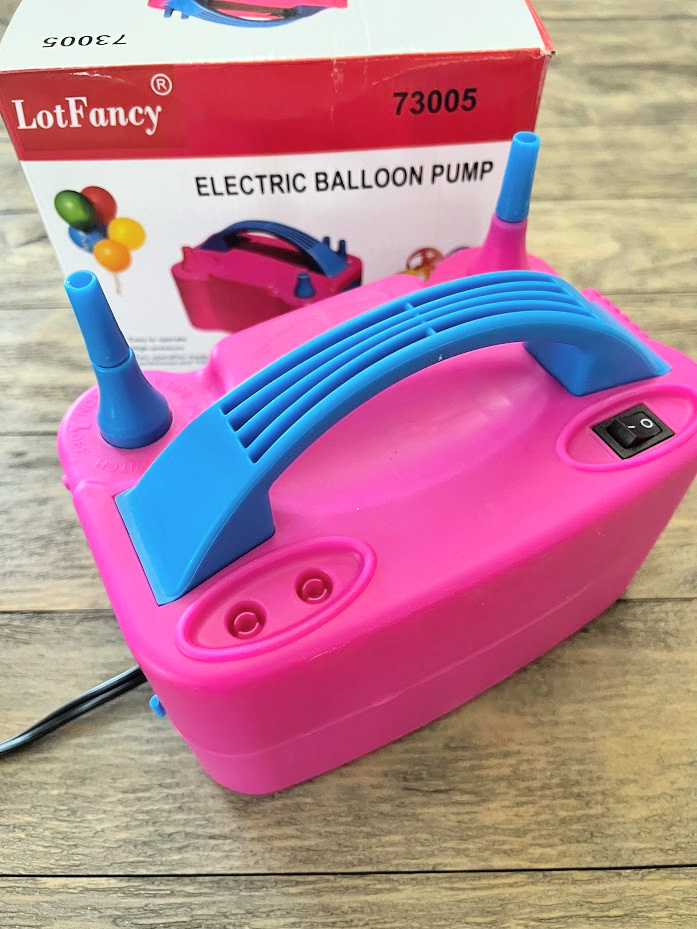
Electric pump
Various sizes of latex balloons (I had a total of 240 balloons in small, medium and large) the number of balloons will depend on how large your arch is
Glue dots
Balloon tape
Fishing line
Command hooks
Scissors
Directions
Come up with your color scheme and purchase balloons
Decide how big you want your arch to be
I would highly recommend sketching your design out before you begin. Ideally, your balloon arch will go up against a backdrop, frame, or wall.
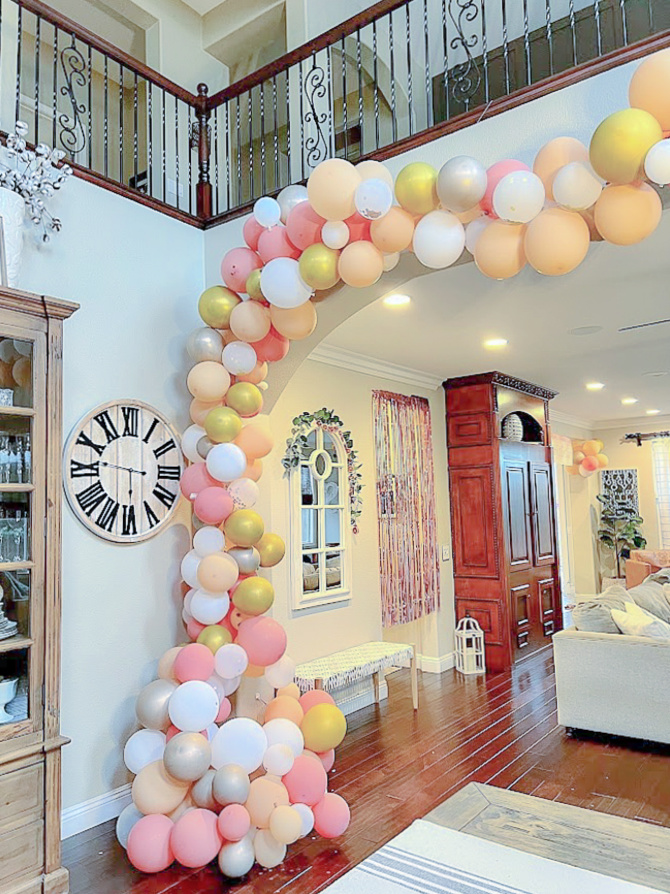
My balloon arch was going over approx 3/4 of the archway in our family room, which is big, it’s about 15 feet. When you purchase the kits, it should tell you how many feet it will cover however, keep in mind there are a lot of factors that go into how large your arch will be. Depending on how large you blow up your balloons and how closely you pack them together on the ribbon will make a difference.
I purchased 2 kits which came with 200 balloons and I purchased an additional 50 balloons for this arch, yes it was huge. It covered 15 feet plus a huge puddle on the ground. Having this big of an arch created a few bumps in the road but we tackled them as we went.
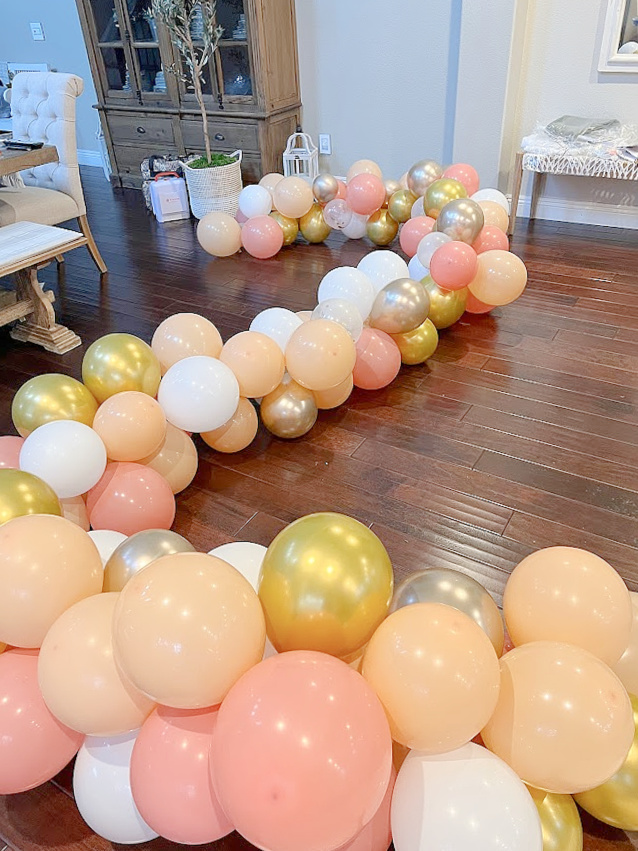
Blow up your balloons
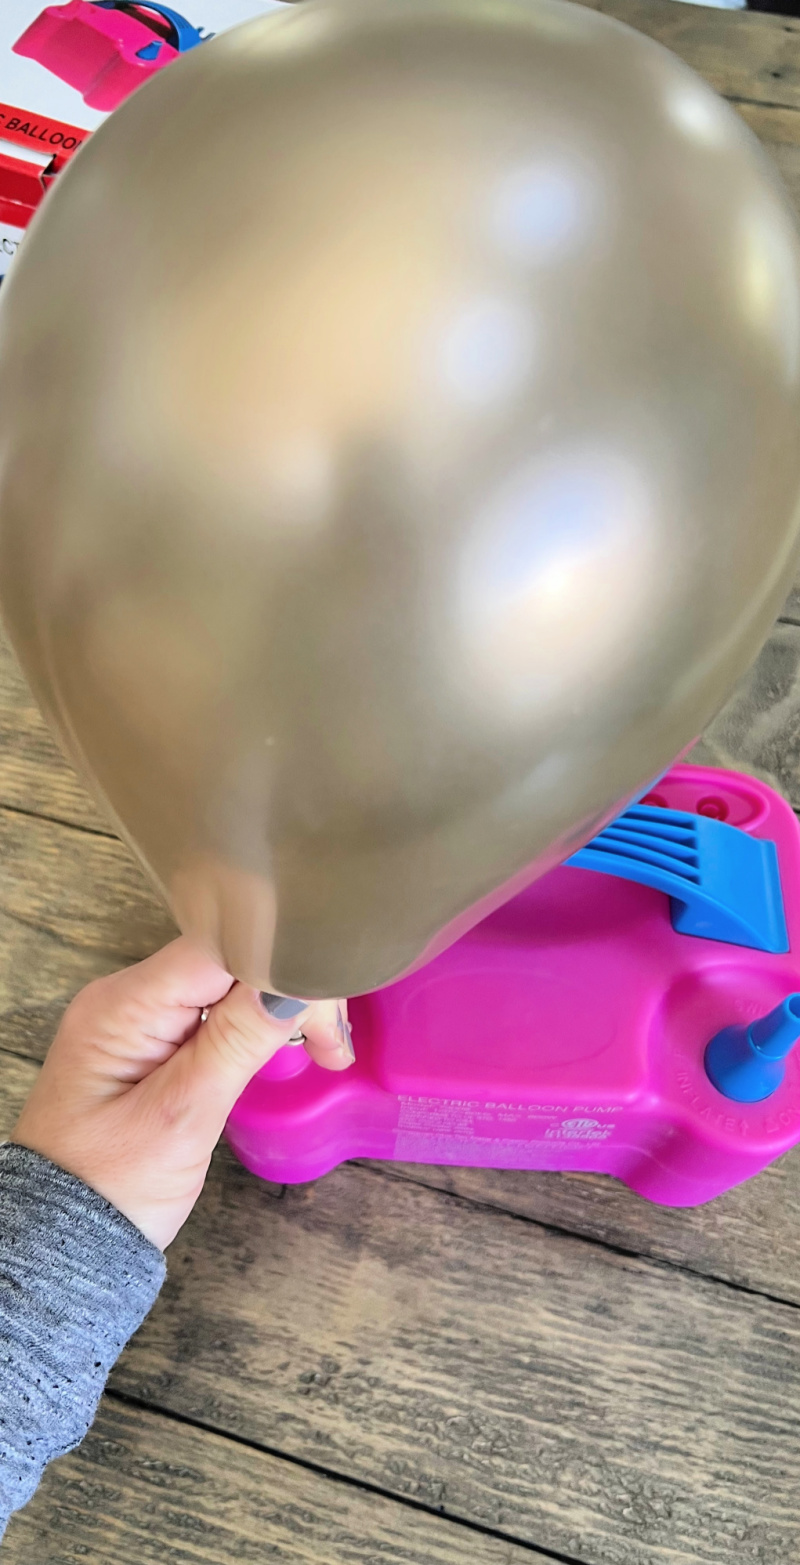
An easy way to blow up your balloons is to use an electric balloon pump, blow up all of your balloons and tie them at the bottom so the air will not release out. We did this on a sofa with a carpet below us, so they stayed put for the most part. We also used regular air, if you are using helium you would need to be in a small room with a low ceiling or put them in large trash bags.
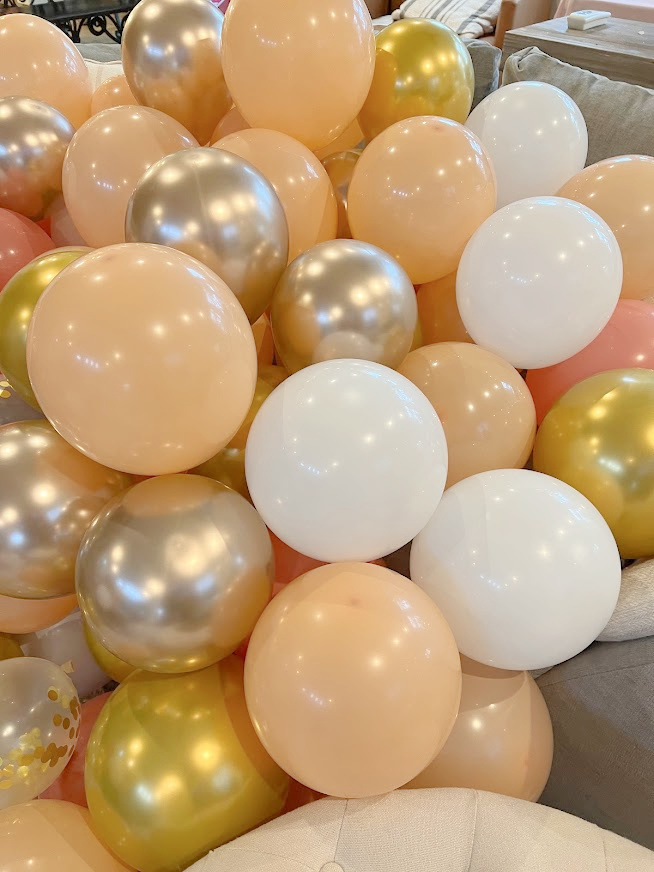
If your using a kit, you most likely will be given a variety of different-sized balloons. If not, make sure to blow your balloons up in different sizes, ideally, you want 18″ 12″ 10″ 5″ balloons. Just make sure they are all different sizes to add interest and dimension to your garland.
Add the Balloons to The Ribbon
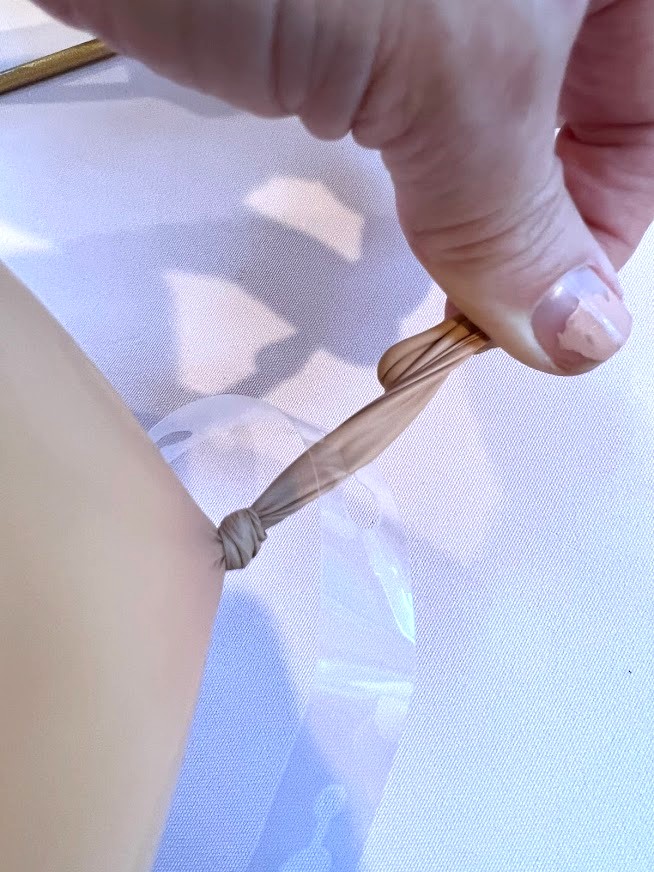
Pro Tip: Save some medium and small-sized balloons to use as filler
There are two holes, one large hole and one small. Grab the balloon’s tie and place it in the big hole. Move the tie from the big hole and slide it into the smaller hole, repeat. I didn’t have any real pattern, we just kept alternating colors, larger balloons with the small balloons, and rotated the balloons in opposite directions on the strip. Don’t worry too much about the final shape, everything is adjustable, don’t put too much thought into this, it will all work out, trust me. Keep going until you have a balloon strip as long as you want your arch to be.
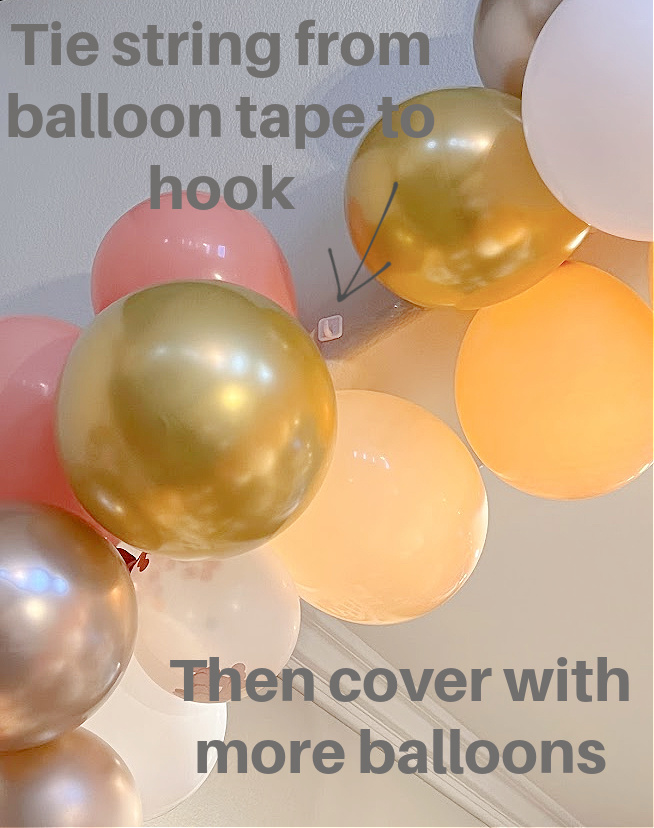
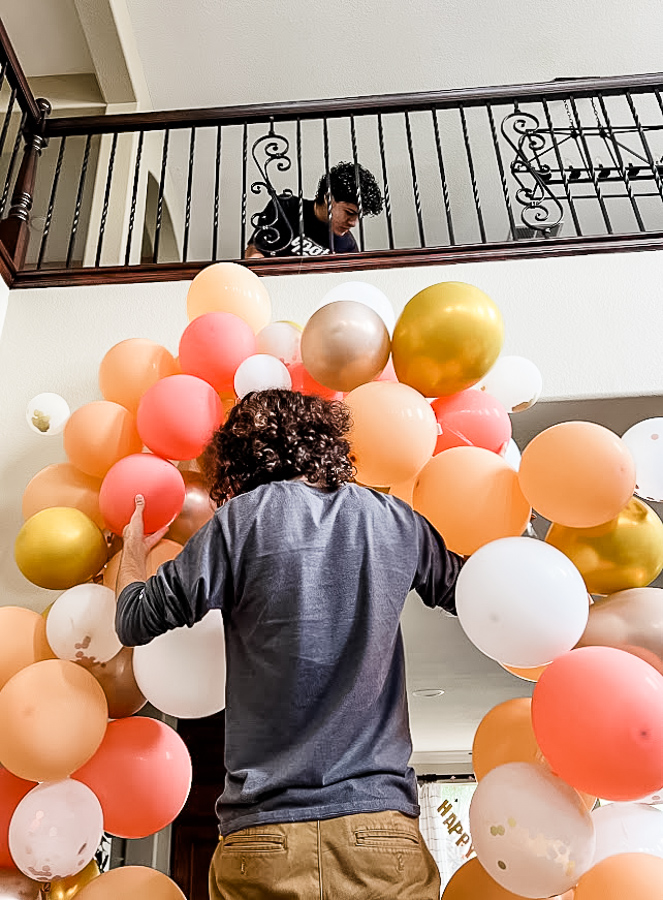
Hang The Arch
The easiest way is to hang the hooks on the walls or structure where you want the arch to go. I highly recommend the 3M Command hooks so that they are easily removed without damaging your walls and let’s face it they work! I used the cheaper version and my whole arch was on the ground in the morning. (minor panic attack but my amazing boys said mom, don’t worry we got this and figured it out) But let’s say that didn’t happen, using fishing string or regular string, tie a piece around your completed balloon strand, and loop that string onto the command hook, repeat this process where all of your hooks are. My kid’s solution to the fallen arch was to tie the fishing string to the ribbon and secure it to our stair railing. Genius! I would say this took them about an hour.
Fill In The Gaps And Manipulate the Arch
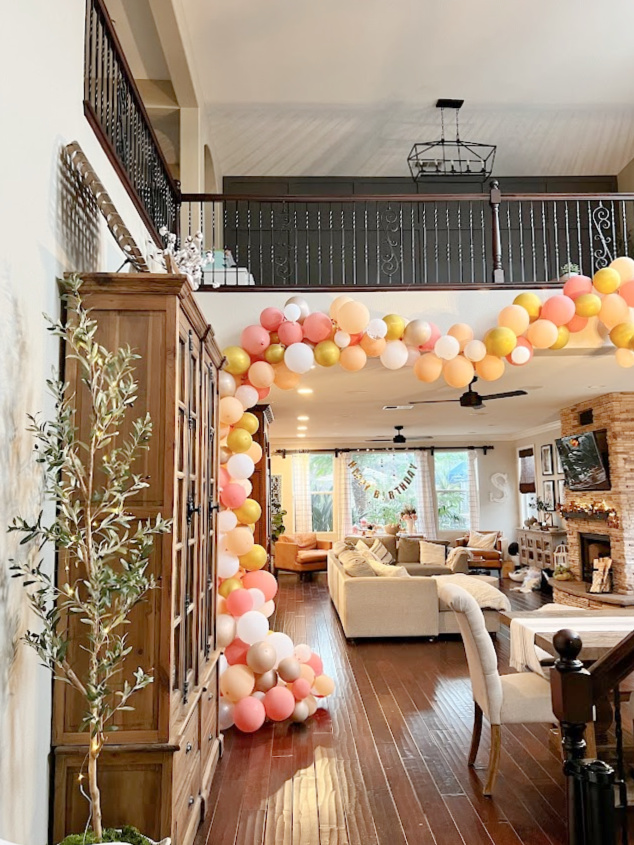
The shape of the arch will change once it is hung, don’t panic. Using your glue dots, fill in any gaps that remain, and simply stick the smaller balloons to the wall or other balloons, no need to use the strip here, I also made it fuller in places that were a little sparse. You can also move a balloon if it looks too high or low and glue it with a glue dot to the balloon next to it. Cotinine with this until you are happy with your arch. We had a ton of balloons left over so we made a big puddle at the bottom of the arch that spilled onto the floor.
Can We Inflate Them Ahead of Time?
Yes, you can blow up latex balloons the day before the event so on the day of the party you can take care of all the last-minute things. Balloons will stay inflated for several days before starting to deflate if kept indoors. Keep them in a cool, dry location, away from direct sunlight.
The following day, it was still in perfect shape. I put a little blurb out on our neighborhood Facebook page for a free balloon arch and someone was able to reuse it for their kid’s birthday YAY!
Where to place the arch
Over the dessert table
Above the dining table
On a wall
Near a fireplace
Above the entryway or archway
Near the gift table
As a photo backdrop.
How Can I Embellish the DIY Balloon Arch
Add fresh flowers or faux flowers
Add sprigs of greenery
Sign or Banner below the arch

We were able to get a pretty good group photo but couldn’t get a good amount of peeps away from the Padres game LOL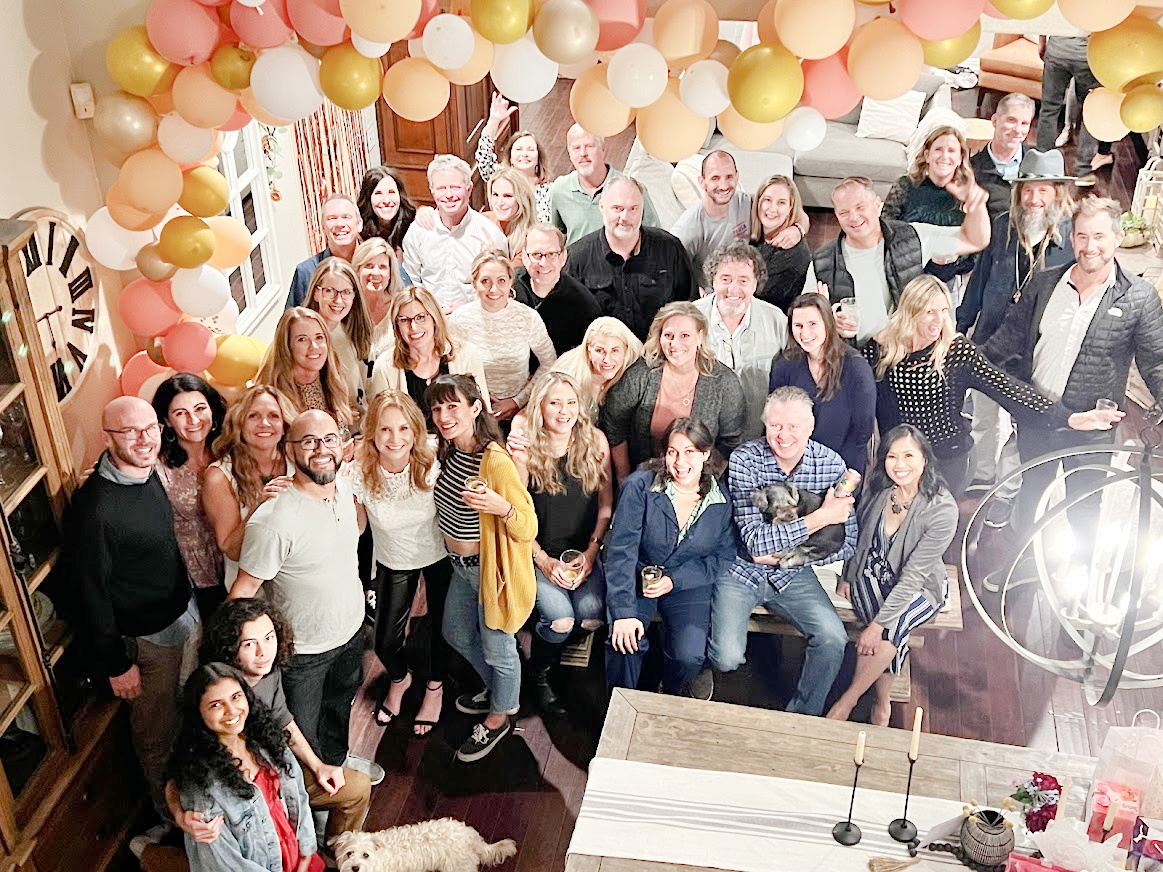
DIY Balloon garlands are such a pretty addition to any party. And it’s a relatively inexpensive way to add a big impact and will definitely be the highlight of the party! I hope these step-by-step instructions helped, let me know if you make your own, I would love to see your pictures! A great big thank you to my sister-in-law for all the help!!!
I’ll be putting togeher tips on creating a dessert table for next week.

Have a great rest of your weekend and than you for stopping in today!

Happy Birthday! Your balloon garland is gorgeous. I am saving this inspiration for later.
Have a great week,
Kippi
Thank you so much Kippi!
This is awesome – this has inspired me to DIY it as well. I usually just have those balloon garlands done by others. Thanks for sharing this!
You are so welcome, I hope it turns out beautifully!
Wishing you the happiest of birthdays! Thank you for sharing how to make this arch! It looks amazing in your home for your party!
Thank you so much, Kimberly!
Best wishes for a very happy birthday, Kristin! Your balloon garland is beautiful and it looks like you enjoyed a wonderful celebration!
Thank you so much Lynne!
Happy belated birthday!! Love the colors you chose for the balloon arch. You look fab!
Your so sweet, thank you Marie!