
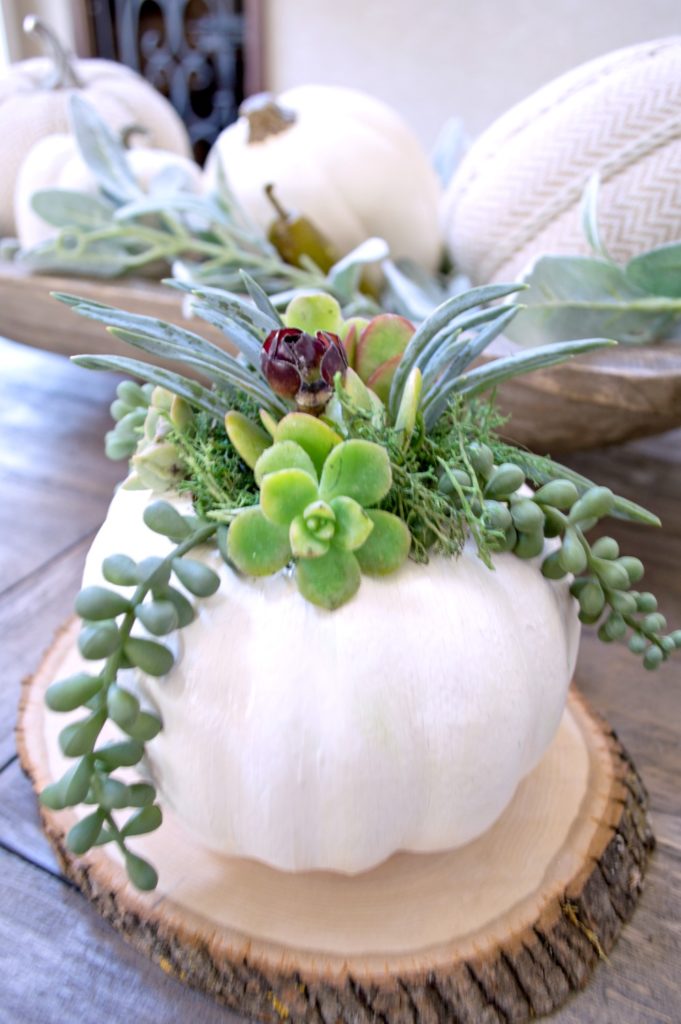
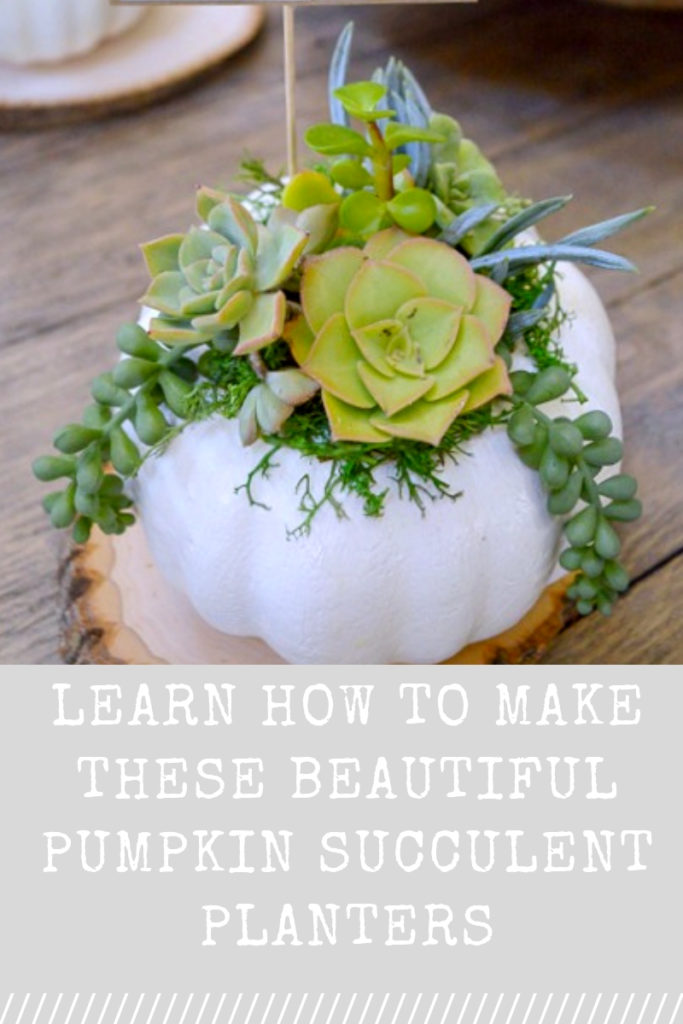
DIY Pumpkin Succulent Planter
I’m excited to bring you the tutorial for these DIY Pumpkin Succulent Planters! These are perfect for making a beautiful tablescape, would make a great hostess gift and it would also be a thoughtful, handmade gift for loved ones.
A few notes before I get into the tutorial
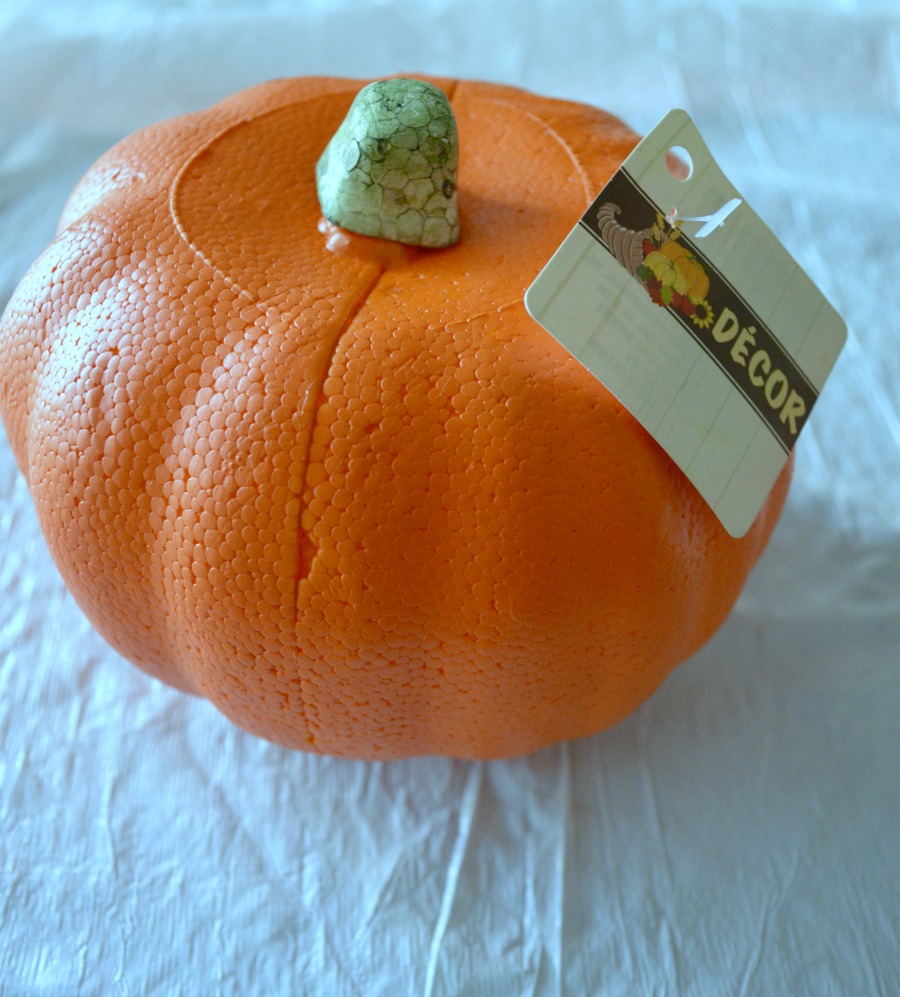
I did not use a real pumpkin because I was afraid of it molding. I’m sure it would be completely fine for the fall season but since we are still in Summer and it’s been hot I didn’t want to risk it.
You can plant everything in the pumpkin if you would like and skip the container. The only reason I did not do this is because I wanted to reuse the pumpkin the following year. Just make sure you add some drainage at the bottom of the pumpkin.
All of my succulents were real other then the flowing vines, I bought those from the craft store since I did not have enough in our garden to cut.
Let the stems dry out after you clip them so they don’t absorb moisture too quickly which could cause them to rot and eventually die.
Affiliate links posted below
Supplies
Catus soil
Moss (dollar Store)
Scissors
Small succulents
Plastic cups
DecoArtChalky Finish Paint EverlastingCraft Brush
Faux pumpkin (found mine at the dollar store) or real pumpkin
Americana Multi-Purpose Sealer
If you are starting off with a pumpkin that needs a updated color you can follow these steps
Clean the pumpkin using a damp cloth.
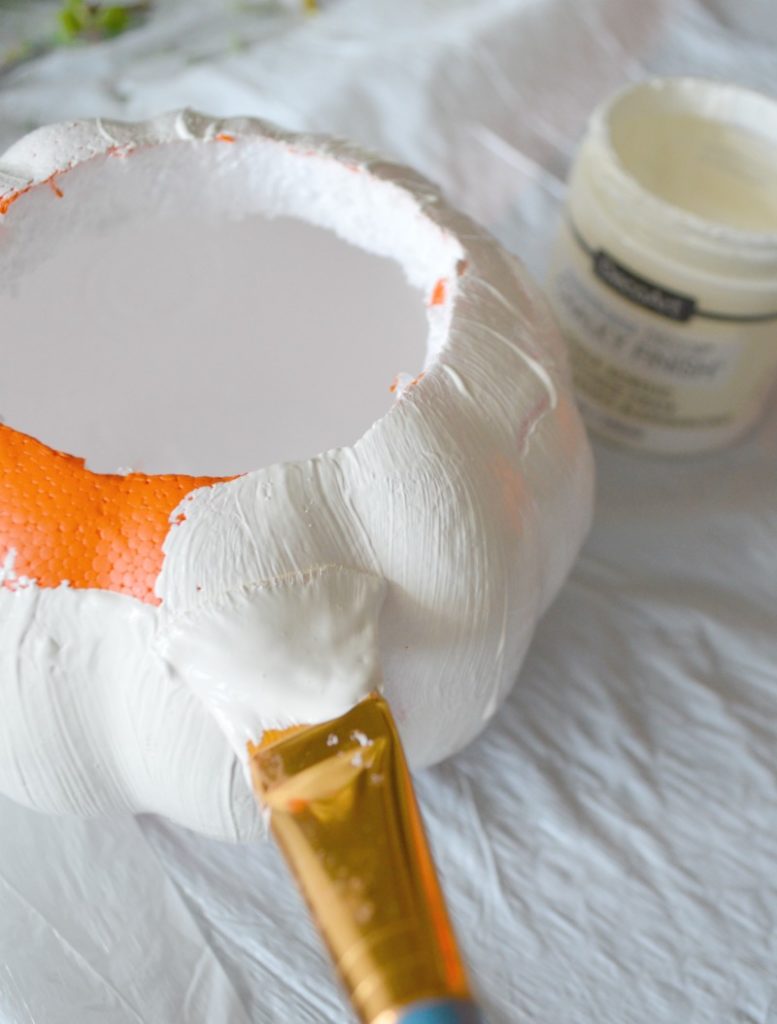
Apply this first coat of paint using a 1″ brush. Allow to dry, apply the second coat using the same process in step 1. If you have areas that have bleed through, you can touch up with a third coat.
After everything was dry, I applied a coat of clear sealer
Now you are ready to plant the succulents
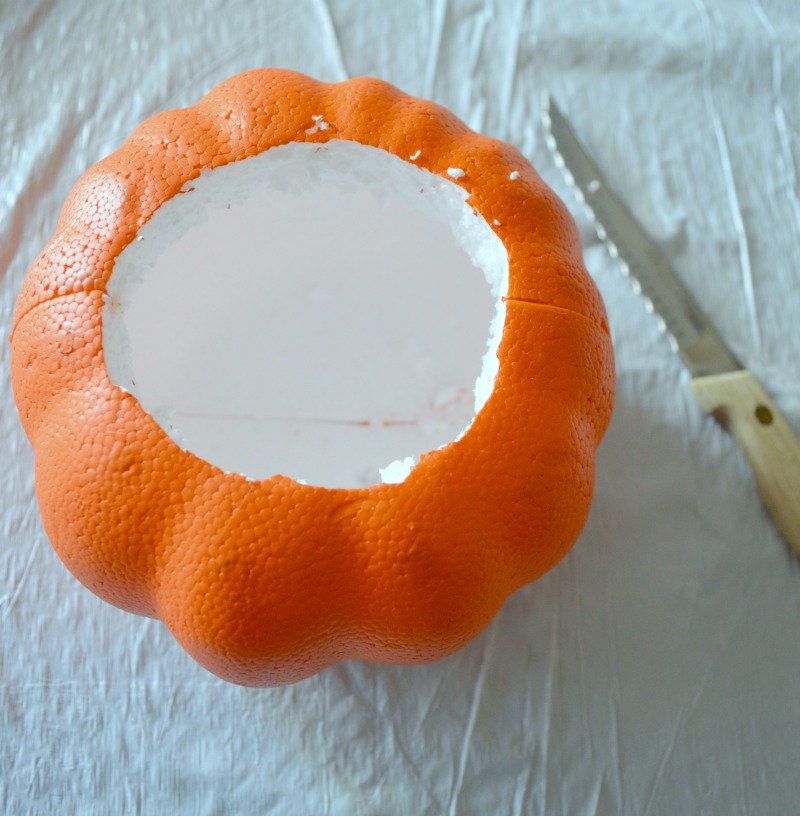
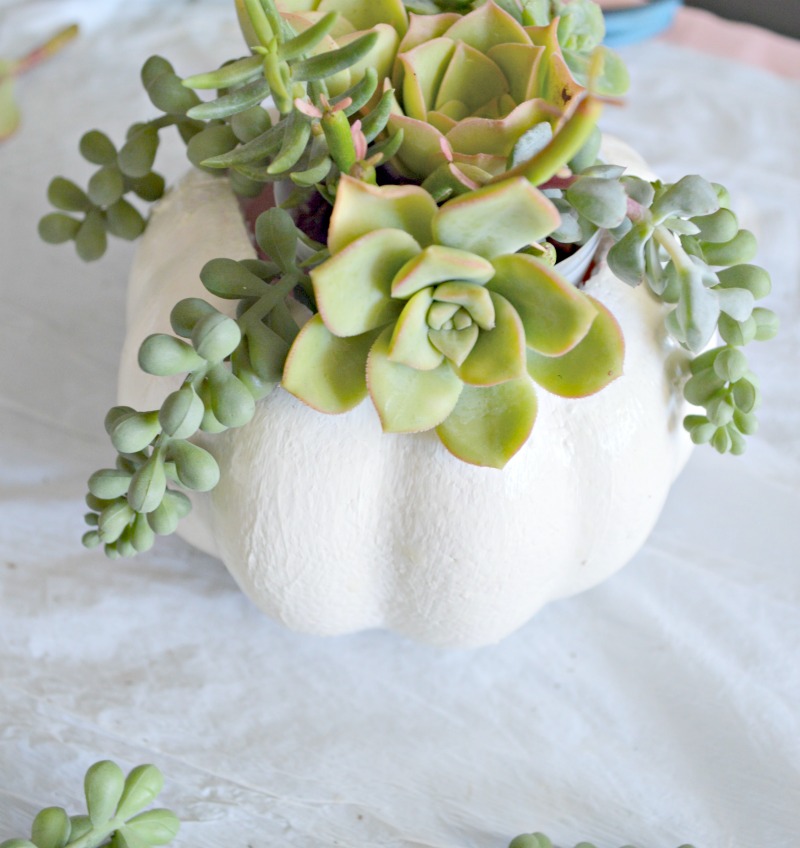
- Cut an opening on top of the pumpkin using a knife. Take out the section, hopefully it will be hollow if not, dig out any extra bits of Styrofoam.
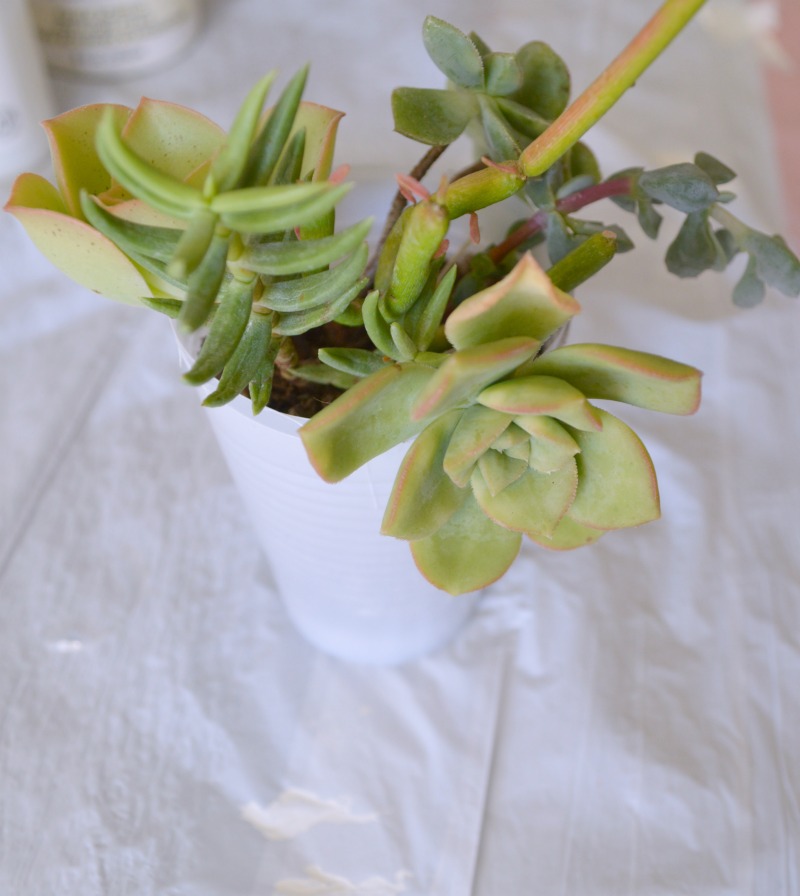
- Fill a plastic cup or some sort of container with soil (about 3/4 of the way)
- Plant the succulents, making sure you have height in certain areas so the pumpkin will look good from all sides. Don’t be afraid to use all sorts of succulent cuttings; different colors, shapes and sizes.
- Place the container into the pumpkin.
- Place the moss between the container and the pumpkin, I just kind of jammed it in and it stuck. You could also hot glue if needed.
- Add long flowing vines into the soil.

These will last a long time, simply mist occasionally, if you feel they are getting too dry just add a little bit of water.
![]()
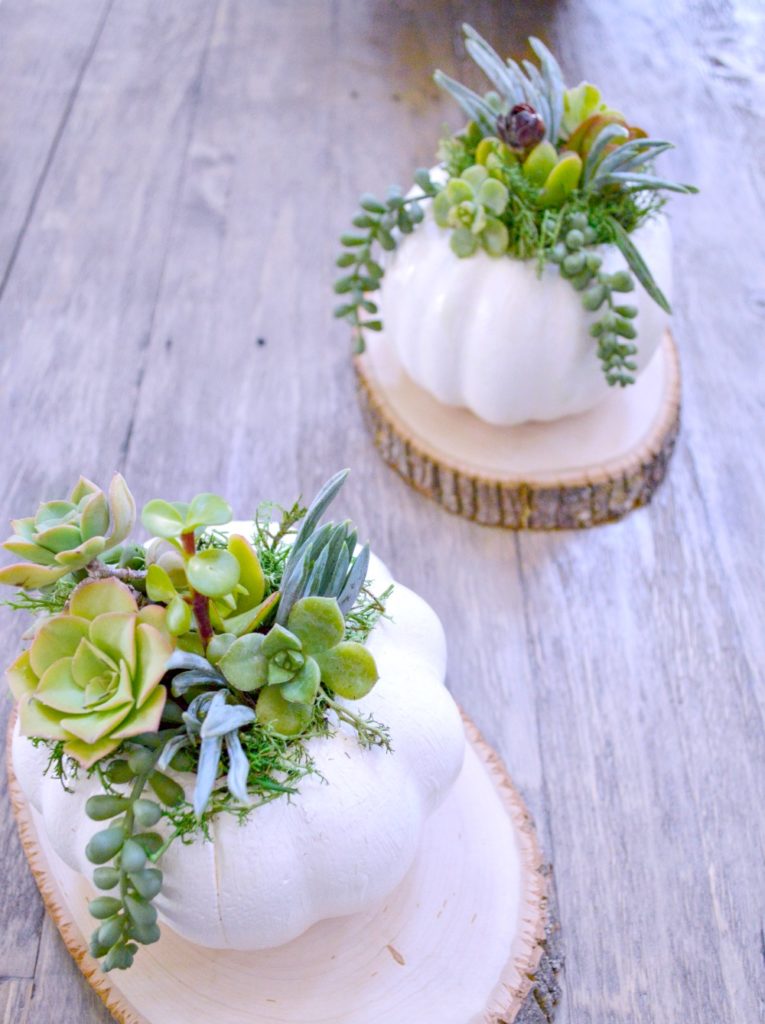
You can see how I displayed them on our table you can also download my free printable in this post. 
The succulents should sprout roots so when you are done with the pumpkin simply re-pot into containers or in the garden, they really are so easy to care for! Thanks so much for stopping in today, have a wonderful weekend!


Wow! I love this succulent pumpkin.
Happy almost Fall,
Kippi
Thank you so much Kippi!
This looks beautiful! I like that you used a faux pumpkin!
Thank you so much Marie!