
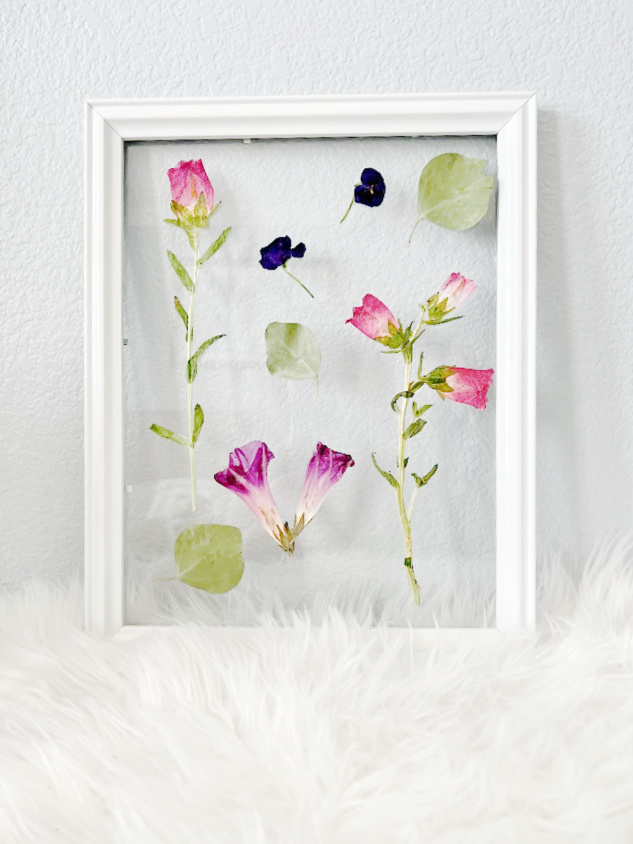
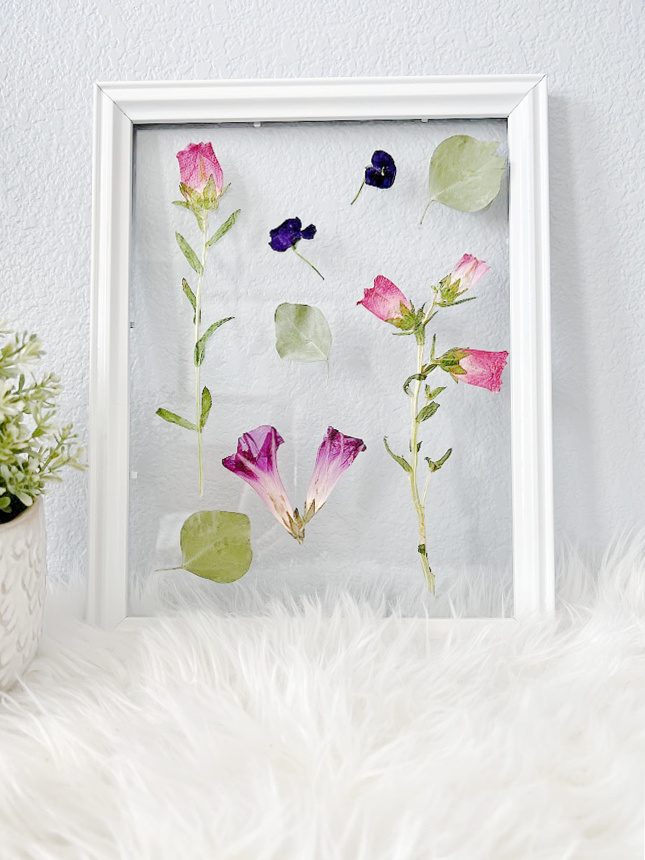
DIY Pressed Flower Art in a Picture Frame
Learn how to make this beautiful DIY pressed flower art using a picture frame, hot glue, and dried flowers! Whether you have flowers from your garden, flowers from nature, or purchased flowers, you can easily turn them into a beautiful piece of art inviting Spring and Summer into your home.
Did you know you can dry out flowers in the microwave? It was so easy to do but also brought back lots of memories of when I was a little girl and I used to press flowers in between book pages in our world book and wait a few weeks. If you don’t have the time or patience use the microwave, it worked perfectly.
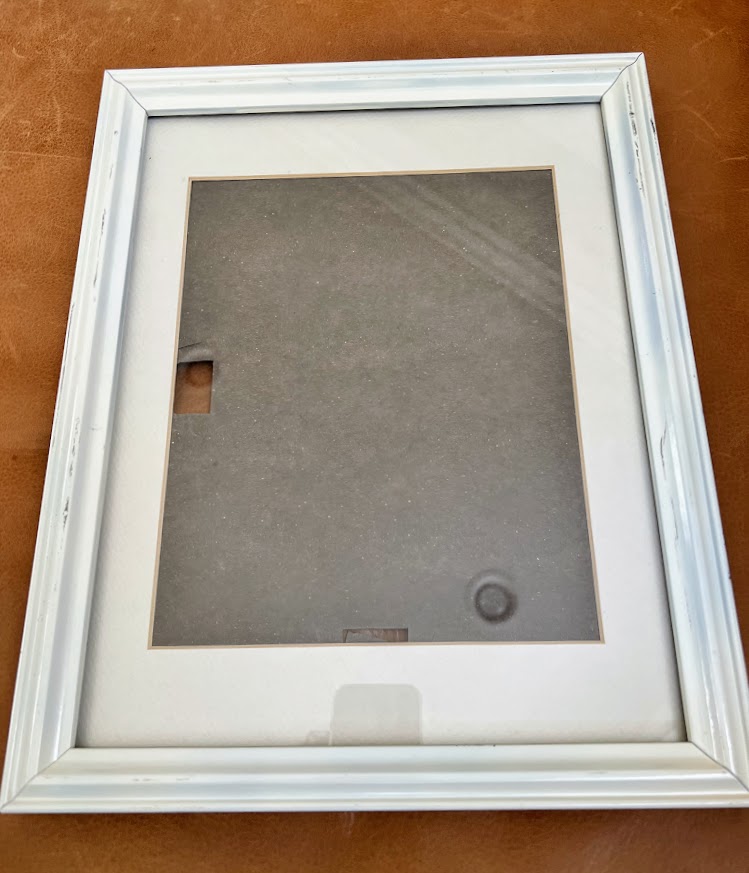
It’s thrift store decor day so make sure you see what everyone else made over this month! It all started with this 75 cent frame!
Affiliate links are listed below that I may make a small commission
Supplies:
Hot Glue and Glue Gun You could also use glass glue that dries clear
Flowers of your choice
Picture Frame
Scissors
Paper Towels or parchment paper
Optional: Spray Paint I used Rustoleum Satin White
If you would prefer to use a floating frame here are a few options on amazon
Gold Metal Frame (floating)
Wood Floating Frame
Step by step tutorial
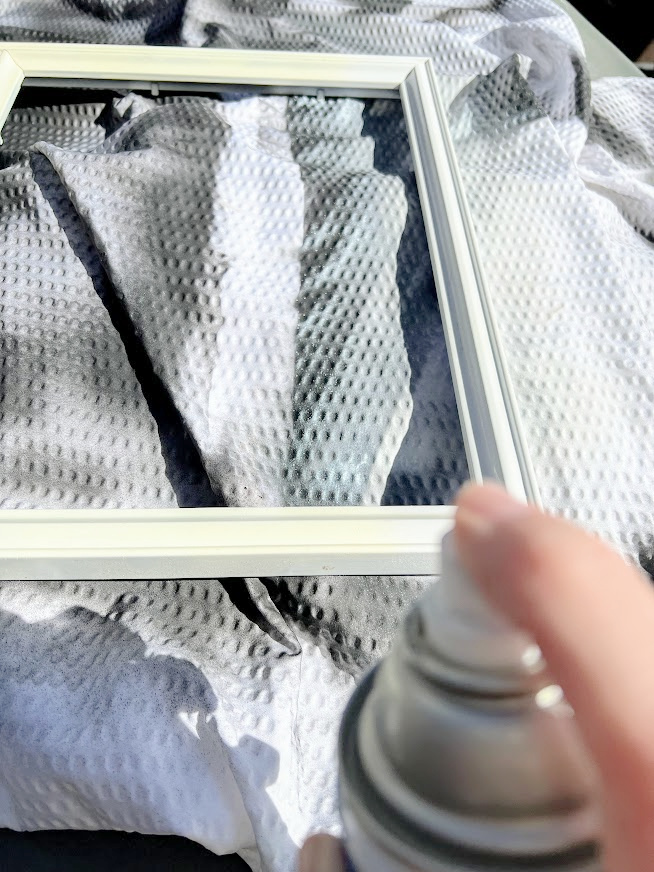
Step 1: Spray Paint The picture frame
I found my picture frame at the Hospice Resale Shop for 75 cents, I always go on half-price days. Most thrift stores carry a variety of frames but if you’re having problems finding one, your local craft store will sell them as well. I took out the glass, the backboard, and the matting and gave it 1 coat of white spray paint to freshen it up a bit. I then gave the glass a good cleaning with a soft cloth.
Step 2: Pick different various flowers
We are fortunate right now that our whole yard is blooming so I didn’t have to go far for different types of flowers. However, If you’re not finding them in your yard, there are probably a lot of wildflowers surrounding you, take a little nature walk. Maybe it’s ice-cold with no flowers on-site, visit your local florist and see if they have any they are about to throw out. Just make sure you pick out different size flowers including smaller flowers.
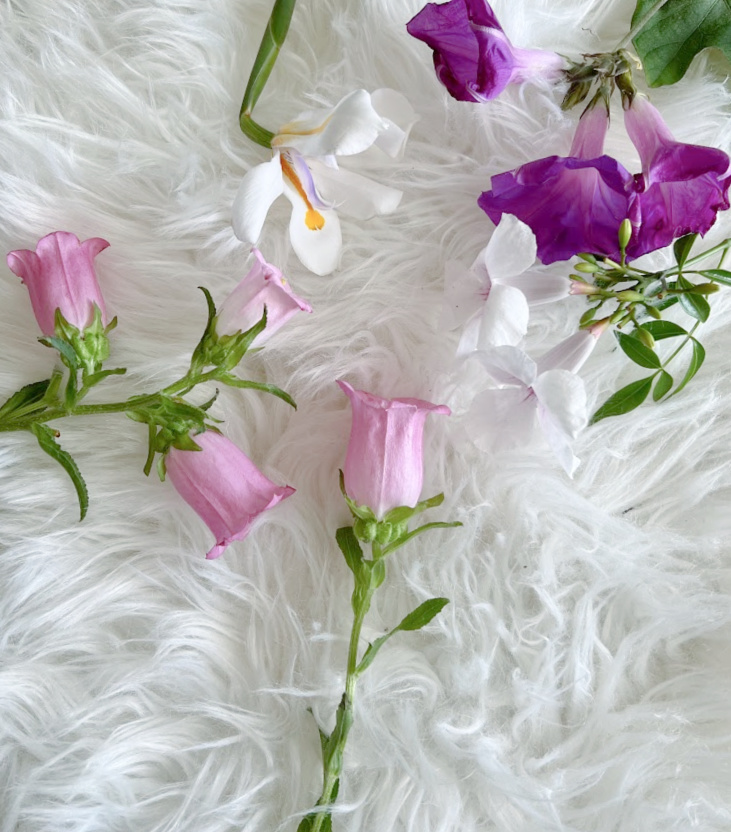
I would stay away from anything too bulky and anything white. All the white flowers I put in the microwave turned out brown. However, if you are drying the flowers the good old fashioned way (between heavy books) I’m sure the white would turn out just fine.
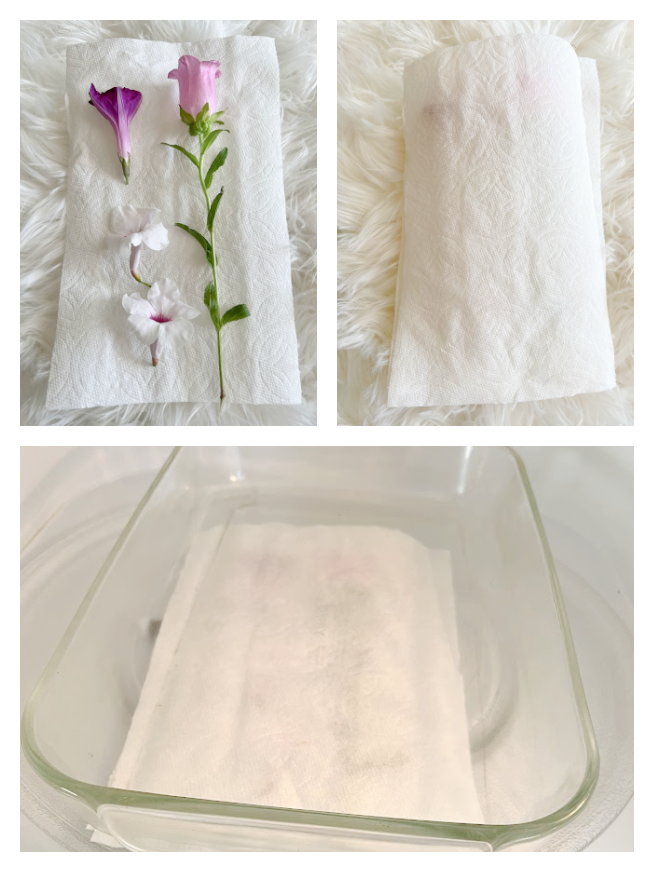
Step 3: Dry the flowers
The drying process is very simple. To dry your flowers in a microwave, place the fresh flowers between two paper towels, you could also use parchment sheets. Place them into the microwave and weigh them down with something heavy, I used a casserole dish. Microwave for 30-second intervals and check if the flowers are dry enough. Be careful when taking the paper towels off as these are delicate flowers. Depending upon the wattage of your microwave you might want to start on half power. I continued to do this in 30-second intervals until the flowers were completely dry. You will know they are dried out when you hold it up and the flower does not flop, mine took about 3 1/2 minutes.
You can protect your flowers by fortifying them with a few coats of hairspray when they are all dry.
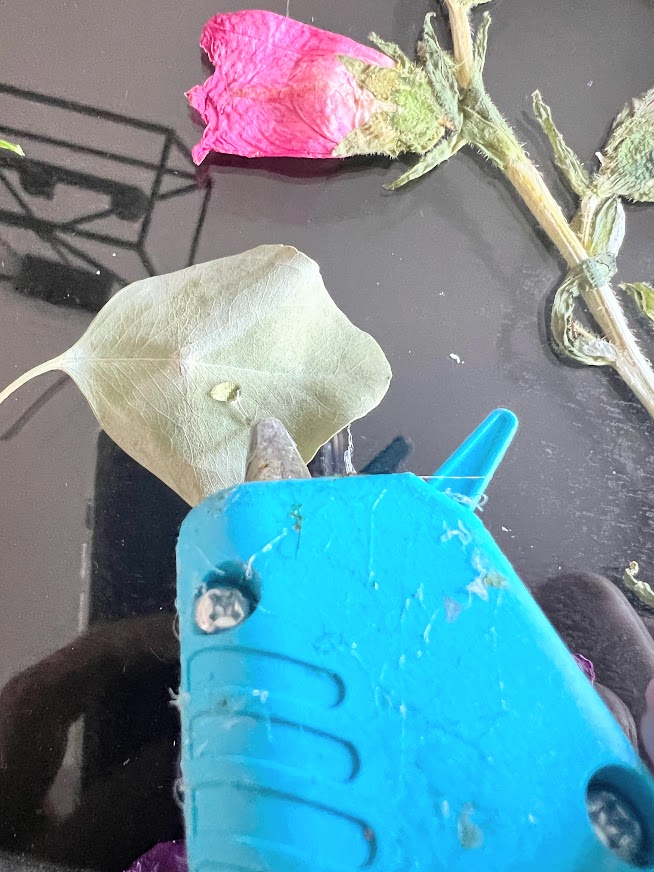
Step 3:Arrange the flowers on the photo frame glass
Arrange the flowers however you would like, I went with a more minimalist approach but you could absolutely fill it all in. I kept the flower stem on some of the flowers and clipped them off of others. Once you place your flowers down and are happy with how they look, it is time to hot glue. Place a small spot of glue on the back of the flowers and place it on top of the glass. Add the glass to the back of the picture frame and secure it with the spring clips.
You could use background paper as if you would like.
Voila!
I’m thinking I might have a piece of glass cut so I can protect the flowers but I’ll see how they do over the next few months. The other option, which is considered the traditional method would have been to place the pressed flowers behind the glass frames, you might be able to see a small trace of glue but it is hardly noticeable. However, on my next thrift store run I”m definitely keeping my eye out for some of the double glass metal frames that have a look vintage.

There you have it, this project was so simple and quick to make, and will add a personal touch to any wall. This would be a great way to preserve a wedding bouquet or a special floral arrangement. This flower wall art would make a great gift for any of your loved ones for a very special occasion.
Check out all of the other makeovers for this month!
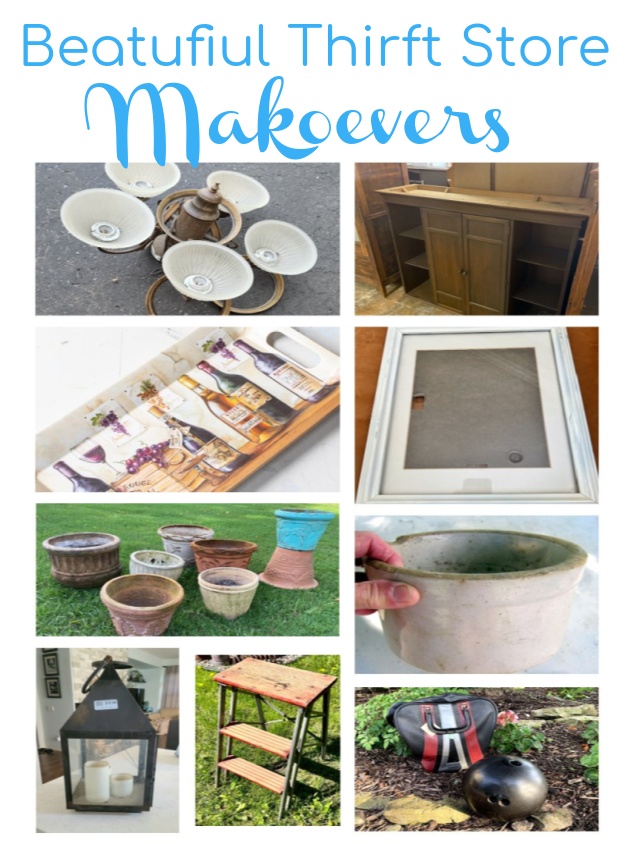
Thrift Store Decor Tour
DIY Chandelier Planter – My Repurposed Life
Succulent Crock Planter – Petticoat Junktion
DIY Upcycled Bar Cabinet – Our Southern Home
DIY Pressed Flower Art – My Uncommon Slice of Suburbia
Mosaic Bowling Ball Yard Art – House Of Hawthornes
Herb Themed Rustic Garden Stepladder – Organized Clutter
Patriotic Serving Tray – Reinvented Delaware
Upcycled Garden Pot – Shop At Blu


I really love this idea and so doing it for Ashlyn! It would be so fun to save flowers from her shower, rehearsal dinner, and wedding to do this.
That would be a perfect way to preserve her bouquet!!! I bet everyone is getting so excited.
I am always looking for frame ideas because I have a lot of them! Yours is really beautiful!
THank you so much Carlene
Kristin the colors are fabulous! So many possibilities!! Pinned
Thank you so much Sue, it was fun to make
I love flower projects. I purchase them on vacation as keepsakes, yet I’ve never done one myself! I see this project in my future. Thank you for the inspiration Kristin!
gail
pinned!
Thank you Gail, so glad you like it!
This is so pretty Kristin and it would be a great way to save flowers from a special bouquet. Thanks for telling us how to dry flowers in the microwave – that’s new to me and I am going to try it with some flowers from our yard this year! Pinned 😊
So pretty & whimsical Kristin!