
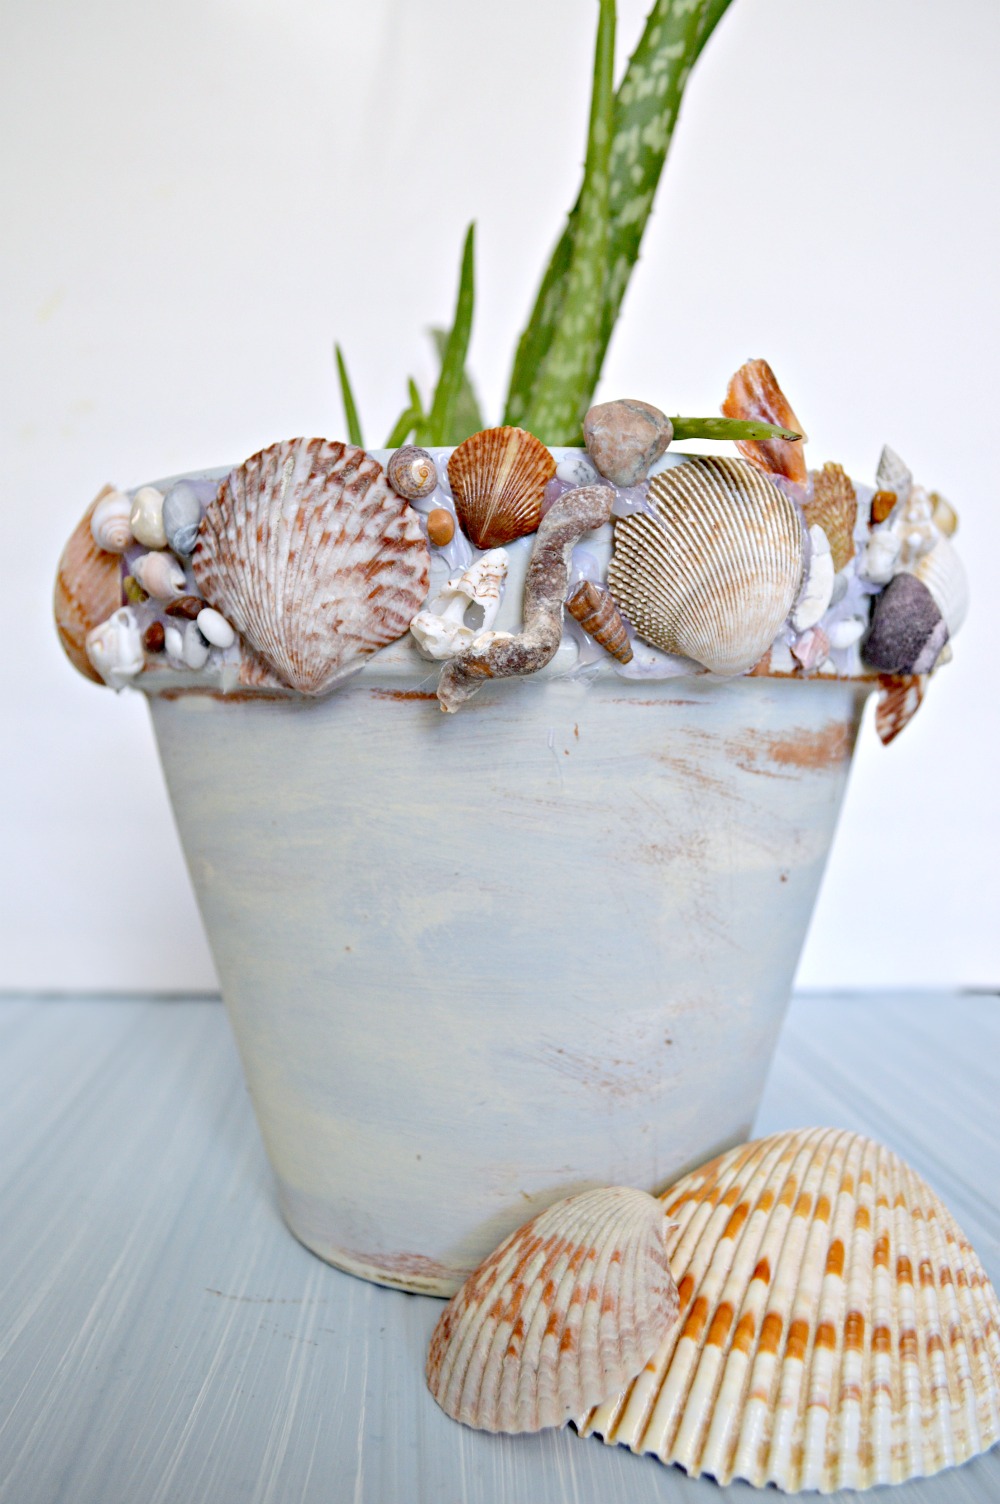
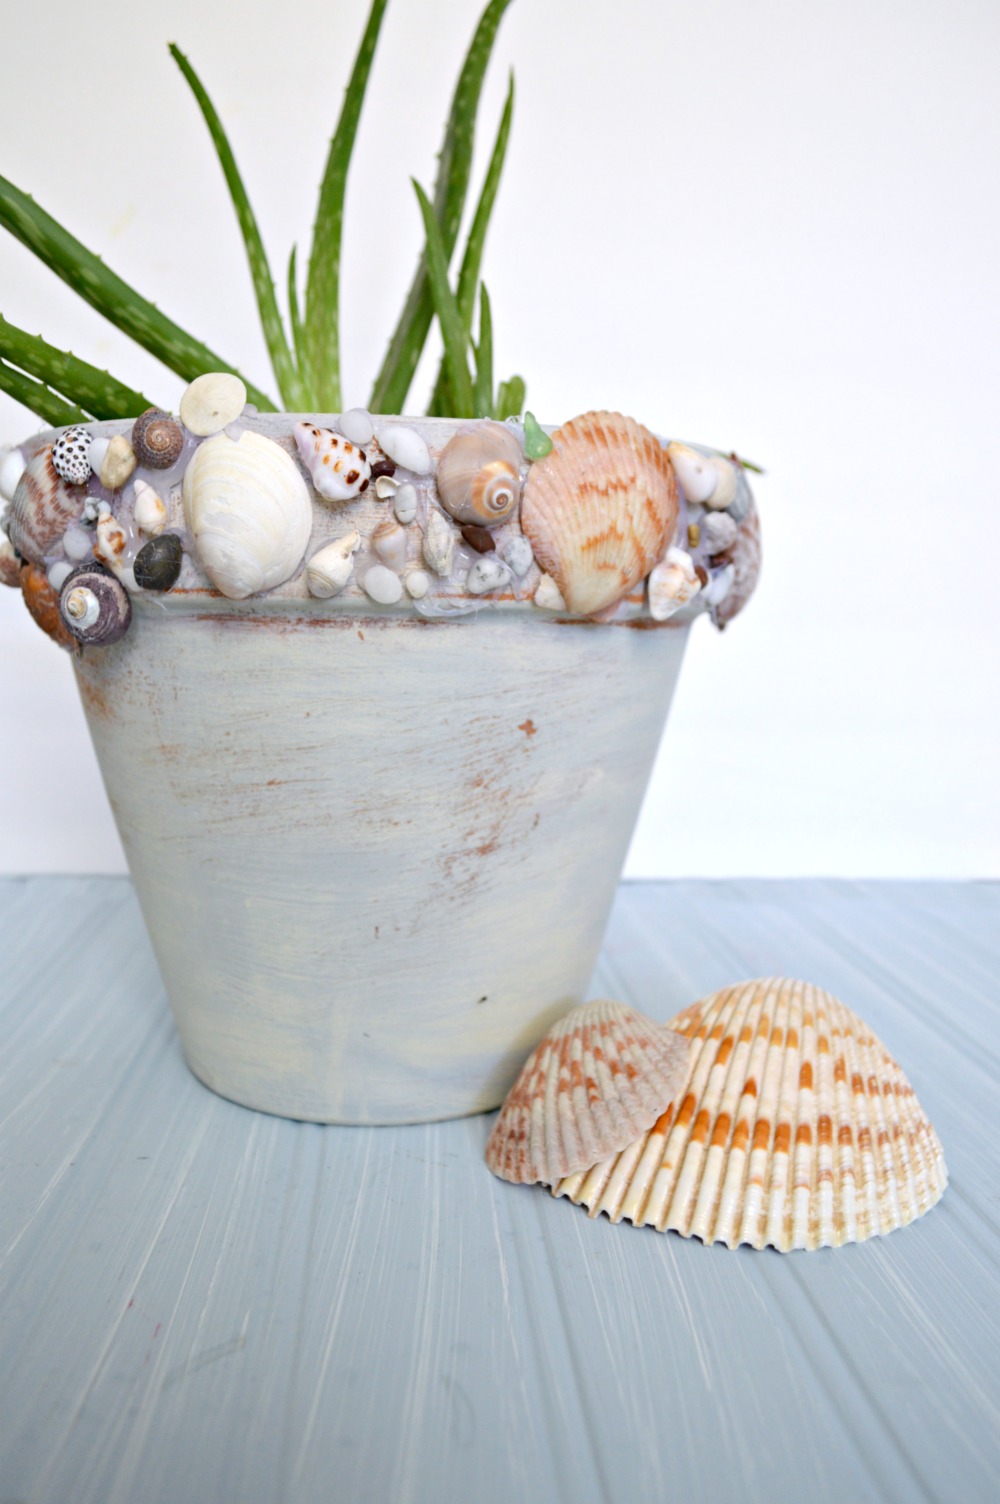
DIY Shell Covered Pot
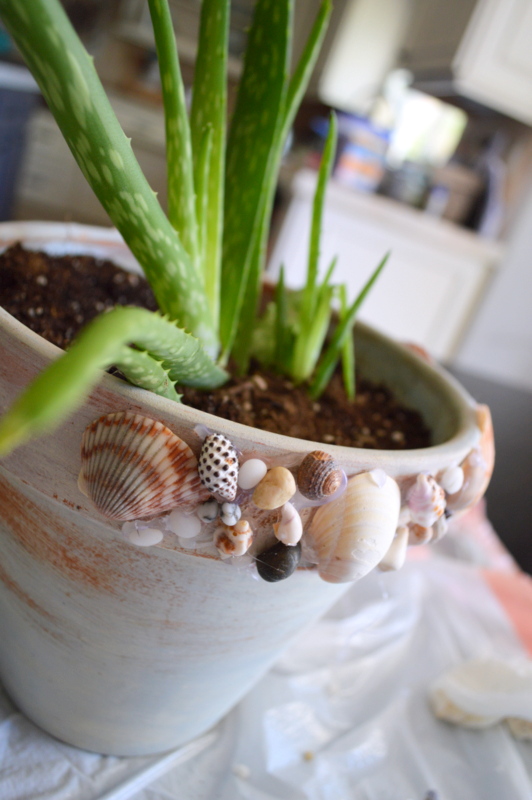
It was so fun creating this DIY shell covered pot. Embellishing gardening containers with shells is so easy and pretty! First, I found a box of shells at our local thrift store for $2.00, how could I pass up such a bargain.
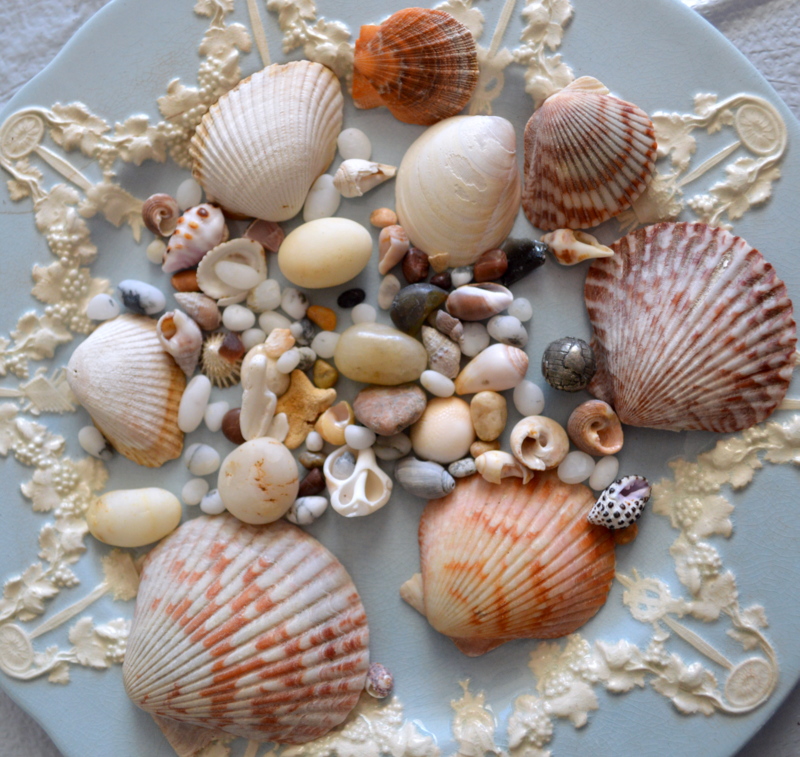
Next, I placed all my favorites on a plate and went to work.
Supplies
*Elmer’s Advanced ProBond Advanced Weatherproof Glue
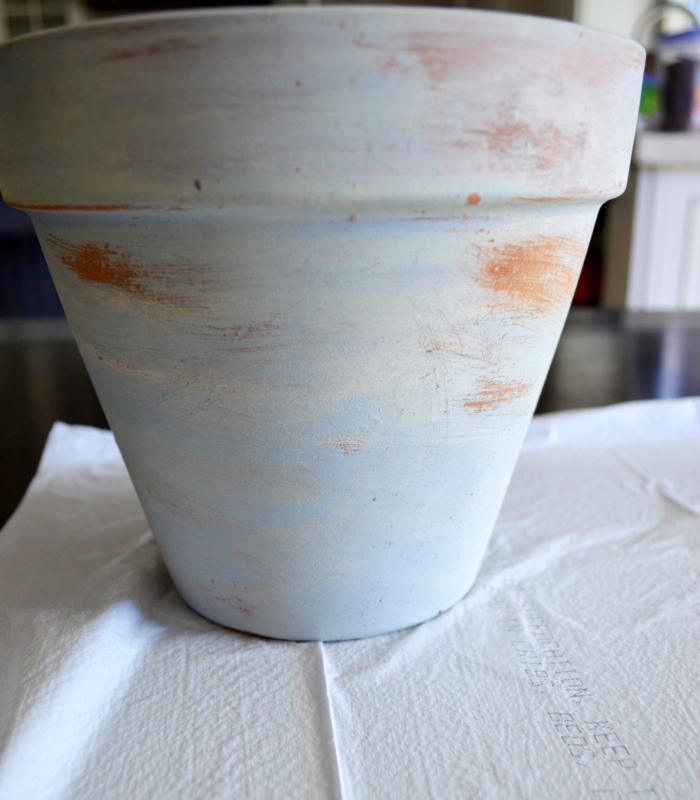
*Ceramic Pot (I found mine at the dollar store and antiqued them, you can find that tutorial here)
*Shells
(affiliate link above)
Directions
Make sure your container is clean from dust and dirt.
Simply apply a layer of Elmer’s Pro Bond in small sections and placed the shells on top of the glue.
This glue dried clear which was perfect for this project. It is non toxic and you can adhere porous to non-porous materials together, like wood to metal, glass, or ceramic to drywall, all without messy foaming, huge bonus!
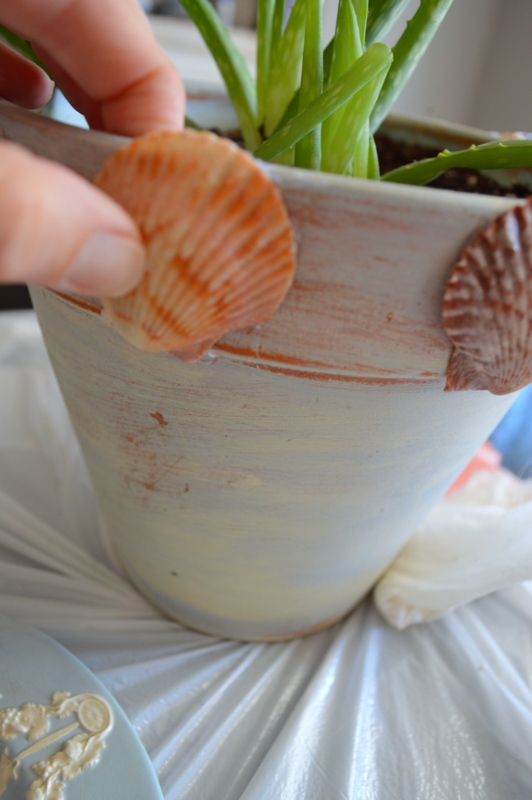
I just continued adding the shells until I was happy with how it looked.
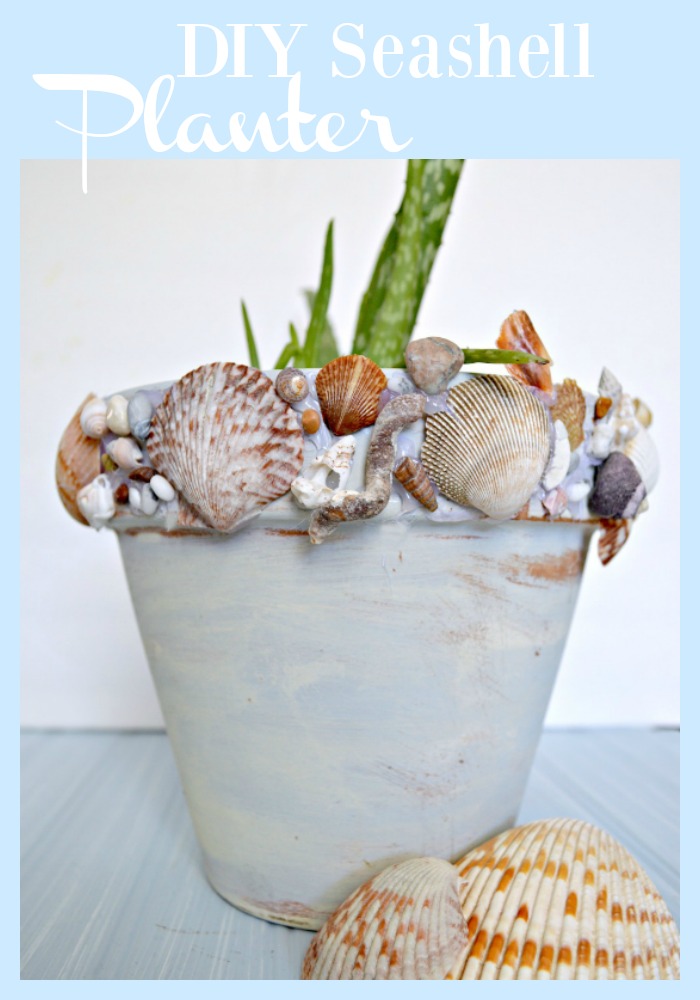
So incredibly simple and it adds a fun beachy vibe to our decor!
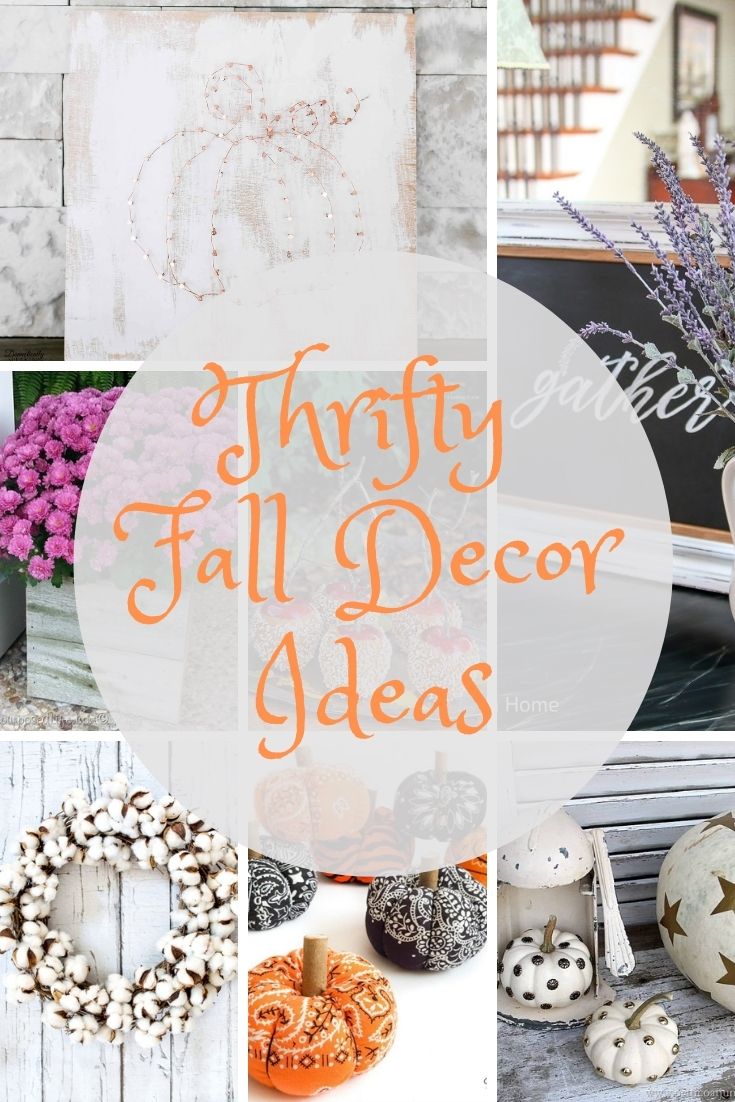
It’s that time again, go check out what all the talented ladies found this month at the thrift store, they are always sure to impress!


Stenciled Box Makeover from Our Southern Home
Kitchen Shelf to Coat Rack from Domestically Speaking
Magnetic Chalkboard Makeover from My Repurposed Life
DIY Shell Covered Pot from My Uncommon Slice of Suburbia
Reloved Mirrors from Bliss Ranch
Upcycle Fabric Calendar Petticoat Junktion
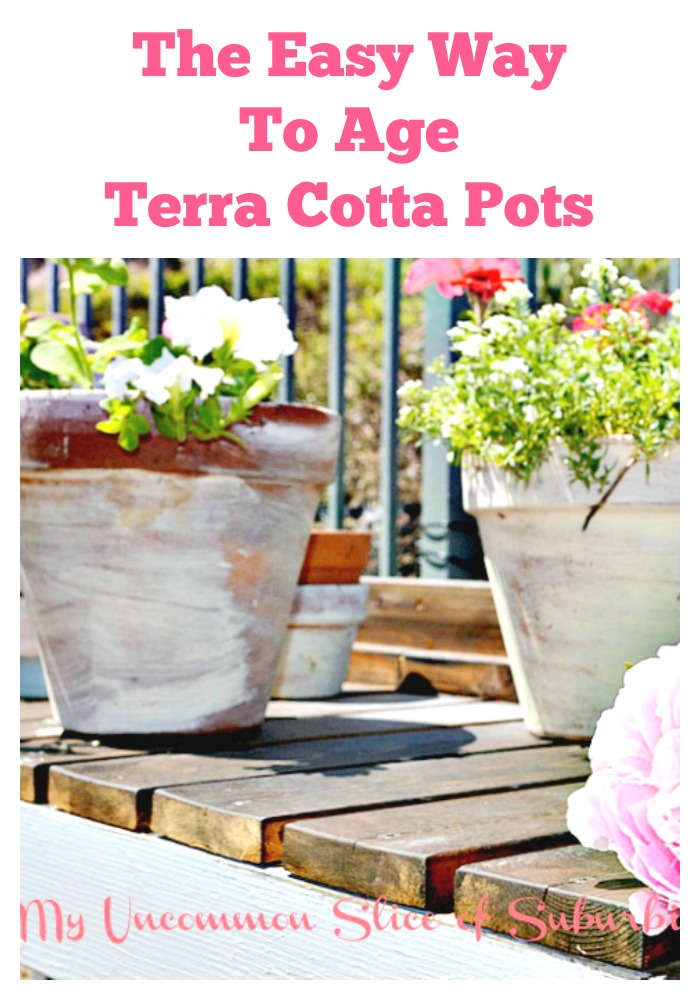
How to Age Pots
Affiliate Links Listed Below
Supplies
Clay pots (I find mine at the dollar store)
Paint (I used a variety of white/blue/green)
Sponge
Lint-free rag
How to age a terra cotta pots
Grab whatever paint you have on hand, think creamy antique colors and white.
Use a paintbrush and lightly paint a coat of white around the pot
Take a sponge and apply the antique colored paint onto the terra-cotta pot leaving certain areas of the pot lightly exposed.
If you feel there is too much paint in some areas, take a wet lint-free rag and wipe the pot with the rag until it removes some of the paint.
 Use a dark wax with a lint-free rag to lightly rub over the pot. If you feel the wax is too dark, add just a bit of water to the rag before dipping it in the wax and it will not come out as dark. The wax will protect against moisture and make the pots more durable
You are left with a gorgeous pot that looks like it has been sitting around for years.

Love it Kristin!
Kristin,
So simple, but so beachy! I have a friend that would love this pretty shell covered pot. It’s a great gift idea.
gail
Now I know what to do with our huge shell collection. This is just beautiful!
Thanks CHristy
Great idea to perk up a pot. I use the Probond too!
Thanks Kathy!
Where and what kind of wax do you mix with the paint? I want to make this, it’s beautiful.
Here is a link to a product on amazon. https://amzn.to/39DpQCG
Otherwise, you can find dark wax in home depot and Michaels (Americana decor and Annie Sloan)
I’ve updated the links and tutorial here if you want to see more details. Let me know if you have any questions! A peek around the garden & aging terra cotta pots