
Stenciled Wall
Today, I am sharing with you the best stenciling tips and tricks for avoiding paint bleeding when stenciling with a foam roller. Stenciling with a foam roller is by far the fastest stenciling technique, and also the easiest. However, there are a couple of things to keep in mind to make sure the results are perfect.
Affiliate links are listed below.
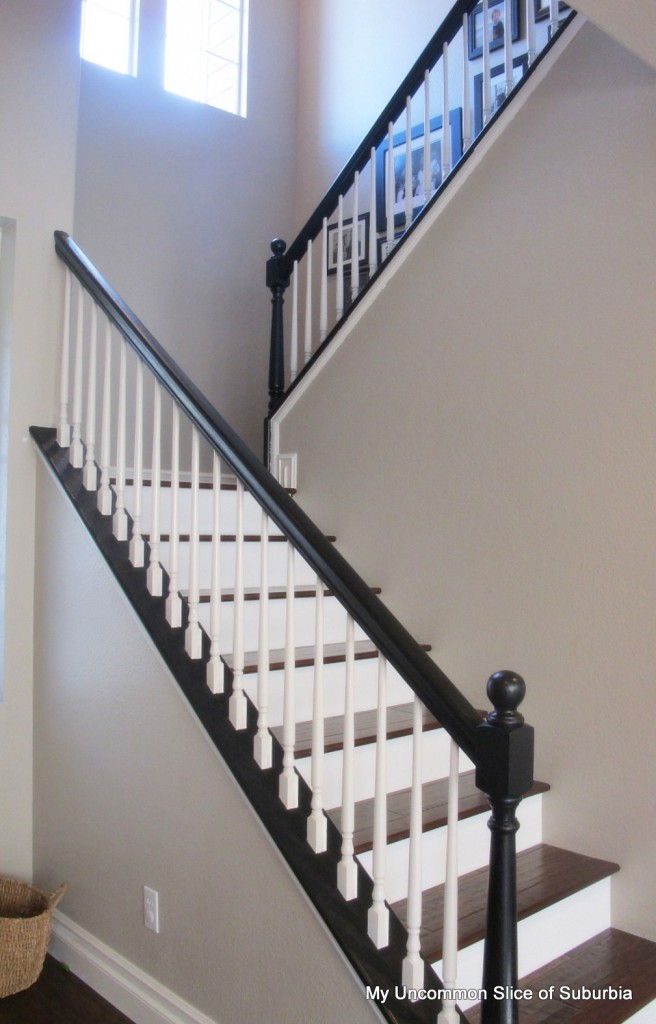
Stenciling the wall that leads up our stairs has made a big impact in our great room and it was so simple.
The stencil is the Lilly scroll
The stencil is the Lilly scroll
All of their stencils are made from sturdy clear plastic material which made it super easy to work with! Do you know what I loved most about this stencil, I ROLLED IT ON!!

Stenciling Supplies
- Foam Roller
- Repositionable Spray Adhesive
- Frog Painter’s Tape
- Stencil
- Paint of your choice
- Paint Roller Tray
Directions:
Note: If you have never stenciled before, instead of using tape you might want to try a spray adhesive.
Shake the can well, then lightly mist your stencil with the spray adhesive, let it dry for a few seconds and place the stencil on the wall. For my tutorial, I am not using any spray adhesive, just some tape.
I mixed Grant Beige and Valspar’s brushed pearl paint to give it a shimmery effect.

Tape everything off
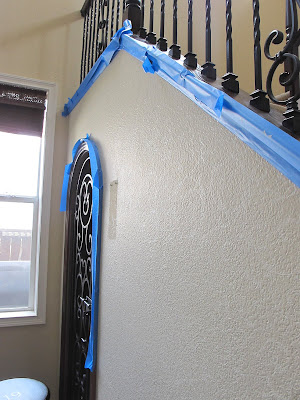
Position your stencil using painter’s tape and a level if needed, then lightly mark the edges with a pencil.

OK here is the part where I used my stencil brush and lightly tapped each section and went you have got to be kidding!
If you know me I’m an instant gratification girl, I don’t have the patience for it or the time.
I picked up my instructions and read you may roll this on with a foam roller! Seriously, the good man upstairs was watching me! I did my happy dance and grabbed a foam roller out of my supplies and went to work. Note…I don’t know if you can roll it on with all stencils but you sure can with theirs!
Make sure to not overload your roller with paint and always blot off excess paint onto a paper towel.
Push down on the area of the stencil being worked on

Start rolling over the stencil with your foam roller applying light to medium pressure. Continue rolling over the stencil in short back-and-forth strokes until you get your desired coverage.
I always start light on the pressure and build up to prevent paint bleed underneath the stencil. You can lift the stencil and take a peek to make sure it looks ok with no bleeding.
I always start light on the pressure and build up to prevent paint bleed underneath the stencil. You can lift the stencil and take a peek to make sure it looks ok with no bleeding.

Repeat the process for as many prints as you want or until the wall is complete. Simply line the stencil up beside the freshly painted design, add more painter’s tape and, continue rolling paint through the stencil just as before.
When you find the paint is very light on your surface. Repeat the steps of loading your roller and rolling excess paint onto a paper towel before you continue stenciling.
With the right amount of paint on your roller and the right pressure there is usually no bleed at all and the edges are crisp.
The whole process most likely took a little under 3 hours.


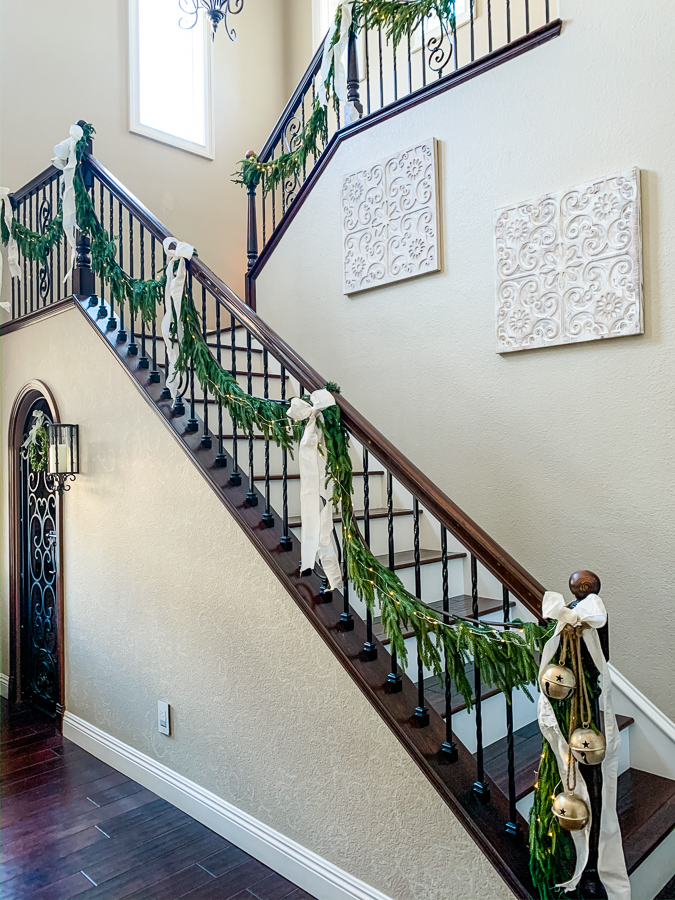
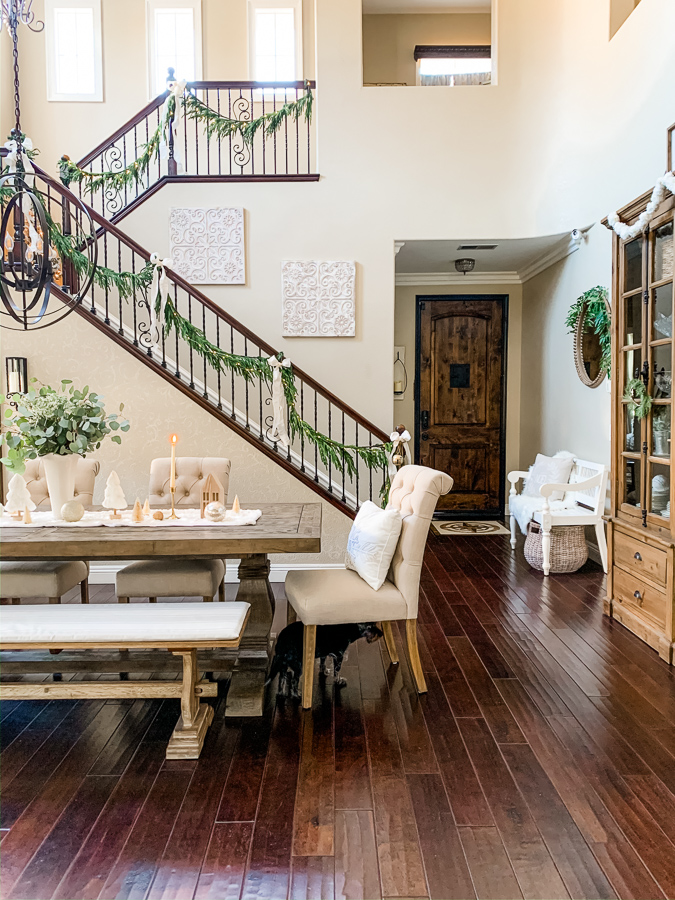
The results are stunning and I just love the design. I hope you will give this a try.
So pretty Kristin! Oh and I am with you girl! ROLLER any day. That chalk one I did took for-ever. For just that one section. I think it was a one time affair 😉 This looks so subtle and elegant. Love it!!
I have a pile of stencils gathering dust and need to do something fabulous like this! Love the subtle color!
Kelly
I like that look – just beautiful and thanks for the inspiration!!
This is beautiful – I love that it is so subtle. Great idea!! Pinning!! xoxo
I love the subtle tone on tone look. I have never stenciled, but have a project or two in mind.
Where did you find the stencil? I love this!!!!
Cutting Edge Stencils. I went with the Lilly scroll design
Beautiful! Subtle! Elegant! This is what I want for my bedroom that’s been pea green for way too long. Thank you.
Looks fantastic! I’ll have to try that.
Oh, Kristin!! It looks beautiful. 🙂
xoxo
Denyse
LOL! I would have had the same response to the dabbing method..I’m very impatient.
I LOVE the design. The wall looks beautiful.
Wall looks great. What color is the base coat that you paint all over the wall
Thanks so much, it is bleeker beige
Did you use the same color as on the wall originally and just the pearl so it would show up or how did you decide the color?
Hi-
For the stenciled wall Bleeker Beige was already on the wall. Then I mixed the grant beige which is very similar to Bleeker Beige with the brushed pearl so it would stand out but still be very subtle. Hope that makes sense. Let me know if you have any other questions.
When you stencil with a brush you use a “dry” brush – dab most of the paint off the brush before applying on the wall. How wet is the roller?
Hi Sharon- Yes, dab it on dry and if you decide to use the roller make sure to have most of the paint off the roller before rolling it on the stencil/wall. I always have a brown paper bag handy, perfect for this 🙂
great job!!
Thank you!
Me gusta, queda muy fino y elegante.
I bought the design and did a practice today using pearl paint and a roller – looks good but not as subtle as I want. What kind of paint would you suggest for a more subtle design than the pearl paint gives it?
Try adding a little cream color to the mix and it should make it more subtle, something like this: http://www.myperfectcolor.com/en/color/89520_Valspar-7003-4-Honeymilk
Beautiful! I’ll be using your idea – thanks for sharing!
Hi – I know this post is several years old now, but I just saw it for the first time. It looks great! I’ve been wanting to do this to a wall, but was hesitant since they are textured. From your pictures, it looks like you wall had texture as well, is that correct? And if so, how was the bleed through? Thanks!
Hi Erin, thank you so much for stopping in again! Yes, they are textured and as long as you keep the stencil secured to the wall while painting, I did not have bleed through.
Hi Kristin,
I want the EXACT look that you did here! It’s beautiful. I understand this was posted back in 2013, and it appears Valspar no longer makes the brushed pearl (at least from my search). Is there another type/brand of “shimmer” paint that you could recommend for mixing with the paint?
Thank you so much!
Dee
Hi Dee-
I did a little research and PEARLESCENT GLAZE BY ANNIE SLOAN seems to look to be the closest to the brushed pearl. Do an image search and see if it is something you think you might like. Let me know when you finish your wall, would love to see it.