
DIY Pallet Herb Garden
Transform your outdoor space with a pallet garden! Learn how to create a beautiful and sustainable garden using pallets. From herbs to flowers, discover the endless possibilities of pallet gardening. Start your DIY project today!
It has been cold, rainy and just plain yucky here but it didn’t deter me from getting our garden ready for Spring, A HUGE HELP to my husband for helping me with this project, love that we work so well as a team!

Whether you have a large outdoor garden or have limited space this is the perfect DIY project for creating a small herb garden. We have a raised garden bed that I love but the fact that I can move this around depending on the season and how much sun the herbs are needing at that time.
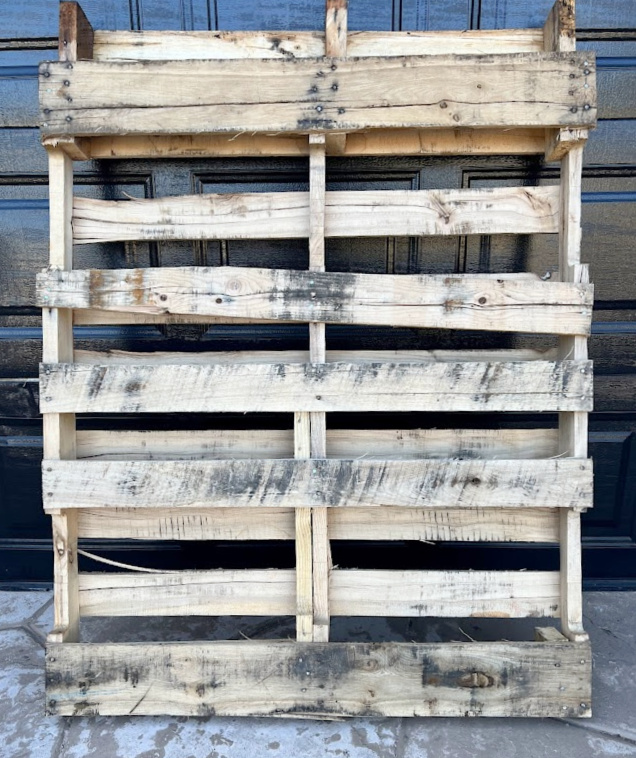
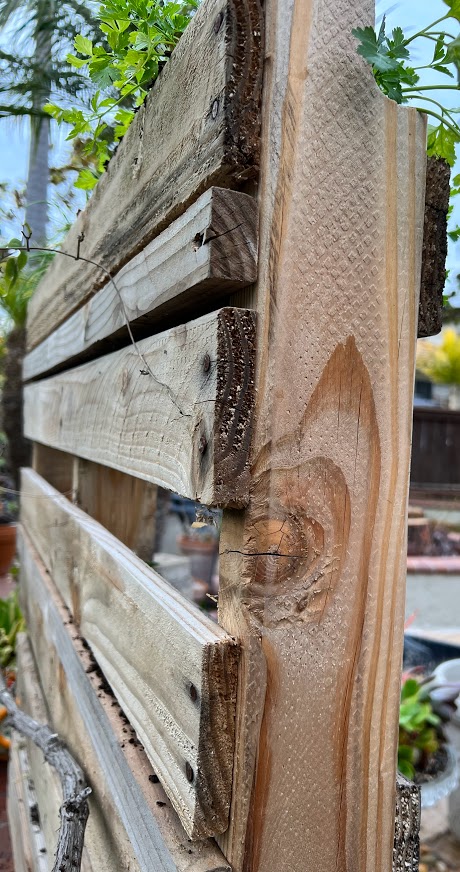
Here is what the pallet looked like before we started working on it. We had tile delivered last week for our bathroom floor (finally I made a decision) so I decided this would be perfect for our thrift store day since it’s a recycled product!
Affiliate links are listed below, I am an Amazon Associate, you can read my full disclosure here
Supplies:
Miter saw or hand saw
Wood Pallet
Measuring tape
Staple gun and staples
Screwdriver and screws
Nails and hammer or nail gun (We have this cordless nail gun and love it)
Prybar
Weed cloth – landscaping fabric or wire mesh
Fresh herbs
Plywood
Soil
Wood stain or paint (Optional)
Protective clear coat
Step-By-Step Instructions
Making a vertical garden using a pallet is a great way to create a beautiful, garden in your backyard, perfect for a small space. Here are the steps to follow:
- The first step, Find your free pallets: You can find a used or old pallet at home depot, a hardware store and garden centers many times for free, just ask. Make sure the pallet is in good condition and has no cracks or broken boards. Avoid any that have obvious oil spills or evidence of rot or mold growth. If you are not having any luck, you can purchase one online.
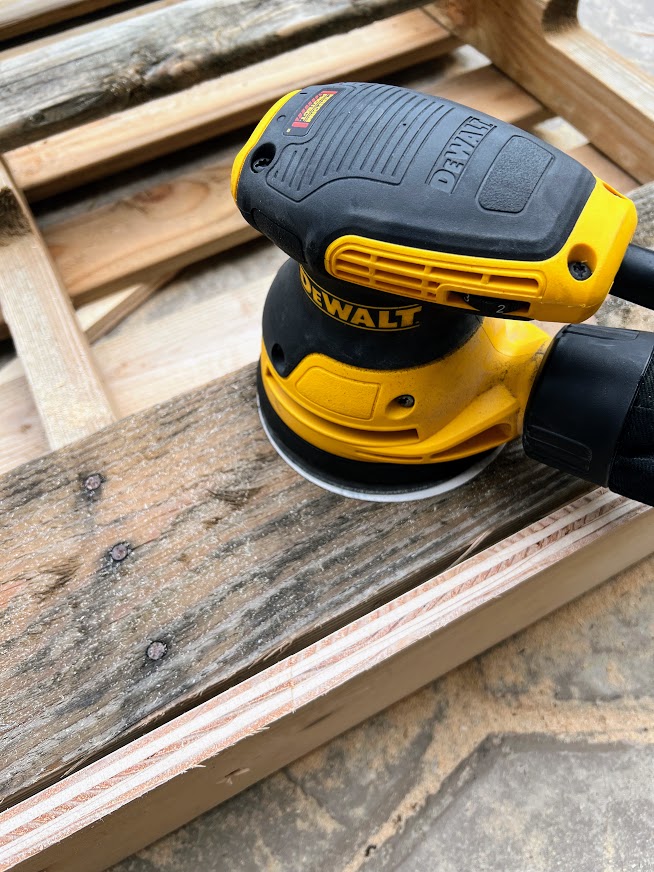
Prepare the pallet: You may need to do a little work first to get it ready for planting. If there are rough edges or splinters feel free to sand the pallet. Pry out any protruding nails and reinforce any loose joints with screws. If the pallet has been treated with chemicals, allow it to weather for a few weeks to ensure it is safe for planting, you could also clean it with a water-and-borax mixture or a water/bleach mixture.
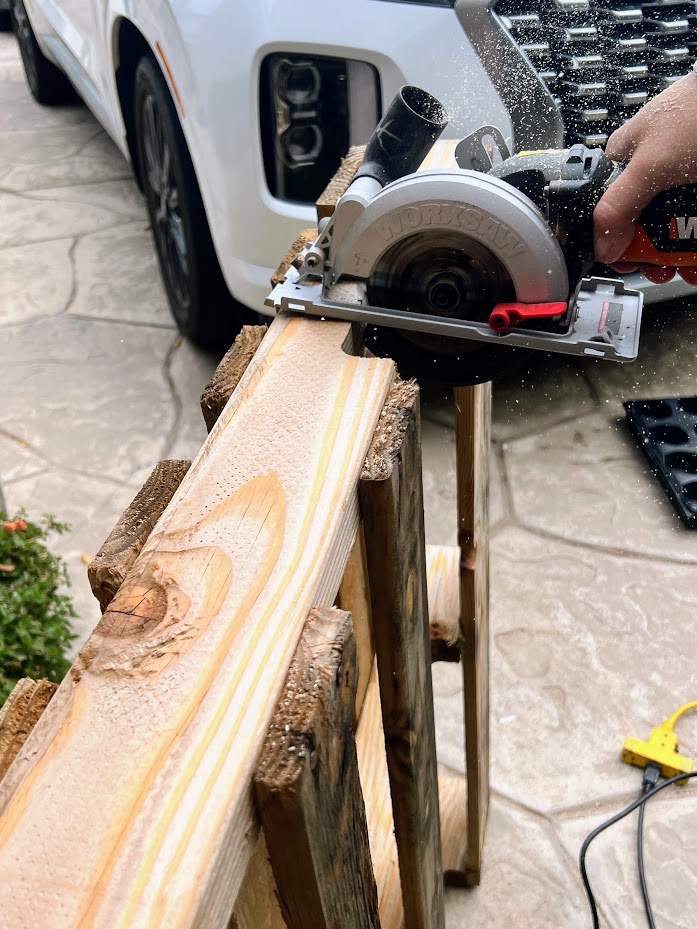
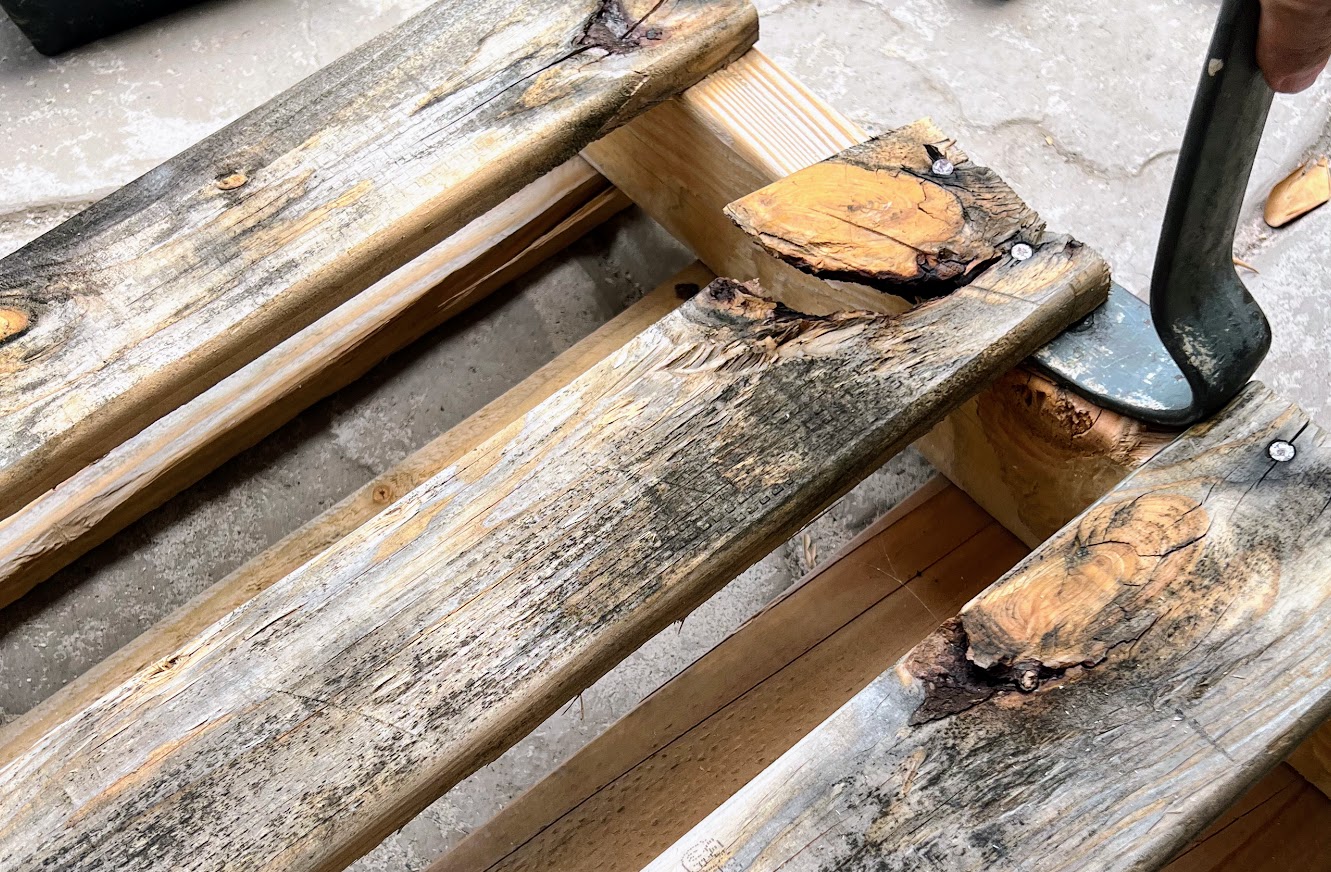
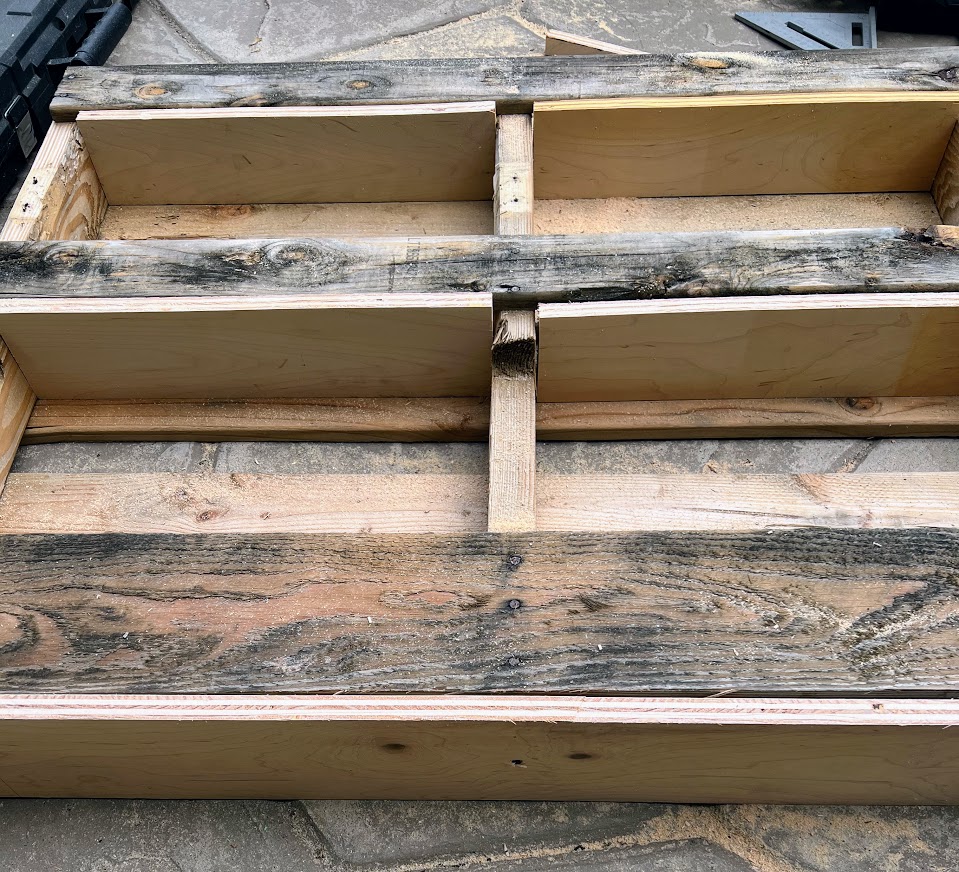
 Optional Reconfigure the Pallet: Our pallet was fairly large so we decided to make it a little smaller by cutting aprox 1/4 of the top off. We then removed a few of the horizontal boards with a pry bar to create a larger space for taller herbs.
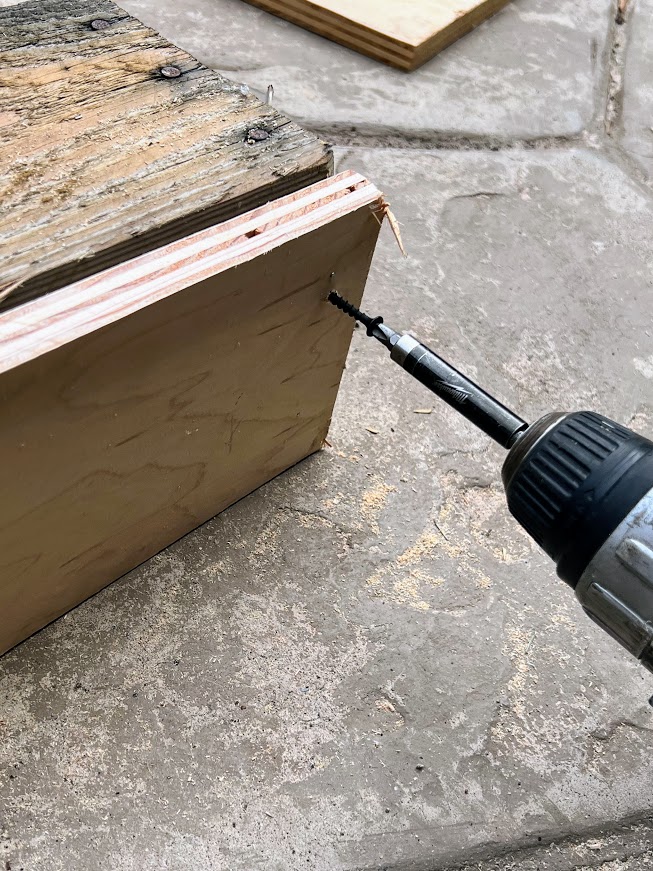
Create Shelves: Using scrap wood or you could reuse the wood we took off of the pallet, we Drilled the wood, to the bottoms of each level to create shelves.
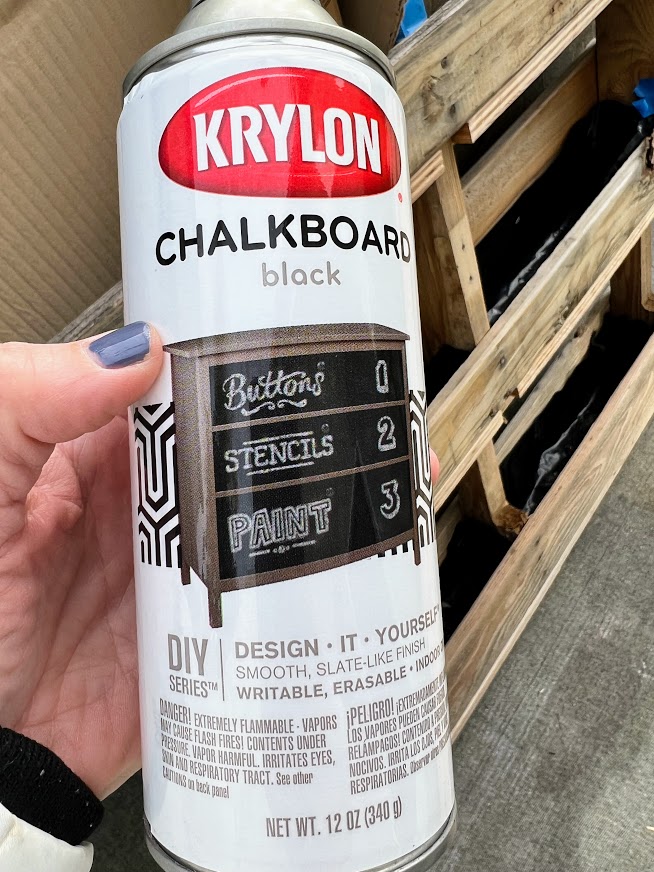
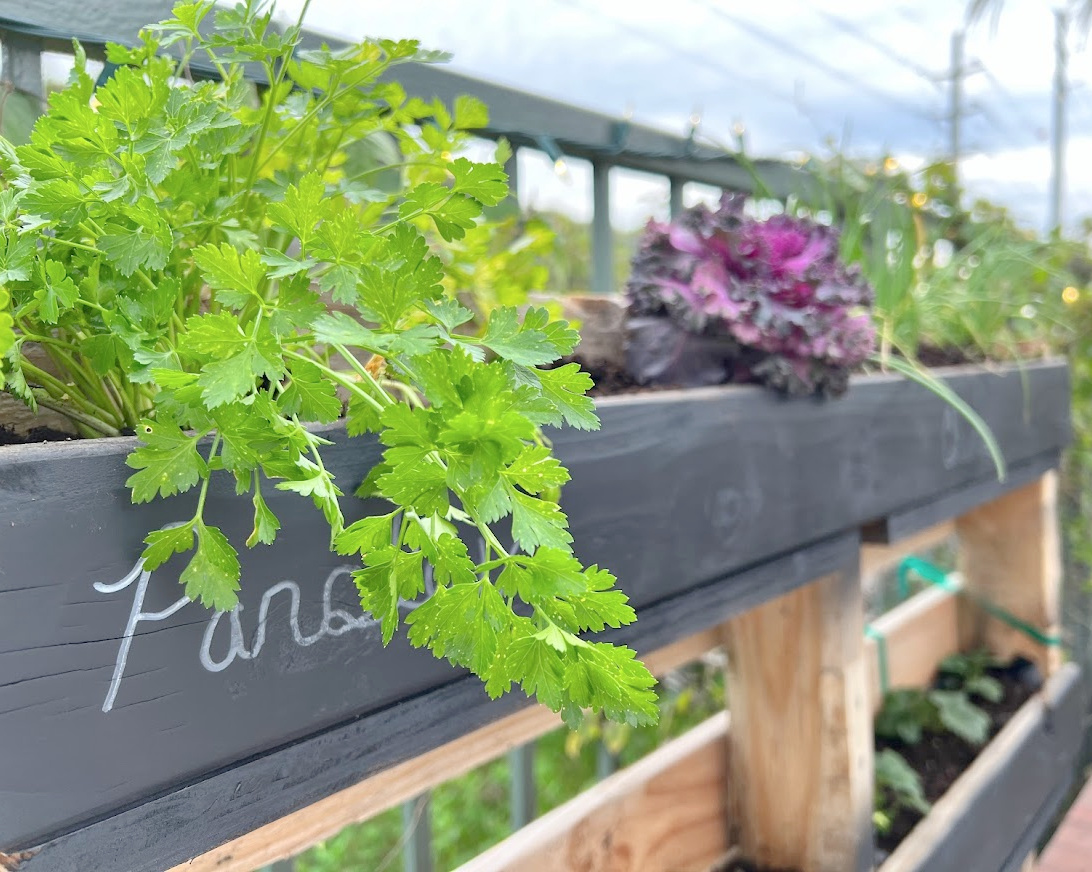
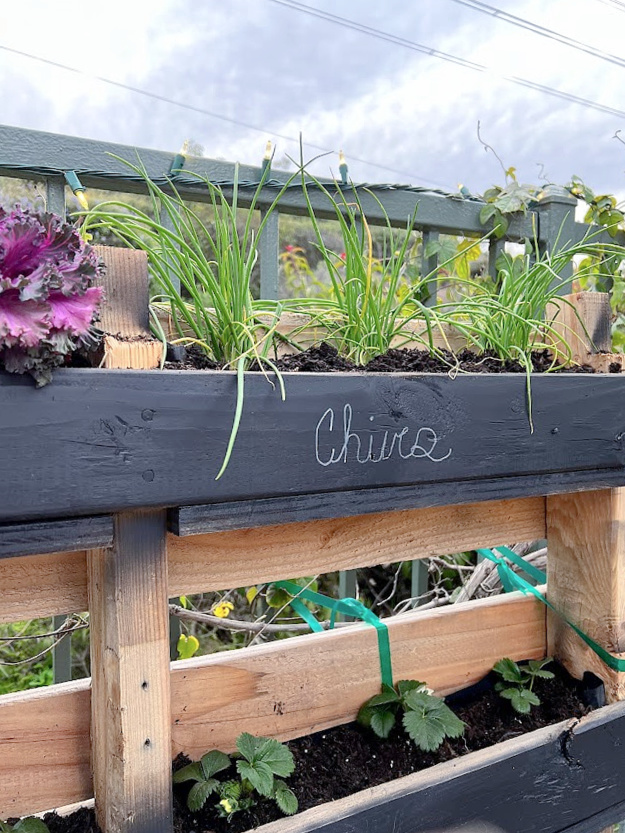
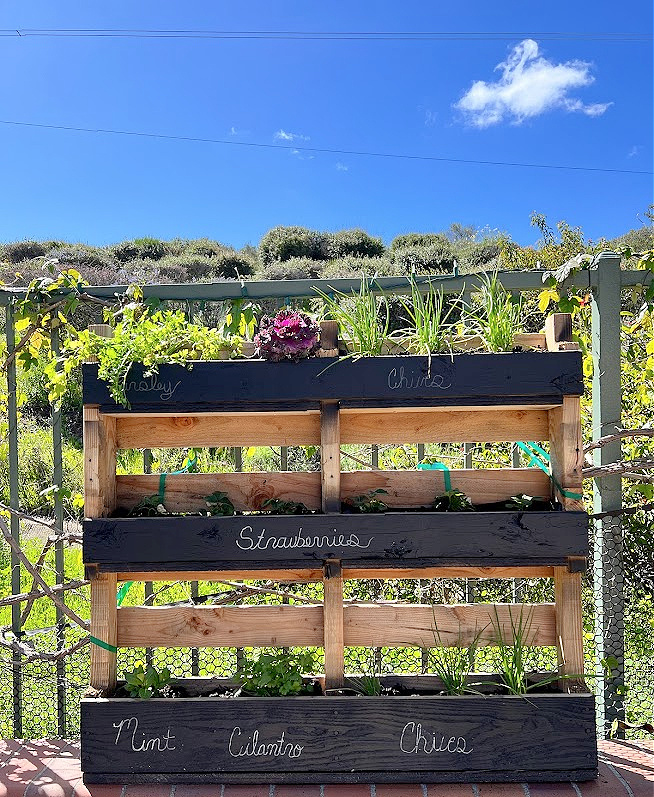
 Paint or Stain: If you are going to paint or stain the pallet, now is the time to do it. If not, I definitely recommend a coat of poly to protect the wood from the outdoor elements. I used chalkboard paint so I could write which herbs are planted, plus it’s cute!
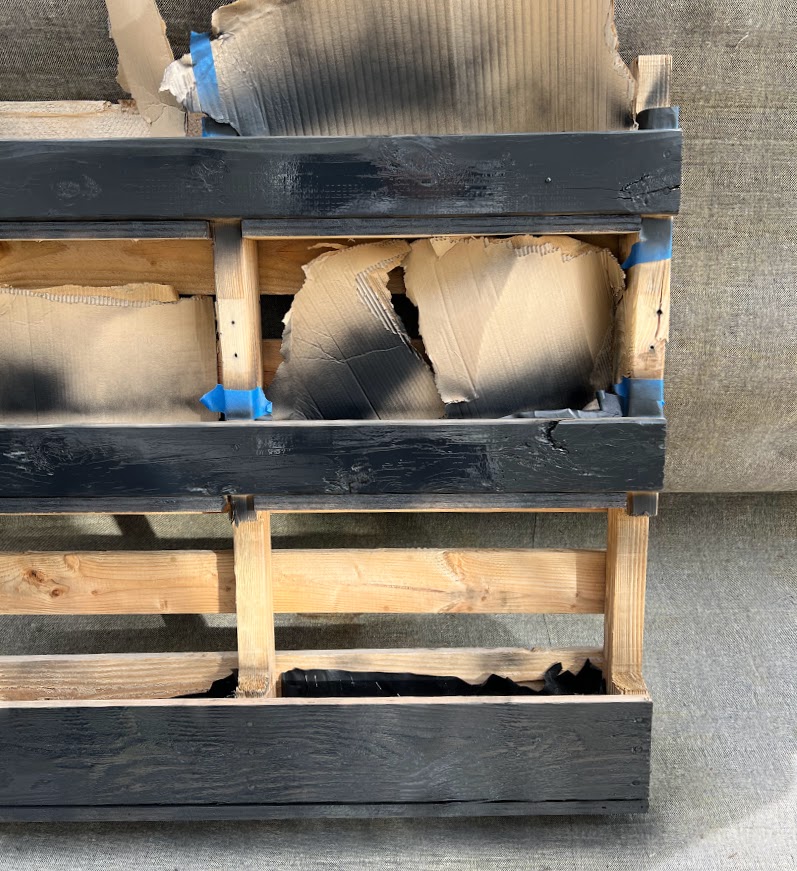
Line the pallet: Take your weed cloth and roll it over the back of the pallet, so it’s completely covered. Or you can add it individually to each shelf. Using a staple gun, staple landscaping fabric to the back of the pallet to line the back, bottom and side of the pallet. You could also use wire mesh. This will help hold the soil in place and prevent it from falling out.
Provide a backing: You can cut a piece of ½-inch plywood the same size as the bottom of the pallet and cover the fabric cloth with plywood to provide a backing. Or you can add extra pieces of scrap wood on the back, either way, will work. This is what the back of ours looks like.
If you are working with a large pallet I would move to its final location before you fill it or it’ll simply be too heavy to move.
Add soil: Fill the pallet with potting soil, leaving a few inches of space at the top. You can mix in some compost to help your plants thrive.
Plant your garden: Decide what plants you want to grow in your garden. Choose plants that will thrive in the amount of sunlight and climate in your area. You could also mix in, flowers, vegetables, or succulents. Make use of all of the different levels of your pallet.
Water your garden: Water your garden regularly to keep the soil moist. Be sure to water both the top and bottom of the pallet.
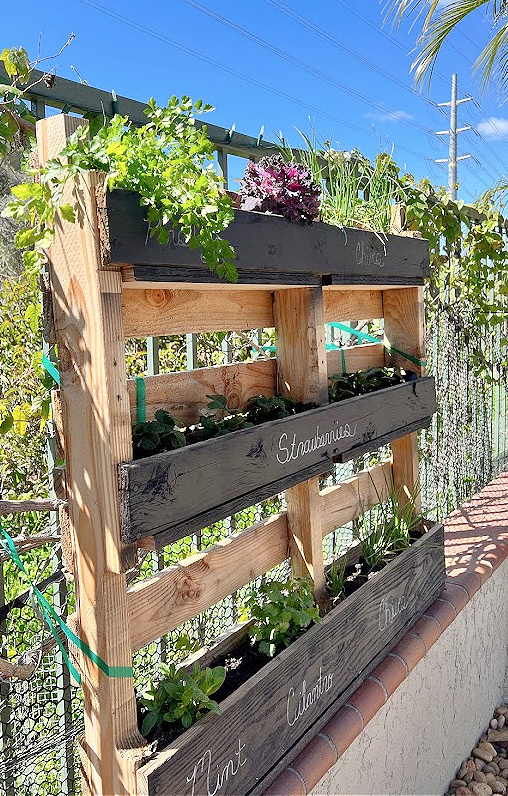
Option to Hang your garden: Use strong hooks to hang the pallet vertically. You can hang it on a wall, fence, or other sturdy structure. I’m not sure if this is going to be a permanent spot for our garden so I just simply secured it to our fence with something non-permanent for now. We have had some crazy weather lately.
Enjoy your garden: Sit back and enjoy your beautiful, space-saving vertical garden!
Ignore the horrible power lines behind us, don’t get me started on SDGE and how they refused to put our lines underground, knowing the huge fire risk that is involved, we fought so hard, and in the end, the end we lost, I don’t think we ever had a chance.
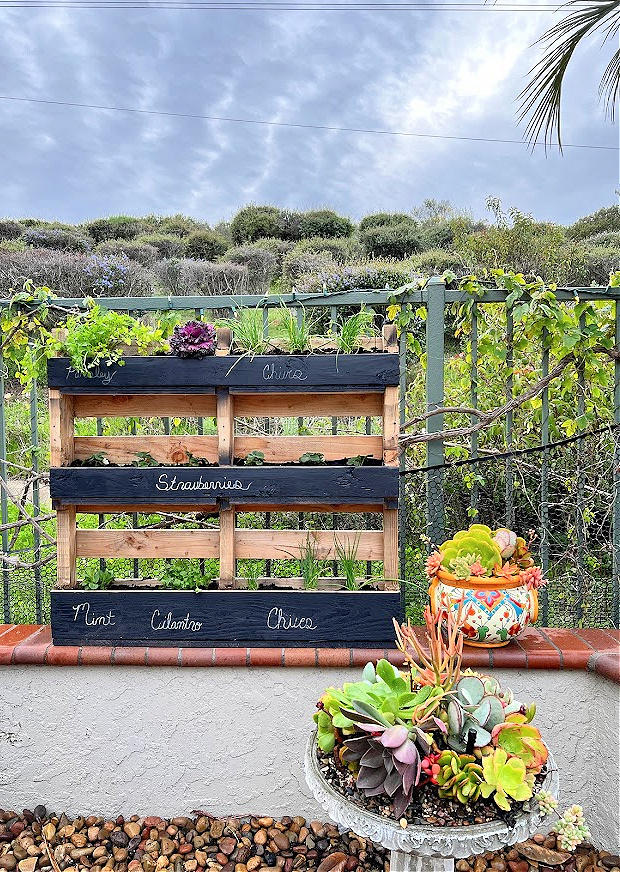
The sun finally came out yesterday, so I had to take a few more pictures, I have missed you!
Customize your wooden pallet herb garden
You can leave your pallet as is or you can jazz it up a bit with different colors of paint. I liked the idea of black chalkboard paint so I could write the names of the different herbs. You could also give it a coat of dark stain or a coat of white paint and stencil the names of the herbs over the paint.

Tips and Tricks
Pallet gardening is a great way to grow plants and vegetables in small spaces, and it’s a fun DIY project for gardeners of all skill levels. Here are some tips and tricks to help you create a successful pallet garden:
Make sure you use a pallet that is in good condition and made from untreated wood, as pallets treated with chemicals can be harmful to plants. Most pallets are marked or stamped with letters that tell you how they’re treated. The safe ones to use in a garden bed DIY build are:
HT (heat treated)
DB (debarked)
KD (kiln-dried)
If you’re planning to grow fruit or vegetables in your pallet garden bed, it’s not advisable to use a chemically treated pallet. If you do, you could contaminate your soil, the plants, and the food you intend to eat.
Clean the pallet: Before starting your pallet garden, clean the pallet thoroughly with a stiff brush and soapy water. Let it dry completely before proceeding.
You may need to do a little work first to secure a high-quality pallet for your garden beds. For example, you should avoid rickety old pallets with broken, cracked, or thin planks, missing blocks, splintered wood and lots of missing nails.
Add a barrier: To prevent soil from falling through the gaps in the pallet, add a barrier to the bottom of each section. You can use landscape fabric, burlap, or even an old t-shirt.
Fill with soil: Once the barrier is in place, fill each section with high-quality potting soil. Compact the soil slightly, but leave enough room for plants to grow, we always use organic soil.
Choose plants carefully: Because pallet gardens are shallow, you’ll need to choose plants that have shallow root systems. Some good options include herbs, lettuce, strawberries, and succulents.
Plant and water: Plant your chosen plants into the soil and water thoroughly. Keep an eye on the soil moisture levels and water regularly as needed.
Position your pallet garden: Find a spot that gets plenty of sunlight for your pallet garden. If possible, position it at an angle to allow for proper drainage.
Maintain your pallet garden: Regularly check your pallet garden for pests, weeds, and moisture levels. Fertilize as needed and prune plants as necessary to keep them healthy and thriving.
With these easy steps, you can create beautiful herb pallet gardens in no time at all that will add greenery and life to your outdoor space. You could make a variety of them, one for a vegetable garden, another for flower beds, the possibilities are endless!

Time to check out all of the other thrift store makeovers for this month! Links are in order of the picture, so many great ideas this month!
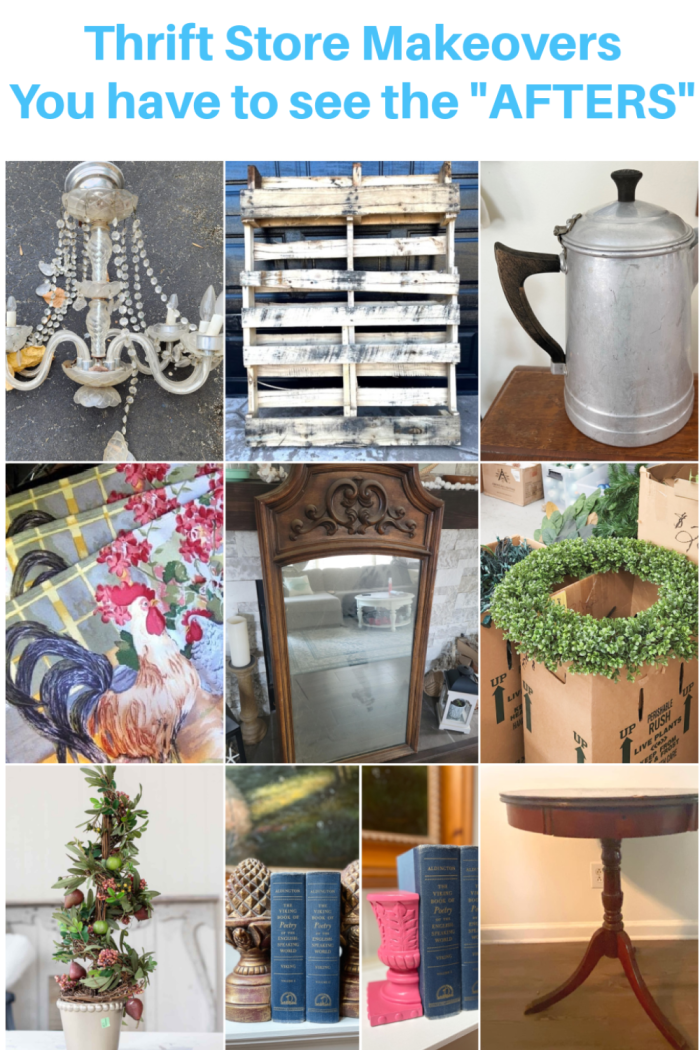
Upcycled Glass Chandelier My Repurposed Life
Old Coffee Pot Upcycled As A Flower Pot Organized Clutter
Chicken Wall Decor Idea Petticoat Junktion
How to Update an Old Mirror Domestically Speaking
St. Patrick’s Day Wreath Sadie Seasongoods
Thrift Store Upcycle Idea for Spring Reinvented Deleware
Whitewashing Bookends Our Southern Home
Thrift Store Painted Side Table Shop At Blu
I’ll definitely be updating all of you on how our herbs grow in and let you know what works and what doesn’t.
Thank you so much for stopping in today!

Wow! Your pallet herb garden looks great Kristin!
I appreciate all of your tips, especially about which pallets to choose and avoid when growing herbs and edibles.
pinned!
gail
You did it!! It seriously looks fantastic, what a great job!!
This is really cool! I like that you used chalkboard paint – functional and looks sleek.
Thanks for sharing which pallets are safe. I never knew how to discern this and so I just stayed away from pallets all together ha ha.
Thank you Marie! xo
You did a great job making that old pallet a great container garden! Love the chalkboard paint idea. Pinned!
Thank you so much Carlene!
Kristin I love this!!! I need to plant some new herbs and this is inspiring!
Thank you Maryann, I can’t wait for Spring!
I knew you would do something great with that pallet Kristin! I love this garden so much! Pinned 🙂
Thank you so much Cindy!
This is a great project. We have a to install a fence and a surround for under the patio this summer. When I saw your post I had to show hubs as we can incorporate it in one or two of the areas. Pinned to make, and thank you.
Thank you so much Leanna, I can’t wait to see how yours turn out!
I love this idea! I am so excited to start working in the yard. Our last frost date here is April 15. This is such a fun idea and much easier on the back for harvesting!
Thank you so much Christy, I can’t wait to see how you make yours. We have a weekend full of rain again, I can’t wait for spring!
Absolutely charming! This DIY pallet herb garden is a great way to bring fresh herbs into your kitchen.