
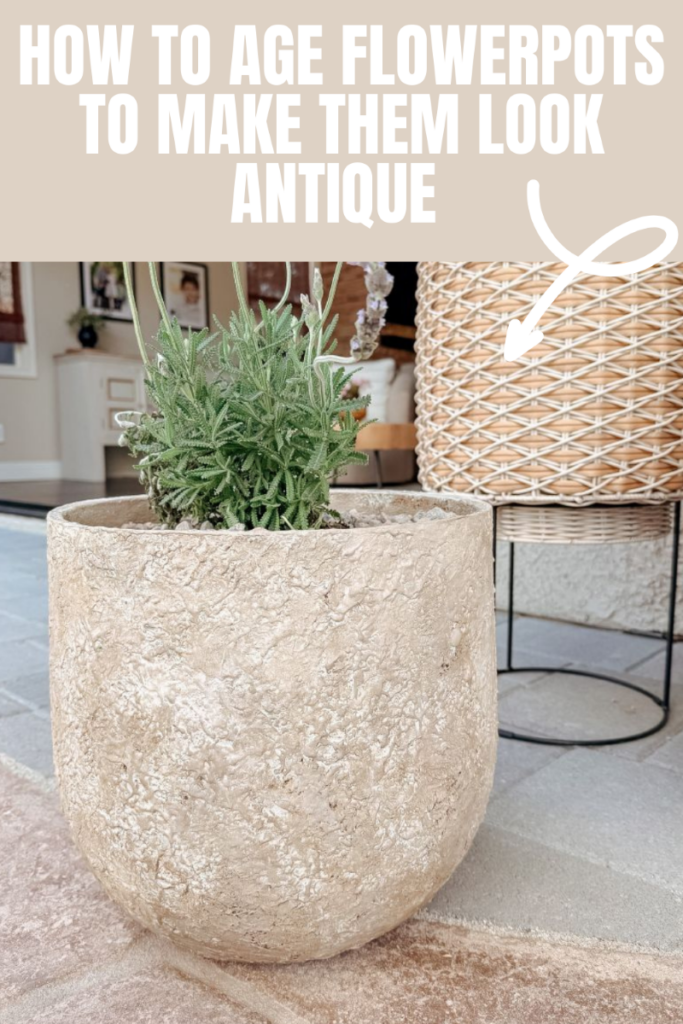
How to Age Flowerpots to Make Them Look Antique Using Paint
Learn how to create an aged look that looks Mediterranean on any pot using beige paint and dark wax in under an hour.
If you love the look of aged pots but only have new cement pots or basic clay pots on hand, there’s an easy way to give them beautiful character with paint. This simple way to create an aged look works on clay terra cotta pots, plastic flower pots, and even old pots you’ve had sitting on the back porch or in the back yard since last summer. It’s instant gratification and a great idea for anyone who loves the look of aged pottery.
I’m on a mission to finish the back yard so I can share with you soon. You will see a little sneak peek in this post, but not much; it’s still a mess.
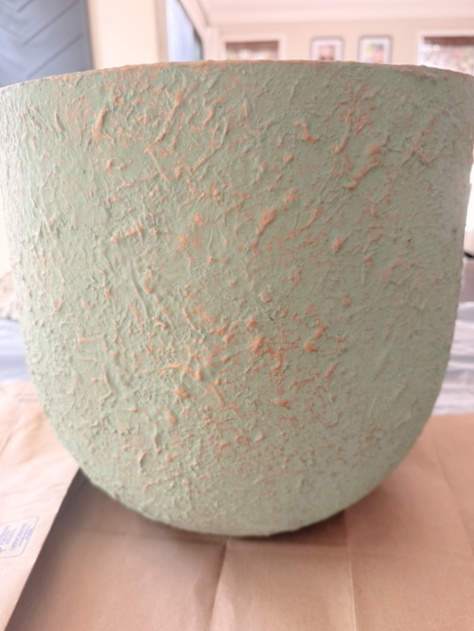
I was running around town last week and stopped into Home Goods just to “browse”. There was a pot sitting off in the corner with a red sticker, but it was green and gold. Love the colors, but not for the backyard. However, the pot was super heavy and had a beautiful texture, so it made its way up to the cashier. She even said, ” You need a cart for that heavy thing. I walked out paying $6.78 and a big smile. What I loved about this project is that I knew how easy it would be because I wouldn’t have to add any texture.
You can find everything you need at local craft stores, thrift stores, Home Depot, or even the dollar store. I’ve included affiliate links throughout this post, and I may earn a small commission if you purchase through them.
Here is the before, a very heavy pot, with the perfect texture, just needed to update the color.

Supplies:
Textured Pot in any size
White acrylic paints, white craft paint, household paint or chalk paint (all personal preference or what you have on hand)
Foam Brush, Paint brush, or sponge brush
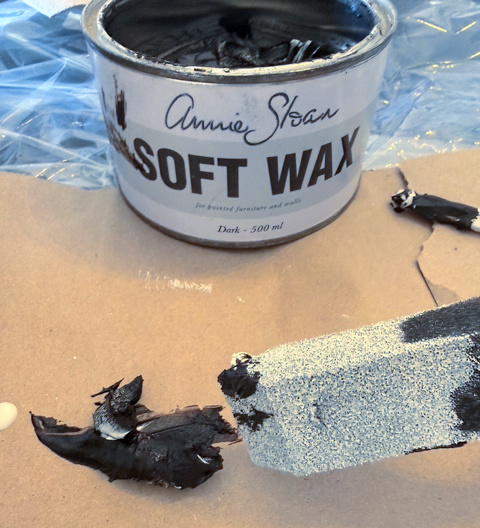
Dark Wax
Clear sealer or matte sealer, I like the spray paint version for ease
Drop cloth/paper bag, anything to protect your surface.
Pebbles (optional
First step: Choose your pots and paint
A light tan paint will work well as your base color. A darker tone, like black paint or dark wax, will help create depth later.
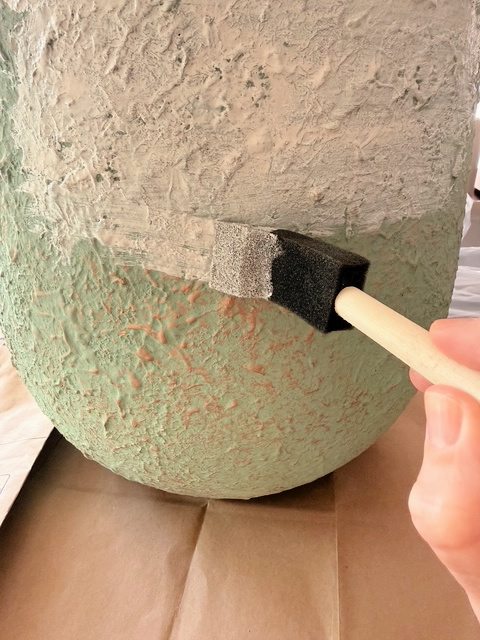
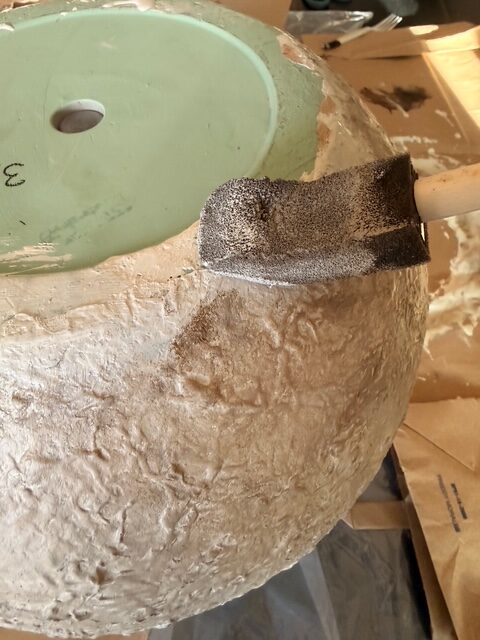
Base coat for the aged finish
Start by covering the whole pot with your base coat. I used a foam brush and covered it twice. Make sure to paint the inside of the pot a few inches down. You can paint the entire inside, especially if you want the entire time to feel cohesive, but it’s not necessary. I dabbed paint into the spots where the coverage wasn’t full. This is totally normal with textured pots. Let it dry completely before moving on. If you have high humidity, it might take longer to dry.
Creating the aged look
This is where the magic happens. There are different ways to get an aged finish, and you can mix and match depending on the effect you want. For this particular pot, I used dark wax and lightly dabbed the entire pot using a foam brush. I went lighter in different areas and darker in other areas to give it that aged Mediterranean feel.

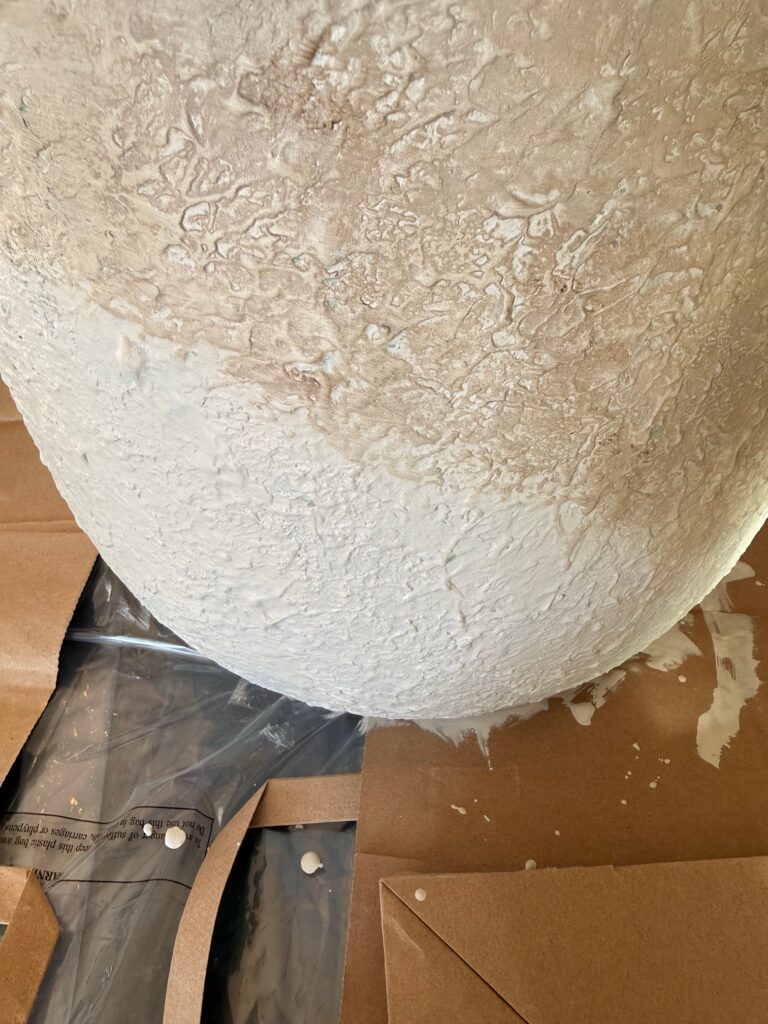
I turned the pot over to get to the bottom.
You can see the difference in the wax here.
Last step: Seal your aged pots
Once you’re happy with the aged pots, finish with a clear sealer or matte sealer. This keeps the paint from chipping and gives the pot a matte finish that looks like real aged pottery. Make sure the sealer is fully dry before placing your faux plants or real plants inside.
Options: Adding layers for a vintage look
I didn’t add any other layers; mine was simply three steps, but you certainly can if you would like! I added some pebbles over the dirt to improve drainage.

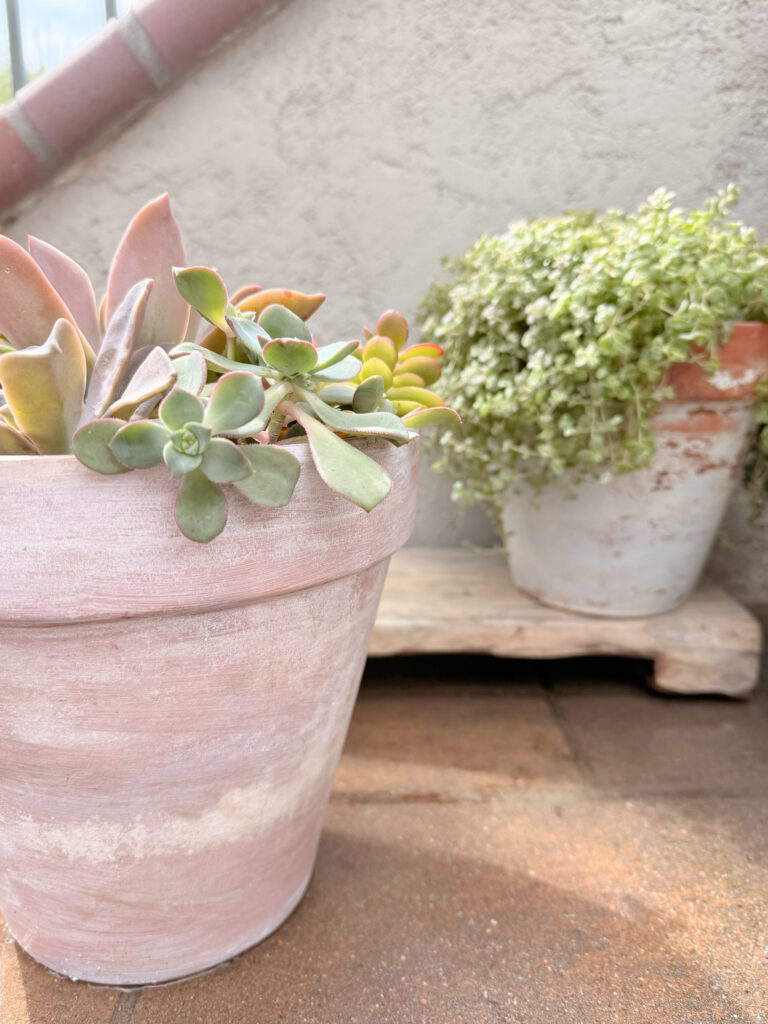
If you want a different look, try adding a little texture with a sanding block. Lightly sand the pot after the paint dries to reveal the base color underneath. This creates different effects and makes the pot feel authentically worn.
A simple diy project with beautiful results
This easy project is a great way to transform pots into aged pots with a vintage look. Whether you’re decorating your living room, back porch, or planning a spring display with easter eggs and printable seed packets, these aged pots add charm to any space.
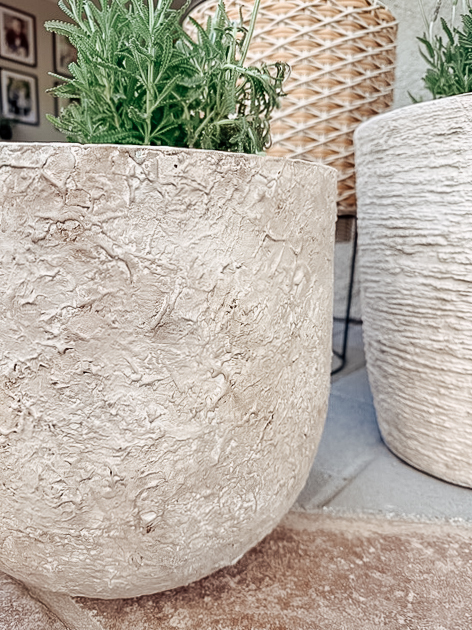
There are so many different ways to customize the look, and you can experiment with different sizes, base colors, and techniques.
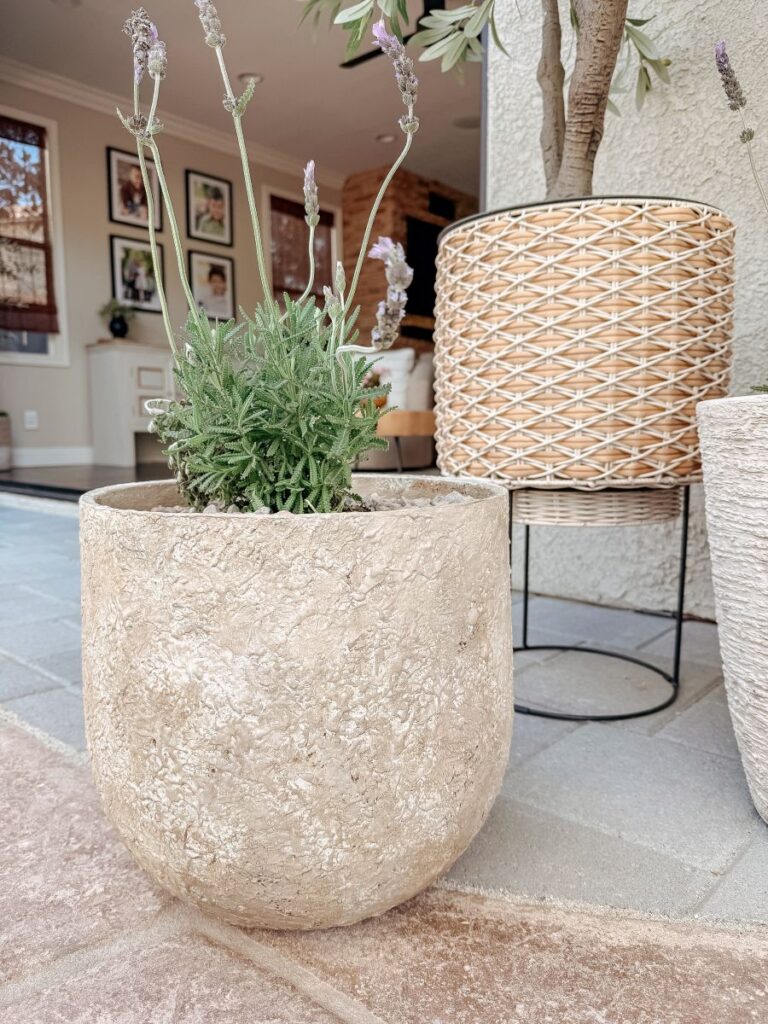
Here it is next to a bigger pot I aged using cement.
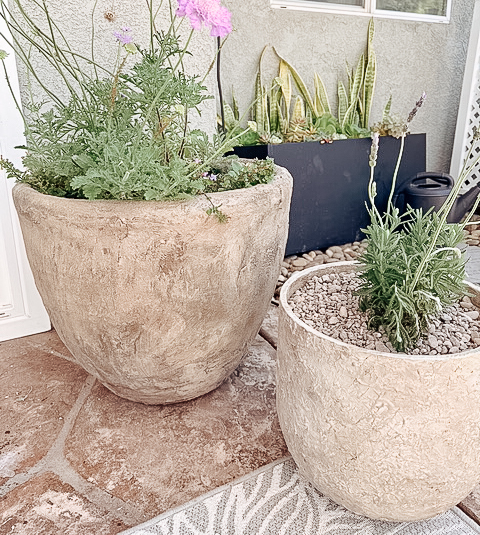
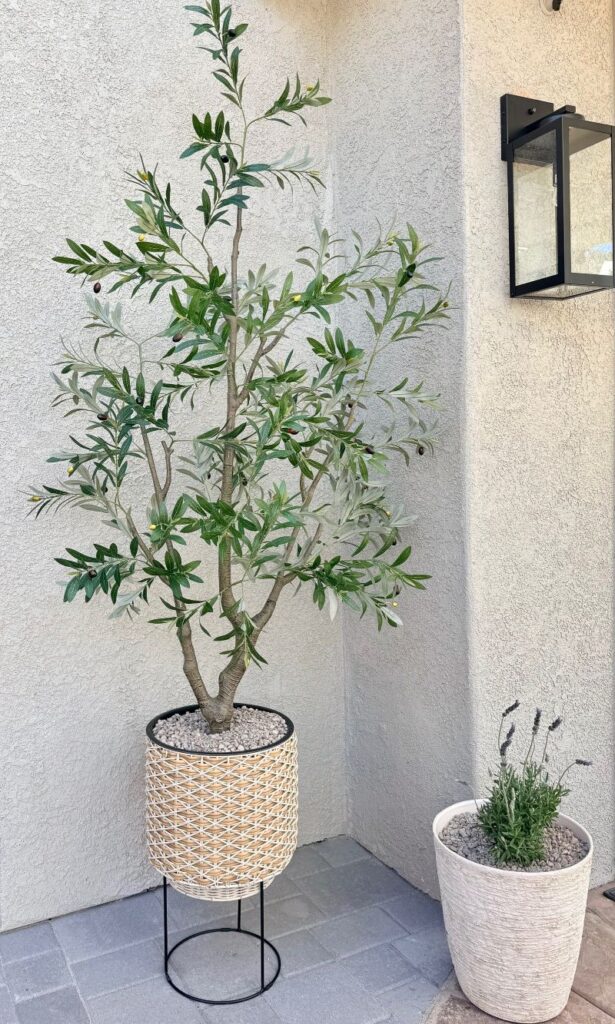
It’s a fun project that gives you instant gratification and a timeless, weathered look. I added a faux Olive tree outside, and I couldn’t be more thrilled with it!
Thank you so much for stopping in today. It means so much to me!


Beautiful, beautiful, beautiful. I would have snapped that pot up in a heartbeat, too. I have a set of pots to paint once it warms up enough here so I can do it outside.
I think of you so often and don’t spend nearly the time visiting blogs as I once did. Our little Carlisle that had Kawasaki is now 13 years old and we might have lost him had it not been for your blog and Lauren that pointed it out to me.
Hugs and Happy First Day of Spring- xo Diana
Hi Diana-
It is so great to hear from you, thank you so much for taking the time to leave me a little note, it means the world to me! I still get emotional thinking back at that time in our lives. It’s amazing that our blogging community has saved lives! Happy Spring to you as well, sending all my love! Kristin
I love the vintage look of these and that it only requires minimal supplies!! Thank you for the detailed instructions – Beautiful!
Thank you so much Lexi, so sweet of you to leave a nice note! Happy Monday!
What a great transformation! I love projects like this, especially when it is so easy to do. You made the planter pot look so beautiful. Great job & great tutorial!
You are so sweet Dusty, thank you so much!