DIY Ribbon Flower
First I started by sewing a ruffle. If you don’t know how to sew a ruffle, you can find that tutorial here.
You can make it as long as you like…I started with a piece of fabric that was 42 X 3 inches, and folded it over before sewing down the side.
Once you have your ruffle pulled, squeeze a line of hot glue along one end.
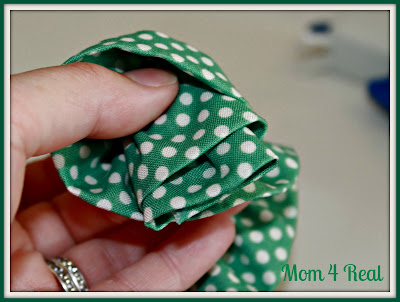
Now start rolling your fabric inward.
Keep rolling it until you get to the end of your ribbon.
Take that end and fold it inward. Then squeeze a line of hot glue on it.
Finally, roll your other end over and squeeze the fabric together to adhere.
Start pulling your “petals” back layer by layer until your flower looks open.
Now, do what you will with it! This time, I took a round piece of fabric and glued it to the bottom of the flower. Then I hot glued an alligator clip to it.
Doesn’t it make the sweetest little hair clip? Now we just have to find a coordinating outfit…or maybe we can just use some of these flowers and embellish a cute tee!
Thank you so much for having me here today, Kristin! I would love for ya’ll to come visit me over at Mom 4 Real!




That is so cute Jessica!~ I love the color too. Thanks for sharing.
Adorable!! I love it, Jessica! Megan
Pretty cute! And you could totally make matching outfit/hair bobs that way 😉
Super cute!!
Love it! Can’t wait to make some for my own girl! 🙂
The Cutest Ribbon Flower ever!! And totally helps that your daughter is so so cute- like I want her…! Can I just have her? You make this look oh-so easy!!! Great job Jess!
Super cool!
Jessica has some serious skills! My girls would love this!
Kelly