
Envelope Back Pillow Tutorial
A very sweet friend of mine I met through blogging asked me to sew her a pillow. Since I would only be sending her the pillowcase I knew I had to learn how to sew an envelope back, it was pretty simple, here is the tutorial.

Cut a piece of fabric that is the width of your pillow, plus 1 extra inch on each side. For the height add 6 inches in addition to the height of your pillow.
After the fabric is cut, hem the sides. I do this by folding the sides over a half inch and iron, then fold them over and iron again. This just gives it a more finished look.

Then sew
Lay fabric with the print side facing you. Fold the hemmed edges towards the center about a quarter up. (I realized since I wasn’t working with a print it might be hard to follow along so I mocked this up to give you a better example)

Lay your other piece of fabric on top with the print facing down. Allow the top (where the envelope fold will be) to overlap about 2 inches.


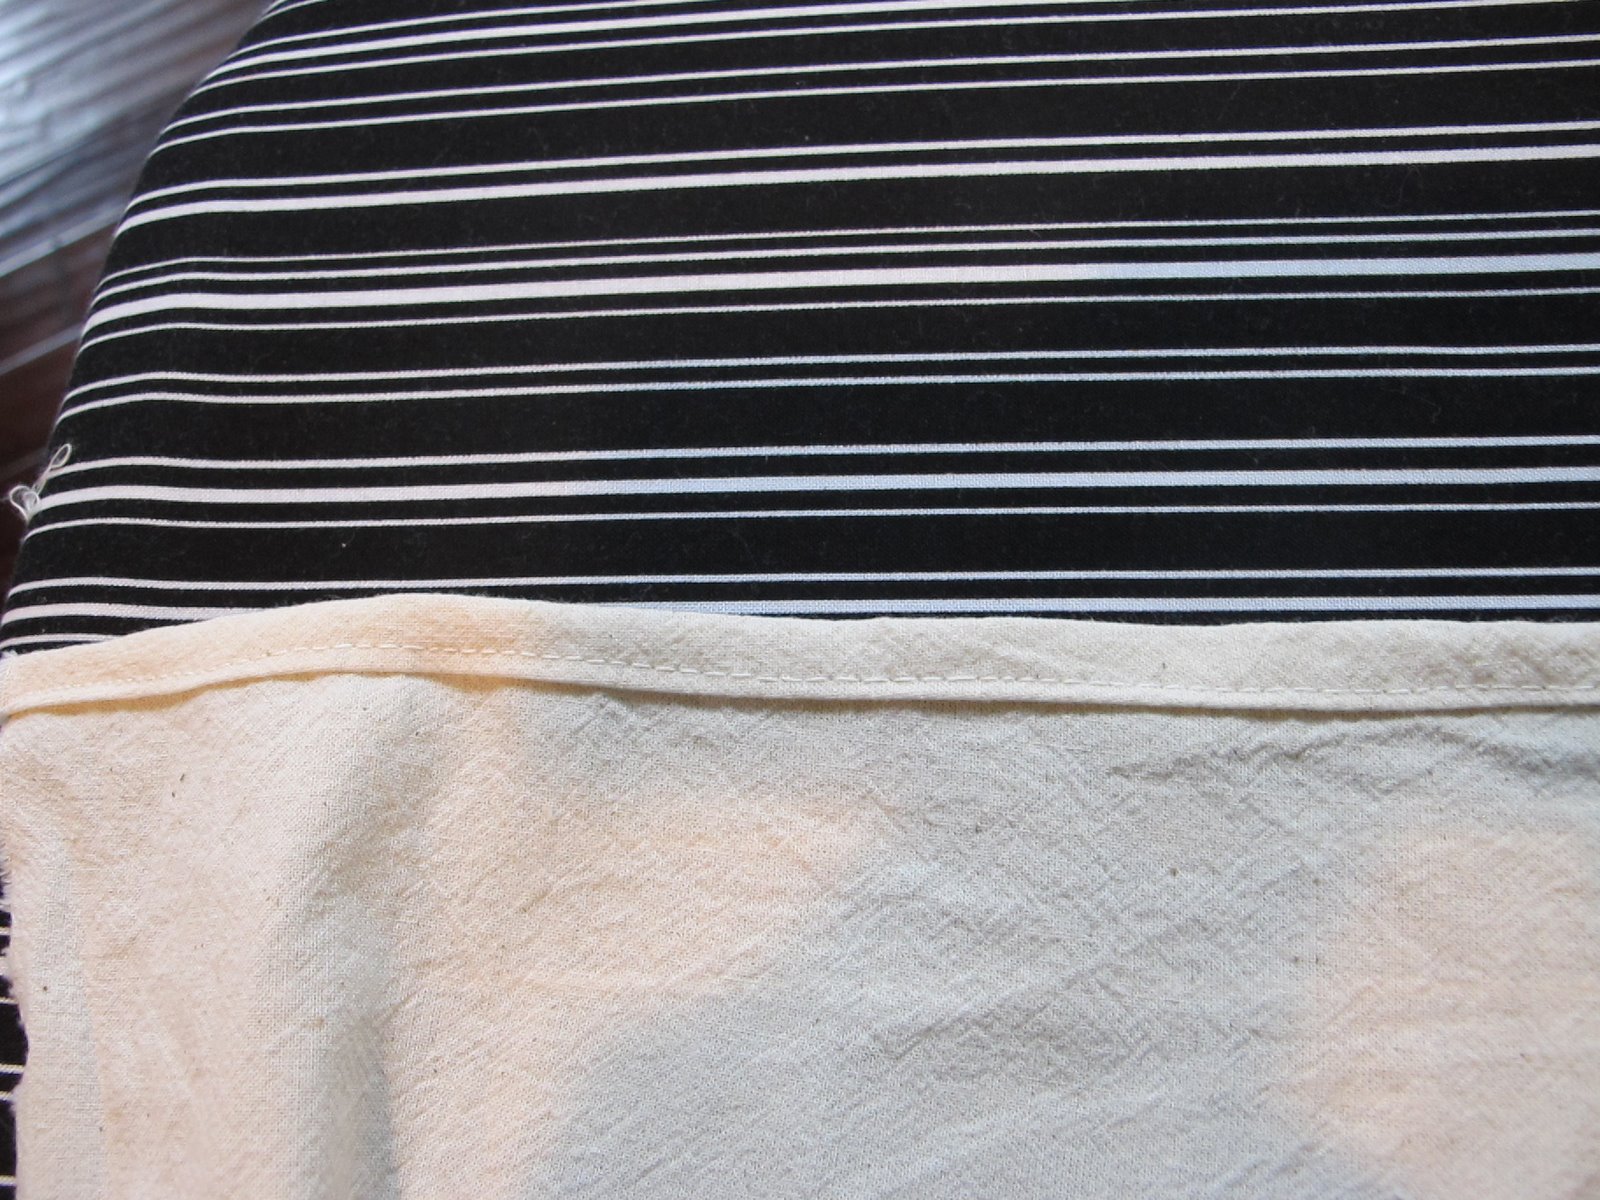
This is what it looks like with no print

I pin the two pieces together and iron, where I am going to sew so my lines, are straight. I know the more experience I have I could skip this step.


Sew and turn your pillowcase right side out. Poke out the corners and insert your pillow.
Pretty easy!
Allison asked for the french postcard print.
I used the same process that I used here to transfer the print.

I hope she likes it!


Your home is beautiful, mainly due to the styling and work you and your husband
Have put into it over time. I just found your blog today and have subscribed so I can Lear. From you.
So happy to have found you.
Janie
You are so sweet, thank you so much!