
How to Build an Outdoor Stacked Stone Fireplace
Can you believe it, we finished our fireplace and I have all the info on how to build your own outdoor stacked stone fireplace today! I think it has been almost exactly a year since my husband brought home a fireplace insert that he found off Craigslist, yes, things take a long time to get complete around here. Although, I will admit, good things are worth the wait!

15 years ago when we bought this house we wanted a small water fountain and we came home from work to a monstrous water fountain. We were young and didn’t say much to the landscapers, our bad. Soon after, we started a family, I had to purchase the catch a kid netting so we didn’t have any accidents (yes it was that big). The wonderful thing about the fountain is my dad baptized each of the boys here so I do have some wonderful memories. Eventually the motor broke and we were ready to move on. We had plans for a pizza oven but then my husband found a fireplace insert on craigslist so our plans shifted a bit.
Before

First up, a fun family affair (not really) tearing down the water fountain, we left the wall behind it and the cement foundation in tact.
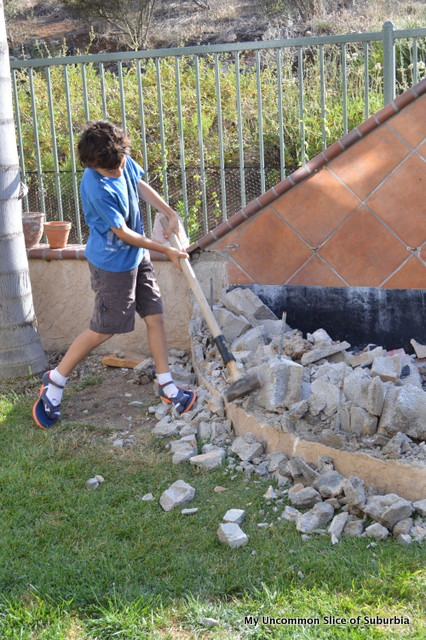
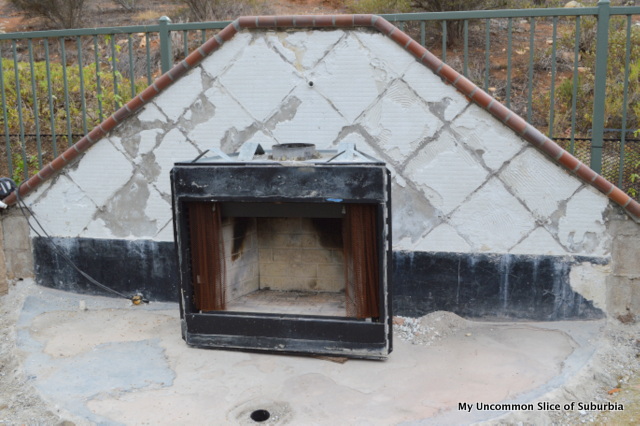
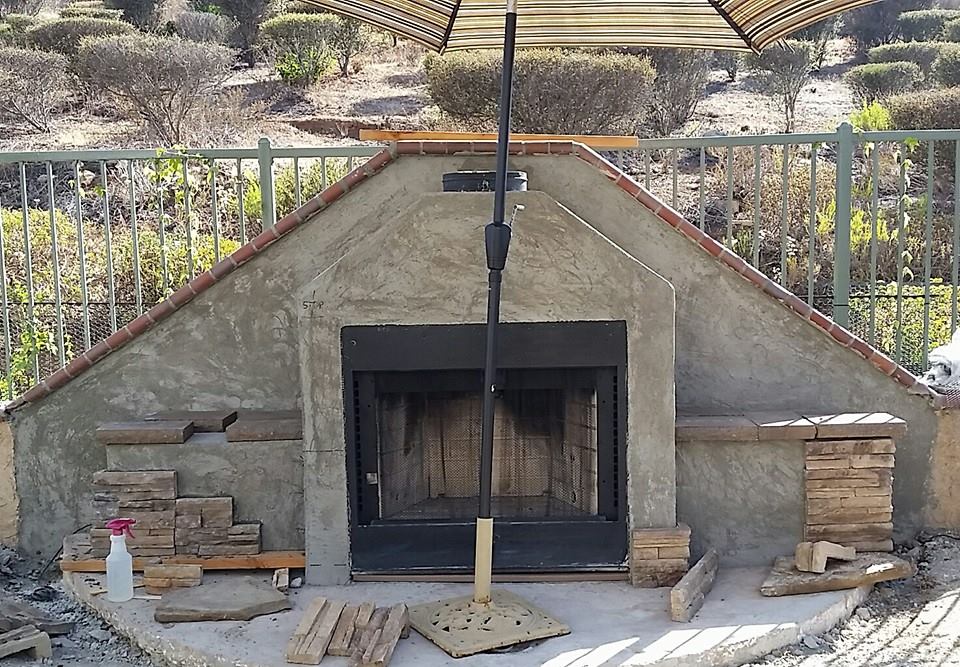
Next, we took off all the tile from the wall and placed the fireplace smack in the middle, now the fun begins.
Step 1: Pour a concrete pad
You would normally pour a concrete pad but in our case we already had the concrete.
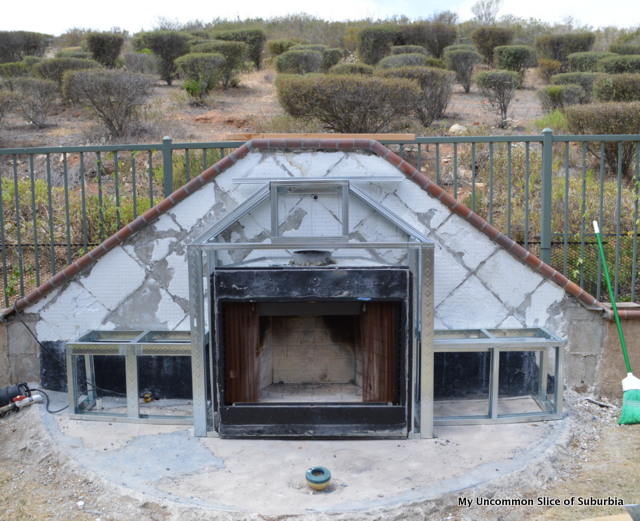
Step 2: Create a Design
Sketch out your design, we wanted Built-in seating as an extension of the fireplace plus it adds just a little charm.
Step 3: Build a Façade Frame
We used steel to frame out the extension of the fireplace. This was the perfect material as it is lighweight, resists fire, perfectly straight and easy to cut.
Step 4: Attach Cement Board
Cover the entire frame with cement board. This will provide a sturdy base for the mortar, which you’ll apply later.
Step 5: Attach Metal Lath
Use screws to attach metal lath which is a wire mesh over all of the exposed cement board. The metal lath will provide support for the stone that will be placed on top. Sorry, I forgot to take a picture of this step, here is what lath looks like.

Step 6: Add Mortar
Prep the mortar mix according to the directions and apply it to the metal lath with a trowel, making sure to completely cover the lath. Apply mortar in sections which will keep it from drying out prior to placing the stone, if you see it start to dry, mist the whole area.
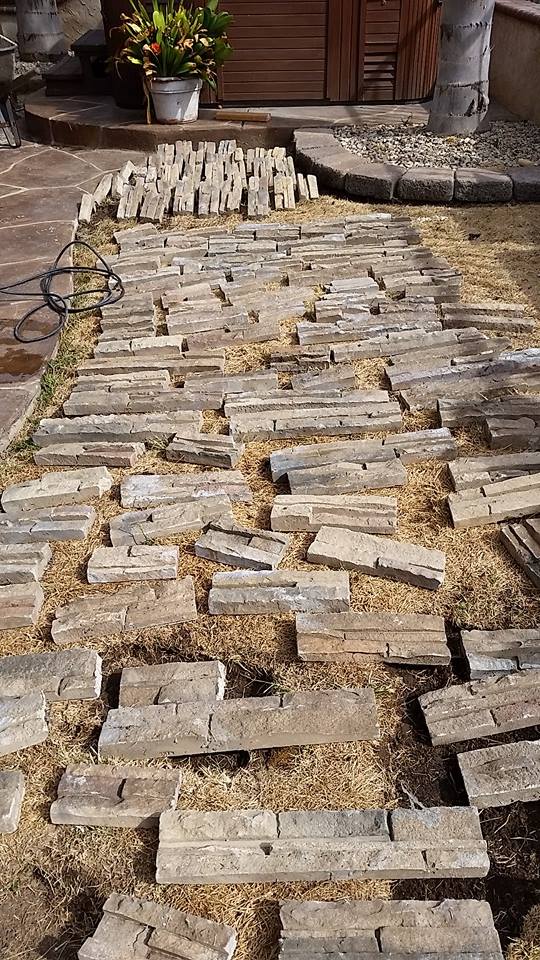
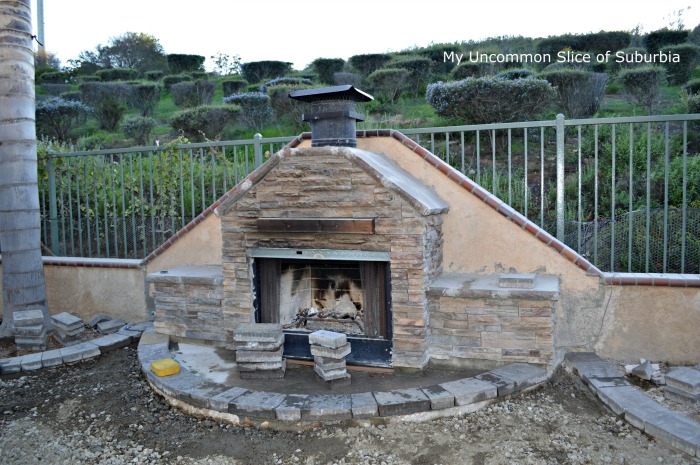
Step 7: Install Stacked Stone
Press stacked stone material into mortar, holding in place until self-supported. Continue placement of stones, ensuring no space is left between them.
We found all of our stacked stone off craigslist for $30, woo hoo!
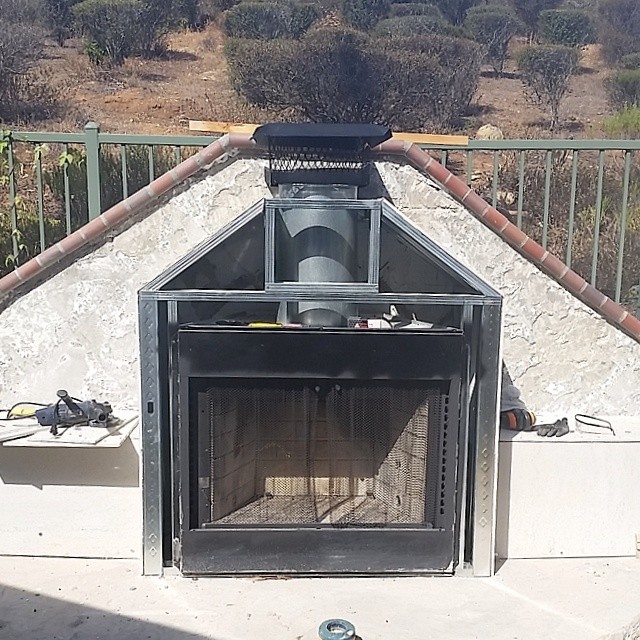
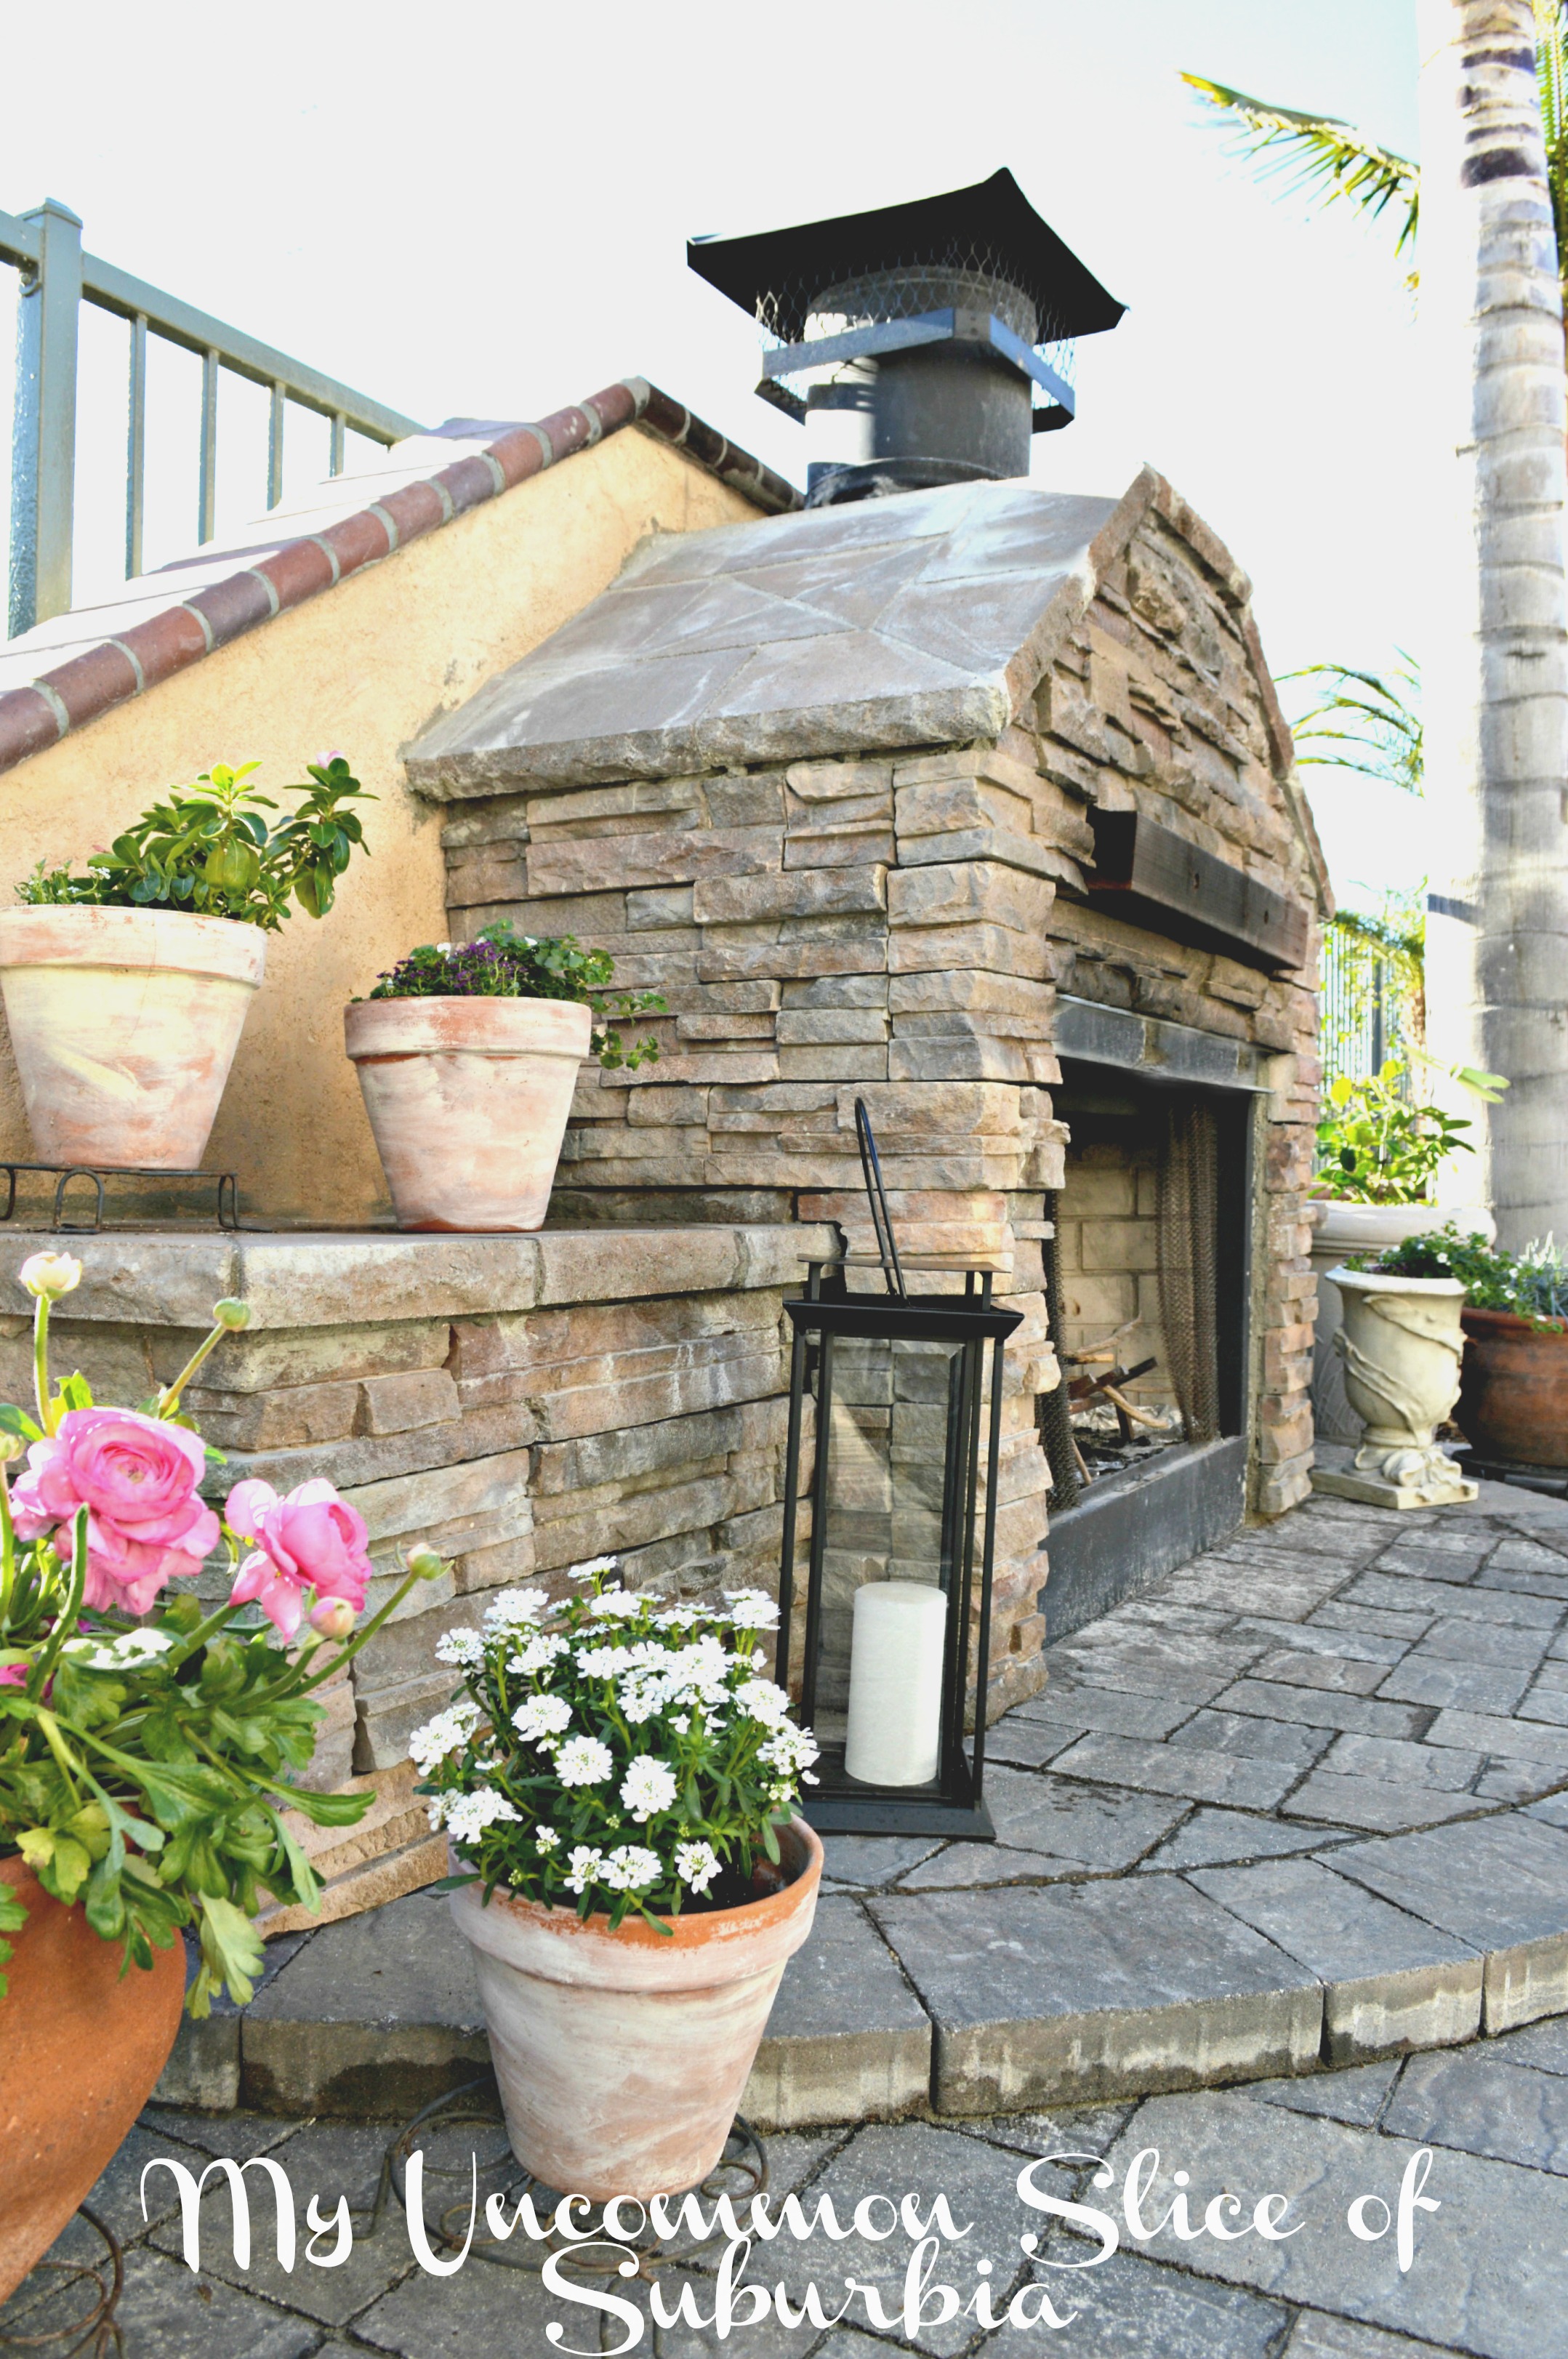
Step 8: Attach Chimney Cap
If you are burning wood you need a cap, this traps embers from the hearth.
So, I’m not going to lie, the fireplace has been done for a few months, however, being in a drought and no rain in site, everything died. We tore all the grass out and waited patiently…..for some pavers to come up on craigslist! Another score and a HUGE thank you to my hubby and FIL for loading up each and every paver for 4 days straight! (this is only about half of them)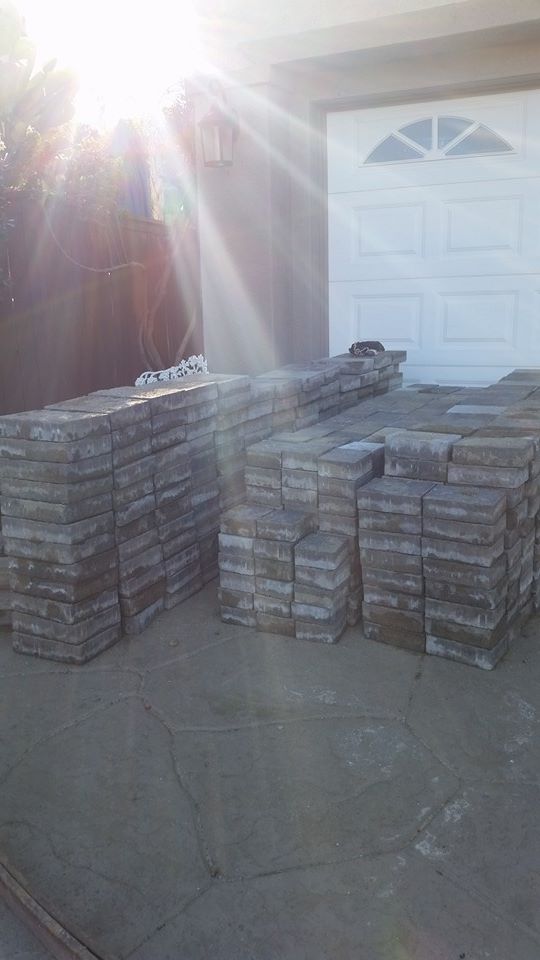
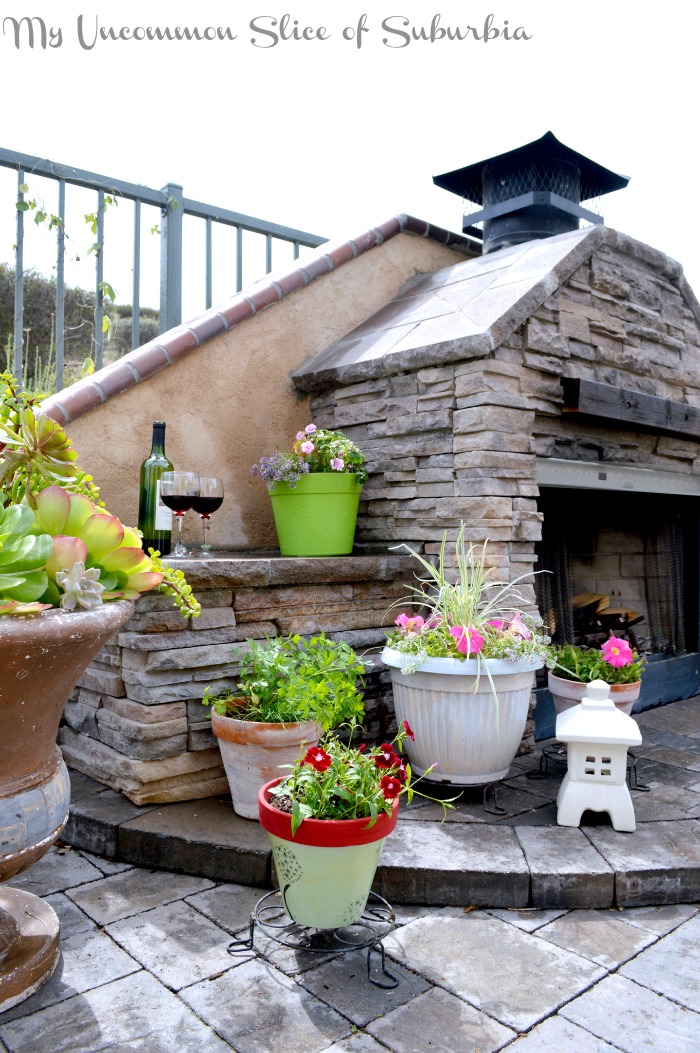
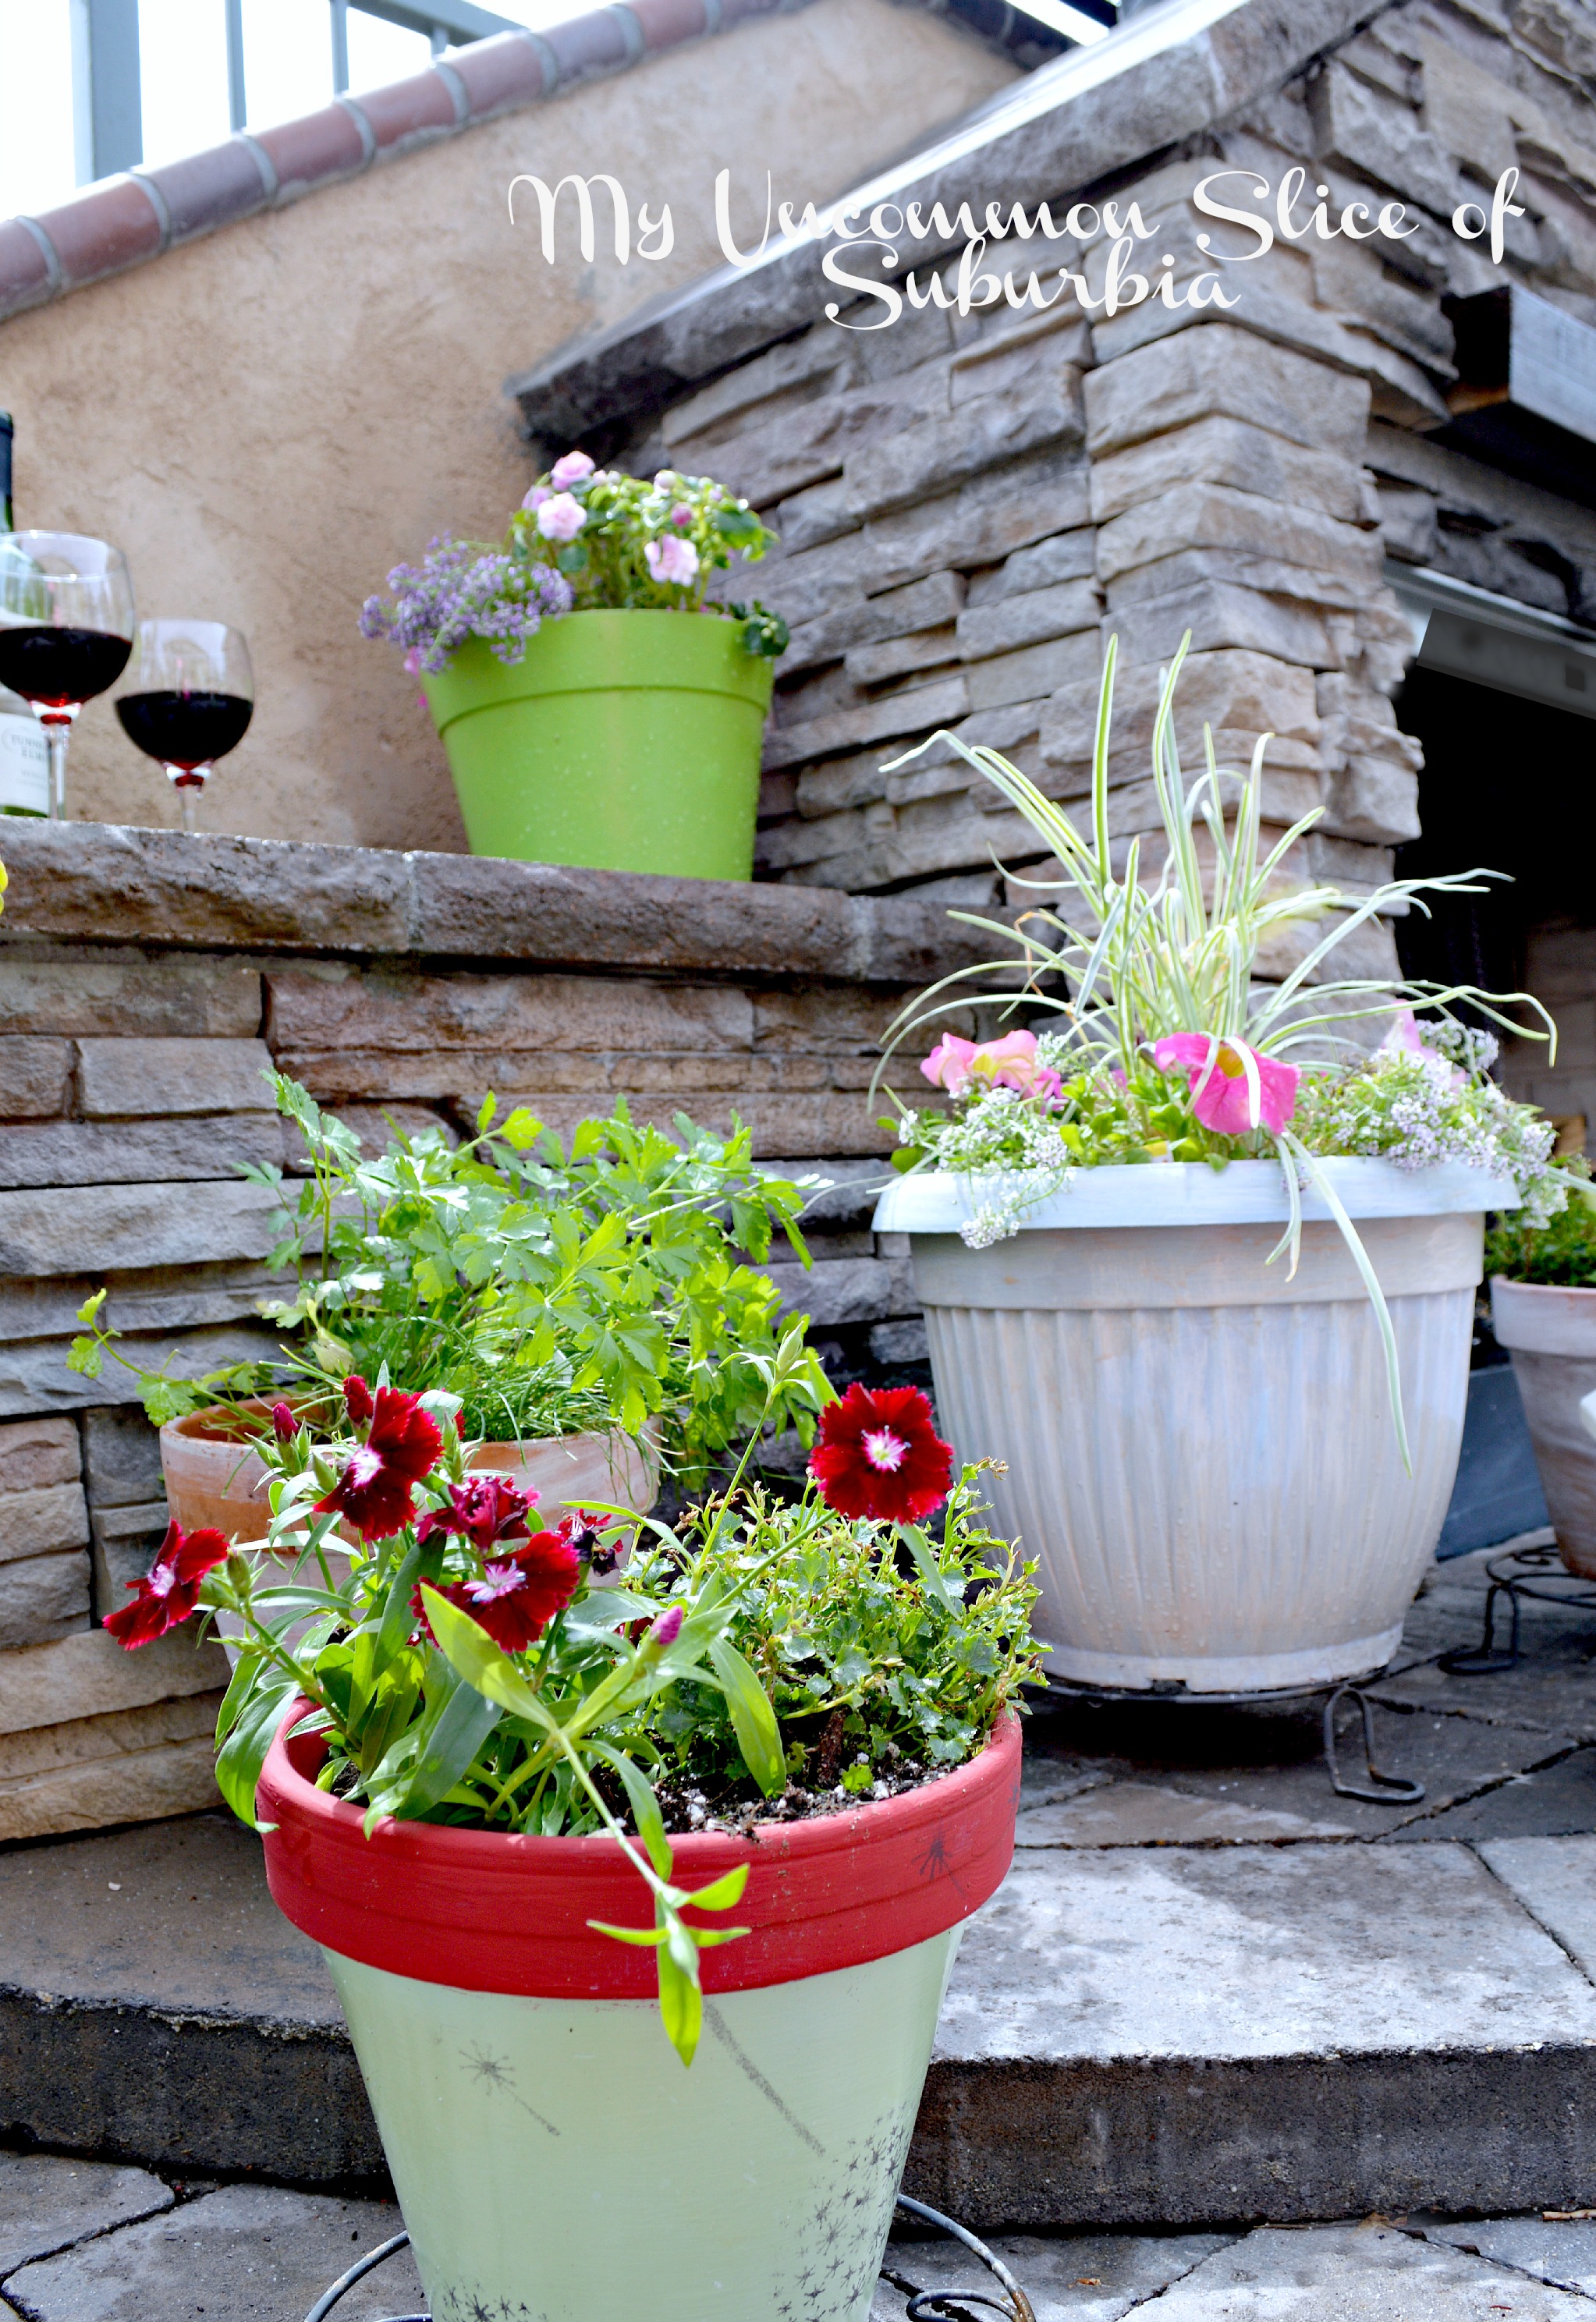
Everything which used to be grass was covered with pavers. We left two planters on each side of the fireplace which we will eventually fill with gravel and drought tolerant plants.
Cant wait to show you the whole space but for now we are pretty smitten with how everything is turning out.
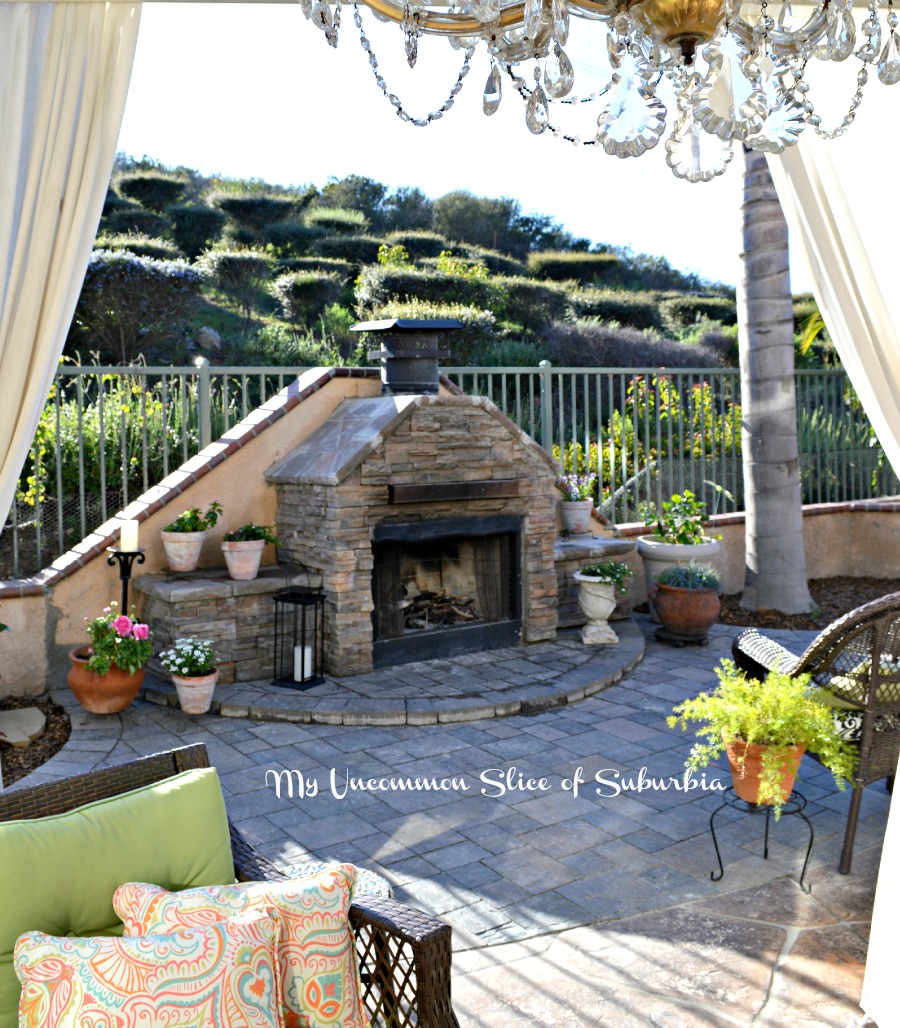
Thanks so much for stopping by today!
Linking up here:

It is gorgeous. And what a fabulous view!
Thank you Lauren 🙂
Just what I want!! I don’t know if I can get everyone in my family on board for this much work. I love it!! Y’all did an amazing job! Love a the Craigslist finds!
Debbie
Oh my goodness, it looks amazing! This project is in the hopper for this year (we’re in the process of waiting for The Big Thaw so that our pond can be removed), and I’m hoping to tackle the outdoor fireplace part of it myself. I can’t believe the score on that stone! Amazing! Great work!
Thanks so much Jenny, can’t wait to see what you come up with!
It looks wonderful!! I know your family will make many new memories with the addition and the great new space!! Sometimes, projects take time when we have otherwise busy lives and jobs. I totally get that. It sounds like it all fell into place. The pavers look super too, and no mowing or watering :))) Congrats on the awesome project!!
Thank you Shannon! All the patience paid off, I think the hubby is most excited about not mowing the lawn LOL
It looks great! Y’all are so talented!
It turned out so great. I still can’t get over your cl scores!
It looks amazing. What a fabulous addition to the yard and I love all those pavers too.
Thank you so much Marty!
Stunning!! What a great little back yard oasis you guys have :o))
Thank you so much Lauurie
Your outdoor fireplace is so beautiful! You guys will get many years of use out of it and what a beautiful focal point in the yard too!
I appreciate that, thank you!
Absolutely beautiful!! Lots of hard work, but the outcome is wonderful!!
It looks so good Kristin! How wonderful to sit out there in the evenings and your gorgeous chandelier, too. Your husband did an amazing job! Well worth the wait and all of his hard work. Your backyard is beautiful and all of that lovely open space behind you is so nice. Makes it nice and private, Happy Saturday!
Absolutely stunning! I cannot wait to show my husband. We are taking down an old shed that sits on a perfect cement pad. I have been at odds of what to do with it. Not anymore!
Thank you Maureen, good luck with the project!
So so pretty Kristin!! I love how it turned out!! It is gorgeous!! Thanks for linking up at FNF! 🙂
Thanks so much Courtney
Kristin, this is amazing! Every special occasion, I hint to my husband that I want a fireplace. I’ll have to show him yours! Love the rock. We had a contractor call it, Lick and Stick! Thanks for the wonderful post!
Love it, lick and stick! 🙂
This looks great! My hubby so wants one of these but unfortunately our garden is too tiny. Who knows maybe when the kids are older and the trampoline has gone. 🙂
Ha ha, I get that 🙂
Your fireplace and patio is gorgeous!
Wow – this is so beautiful! I would kill for a backyard like this! Thanks so much for sharing at The DIY Collective!
Thank you so much Bre
Wow. So much work, but so very clearly worth the effort! The final result is amazing. Thanks for sharing at Merry Monday! The party is live again tonight, we hope to see you there!
Thanks so much Megan!
What material is your steel frame (are they flat, round, etc)? Where did you purchase it? How did you make your frame and how did you cut it?
Thanks!
We at all times love speaking about landscapes.